Page 1483 of 2896
EC-314Revision: June 2006
DTC P0300 - P0304 MULTIPLE CYLINDER MISFIRE, NO. 1 - 4 CYLINDER MIS-
FIRE
2007 Versa
15. REPLACE AIR FUEL RATIO (A/F) SENSOR 1
Replace air fuel ratio (A/F) sensor 1.
CAUTION:
�Discard any A/F sensor which has been dropped from a height of more than 0.5 m (19.7 in) onto a
hard surface such as a concrete floor; use a new one.
�Before installing new A/F sensor, clean exhaust system threads using Oxygen Sensor Thread
Cleaner tool J-43897-18 or J-43897-12 and approved anti-seize lubricant.
>>INSPECTION END
16. CHECK MASS AIR FLOW SENSOR
With CONSULT-II
1. Start engine and warm it up to normal operating temperature.
2. Check mass air flow sensor signal in “DATA MONITOR” mode with CONSULT-II.
With GST
1. Start engine and warm it up to normal operating temperature.
2. Check mass air flow sensor signal in Service $01 with GST.
OK or NG
OK >> GO TO 17.
NG >> Check connectors for rusted terminals or loose connections in the mass air flow sensor circuit or
ground. Refer to EC-178, "
DTC P0101 MAF SENSOR" .
17. CHECK SYMPTOM MATRIX CHART
Check items on the rough idle symptom in EC-92, "
Symptom Matrix Chart" .
OK or NG
OK >> GO TO 18.
NG >> Repair or replace.
18. ERASE THE 1ST TRIP DTC
Some tests may cause a 1st trip DTC to be set.
Erase the 1st trip DTC from the ECM memory after performing the tests. Refer to EC-60, "
HOW TO ERASE
EMISSION-RELATED DIAGNOSTIC INFORMATION" .
>> GO TO 19.
19. CHECK INTERMITTENT INCIDENT
Refer to EC-143, "
TROUBLE DIAGNOSIS FOR INTERMITTENT INCIDENT" .
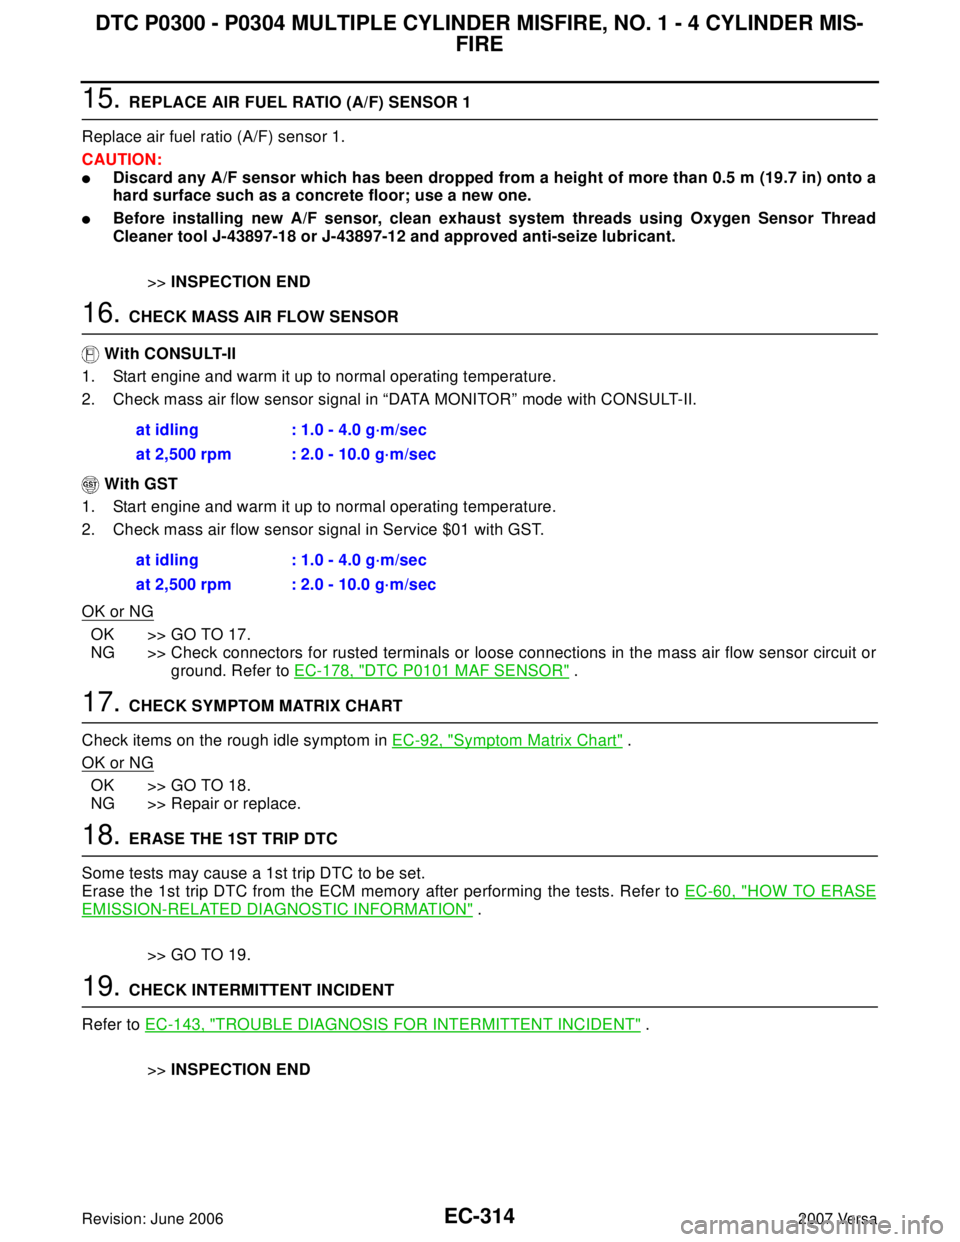
>>INSPECTION END at idling : 1.0 - 4.0 g·m/sec
at 2,500 rpm : 2.0 - 10.0 g·m/sec
at idling : 1.0 - 4.0 g·m/sec
at 2,500 rpm : 2.0 - 10.0 g·m/sec
Page 1484 of 2896
DTC P0327, P0328 KS
EC-315
C
D
E
F
G
H
I
J
K
L
MA
EC
Revision: June 20062007 Versa
DTC P0327, P0328 KSPFP:22060
Component DescriptionUBS00QH2
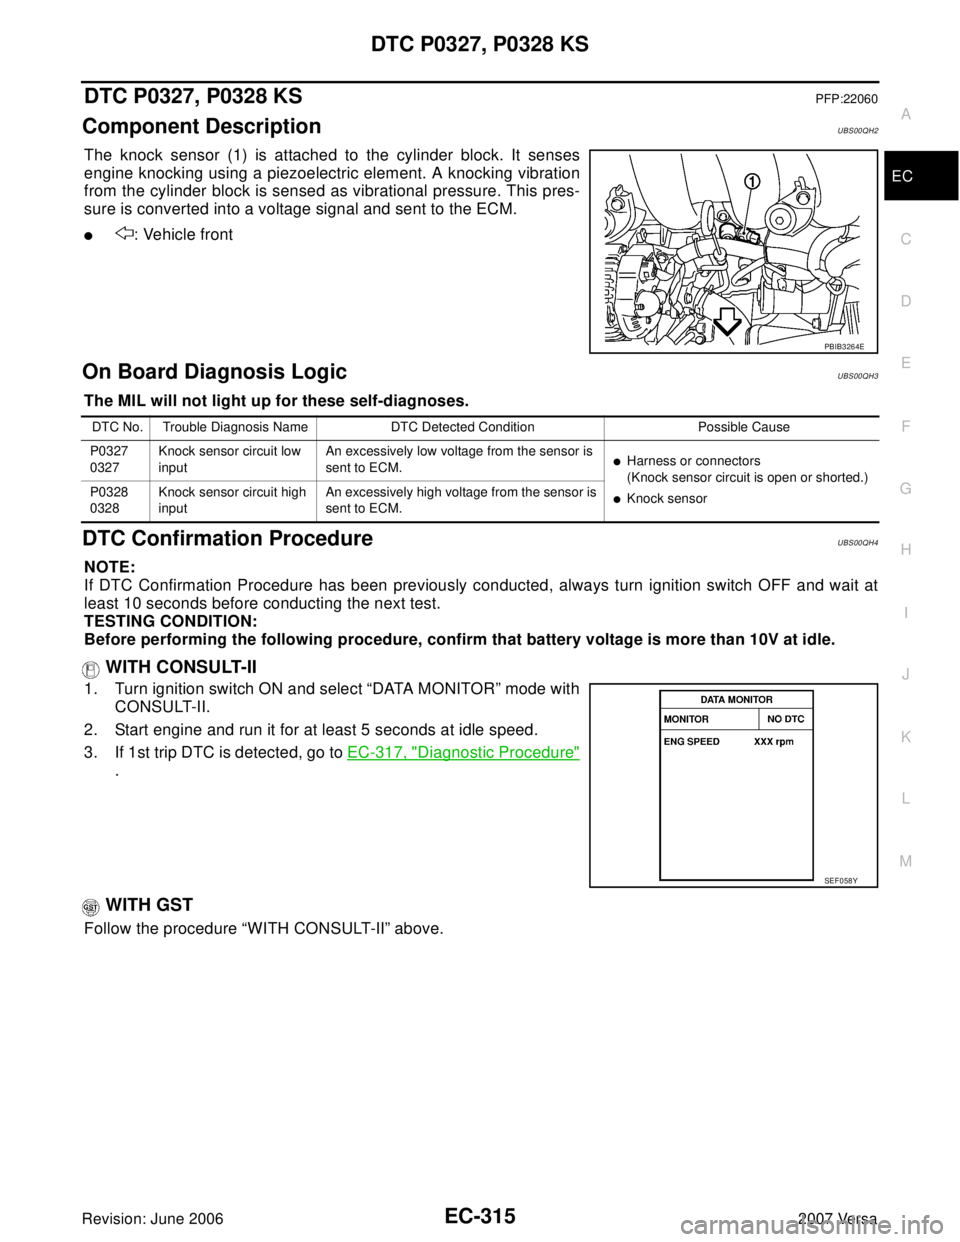
The knock sensor (1) is attached to the cylinder block. It senses
engine knocking using a piezoelectric element. A knocking vibration
from the cylinder block is sensed as vibrational pressure. This pres-
sure is converted into a voltage signal and sent to the ECM.
�: Vehicle front
On Board Diagnosis LogicUBS00QH3
The MIL will not light up for these self-diagnoses.
DTC Confirmation ProcedureUBS00QH4
NOTE:
If DTC Confirmation Procedure has been previously conducted, always turn ignition switch OFF and wait at
least 10 seconds before conducting the next test.
TESTING CONDITION:
Before performing the following procedure, confirm that battery voltage is more than 10V at idle.
WITH CONSULT-II
1. Turn ignition switch ON and select “DATA MONITOR” mode with
CONSULT-II.
2. Start engine and run it for at least 5 seconds at idle speed.
3. If 1st trip DTC is detected, go to EC-317, "
Diagnostic Procedure"
.
WITH GST
Follow the procedure “WITH CONSULT-II” above.
PBIB3264E
DTC No. Trouble Diagnosis Name DTC Detected Condition Possible Cause
P0327
0327Knock sensor circuit low
inputAn excessively low voltage from the sensor is
sent to ECM.
�Harness or connectors
(Knock sensor circuit is open or shorted.)
�Knock sensor P0328
0328Knock sensor circuit high
inputAn excessively high voltage from the sensor is
sent to ECM.
SEF 0 58 Y
Page 1486 of 2896
DTC P0327, P0328 KS
EC-317
C
D
E
F
G
H
I
J
K
L
MA
EC
Revision: June 20062007 Versa
Specification data are reference values and are measured between each terminal and ground.
CAUTION:
Do not use ECM ground terminals when measuring input/output voltage. Doing so may result in dam-
age to the ECM's transistor. Use a ground other than ECM terminals, such as the ground.
Diagnostic ProcedureUBS00QH6
1. CHECK KNOCK SENSOR INPUT SIGNAL CIRCUIT-I
1. Turn ignition switch OFF.
2. Disconnect ECM harness connector.
3. Check resistance between ECM terminal 37 and ground. Refer to Wiring Diagram.
NOTE:
It is necessary to use an ohmmeter which can measure more than 10 MΩ.
4. Also check harness for short to ground and short to power.
OK or NG
OK >> GO TO 4.
NG >> GO TO 2.
2. CHECK KNOCK SENSOR INPUT SIGNAL CIRCUIT-II
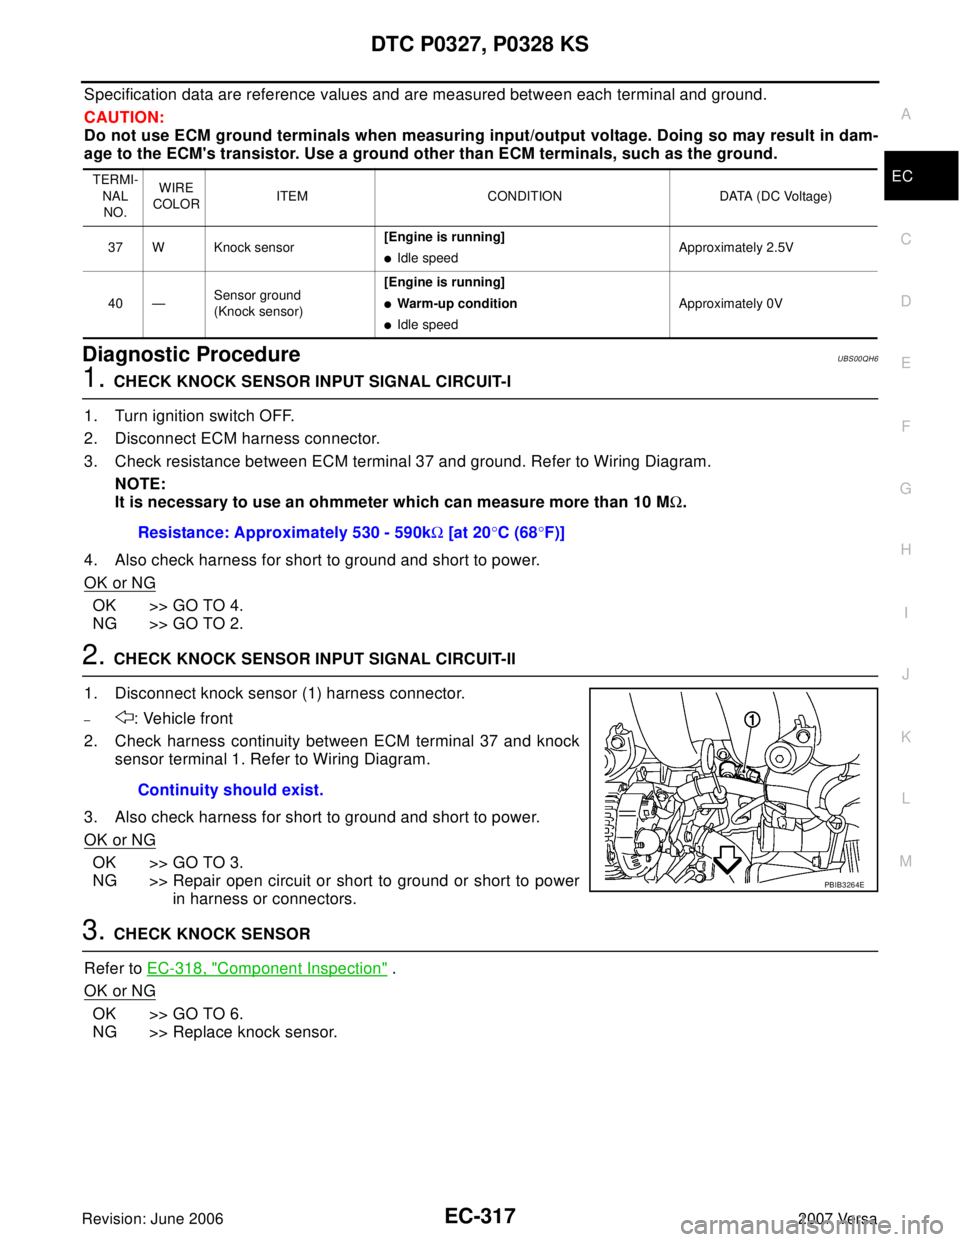
1. Disconnect knock sensor (1) harness connector.
–: Vehicle front
2. Check harness continuity between ECM terminal 37 and knock
sensor terminal 1. Refer to Wiring Diagram.
3. Also check harness for short to ground and short to power.
OK or NG
OK >> GO TO 3.
NG >> Repair open circuit or short to ground or short to power
in harness or connectors.
3. CHECK KNOCK SENSOR
Refer to EC-318, "
Component Inspection" .
OK or NG
OK >> GO TO 6.
NG >> Replace knock sensor.
TERMI-
NAL
NO.WIRE
COLORITEM CONDITION DATA (DC Voltage)
37 W Knock sensor[Engine is running]
�Idle speedApproximately 2.5V
40 —Sensor ground
(Knock sensor)[Engine is running]
�Warm-up condition
�Idle speedApproximately 0V
Resistance: Approximately 530 - 590kΩ [at 20°C (68°F)]
Continuity should exist.
PBIB3264E
Page 1487 of 2896
EC-318Revision: June 2006
DTC P0327, P0328 KS
2007 Versa
4. CHECK GROUND CONNECTIONS
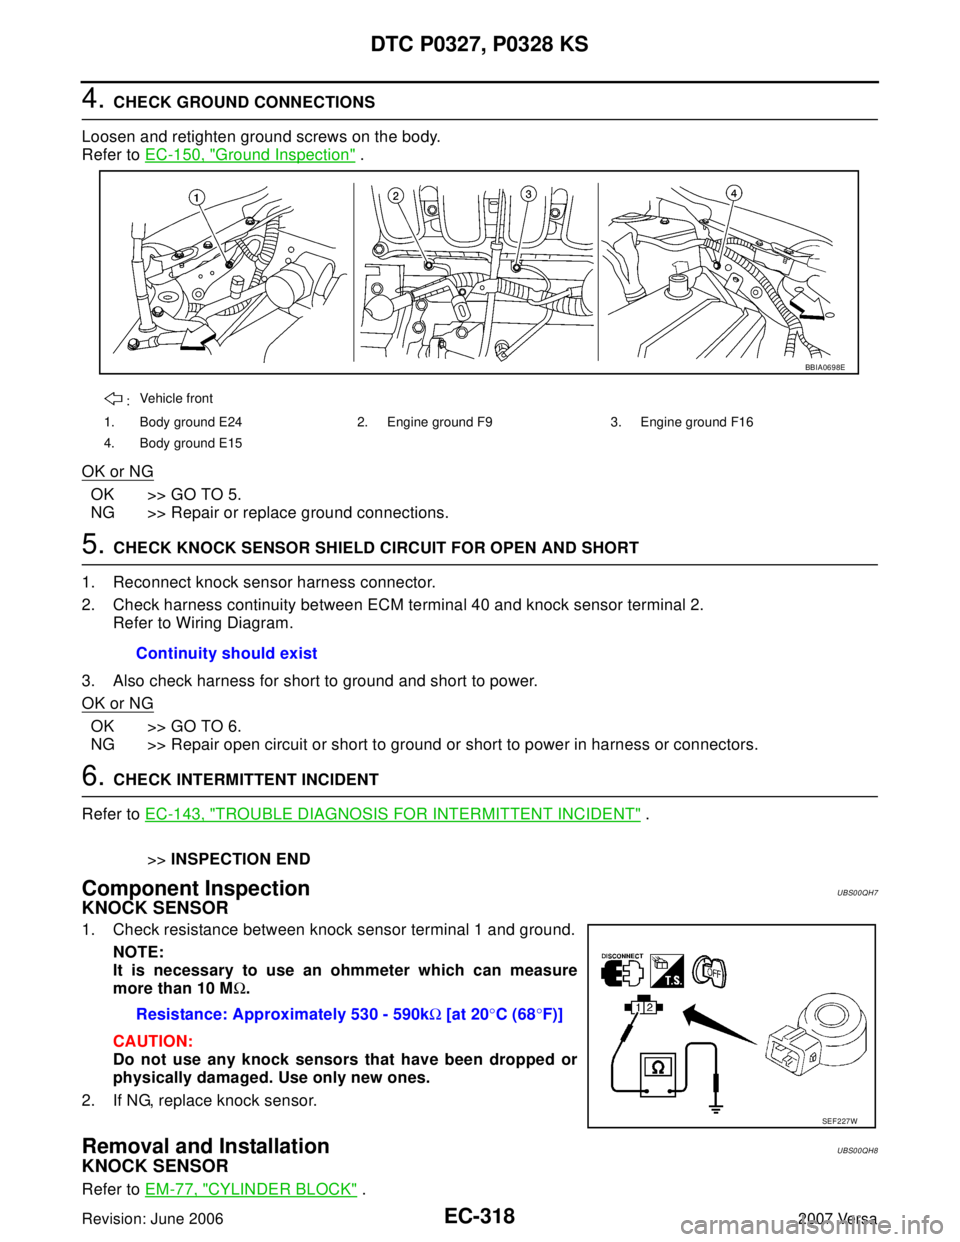
Loosen and retighten ground screws on the body.
Refer to EC-150, "
Ground Inspection" .
OK or NG
OK >> GO TO 5.
NG >> Repair or replace ground connections.
5. CHECK KNOCK SENSOR SHIELD CIRCUIT FOR OPEN AND SHORT
1. Reconnect knock sensor harness connector.
2. Check harness continuity between ECM terminal 40 and knock sensor terminal 2.
Refer to Wiring Diagram.
3. Also check harness for short to ground and short to power.
OK or NG
OK >> GO TO 6.
NG >> Repair open circuit or short to ground or short to power in harness or connectors.
6. CHECK INTERMITTENT INCIDENT
Refer to EC-143, "
TROUBLE DIAGNOSIS FOR INTERMITTENT INCIDENT" .
>>INSPECTION END
Component InspectionUBS00QH7
KNOCK SENSOR
1. Check resistance between knock sensor terminal 1 and ground.
NOTE:
It is necessary to use an ohmmeter which can measure
more than 10 MΩ.
CAUTION:
Do not use any knock sensors that have been dropped or
physically damaged. Use only new ones.
2. If NG, replace knock sensor.
Removal and InstallationUBS00QH8
KNOCK SENSOR
Refer to EM-77, "CYLINDER BLOCK" .
:Vehicle front
1. Body ground E24 2. Engine ground F9 3. Engine ground F16
4. Body ground E15
BBIA0698E
Continuity should exist
Resistance: Approximately 530 - 590kΩ [at 20°C (68°F)]
SEF 2 27 W
Page 1488 of 2896
DTC P0335 CKP SENSOR (POS)
EC-319
C
D
E
F
G
H
I
J
K
L
MA
EC
Revision: June 20062007 Versa
DTC P0335 CKP SENSOR (POS)PFP:23731
Component DescriptionUBS00QH9
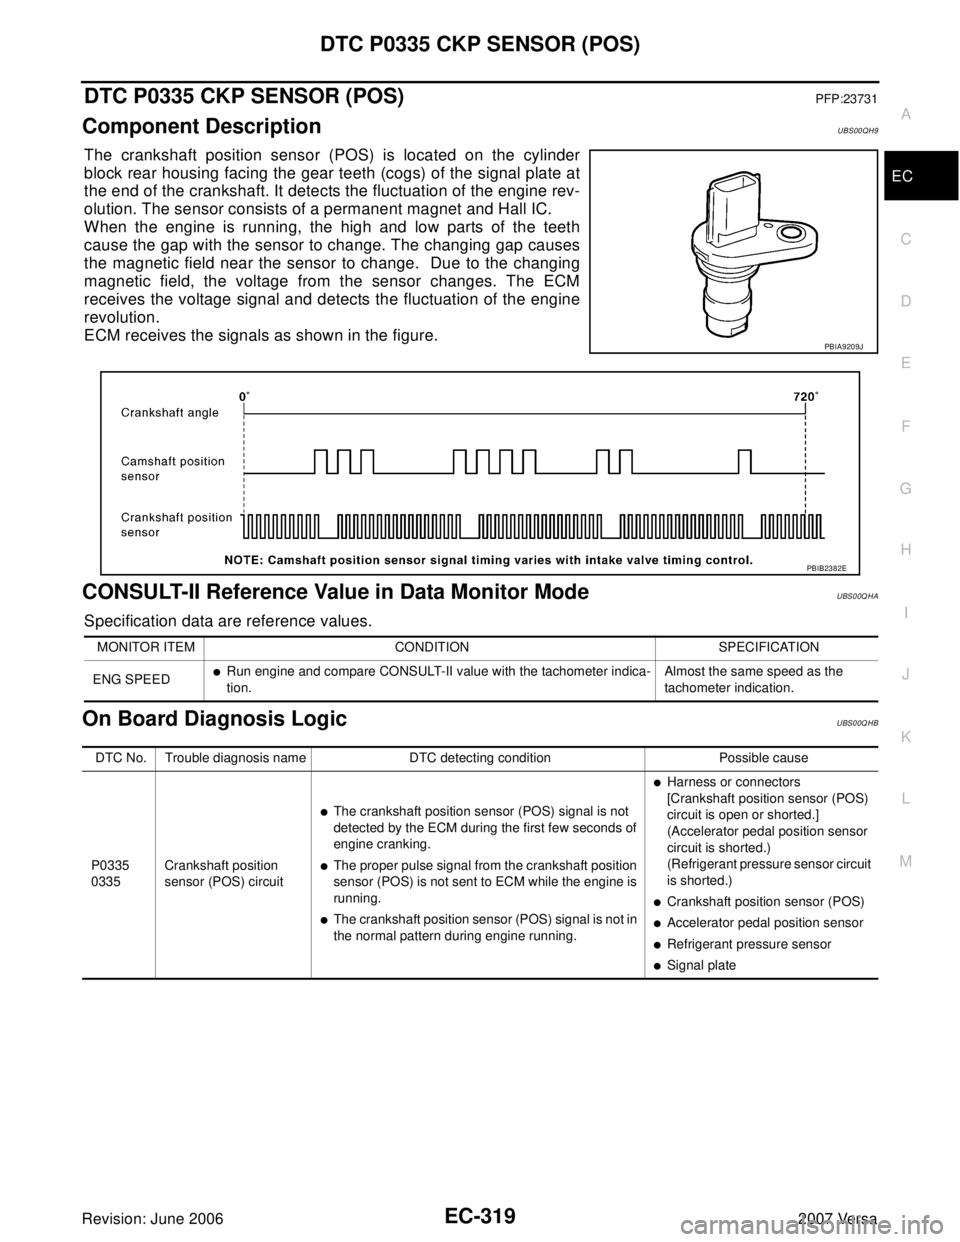
The crankshaft position sensor (POS) is located on the cylinder
block rear housing facing the gear teeth (cogs) of the signal plate at
the end of the crankshaft. It detects the fluctuation of the engine rev-
olution. The sensor consists of a permanent magnet and Hall IC.
When the engine is running, the high and low parts of the teeth
cause the gap with the sensor to change. The changing gap causes
the magnetic field near the sensor to change. Due to the changing
magnetic field, the voltage from the sensor changes. The ECM
receives the voltage signal and detects the fluctuation of the engine
revolution.
ECM receives the signals as shown in the figure.
CONSULT-II Reference Value in Data Monitor ModeUBS00QHA
Specification data are reference values.
On Board Diagnosis LogicUBS00QHB
PBIA9209J
PBIB2382E
MONITOR ITEM CONDITION SPECIFICATION
ENG SPEED
�Run engine and compare CONSULT-II value with the tachometer indica-
tion.Almost the same speed as the
tachometer indication.
DTC No. Trouble diagnosis name DTC detecting condition Possible cause
P0335
0335Crankshaft position
sensor (POS) circuit
�The crankshaft position sensor (POS) signal is not
detected by the ECM during the first few seconds of
engine cranking.
�The proper pulse signal from the crankshaft position
sensor (POS) is not sent to ECM while the engine is
running.
�The crankshaft position sensor (POS) signal is not in
the normal pattern during engine running.
�Harness or connectors
[Crankshaft position sensor (POS)
circuit is open or shorted.]
(Accelerator pedal position sensor
circuit is shorted.)
(Refrigerant pressure sensor circuit
is shorted.)
�Crankshaft position sensor (POS)
�Accelerator pedal position sensor
�Refrigerant pressure sensor
�Signal plate
Page 1489 of 2896
EC-320Revision: June 2006
DTC P0335 CKP SENSOR (POS)
2007 Versa
DTC Confirmation ProcedureUBS00QHC
NOTE:
If DTC Confirmation Procedure has been previously conducted, always turn ignition switch OFF and wait at
least 10 seconds before conducting the next test.
TESTING CONDITION:
Before performing the following procedure, confirm that battery voltage is more than 10.5V with igni-
tion switch ON.
WITH CONSULT-II
1. Turn ignition switch ON and select “DATA MONITOR” mode with
CONSULT-II.
2. Crank engine for at least 2 seconds and run it for at least 5 sec-
onds at idle speed.
3. If 1st trip DTC is detected, go to EC-323, "
Diagnostic Procedure"
.
WITH GST
Follow the procedure “WITH CONSULT-II” above.
SEF 0 58 Y
Page 1490 of 2896
DTC P0335 CKP SENSOR (POS)
EC-321
C
D
E
F
G
H
I
J
K
L
MA
EC
Revision: June 20062007 Versa
Wiring DiagramUBS00QHD
BBWA2638E
Page 1491 of 2896
EC-322Revision: June 2006
DTC P0335 CKP SENSOR (POS)
2007 Versa
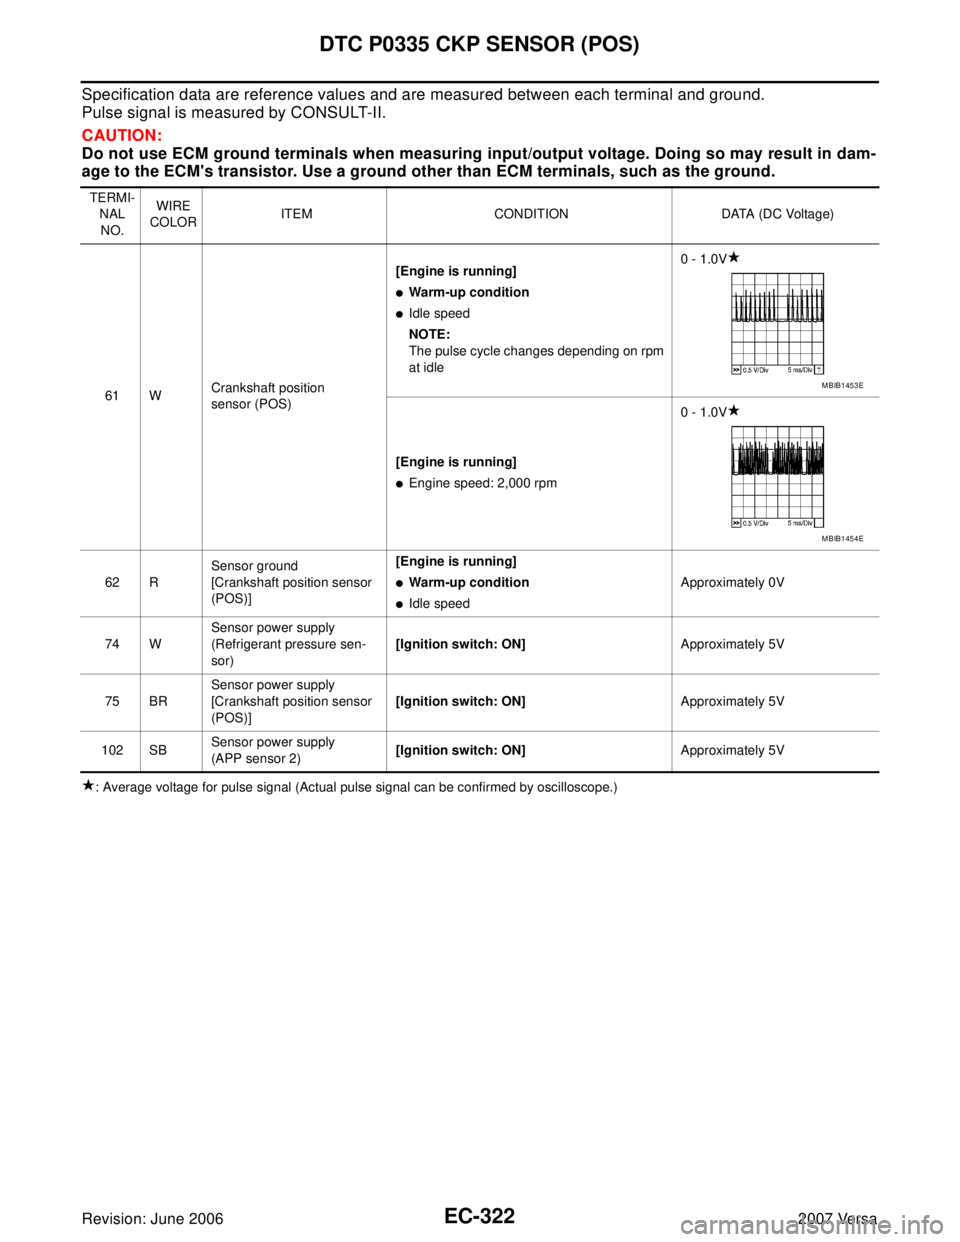
Specification data are reference values and are measured between each terminal and ground.
Pulse signal is measured by CONSULT-II.
CAUTION:
Do not use ECM ground terminals when measuring input/output voltage. Doing so may result in dam-
age to the ECM's transistor. Use a ground other than ECM terminals, such as the ground.
: Average voltage for pulse signal (Actual pulse signal can be confirmed by oscilloscope.) TERMI-
NAL
NO.WIRE
COLORITEM CONDITION DATA (DC Voltage)
61 WCrankshaft position
sensor (POS)[Engine is running]
�Warm-up condition
�Idle speed
NOTE:
The pulse cycle changes depending on rpm
at idle0 - 1.0V
[Engine is running]
�Engine speed: 2,000 rpm0 - 1.0V
62 RSensor ground
[Crankshaft position sensor
(POS)][Engine is running]
�Warm-up condition
�Idle speedApproximately 0V
74 WSensor power supply
(Refrigerant pressure sen-
sor)[Ignition switch: ON]Approximately 5V
75 BRSensor power supply
[Crankshaft position sensor
(POS)][Ignition switch: ON]Approximately 5V
102 SBSensor power supply
(APP sensor 2)[Ignition switch: ON]Approximately 5V
MBIB1453E
MBIB1454E