Page 2617 of 2896

WHEEL HUB
RAX-5
C
E
F
G
H
I
J
K
L
MA
B
RAX
Revision: June 20062007 Versa
CAUTION:
Do not pull on wheel sensor harness.
3. Remove the drum brake assembly. Refer to BR-31, "
Removal and Installation of Drum Brake Assembly" .
4. Remove wheel hub and bearing assembly bolts, and then remove wheel hub and bearing assembly from
vehicle.
5. If necessary remove back plate, following procedure.
1. Remove parking brake rear cable from back plate. Refer to PB-4, "
PARKING BRAKE CONTROL" .
2. Separate brake tube from wheel cylinder. Refer to BR-11, "
BRAKE TUBE AND HOSE" .
INSPECTION AFTER REMOVAL
Check for any deformity, cracks, or other damage on the wheel hub assembly, replace if necessary.
CAUTION:
The wheel hub assembly does not require maintenance. If any of the following symptoms are noted,
replace the wheel hub assembly.
�Growling noise is emitted from the wheel hub bearing during operation.
�Wheel hub bearing drags or turns roughly.
INSTALLATION
Installation is in the reverse order of removal.
Page 2660 of 2896

RSU-12
REAR SUSPENSION BEAM
Revision: June 20062007 Versa
REAR SUSPENSION BEAMPFP:55501
Removal and InstallationEES002D2
REMOVAL
1. Remove rear tires from vehicle using power tool.
2. Separate parking brake rear cable from rear drum brake and rear suspension beam. Refer to PB-4,
"PARKING BRAKE CONTROL" .
3. Remove wheel sensor and wheel sensor harness from wheel hub and bearing assembly and rear suspen-
sion beam. Refer to BRC-33, "
WHEEL SENSORS" .
4. Remove lock plate and separate brake tube from brake hose.
Refer to BR-11, "
BRAKE TUBE AND HOSE" .
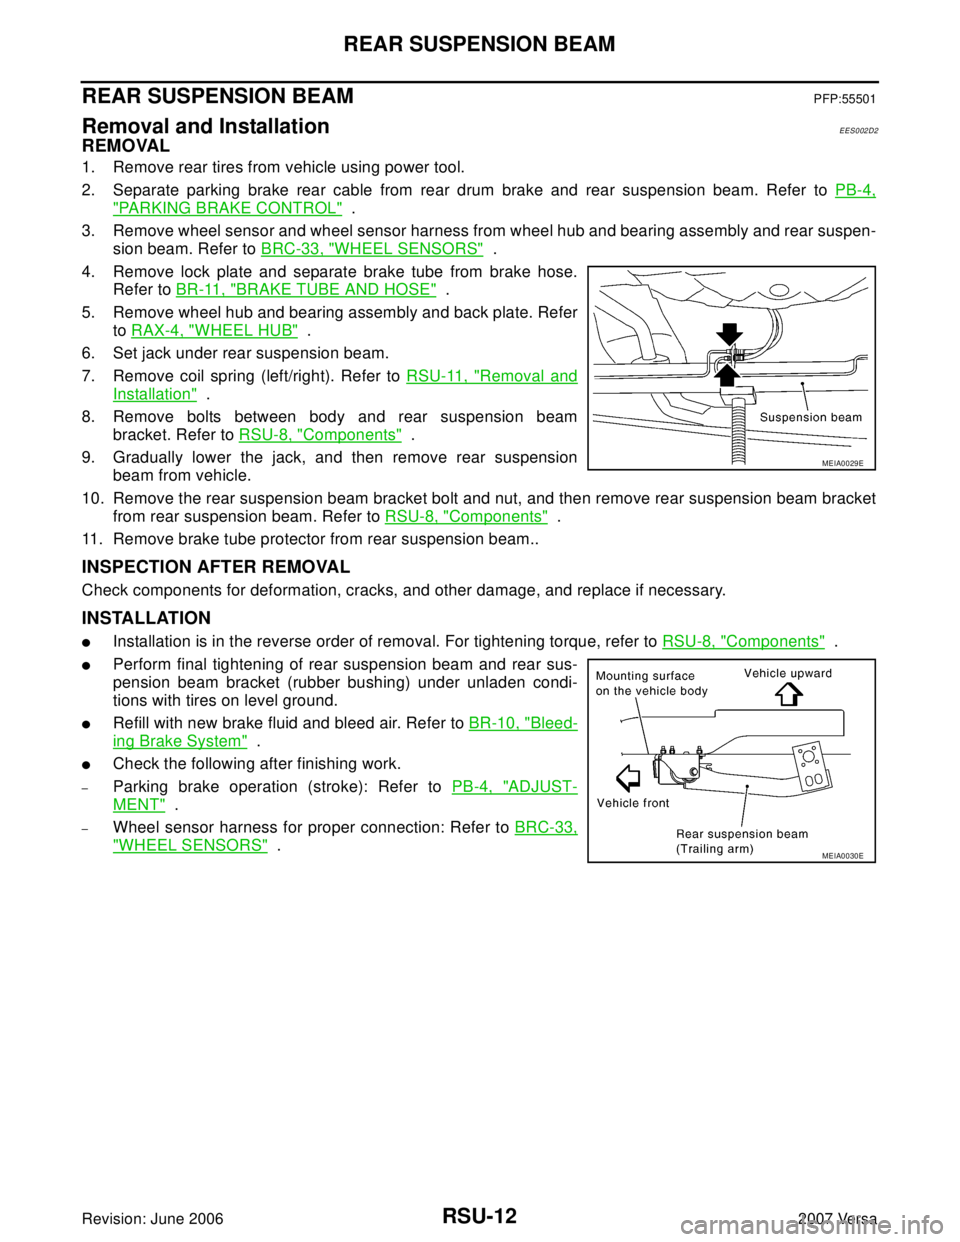
5. Remove wheel hub and bearing assembly and back plate. Refer
to RAX-4, "
WHEEL HUB" .
6. Set jack under rear suspension beam.
7. Remove coil spring (left/right). Refer to RSU-11, "
Removal and
Installation" .
8. Remove bolts between body and rear suspension beam
bracket. Refer to RSU-8, "
Components" .
9. Gradually lower the jack, and then remove rear suspension
beam from vehicle.
10. Remove the rear suspension beam bracket bolt and nut, and then remove rear suspension beam bracket
from rear suspension beam. Refer to RSU-8, "
Components" .
11. Remove brake tube protector from rear suspension beam..
INSPECTION AFTER REMOVAL
Check components for deformation, cracks, and other damage, and replace if necessary.
INSTALLATION
�Installation is in the reverse order of removal. For tightening torque, refer to RSU-8, "Components" .
�Perform final tightening of rear suspension beam and rear sus-
pension beam bracket (rubber bushing) under unladen condi-
tions with tires on level ground.
�Refill with new brake fluid and bleed air. Refer to BR-10, "Bleed-
ing Brake System" .
�Check the following after finishing work.
–Parking brake operation (stroke): Refer to PB-4, "ADJUST-
MENT" .
–Wheel sensor harness for proper connection: Refer to BRC-33,
"WHEEL SENSORS" .
MEIA0029E
MEIA0030E
Page 2790 of 2896
![NISSAN LATIO 2007 Service Repair Manual STC-4
[EPS]
PRECAUTIONS
Revision: June 20062007 Versa
Service Notice or Precautions for EPS SystemUGS0008F
CAUTION:
Check or confirm the following item when performing the trouble diagnosis.
�Check an NISSAN LATIO 2007 Service Repair Manual STC-4
[EPS]
PRECAUTIONS
Revision: June 20062007 Versa
Service Notice or Precautions for EPS SystemUGS0008F
CAUTION:
Check or confirm the following item when performing the trouble diagnosis.
�Check an](/manual-img/5/57361/w960_57361-2789.png)
STC-4
[EPS]
PRECAUTIONS
Revision: June 20062007 Versa
Service Notice or Precautions for EPS SystemUGS0008F
CAUTION:
Check or confirm the following item when performing the trouble diagnosis.
�Check any possible causes by interviewing the symptom and it’s condition from the customer if
any malfunction, such as EPS warning lamp turns ON, occurs.
�Check if air pressure and size of tires are proper, the specified part is used for the steering wheel,
and control unit is genuine part.
�Check if the connection of steering column assembly and steering gear assembly is proper (there
is not looseness of mounting bolts, damage of rods, boots or sealants, and leakage of grease,
etc).
�Check if the wheel alignment is adjusted properly.
�Check if there is any damage or modification to suspension or body resulting in increased weight
or altered ground clearance.
�Check if installation conditions of each link and suspension are proper.
�Check if the battery voltage is proper
�Check connection conditions of each connector are proper.
�Before connecting or disconnecting the EPS control unit
harness connector, turn ignition switch “OFF” and discon-
nect battery ground cable. Because battery voltage is
applied to EPS control unit even if ignition switch is turned
“OFF”.
�When connecting or disconnecting pin connectors into or
from EPS control unit, take care not to damage pin termi-
nals (bend or break).
When connecting pin connectors, make sure that there are
no bends or breaks on EPS control unit pin terminal.
�Before replacing EPS control unit, perform EPS control unit
input/output signal inspection and make sure whether EPS
control unit functions properly or not. Refer to STC-11,
"EPS Control Unit Input/Output Signal Reference Values" .
SEF 2 89 H
SEF 2 91 H
SDIA1848E