2007 NISSAN FRONTIER oil pressure
[x] Cancel search: oil pressurePage 16 of 336

Warning
lightName Page
or
Anti-lock Braking
System (ABS) warn-
ing light2-15
Automatic transmis-
sion oil temperature
warning light (if so
equipped)2-15
Automatic transmis-
sion park warning
light (
model)2-15
or
Brake warning light 2-16
Charge warning
light (if so equipped)2-16
Warning
lightName Page
Door open warning
light2-16
Engine oil pressure
warning light (if so
equipped)2-16
4WD warning light
(
model)2-17
Low fuel warning
light2-17
Low tire pressure
warning light2-17
Low windshield
washer fluid warning
light2-18
Seat belt warning
light and chime2-18
Supplemental air
bag warning light2-19
Indicator
lightName Page
Automatic transmis-
sion position indica-
tor light2-19
Cruise main switch
indicator light (if so
equipped)2-19
Cruise set switch
indicator light (if so
equipped)2-19
Electronic locking
rear differential (E-
Lock) system on
indicator light (if so
equipped)2-19
4WD shift indicator
light (
model)2-20
Front passenger air
bag status light2-20
WARNING/INDICATOR LIGHTS
0-10Illustrated table of contents
ZREVIEW COPYÐ2007 Truck/Frontier(d22)
Owners ManualÐUSA_English(nna)
12/13/06Ðcathy
X
Page 85 of 336

2 Instruments and controls
Instrument panel...................................2-3
Meters and gauges................................2-5
Speedometer and odometer.....................2-5
Trip computer (if so equipped)...................2-7
Tachometer....................................2-8
Engine coolant temperature gauge...............2-8
Fuel gauge....................................2-9
Engine oil pressure gauge (if so equipped)........2-9
Voltmeter (if so equipped)......................2-10
Compass and outside temperature display
(if so equipped)..................................2-10
Outside temperature display....................2-11
Compass display..............................2-11
Warning/indicator lights and audible reminders......2-14
Checking bulbs...............................2-15
Warning lights................................2-15
Indicator lights................................2-19
Audible reminders.............................2-23
Security systems (if so equipped)..................2-23
Vehicle security system (if so equipped)..........2-23
NISSAN vehicle immobilizer system
(if so equipped)...............................2-25
Windshield wiper and washer switch...............2-26Switch operation..............................2-26
Rear window and outside mirror defroster switch
(if so equipped)..................................2-27
Headlight and turn signal switch....................2-27
Headlight control switch........................2-27
Daytime running light system (Canada only)......2-29
Instrument brightness control...................2-30
Turn signal switch.............................2-30
Fog light switch (if so equipped)................2-31
Hazard warning flasher switch.....................2-31
Horn............................................2-32
Cargo lamp switch...............................2-32
Heated seat (if so equipped).......................2-33
Vehicle dynamic control (VDC) off switch
(if so equipped)..................................2-33
Hill descent control switch (if so equipped)..........2-34
Electronic locking rear differential (E-Lock) system
switch (if so equipped)............................2-35
Clutch interlock (clutch start) switch
(if so equipped)..................................2-36
Power outlet.....................................2-36
Storage.........................................2-37
Storage trays.................................2-37
ZREVIEW COPYÐ2007 Truck/Frontier(d22)
Owners ManualÐUSA_English(nna)
12/21/06Ðcathy
X
Page 89 of 336

1. Warning/indicator lights
2. Tachometer
3. Speedometer
4. Fuel gauge
5. Voltmeter (if so equipped)6. Odometer/Twin trip odometer/
Trip computer (if so equipped)
7. Engine oil pressure gauge
(if so equipped)
8. Engine coolant temperature gauge1. Speedometer
2. Odometer/twin trip display
3. Change button
SPEEDOMETER AND ODOMETER
Speedometer
The speedometer indicates vehicle speed in
miles per hour (MPH) and kilometers per hour
(km/h) .
Odometer/Twin trip odometer
The odometer/twin trip odometer is displayed
when the ignition key is in the ON position.
WIC1040
WIC0912
METERS AND GAUGES
Instruments and controls2-5
ZREVIEW COPYÐ2007 Truck/Frontier(d22)
Owners ManualÐUSA_English(nna)
12/13/06Ðcathy
X
Page 93 of 336

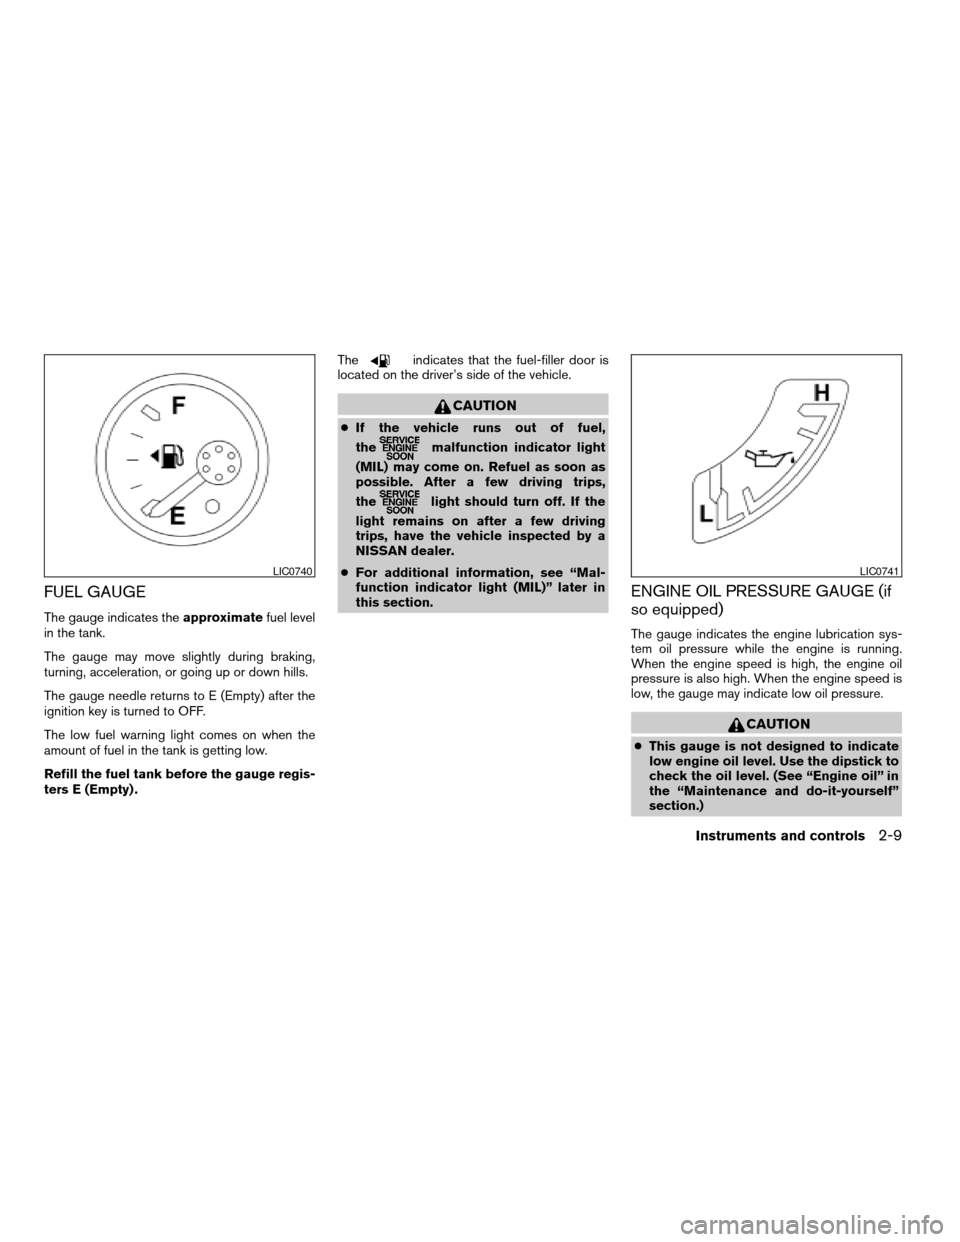
FUEL GAUGE
The gauge indicates theapproximatefuel level
in the tank.
The gauge may move slightly during braking,
turning, acceleration, or going up or down hills.
The gauge needle returns to E (Empty) after the
ignition key is turned to OFF.
The low fuel warning light comes on when the
amount of fuel in the tank is getting low.
Refill the fuel tank before the gauge regis-
ters E (Empty) .The
indicates that the fuel-filler door is
located on the driver’s side of the vehicle.
CAUTION
cIf the vehicle runs out of fuel,
the
malfunction indicator light
(MIL) may come on. Refuel as soon as
possible. After a few driving trips,
the
light should turn off. If the
light remains on after a few driving
trips, have the vehicle inspected by a
NISSAN dealer.
cFor additional information, see “Mal-
function indicator light (MIL)” later in
this section.
ENGINE OIL PRESSURE GAUGE (if
so equipped)
The gauge indicates the engine lubrication sys-
tem oil pressure while the engine is running.
When the engine speed is high, the engine oil
pressure is also high. When the engine speed is
low, the gauge may indicate low oil pressure.
CAUTION
cThis gauge is not designed to indicate
low engine oil level. Use the dipstick to
check the oil level. (See “Engine oil” in
the “Maintenance and do-it-yourself”
section.)
LIC0740LIC0741
Instruments and controls2-9
ZREVIEW COPYÐ2007 Truck/Frontier(d22)
Owners ManualÐUSA_English(nna)
12/13/06Ðcathy
X
Page 98 of 336

orAnti-lock Braking System (ABS)
warning lightLow windshield washer fluid warning lightHill descent control indicator light
(if so equipped)
Automatic transmission oil temperature warning
light (if so equipped)Seat belt warning light and chimeMalfunction indicator light (MIL)
Automatic transmission park warning light
(model)Supplemental air bag warning lightOverdrive off indicator light
(automatic transmission only)
orBrake warning lightAutomatic transmission position indicator lightSecurity indicator light (if so equipped)
Charge warning light (if so equipped)Cruise main switch indicator light
(if so equipped)Slip indicator light for models with ABLS
(if so equipped)
Door open warning lightCruise set switch indicator light
(if so equipped)Slip indicator light for models with VDC
(if so equipped)
Engine oil pressure warning light
(if so equipped)Electronic locking rear differential (E-Lock)
system on indicator light (if so equipped)Transfer 4LO position indicator light
(model)
4WD warning light (model)4WD shift indicator light (model)Turn signal/hazard indicator lights
Low fuel warning lightFront passenger air bag status lightVehicle dynamic control off indicator light
(if so equipped)
Low tire pressure warning lightHigh beam indicator light (Blue)
WARNING/INDICATOR LIGHTS AND
AUDIBLE REMINDERS
2-14Instruments and controls
ZREVIEW COPYÐ2007 Truck/Frontier(d22)
Owners ManualÐUSA_English(nna)
12/21/06Ðcathy
X
Page 100 of 336

while the automatic transmission selector lever is
in the P (Park) position, the transmission will
disengage and the drive wheels will not lock.
orBrake warning light
This light functions for both the parking brake and
the foot brake systems.
Parking brake indicator
When the ignition key is in the ON position, the
light comes on when the parking brake is applied.
Low brake fluid warning light
When the ignition key is in the ON position, the
light warns of a low brake fluid level. If the light
comes on while the engine is running with the
parking brake not applied, stop the vehicle and
perform the following:
1. Check the brake fluid level. Add brake fluid
as necessary. See “Brake fluid” in the “Main-
tenance and do-it-yourself” section of this
manual.
2. If the brake fluid level is correct, have the
warning system checked by a NISSAN
dealer.
WARNING
cYour brake system may not be working
properly if the warning light is on. Driv-
ing could be dangerous. If you judge it
to be safe, drive carefully to the nearest
service station for repairs. Otherwise,
have your vehicle towed because driv-
ing it could be dangerous.
cPressing the brake pedal with the en-
gine stopped and/or a low brake fluid
level may increase your stopping dis-
tance and braking will require greater
pedal effort as well as pedal travel.
cIf the brake fluid level is below the
MINIMUM or MIN mark on the brake
fluid reservoir, do not drive until the
brake system has been checked at a
NISSAN dealer.
Charge warning light (if so
equipped)
If this light comes on while the engine is running,
it may indicate the charging system is not func-
tioning properly. Turn the engine off and check
the generator belt. If the belt is loose, broken,
missing, or if the light remains on, see a NISSAN
dealer immediately.
CAUTION
cDo not ground electrical accessories
directly to the battery terminal. Doing
so will bypass the variable control sys-
tem and the vehicle battery may not
charge completely. Refer to “Variable
voltage control system” in the “Mainte-
nance and do-it-yourself” section later
in this manual.
cDo not continue driving if the generator
belt is loose, broken or missing.
Door open warning light
This light comes on when any of the doors are not
closed securely while the ignition key is in the ON
position.
Engine oil pressure warning
light (if so equipped)
This light warns of low engine oil pressure. If the
light flickers or comes on during normal driving,
pull off the road in a safe area, stop the engine
immediatelyand call a NISSAN dealer or other
authorized repair shop.
The engine oil pressure warning light is not
designed to indicate a low oil level.Use the
2-16Instruments and controls
ZREVIEW COPYÐ2007 Truck/Frontier(d22)
Owners ManualÐUSA_English(nna)
12/13/06Ðcathy
X
Page 101 of 336

dipstick to check the oil level. See “Engine oil” in
the “Maintenance and do-it-yourself” section of
this manual.
CAUTION
Running the engine with the engine oil
pressure warning light on could cause se-
rious damage to the engine almost imme-
diately. Such damage is not covered by
warranty. Turn off the engine as soon as it
is safe to do so.
4WD warning light
(
model)
The 4WD warning light comes on when the key
switch is turned to ON. It turns off soon after the
engine is started.
If the engine or vehicle is not functioning properly,
the warning light will either remain illuminated or
blink. See “4WD warning light” in the “Starting
and driving” section.
CAUTION
cIf the warning light comes on or blinks
during operation, have your vehicle
checked by a NISSAN dealer as soon as
possible.cDo not drive on dry hard surface roads
in the 4H or 4LO position. If the 4WD
warning light turns on when you are
driving on dry hard surface roads:
– in the 4H position, shift the 4WD shift
switch to 2WD.
– in the 4LO position for automatic
transmission models, stop the ve-
hicle and shift the transmission se-
lector lever to the N position with the
brake pedal depressed and shift the
4WD shift switch to 2WD.
– in the 4LO position for manual trans-
mission models, stop the vehicle and
shift the transmission shift lever to
the N position with the clutch pedal
depressed and shift the 4WD shift
switch to 2WD.
cIf the warning light is still on after the
above operation, have your vehicle
checked by a NISSAN dealer as soon as
possible.Low fuel warning light
This light comes on when the fuel level in the fuel
tank is getting low. Refuel as soon as it is conve-
nient, preferably before the fuel gauge reaches E(Empty) .There will be a small reserve of fuel
in the tank when the fuel gauge needle
reaches E (Empty) .
Low tire pressure warning
light
Your vehicle is equipped with a Tire Pressure
Monitoring System (TPMS) that monitors the tire
pressure of all tires except the spare.
The low tire pressure warning light warns of low
tire pressure or indicates that the TPMS is not
functioning properly.
After the ignition switch is turned ON, this light
illuminates for about 1 second and turns off.
Low tire pressure warning:
If the vehicle is being driven with low tire pres-
sure, the warning light will illuminate.
When the low tire pressure warning light illumi-
nates, you should stop and adjust the tire pres-
sure to the recommended COLD tire pressure
shown on the Tire and Loading Information label.
The low tire pressure warning light does not
automatically turn off when the tire pressure is
adjusted. After the tire is inflated to the recom-
mended pressure, the vehicle must be driven
over 16 MPH (25 km/h) to activate the TPMS and
turn off the low tire pressure warning light. Use a
Instruments and controls2-17
ZREVIEW COPYÐ2007 Truck/Frontier(d22)
Owners ManualÐUSA_English(nna)
12/21/06Ðdebbie
X
Page 232 of 336

4. Lower the vehicle slowly until the tire
touches the ground. Then, with the wheel
nut wrench, tighten the wheel nuts securely
in the sequence illustrated. Lower the ve-
hicle completely.
WARNING
cIncorrect wheel nuts or improperly
tightened wheel nuts can cause the
wheel to become loose or come off.
This could cause an accident.
cDo not use oil or grease on the wheel
studs or nuts. This could cause the nuts
to become loose.
cRetighten the wheel nuts when the ve-
hicle has been driven for 600 miles
(1,000 km) (also in cases of a flat tire,
etc.) .
As soon as possible, tighten the wheel nuts
to the specified torque with a torque
wrench.
Wheel nut tightening torque:
98 ft-lb (133 N·m)
The wheel nuts must be kept tightened to
specification at all times. It is recom-
mended that wheel nuts be tightened to
specifications at each lubrication interval.Adjust tire pressure to the COLD pressure.
COLD pressure: After vehicle has been
parked for three hours or more or driven
less than 1 mile (1.6 km) .
COLD tire pressures are shown on the Tire
and Loading Information label affixed to
the driver side center pillar.
5. Securely store the flat tire and jacking equip-
ment in the vehicle.
WARNING
cAlways make sure that the spare tire
and jacking equipment are properly se-
cured after use. Such items can become
dangerous projectiles in an accident or
sudden stop.
cThe spare tire is designed for emer-
gency use. See specific instructions un-
der the heading “Wheels and tires” in
the “Maintenance and do-it-yourself”
section of this manual.To start your engine with a booster battery, the
instructions and precautions below must be fol-
lowed.
WARNING
cIf done incorrectly, jump starting can
lead to a battery explosion, resulting in
severe injury or death. It could also
damage your vehicle.
cExplosive hydrogen gas is always
present in the vicinity of the battery.
Keep all sparks and flames away from
the battery.
cDo not allow battery fluid to come into
contact with eyes, skin, clothing or
painted surfaces. Battery fluid is a cor-
rosive sulfuric acid solution which can
cause severe burns. If the fluid should
come into contact with anything, imme-
diately flush the contacted area with
water.
cKeep battery out of the reach of
children.
cThe booster battery must be rated at 12
volts. Use of an improperly rated battery
can damage your vehicle.
JUMP STARTING
6-8In case of emergency
ZREVIEW COPYÐ2007 Truck/Frontier(d22)
Owners ManualÐUSA_English(nna)
12/13/06Ðcathy
X