2007 NISSAN FRONTIER heater
[x] Cancel search: heaterPage 181 of 336

4. The channel indicator will then come on and
the sound will resume. Programming is now
complete.
5. Other buttons can be set in the same man-
ner.
If the battery cable is disconnected, or if the fuse
opens, the radio memory will be canceled. In that
case, reset the desired stations.
Radio data system (RDS):
RDS stands for Radio Data System, and is a data
information service transmitted by some radio
stations on the FM band (not AM band) . Cur-
rently, most RDS stations are in large cities, but
many stations are now considering broadcasting
RDS data.
RDS can display:
cStation call sign, such as “WHFR 98.3”.
cStation name, such as “The Groove”.
cMusic or programming type such as “Clas-
sical”, “Country”, or “Rock”.
cArtist and song information.
If the station broadcasts RDS information, the
RDS icon is displayed.Compact disc (CD) changer operation
Turn the ignition key to the ACC or ON position
and insert the compact disc into the slot with the
label side facing up. The compact disc will be
guided automatically into the slot and start play-
ing. To insert the disc, first press the
LOAD
button.
If the radio is already operating, it will automati-
cally turn off and the compact disc will play.
If the system has been turned off while the com-
pact disc was playing, pressing the PWR/VOL
control knob will start the compact disc.
Do not use 3.1 in (8 cm) diameter compact discs
in the CD changer.
LOAD button:
To insert a CD in the CD changer, press the load
button
for less than 1.5 seconds. Select
the loading slot by pressing the CD insert select
button (1 – 6) , then insert the CD.
To insert 6 CDs to the CD changer, press the
load button for more than 1.5 seconds.
The slot numbers (1 – 6) will illuminate on the
display when CDs are loaded into the changer.CD button:
When the CD button is pressed with the system
off and the compact disc loaded, the system will
turn on and the compact disc will start to play.
When the CD button is pressed with the com-
pact disc loaded with the radio playing, the radio
will automatically be turned off and the compact
disc will start to play.
SEEK/TRACK button:
When the
button is pressed for less than
1.5 seconds while a compact disc is playing, the
track being played returns to its beginning. Press
several times to skip back through tracks. The
compact disc will go back the number of times
the button is pressed.
When the
button is pressed for less than
1.5 seconds while the compact disc is playing,
the next track will start to play from its beginning.
Press several times to skip through tracks. The
compact disc will advance the number of times
the button is pressed. (When the last track on the
compact disc is skipped through, the first track
will be played.)
Heater, air conditioner and audio systems4-23
ZREVIEW COPYÐ2007 Truck/Frontier(d22)
Owners ManualÐUSA_English(nna)
12/13/06Ðcathy
X
Page 182 of 336

CAT FOLDER button:
While playing a CD, press the CAT FOLDER
button
orto fast forward or rewind a
track on a CD.
MP3 CAT FOLDER
button:
While playing an MP3 CD, press the CAT
FOLDER button
orto scan back-
ward or forward through available folders.
Press and hold the CAT FOLDER button
orto fast forward or rewind a track on an
MP3 CD.
CD select buttons:
To play another CD that has been loaded, press a
CD select button (1 – 6) .
SCAN/RPT:
When the SCAN/RPT play button is pushed
while the compact disc is played, the play pattern
can be changed as follows:
ALL DISC RPT!1 DISC RPT!1 TRACK RPT
!ALL DISC RDM!1 DISC RDM!ALL DISC
RPT
ALL DISC RPT: All discs loaded will be repeated.
1 DISC RPT: The disc that is currently playing will
be repeated.1 TRACK RPT: The track that is currently playing
will be repeated
ALL DISC RDM: Tracks from all discs will be
played randomly
1 DISC RDM: Tracks from the disc that is cur-
rently playing will be played randomly
CD EJECT:
Current/Selected disc:
cPress the
button, then press the slot
number (1 – 6) for the desired disc. The
compact disc will be ejected. If no slot num-
ber (1 – 6) is pressed, the current loaded
disc will be ejected. Also, if the ejected disc
is not removed within 15 seconds, the disc
will reload.
All discs:
cPress and hold the
button for more
than 1.5 seconds. The compact discs will be
ejected one by one. If a disc is not removed
within 15 seconds, or the
button is
pressed again during the eject sequence,
the entire disc eject sequence will be can-
celed.
When this button is pressed while the compact
disc is being played, the compact disc will eject
and the last source will be played.CD IN indicator:
The slot numbers (1 – 6) will illuminate if CDs
have been loaded into the changer in CD mode
only.
4-24Heater, air conditioner and audio systems
ZREVIEW COPYÐ2007 Truck/Frontier(d22)
Owners ManualÐUSA_English(nna)
12/13/06Ðcathy
X
Page 183 of 336

AUX jack (if so equipped)
The AUX jack
s1is located above the power
outlet. The AUX audio input jack accepts any
standard analog audio input such as from a por-
table cassette tape player, MP3 player or laptop
computers.
Press the AUX button to play a compatible device
when it is plugged into the AUX jack.
CD CARE AND CLEANING
cHandle a CD by its edges. Do not bend the
disc. Never touch the surface of the disc.
cAlways place the discs in the storage case
when they are not being used.
cTo clean a disc, wipe the surface from the
center to the outer edge using a clean, soft
cloth. Do not wipe the disc using a circular
motion.
cDo not use a conventional record cleaner or
alcohol intended for industrial use.cA new disc may be rough on the inner and
outer edges. Remove the rough edges by
rubbing the inner and outer edges with the
side of a pen or pencil as illustrated.
LHA0733LHA0049
Heater, air conditioner and audio systems4-25
ZREVIEW COPYÐ2007 Truck/Frontier(d22)
Owners ManualÐUSA_English(nna)
12/13/06Ðcathy
X
Page 184 of 336

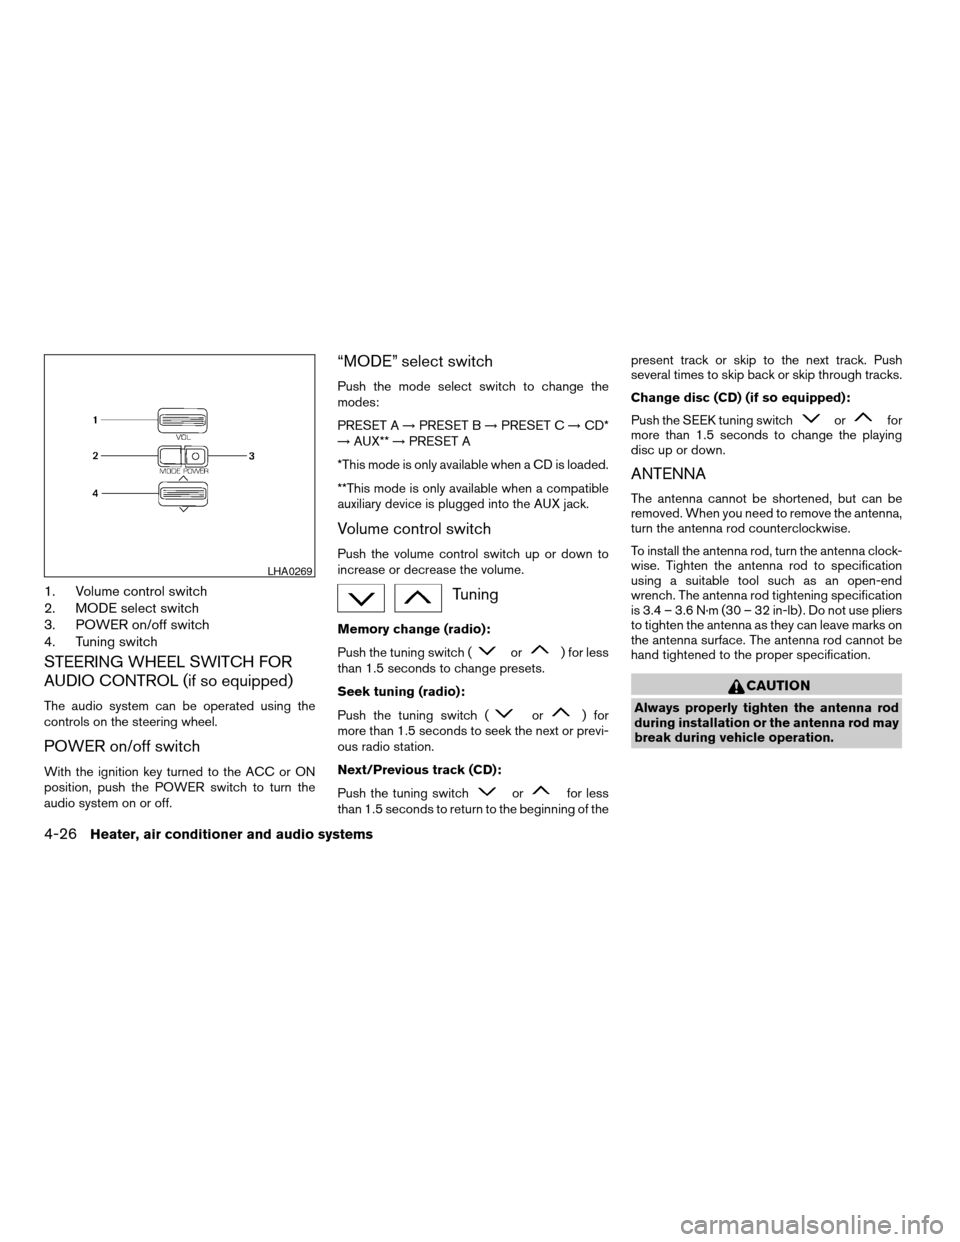
1. Volume control switch
2. MODE select switch
3. POWER on/off switch
4. Tuning switch
STEERING WHEEL SWITCH FOR
AUDIO CONTROL (if so equipped)
The audio system can be operated using the
controls on the steering wheel.
POWER on/off switch
With the ignition key turned to the ACC or ON
position, push the POWER switch to turn the
audio system on or off.
“MODE” select switch
Push the mode select switch to change the
modes:
PRESET A!PRESET B!PRESET C!CD*
!AUX**!PRESET A
*This mode is only available when a CD is loaded.
**This mode is only available when a compatible
auxiliary device is plugged into the AUX jack.
Volume control switch
Push the volume control switch up or down to
increase or decrease the volume.
Tuning
Memory change (radio):
Push the tuning switch (
or) for less
than 1.5 seconds to change presets.
Seek tuning (radio):
Push the tuning switch (
or) for
more than 1.5 seconds to seek the next or previ-
ous radio station.
Next/Previous track (CD):
Push the tuning switch
orfor less
than 1.5 seconds to return to the beginning of thepresent track or skip to the next track. Push
several times to skip back or skip through tracks.
Change disc (CD) (if so equipped):
Push the SEEK tuning switch
orfor
more than 1.5 seconds to change the playing
disc up or down.
ANTENNA
The antenna cannot be shortened, but can be
removed. When you need to remove the antenna,
turn the antenna rod counterclockwise.
To install the antenna rod, turn the antenna clock-
wise. Tighten the antenna rod to specification
using a suitable tool such as an open-end
wrench. The antenna rod tightening specification
is 3.4 – 3.6 N·m (30 – 32 in-lb) . Do not use pliers
to tighten the antenna as they can leave marks on
the antenna surface. The antenna rod cannot be
hand tightened to the proper specification.
CAUTION
Always properly tighten the antenna rod
during installation or the antenna rod may
break during vehicle operation.
LHA0269
4-26Heater, air conditioner and audio systems
ZREVIEW COPYÐ2007 Truck/Frontier(d22)
Owners ManualÐUSA_English(nna)
12/13/06Ðcathy
X
Page 185 of 336

When installing a CB, ham radio or car phone in
your NISSAN, be sure to observe the following
precautions, otherwise the new equipment may
adversely affect the engine control system and
other electronic parts.
WARNING
cA cellular telephone should not be used
while driving so full attention may be
given to vehicle operation. Some juris-
dictions prohibit the use of cellular tele-
phones while driving.
cIf you must make a call while your ve-
hicle is in motion, the hands free cellu-
lar phone operational mode (if so
equipped) is highly recommended. Ex-
ercise extreme caution at all times so
full attention may be given to vehicle
operation.
cIf a conversation in a moving vehicle
requires you to take notes, pull off the
road to a safe location and stop your
vehicle before doing so.
CAUTION
cKeep the antenna as far away as pos-
sible from the electronic control
modules.
cKeep the antenna wire more than 8 in
(20 cm) away from the electronic con-
trol system harnesses. Do not route the
antenna wire next to any harness.
cAdjust the antenna standing-wave ratio
as recommended by the manufacturer.
cConnect the ground wire from the CB
radio chassis to the body.
cFor details, consult a NISSAN dealer.
cDo not ground electrical accessories
directly to the battery terminal. Doing
so, will bypass the variable voltage con-
trol system and the vehicle battery may
not charge completely. Refer to “Vari-
able voltage control system” in the
“Maintenance and do-it-yourself” sec-
tion later in this manual.
cUse electrical accessories with the en-
gine running to avoid discharging the
vehicle battery.
CAR PHONE OR CB RADIO
Heater, air conditioner and audio systems4-27
ZREVIEW COPYÐ2007 Truck/Frontier(d22)
Owners ManualÐUSA_English(nna)
12/13/06Ðcathy
X
Page 187 of 336

Special winter equipment.......................5-36
Driving on snow or ice.........................5-36Engine block heater (if so equipped).............5-36
ZREVIEW COPYÐ2007 Truck/Frontier(d22)
Owners ManualÐUSA_English(nna)
12/13/06Ðcathy
X
Page 190 of 336

km/h) . Also, this system may not detect a
sudden drop in tire pressure (for example a
flat tire while driving) .
cThe low tire pressure warning light does not
automatically turn off when the tire pressure
is adjusted. After the tire is inflated to the
recommended pressure, the vehicle must be
driven at speeds above 16 MPH (25 km/h)
to activate the TPMS and turn off the low tire
pressure warning light. Use a tire pressure
gauge to check the tire pressure.
cTire pressure rises and falls depending on
the heat caused by the vehicle’s operation
and the outside temperature. Low outside
temperature can lower the temperature of
the air inside the tire which can cause a
lower tire inflation pressure. This may cause
the low tire pressure warning light to illumi-
nate. If the warning light illuminates in low
ambient temperature, check the tire pres-
sure for all four tires.
cYou can also check the pressure of all tires
(except the spare tire) on the display screen.
The order of the tire pressure figures dis-
played on the screen does not correspond
with the actual order of the tire position. See
“Tire pressure information” in the “Display
screen, heater, air conditioner and audio
systems” section.For additional information, see “Low tire pressure
warning light” in the “Instruments and controls”
section, “Tire Pressure Monitoring System
(TPMS)” in the “In case of emergency” section.
WARNING
cIf the low tire pressure warning light
illuminates while driving, avoid sudden
steering maneuvers or abrupt braking,
reduce vehicle speed, pull off the road
to a safe location and stop the vehicle
as soon as possible. Serious vehicle
damage could occur and may lead to an
accident and could result in serious
personal injury. Check the tire pressure
for all four tires. Adjust the tire pressure
to the recommended COLD tire pres-
sure shown on the Tire and Loading
Information label to turn the low tire
pressure warning light OFF. If you have
a flat tire, replace it with a spare tire as
soon as possible. (See “Flat tire” in the
“In case of emergency” section for
changing a flat tire.)cWhen a spare tire is mounted or a wheel
is replaced, tire pressure will not be
indicated, the TPMS will not function
and the low tire pressure warning light
will flash for approximately 1 minute.
The light will remain on after 1 minute.
Contact your NISSAN dealer as soon as
possible for tire replacement and/or
system resetting.
cReplacing tires with those not originally
specified by NISSAN could affect the
proper operation of the TPMS.
cDo not inject any tire liquid or aerosol
tire sealant into the tires, as this may
cause a malfunction of the tire pressure
sensors.
CAUTION
Do not place metalized film or any metal
parts (antenna, etc.) on the windows. This
may cause poor reception of the signals
from the tire pressure sensors, and the
TPMS will not function properly.
Some devices and transmitters may temporarily
interfere with the operation of the TPMS and
cause the low tire pressure warning light to illu-
minate.
5-4Starting and driving
ZREVIEW COPYÐ2007 Truck/Frontier(d22)
Owners ManualÐUSA_English(nna)
12/13/06Ðcathy
X
Page 222 of 336

3. Tire chains may be used. For details see
“Tire chains” in the “Maintenance and do-it-
yourself” section of this manual.
SPECIAL WINTER EQUIPMENT
It is recommended that the following items be
carried in the vehicle during winter:
cA scraper and stiff-bristled brush to remove
ice and snow from the windows and wiper
blades.
cA sturdy, flat board to be placed under the
jack to give it firm support.
cA shovel to dig the vehicle out of snowdrifts.
cExtra window washer fluid to refill the reser-
voir tank.
DRIVING ON SNOW OR ICE
WARNING
cWet ice (32°F, 0°C and freezing rain) ,
very cold snow or ice can be slick and
very hard to drive on. The vehicle will
have much less traction or “grip” under
these conditions. Try to avoid driving on
wet ice until the road is salted or
sanded.cWhatever the condition, drive with cau-
tion. Accelerate and slow down with
care. If accelerating or downshifting too
fast, the drive wheels will lose even
more traction.
cAllow more stopping distance under
these conditions. Braking should be
started sooner than on dry pavement.
cAllow greater following distances on
slippery roads.
cWatch for slippery spots (glare ice) .
These may appear on an otherwise
clear road in shaded areas. If a patch of
ice is seen ahead, brake before reach-
ing it. Try not to brake while on the ice,
and avoid any sudden steering
maneuvers.
cDo not use the cruise control on slip-
pery roads.
cSnow can trap dangerous exhaust
gases under your vehicle. Keep snow
clear of the exhaust pipe and from
around your vehicle.
ENGINE BLOCK HEATER (if so
equipped)
WARNING
cDo not use your engine block heater
with an ungrounded electrical system
or a 2-pronged adapter. You can be se-
riously injured by an electrical shock if
you use an ungrounded connection.
cDisconnect and properly store the en-
gine block heater cord before starting
the engine. Damage to the cord could
result in an electrical shock and can
cause serious injury.
cUse a heavy-duty 3-wire, 3-pronged ex-
tension cord rated for at least 10 A. Plug
the extension cord into a Ground Fault
Interrupt (GFI) protected, grounded
110-VAC outlet. Failure to use the
proper extension cord or a grounded
outlet can result in a fire or electrical
shock and cause serious personal
injury.
Engine block heaters are available through
NISSAN dealers to assist in cold temperature
starting. The engine block heater should be used
when the outside temperature is 20° F (-7° C) or
lower.
5-36Starting and driving
ZREVIEW COPYÐ2007 Truck/Frontier(d22)
Owners ManualÐUSA_English(nna)
12/13/06Ðcathy
X