2007 NISSAN ARMADA warning light
[x] Cancel search: warning lightPage 147 of 344

keyfob, the instrument panel switch and by the
outside opener handle. The hazard lights flash
and a chime sounds to indicate the power open
sequence has been started.
cThe lift gate can be opened by the instru-
ment panel switch and the keyfob even if the
vehicle is locked. The lift gate will individually
unlock and open. Once the lift gate is
closed, its lock will align to the vehicle’s lock
or unlock status.
cThe keyfob button must be held for 0.5 sec-
ond before the lift gate opens.cThe lift gate must be unlocked to open it with
the outside opener handle.
cThe switch on the rear pillar cannot be used
to open the lift gate.
A warning chime will sound if the shift selector
lever is moved out of P (Park) during a power
open operation.
Power Close:
The power lift gate automatically moves from the
fully open position to the secondary position.
When the lift gate reaches the secondary posi-
tion, the cinching motor engages and pulls the lift
gate to its primary latch position. Power close
takes approximately7–10seconds. The power
close feature can be activated by the switch on
the keyfob, the instrument panel and the rear
pillar. The hazard lights flash and a chime sounds
to indicate the power close sequence has been
started.
cIf the outside opener handle is activated
while the cinching motor is engaged, the
cinching motor will disengage and release
the latch.
cThe keyfob button must be held for 0.5 sec-
ond before the lift gate closes.
cThe switch on the rear pillar can only be used
to close the lift gate if the cancel switch is
not in the on position.Reverse:
The power lift gate will reverse direction immedi-
ately during power open or power close if the
keyfob, instrument panel or rear pillar switch is
pressed or if the outside handle is lifted. A chime
will sound to announce the reversal.
Auto Reverse:
If an obstacle is detected during power open or
power close, a warning chime will sound and the
lift gate will reverse direction and return to the full
open or full close position. If a second obstacle is
detected, the lift gate motion will stop and the
drive motor will disengage. The lift gate will enter
manual mode.
A pinch strip is mounted on each side of the lift
gate. If an obstacle is detected by a pinch strip
during power close, the lift gate will reverse di-
rection and return to the full open position.
Instrument panel switch
LPD0283
Pre-driving checks and adjustments3-11
ZREVIEW COPYÐ2007 Armada(wzw)
Owners ManualÐUSA_English(nna)
07/08/06Ðtbrooks
X
Page 151 of 344
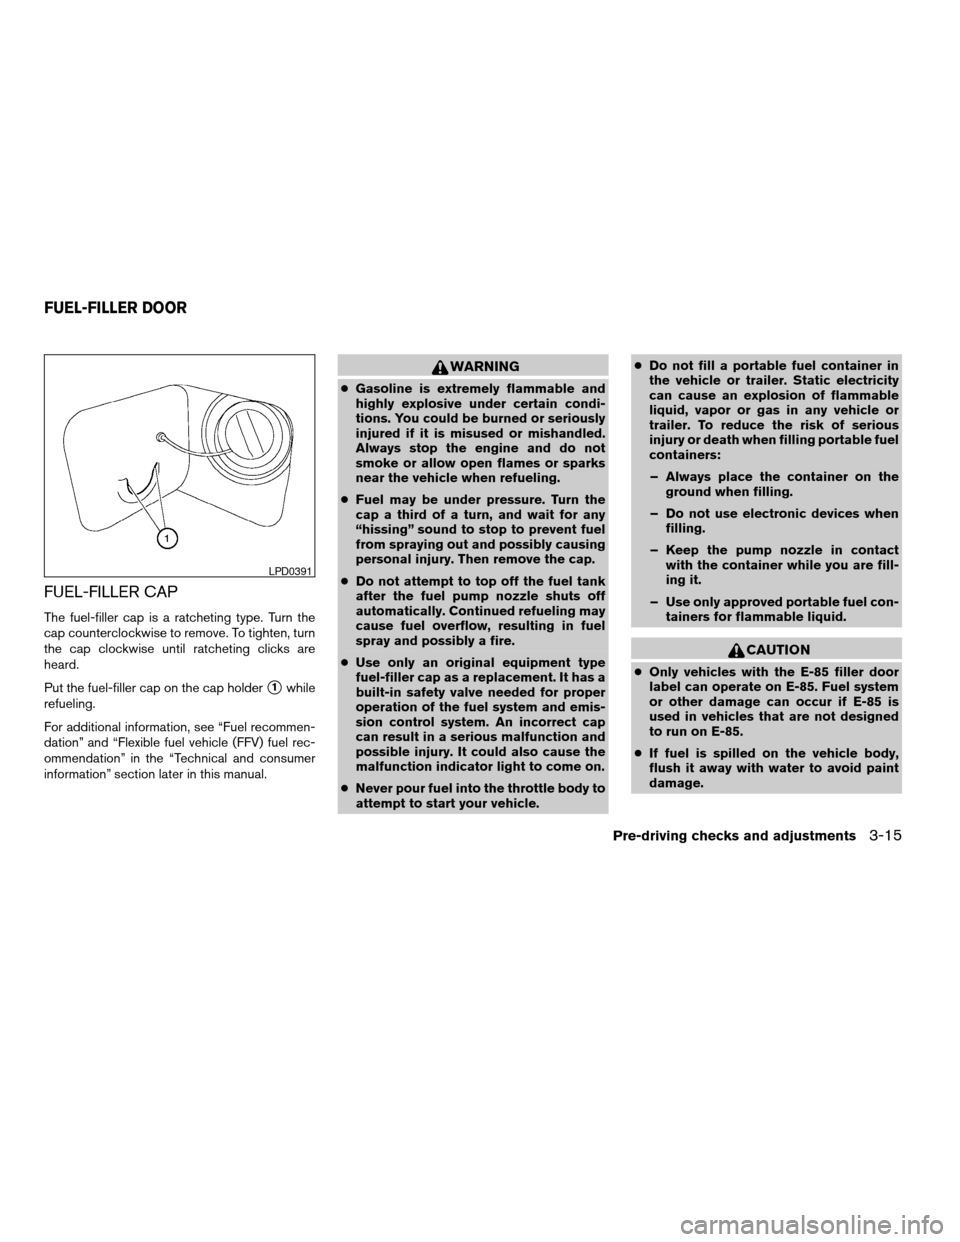
FUEL-FILLER CAP
The fuel-filler cap is a ratcheting type. Turn the
cap counterclockwise to remove. To tighten, turn
the cap clockwise until ratcheting clicks are
heard.
Put the fuel-filler cap on the cap holder
s1while
refueling.
For additional information, see “Fuel recommen-
dation” and “Flexible fuel vehicle (FFV) fuel rec-
ommendation” in the “Technical and consumer
information” section later in this manual.
WARNING
cGasoline is extremely flammable and
highly explosive under certain condi-
tions. You could be burned or seriously
injured if it is misused or mishandled.
Always stop the engine and do not
smoke or allow open flames or sparks
near the vehicle when refueling.
cFuel may be under pressure. Turn the
cap a third of a turn, and wait for any
“hissing” sound to stop to prevent fuel
from spraying out and possibly causing
personal injury. Then remove the cap.
cDo not attempt to top off the fuel tank
after the fuel pump nozzle shuts off
automatically. Continued refueling may
cause fuel overflow, resulting in fuel
spray and possibly a fire.
cUse only an original equipment type
fuel-filler cap as a replacement. It has a
built-in safety valve needed for proper
operation of the fuel system and emis-
sion control system. An incorrect cap
can result in a serious malfunction and
possible injury. It could also cause the
malfunction indicator light to come on.
cNever pour fuel into the throttle body to
attempt to start your vehicle.cDo not fill a portable fuel container in
the vehicle or trailer. Static electricity
can cause an explosion of flammable
liquid, vapor or gas in any vehicle or
trailer. To reduce the risk of serious
injury or death when filling portable fuel
containers:
– Always place the container on the
ground when filling.
– Do not use electronic devices when
filling.
– Keep the pump nozzle in contact
with the container while you are fill-
ing it.
– Use only approved portable fuel con-
tainers for flammable liquid.
CAUTION
cOnly vehicles with the E-85 filler door
label can operate on E-85. Fuel system
or other damage can occur if E-85 is
used in vehicles that are not designed
to run on E-85.
cIf fuel is spilled on the vehicle body,
flush it away with water to avoid paint
damage.
LPD0391
FUEL-FILLER DOOR
Pre-driving checks and adjustments3-15
ZREVIEW COPYÐ2007 Armada(wzw)
Owners ManualÐUSA_English(nna)
07/08/06Ðtbrooks
X
Page 152 of 344
cTighten until the fuel-filler cap clicks.
Failure to tighten the fuel-filler cap
properly may cause the
mal-
function indicator light (MIL) to illumi-
nate. If the
light illuminates be-
cause the fuel-filler cap is loose or
missing, tighten or install the cap and
continue to drive the vehicle.
The
light should turn off after a
few driving trips. If the
light
does not turn off after a few driving
trips, have the vehicle inspected by a
NISSAN dealer.
cFor additional information, see the
“Malfunction indicator light (MIL)” in
the “Instruments and Controls” section
earlier in this manual.
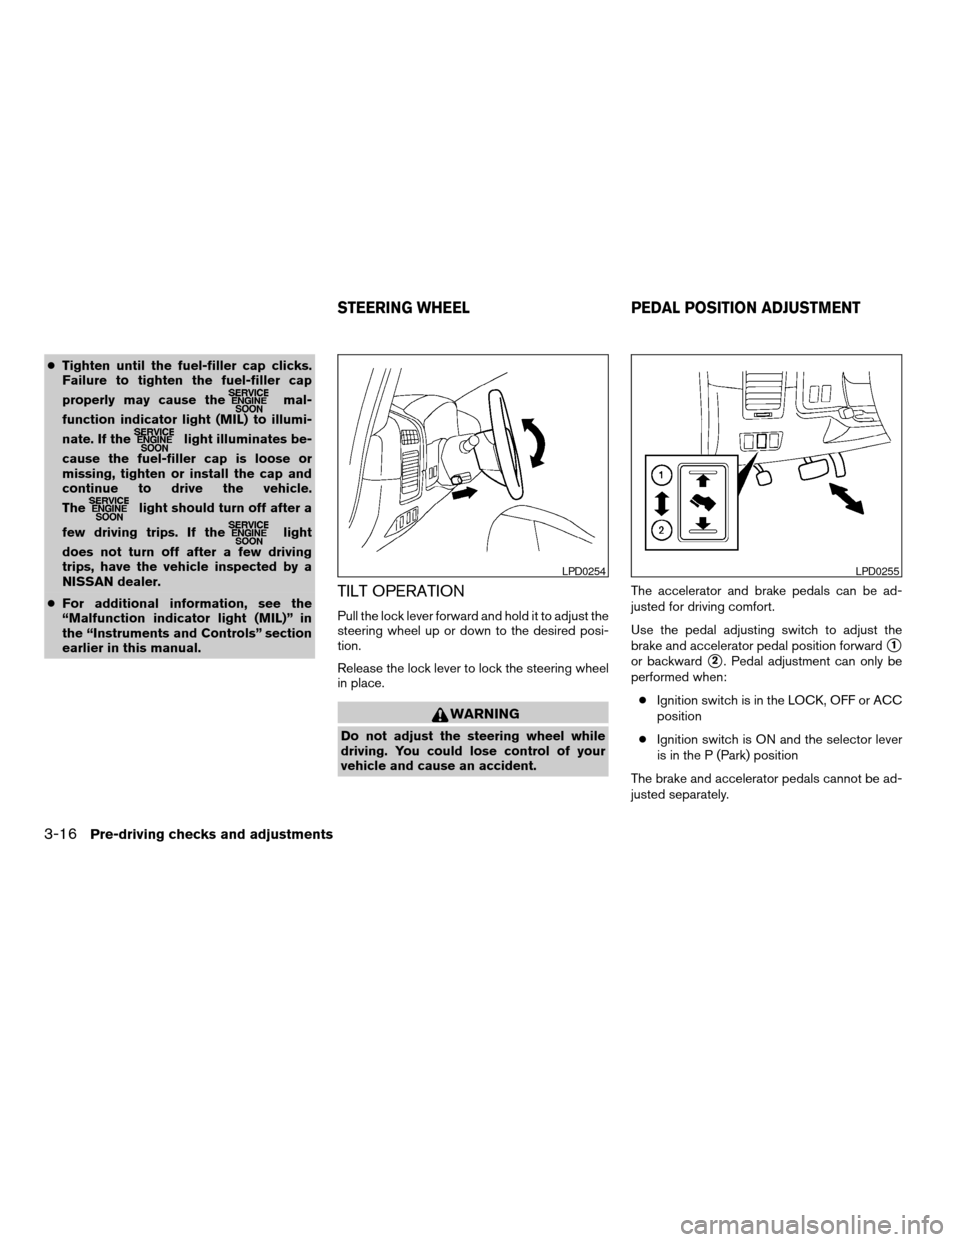
TILT OPERATION
Pull the lock lever forward and hold it to adjust the
steering wheel up or down to the desired posi-
tion.
Release the lock lever to lock the steering wheel
in place.
WARNING
Do not adjust the steering wheel while
driving. You could lose control of your
vehicle and cause an accident.The accelerator and brake pedals can be ad-
justed for driving comfort.
Use the pedal adjusting switch to adjust the
brake and accelerator pedal position forward
s1
or backwards2. Pedal adjustment can only be
performed when:
cIgnition switch is in the LOCK, OFF or ACC
position
cIgnition switch is ON and the selector lever
is in the P (Park) position
The brake and accelerator pedals cannot be ad-
justed separately.
LPD0254LPD0255
STEERING WHEEL PEDAL POSITION ADJUSTMENT
3-16Pre-driving checks and adjustments
ZREVIEW COPYÐ2007 Armada(wzw)
Owners ManualÐUSA_English(nna)
07/08/06Ðtbrooks
X
Page 163 of 344

9. GUIDE VOICE button*
10.
zoom out button*
11.
zoom in button*
*For Navigation system control buttons, refer to
the separate Navigation System Owner’s
Manual.
When you use this system, make sure the engine
is running.
If you use the system with the engine not
running (ignition ON or ACC) for a long
time, it will use up all the battery power,
and the engine will not start.
Reference symbols:
ENTER button — This is a button on the control
panel.
Display key — This is a select key on the screen.
By selecting this key you can proceed to the next
function.
HOW TO USE THE JOYSTICK AND
ENTER BUTTON
Use the joystick to choose an item on the display
screen. Move the joystick up, down, left or right to
highlight an item. Then press the ENTER button
to select the item or perform the action.
HOW TO USE THE BACK BUTTON
This button has two functions.
cGo back to the previous display (cancel) .
If you press the BACK button during setup, the
setup will be canceled and/or the display will
return to the previous screen.
cFinish setup.
In some screens pressing the BACK button ac-
cepts the changes made during setup.
SETTING UP THE START-UP
SCREEN
When you turn the ignition key to ACC or ON, the
system start-up warning is displayed on the
screen. Read the warning and select the “OK”
key by pressing the ENTER button.
If you do not press the ENTER button, the Navi-
gation system will not proceed to the next step in
the Navigation display.
If you do not touch a button or screen key for
more than 1 minute on the system start-up warn-
ing screen, the screen will change to the audio
screen automatically.
To proceed to the next step, refer to the separate
Navigation System Owner’s Manual.HOW TO USE THE TRIP BUTTON
When the TRIP button is pressed, the following
modes will display on the screen.
Warning message (if any)!TRIP 1!TRIP 2!
FUEL ECONOMY!MAINTENANCE!Audio
or OFF!TRIP 1
Each trip display tracks an independent trip and
displays the following:
cElapsed Time - Journey time since the last
reset up to a maximum of 99 hours and 59
minutes.
cDriving Distance - Distance driven (mile or
km) since the last reset.
LHA0572
Display screen, heater, air conditioner and audio systems4-3
ZREVIEW COPYÐ2007 Armada(wzw)
Owners ManualÐUSA_English(nna)
07/08/06Ðtbrooks
X
Page 167 of 344
Tire pressure rises and falls depending on the
heat caused by the vehicle’s operation and the
outside temperature.
In case of low tire pressure, a message is dis-
played on the screen:
LOW PRESSURE — Check All Tires.
WARNING
cWhen a spare tire is mounted or a wheel
is replaced, tire pressure will not be
indicated, the Tire Pressure Monitoring
System (TPMS) will not function and
the low tire pressure warning light will
flash. Contact your NISSAN dealer as
soon as possible for tire replacement
and/or system resetting.
cReplacing tires with those not originally
specified by NISSAN could affect the
proper operation of the TPMS.
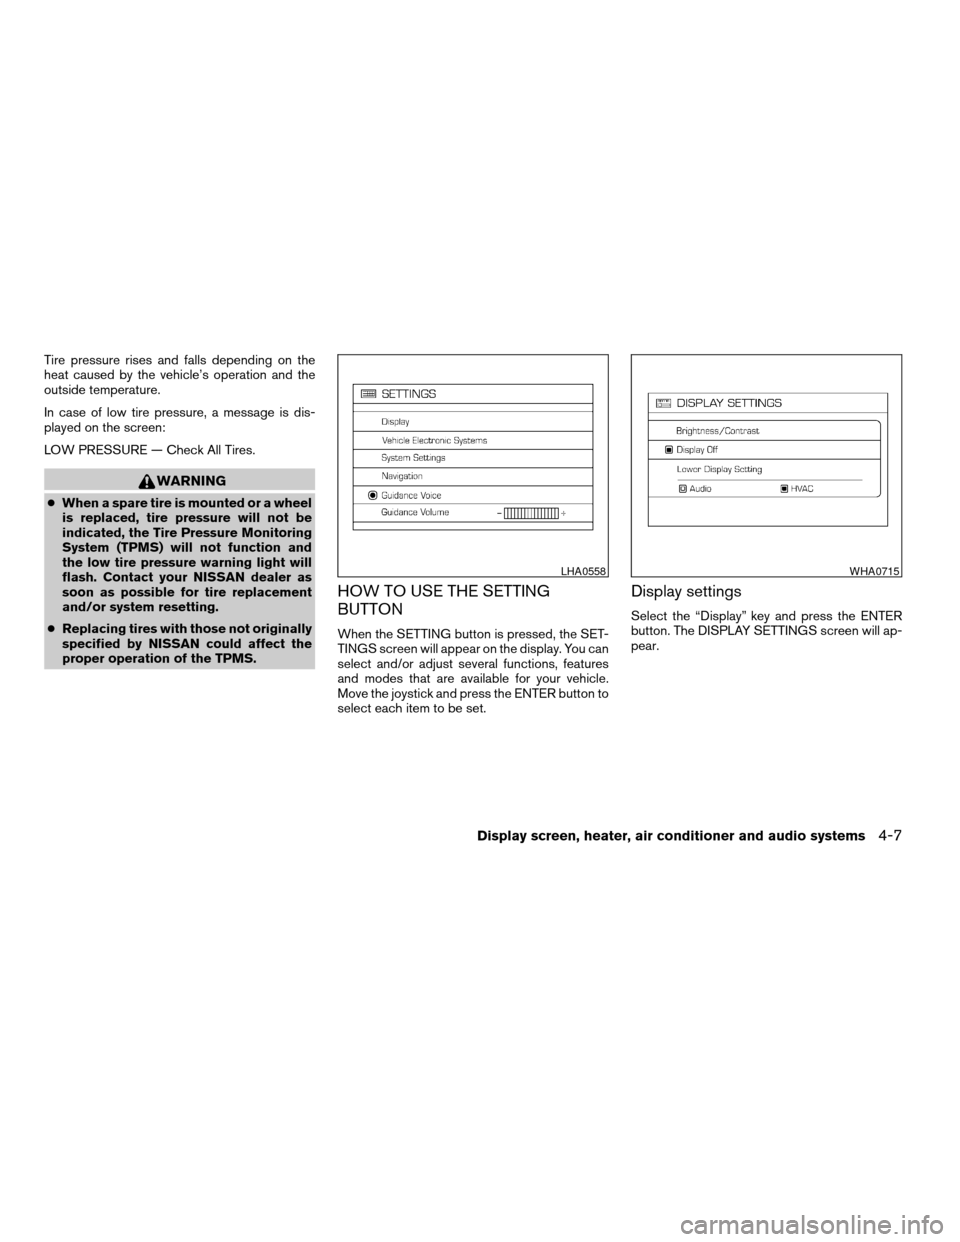
HOW TO USE THE SETTING
BUTTON
When the SETTING button is pressed, the SET-
TINGS screen will appear on the display. You can
select and/or adjust several functions, features
and modes that are available for your vehicle.
Move the joystick and press the ENTER button to
select each item to be set.
Display settings
Select the “Display” key and press the ENTER
button. The DISPLAY SETTINGS screen will ap-
pear.
LHA0558WHA0715
Display screen, heater, air conditioner and audio systems4-7
ZREVIEW COPYÐ2007 Armada(wzw)
Owners ManualÐUSA_English(nna)
07/08/06Ðtbrooks
X
Page 214 of 344
Your vehicle has also been equipped with a
TPMS malfunction indicator to indicate when the
system is not operating properly. The TPMS mal-
function indicator is combined with the low tire
pressure telltale. When the system detects a
malfunction, the telltale will flash for approxi-
mately one minute and then remain continuously
illuminated. This sequence will continue upon
subsequent vehicle start-ups as long as the mal-
function exists. When the malfunction indicator is
illuminated, the system may not be able to detect
or signal low tire pressure as intended. TPMS
malfunctions may occur for a variety of reasons,
including the installation of replacement or alter-
nate tires or wheels on the vehicle that prevent
the TPMS from functioning properly. Always
check the TPMS malfunction telltale after replac-
ing one or more tires or wheels on your vehicle to
ensure that the replacement or alternate tires and
wheels allow the TPMS to continue to function
properly.
Additional information:
cThe TPMS does not monitor the tire pres-
sure of the spare tire.
cThe TPMS will activate only when the vehicle
is driven at speeds above 16 MPH (25
km/h) . Also, this system may not detect a
sudden drop in tire pressure (for example a
flat tire while driving) .cThe low tire pressure warning light does not
automatically turn off when the tire pressure
is adjusted. After the tire is inflated to the
recommended pressure, the vehicle must be
driven at speeds above 16 MPH (25 km/h)
to activate the TPMS and turn off the low tire
pressure warning light. Use a tire pressure
gauge to check the tire pressure.
cTire pressure rises and falls depending on
the heat caused by the vehicle’s operation
and the outside temperature. Low outside
temperature can lower the temperature of
the air inside the tire which can cause a
lower tire inflation pressure. This may cause
the low tire pressure warning light to illumi-
nate. If the warning light illuminates in low
ambient temperature, check the tire pres-
sure for all four tires.
cYou can also check the pressure of all tires
(except the spare tire) on the display screen.
The order of the tire pressure figures dis-
played on the screen does not correspond
with the actual order of the tire position. See
“Tire pressure information” in the “Display
screen, heater, air conditioner and audio
systems” section.
For additional information, see “Low tire pressure
warning light” in the “Instruments and controls”section, “Tire pressure monitoring system
(TPMS)” in the “In case of emergency” section.
WARNING
cIf the low tire pressure warning light
illuminates while driving, avoid sudden
steering maneuvers or abrupt braking,
reduce vehicle speed, pull off the road
to a safe location and stop the vehicle
as soon as possible. Serious vehicle
damage could occur and may lead to an
accident and could result in serious
personal injury. Check the tire pressure
for all four tires. Adjust the tire pressure
to the recommended COLD tire pres-
sure shown on the Tire and Loading
Information label to turn the low tire
pressure warning light OFF. If you have
a flat tire, replace it with a spare tire as
soon as possible. (See “Flat tire” in the
“In case of emergency” section for
changing a flat tire.)
cWhen a spare tire is mounted or a wheel
is replaced, tire pressure will not be
indicated, the TPMS will not function
and the low tire pressure warning light
will flash. Contact your NISSAN dealer
as soon as possible for tire replacement
and/or system resetting.
5-4Starting and driving
ZREVIEW COPYÐ2007 Armada(wzw)
Owners ManualÐUSA_English(nna)
07/08/06Ðtbrooks
X
Page 216 of 344
DRIVING SAFETY PRECAUTIONS
Your NISSAN is designed for both normal and
off-road use. However, avoid driving in deep wa-
ter or mud as your NISSAN is mainly designed for
leisure use, unlike a conventional off-road ve-
hicle.
Remember that two-wheel drive models are less
capable than four-wheel drive models for rough
road driving and extrication when stuck in deep
snow or mud, or the like.
Please observe the following precautions:
WARNING
cDrive carefully when off the road and
avoid dangerous areas. Every person
who drives or rides in this vehicle
should be seated with their seat belt
fastened. This will keep you and your
passengers in position when driving
over rough terrain.
cDo not drive across steep slopes. In-
stead drive either straight up or straight
down the slopes. Off-road vehicles can
tip over sideways much more easily
than they can forward or backward.cMany hills are too steep for any vehicle.
If you drive up them, you may stall. If
you drive down them, you may not be
able to control your speed. If you drive
across them, you may roll over.
cDo not shift gears while driving on
downhill grades as this could cause
loss of control of the vehicle.
cStay alert when driving to the top of a
hill. At the top there could be a drop-off
or other hazard that could cause an
accident.
cIf your engine stalls or you cannot make
it to the top of a steep hill, never at-
tempt to turn around. Your vehicle
could tip or roll over. Always back
straight down in R (Reverse) gear and
apply brakes to control your speed.
cHeavy braking going down a hill could
cause your brakes to overheat and fade,
resulting in loss of control and an acci-
dent. Apply brakes lightly and use a low
gear to control your speed.
cUnsecured cargo can be thrown around
when driving over rough terrain. Prop-
erly secure all cargo so it will not be
thrown forward and cause injury to you
or your passengers.cTo avoid raising the center of gravity
excessively, do not exceed the rated
capacity of the roof rack and evenly
distribute the load. Secure heavy loads
in the cargo area as far forward and as
low as possible. Do not equip the ve-
hicle with tires larger than specified in
this manual. This could cause your ve-
hicle to roll over.
cDo not grip the inside or spokes of the
steering wheel when driving off-road.
The steering wheel could move sud-
denly and injure your hands. Instead
drive with your fingers and thumbs on
the outside of the rim.
cBefore operating the vehicle, ensure
that the driver and all passengers have
their seat belts fastened.
cLower your speed when encountering
strong crosswinds. With a higher center
of gravity, your NISSAN is more af-
fected by strong side winds. Slower
speeds ensure better vehicle control.
cDo not drive beyond the performance
capability of the tires, even with 4WD
engaged.
5-6Starting and driving
ZREVIEW COPYÐ2007 Armada(wzw)
Owners ManualÐUSA_English(nna)
07/08/06Ðtbrooks
X
Page 218 of 344
WARNING
Never remove or turn the key to the LOCK
position while driving. The steering wheel
will lock. This may cause the driver to lose
control of the vehicle and could result in
serious vehicle damage or personal injury.
AUTOMATIC TRANSMISSION
The ignition lock is designed so the key cannot be
turned to the LOCK position and removed until
the shift selector lever is moved to the P (Park)
position.
When removing the key from the ignition, make
sure the shift selector lever is in the P (Park)
position.
If the selector lever is not returned to P (Park)
position, the key cannot be moved to the LOCK
position.
To remove the key from the ignition switch:1. Shift the selector lever to the P (Park) posi-
tion with the key in the ON position.
2. Turn the key to the LOCK position.
3. Remove the key from the ignition.
If the selector lever is shifted to the P (Park) posi-
tion after the key is turned to the OFF position or
when the key cannot be turned to the LOCK posi-
tion, proceed as follows to remove the key.
1. Move the shift selector lever into the P (Park)
position.
2. Turn the ignition key slightly toward the ON
position.
3. Turn the key to the LOCK position.
4. Remove the key.
The shift selector lever is designed so it cannot
moved out of P (Park) and into any of the other
gear positions if the ignition key is turned to OFF
position or if the key is removed from the switch.
The shift selector lever can be moved if the
ignition switch is in the ON position and the
foot brake pedal is depressed.
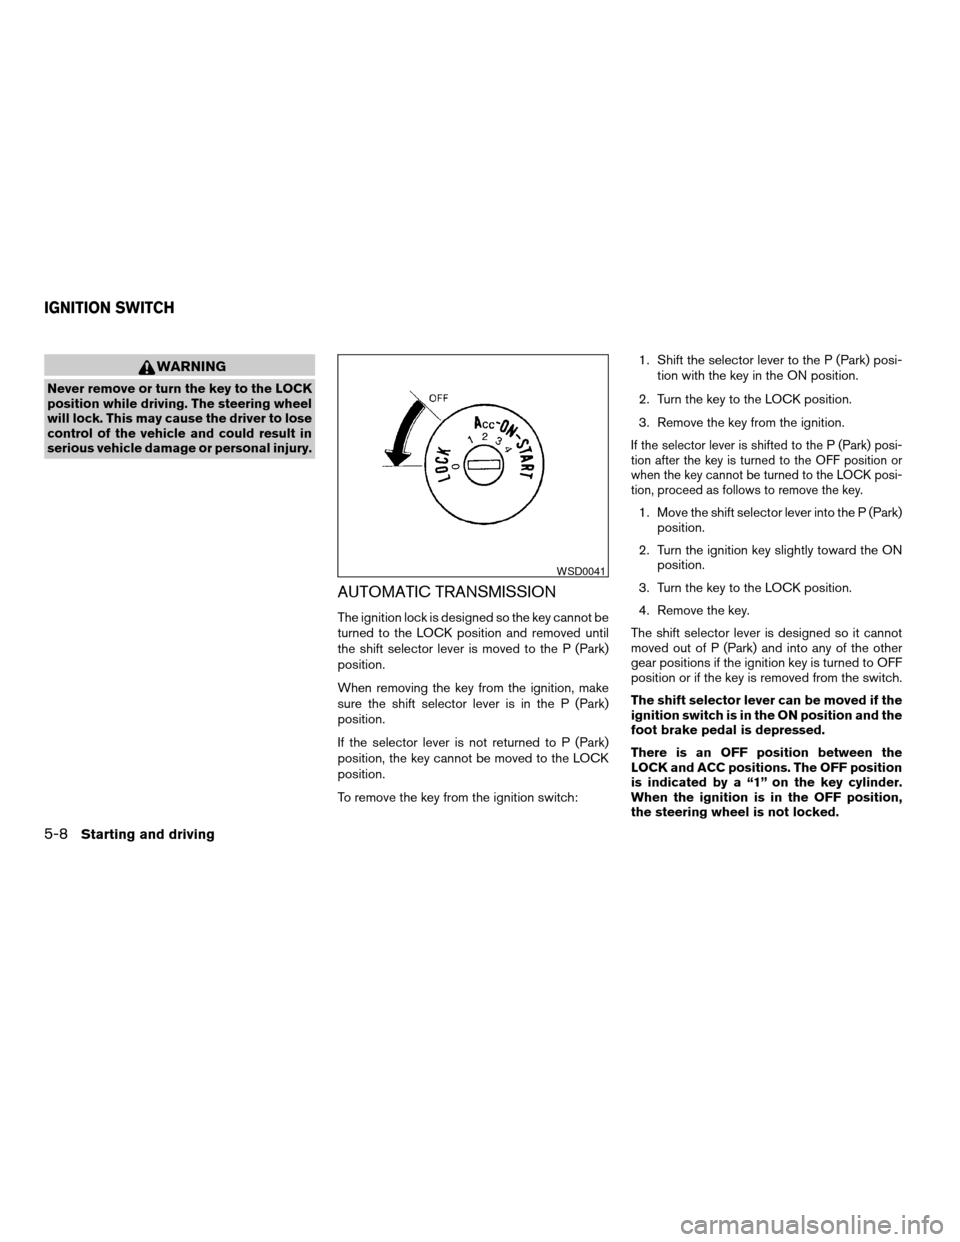
There is an OFF position between the
LOCK and ACC positions. The OFF position
is indicated by a “1” on the key cylinder.
When the ignition is in the OFF position,
the steering wheel is not locked.
WSD0041
IGNITION SWITCH
5-8Starting and driving
ZREVIEW COPYÐ2007 Armada(wzw)
Owners ManualÐUSA_English(nna)
07/08/06Ðtbrooks
X