2007 NISSAN ALTIMA light
[x] Cancel search: lightPage 166 of 344
AUDIO OPERATION PRECAUTIONSCompact disc (CD) player
CAUTION
cDo not force a compact disc into the CD
insert slot. This could damage the CD
and/or CD changer/player.
cTrying to load a CD with the CD door
closed could damage the CD and/or CD
changer.
cOnly one CD can be loaded into the CD
player at a time.
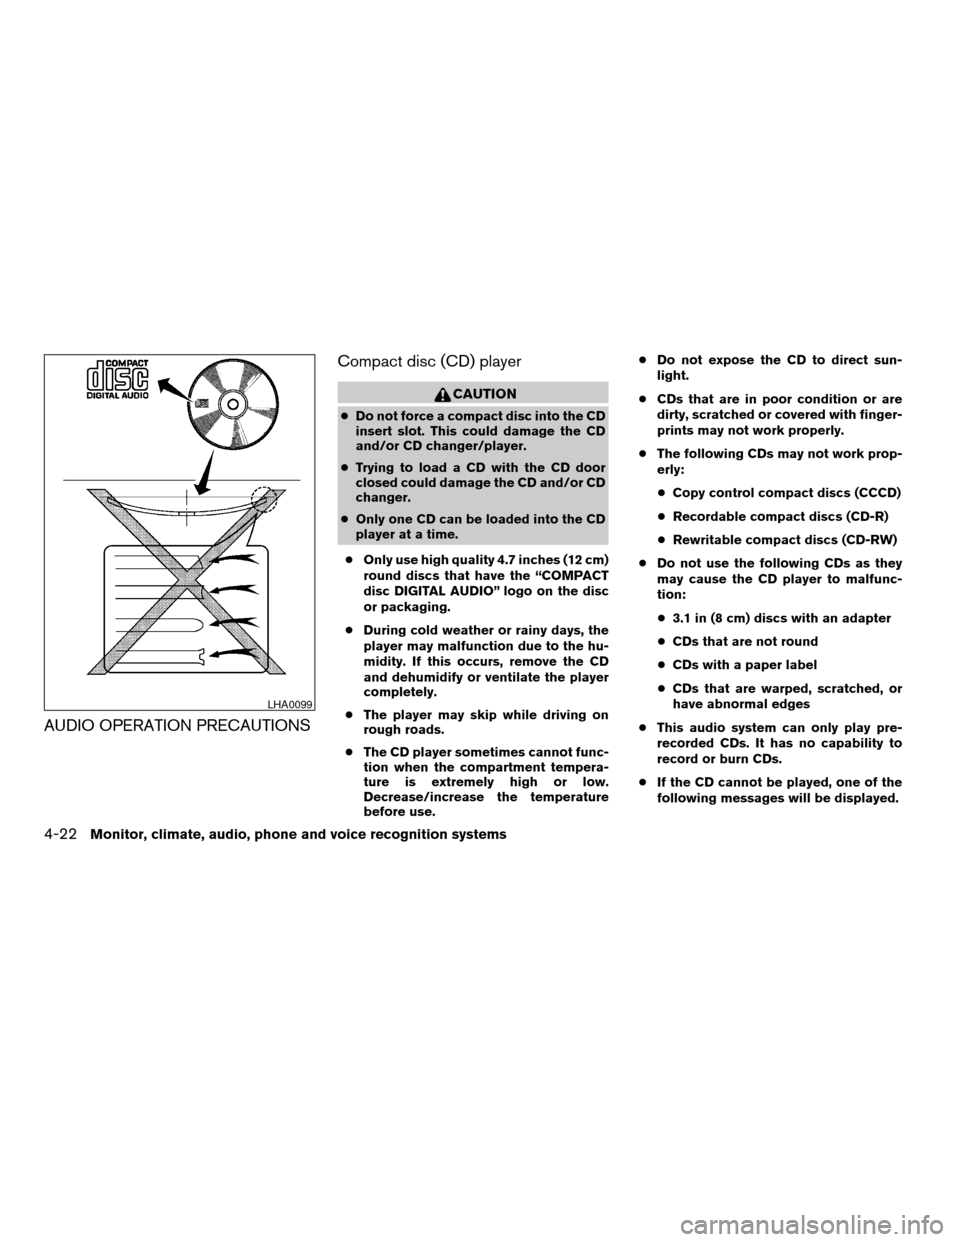
cOnly use high quality 4.7 inches (12 cm)
round discs that have the “COMPACT
disc DIGITAL AUDIO” logo on the disc
or packaging.
cDuring cold weather or rainy days, the
player may malfunction due to the hu-
midity. If this occurs, remove the CD
and dehumidify or ventilate the player
completely.
cThe player may skip while driving on
rough roads.
cThe CD player sometimes cannot func-
tion when the compartment tempera-
ture is extremely high or low.
Decrease/increase the temperature
before use.cDo not expose the CD to direct sun-
light.
cCDs that are in poor condition or are
dirty, scratched or covered with finger-
prints may not work properly.
cThe following CDs may not work prop-
erly:
cCopy control compact discs (CCCD)
cRecordable compact discs (CD-R)
cRewritable compact discs (CD-RW)
cDo not use the following CDs as they
may cause the CD player to malfunc-
tion:
c3.1 in (8 cm) discs with an adapter
cCDs that are not round
cCDs with a paper label
cCDs that are warped, scratched, or
have abnormal edges
cThis audio system can only play pre-
recorded CDs. It has no capability to
record or burn CDs.
cIf the CD cannot be played, one of the
following messages will be displayed.
LHA0099
4-22Monitor, climate, audio, phone and voice recognition systems
ZREVIEW COPYÐ2007 Altima(alt)
Owners ManualÐUSA_English(nna)
10/26/06Ðdebbie
X
Page 188 of 344
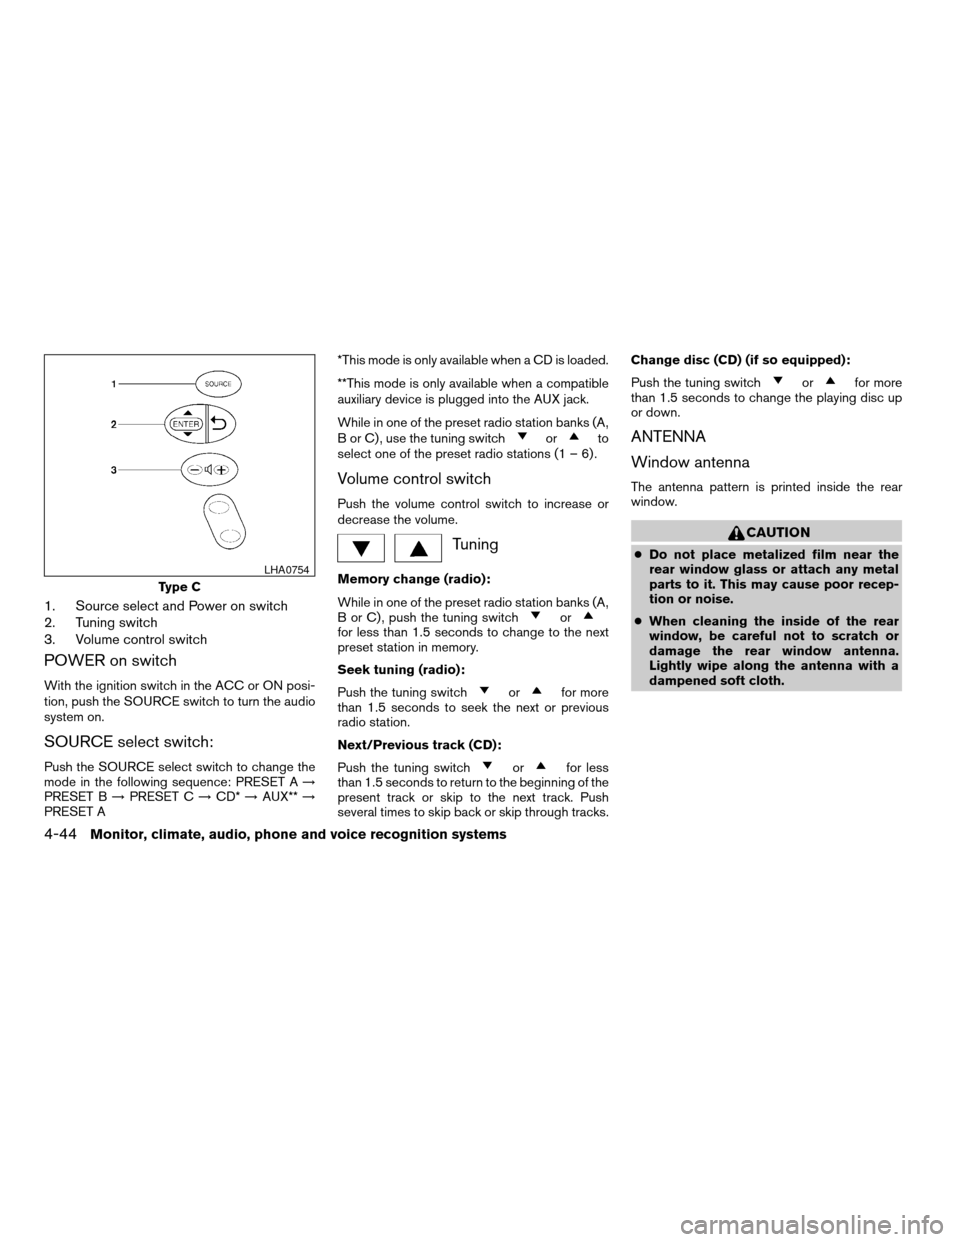
1. Source select and Power on switch
2. Tuning switch
3. Volume control switch
POWER on switch
With the ignition switch in the ACC or ON posi-
tion, push the SOURCE switch to turn the audio
system on.
SOURCE select switch:
Push the SOURCE select switch to change the
mode in the following sequence: PRESET A!
PRESET B!PRESET C!CD*!AUX**!
PRESET A*This mode is only available when a CD is loaded.
**This mode is only available when a compatible
auxiliary device is plugged into the AUX jack.
While in one of the preset radio station banks (A,
B or C) , use the tuning switch
orto
select one of the preset radio stations (1 – 6) .
Volume control switch
Push the volume control switch to increase or
decrease the volume.
Tuning
Memory change (radio):
While in one of the preset radio station banks (A,
B or C) , push the tuning switch
orfor less than 1.5 seconds to change to the next
preset station in memory.
Seek tuning (radio):
Push the tuning switch
orfor more
than 1.5 seconds to seek the next or previous
radio station.
Next/Previous track (CD):
Push the tuning switch
orfor less
than 1.5 seconds to return to the beginning of the
present track or skip to the next track. Push
several times to skip back or skip through tracks.Change disc (CD) (if so equipped):
Push the tuning switch
orfor more
than 1.5 seconds to change the playing disc up
or down.
ANTENNA
Window antenna
The antenna pattern is printed inside the rear
window.
CAUTION
cDo not place metalized film near the
rear window glass or attach any metal
parts to it. This may cause poor recep-
tion or noise.
cWhen cleaning the inside of the rear
window, be careful not to scratch or
damage the rear window antenna.
Lightly wipe along the antenna with a
dampened soft cloth.
Type C
LHA0754
4-44Monitor, climate, audio, phone and voice recognition systems
ZREVIEW COPYÐ2007 Altima(alt)
Owners ManualÐUSA_English(nna)
10/27/06Ðdebbie
X
Page 191 of 344

– Your cellular phone is locked to prevent it
from being dialed.
When the radio wave condition is not ideal or
ambient sound is too loud, it may be difficult to
hear the other person’s voice during a call.
Do not place the cellular phone in an area sur-
rounded by metal or far away from the in-vehicle
phone module to prevent tone quality degrada-
tion and wireless connection disruption.
While a cellular phone is connected through the
BluetoothTwireless connection, the battery
power of the cellular phone may discharge
quicker than usual. The BluetoothTHands-Free
Phone System cannot charge cellular phones.
If the hands-free phone system seems to be
malfunctioning, please refer to “Troubleshooting
guide” later in this section. You can also visit
www.nissanusa.com/bluetooth for troubleshoot-
ing help.
Refer to the cellular phone Owner’s Manual re-
garding the telephone charges, cellular phone
antenna and body, etc.
This device complies with Part 15 of the
FCC Rules. Operation is subject to the fol-
lowing two conditions: (1) this device may
not cause harmful interference, and (2) this
device must accept any interference re-ceived, including interference that may
cause undesired operation.
FCC Radiation Exposure Statement:
This equipment complies with FCC radiation ex-
posure limits set forth for an uncontrolled envi-
ronment. This equipment should be installed and
operated with minimum distance of 8 inches (20
cm) between the radiator and your body. This
Transmitter must not be co-located or operating
in conjunction with any other antenna or transmit-
ter.
USING THE SYSTEM
The NISSAN Voice Recognition system allows
hands-free operation of the BluetoothTPhone
System.
If the vehicle is in motion, some commands may
not be available so full attention may be given to
vehicle operation.
Initialization
When the ignition switch is placed in the ON
position, NISSAN Voice Recognition is initialized,
which takes a few seconds. When completed,
the amber light on the overhead console illumi-
nates and the system is ready to accept voice
commands. If the
button is pressed before
the initialization completes, the system will an-nounce “Hands-free phone system not ready”
and will not react to voice commands.
Operating tips
To get the best performance out of the NISSAN
Voice Recognition system, observe the following:
cKeep the interior of the vehicle as quiet as
possible. Close the windows to eliminate
surrounding noises (traffic noises, vibration
sounds, etc.) , which may prevent the system
from recognizing voice commands correctly.
cWait until the tone sounds before speaking a
command. Otherwise, the command will not
be received properly.
cStart speaking a command within 5 seconds
after the tone sounds.
cSpeak in a natural voice without pausing
between words.
Giving voice commands
To operate NISSAN Voice Recognition, press
and release thebutton located on the
steering wheel. The light on the overhead con-
sole flashes to signal you have entered a voice
recognition (VR) session. After the tone sounds,
speak a command.
Monitor, climate, audio, phone and voice recognition systems4-47
ZREVIEW COPYÐ2007 Altima(alt)
Owners ManualÐUSA_English(nna)
10/27/06Ðdebbie
X
Page 218 of 344
cThe TPMS will activate only when the vehicle
is driven at speeds above 16 MPH (25
km/h) . Also, this system may not detect a
sudden drop in tire pressure (for example a
flat tire while driving) .
cThe low tire pressure warning light does not
automatically turn off when the tire pressure
is adjusted. After the tire is inflated to the
recommended pressure, the vehicle must be
driven at speeds above 16 MPH (25 km/h)
to activate the TPMS and turn off the low tire
pressure warning light. Use a tire pressure
gauge to check the tire pressure.
cTire pressure rises and falls depending on
the heat caused by the vehicle’s operation
and the outside temperature. Low outside
temperature can lower the temperature of
the air inside the tire which can cause a
lower tire inflation pressure. This may cause
the low tire pressure warning light to illumi-
nate. If the warning light illuminates in low
ambient temperature, check the tire pres-
sure for all four tires.
For additional information, see “Low tire pressure
warning light” in the “Instruments and controls”
section and “Tire Pressure Monitoring System
(TPMS)” in the “In case of emergency” section.WARNING
cIf the low tire pressure warning light
illuminates while driving, avoid sudden
steering maneuvers or abrupt braking,
reduce vehicle speed, pull off the road
to a safe location and stop the vehicle
as soon as possible. Serious vehicle
damage could occur and may lead to an
accident and could result in serious
personal injury. Check the tire pressure
for all four tires. Adjust the tire pressure
to the recommended COLD tire pres-
sure shown on the Tire and Loading
Information label to turn the low tire
pressure warning light OFF. If you have
a flat tire, replace it with a spare tire as
soon as possible. (See “Flat tire” in the
“In case of emergency” section for
changing a flat tire.)
cWhen a spare tire is mounted or a wheel
is replaced, the TPMS will not function
and the low tire pressure warning light
will flash for approximately 1 minute.
The light will remain on after 1 minute.
Contact your NISSAN dealer as soon as
possible for tire replacement and/or
system resetting.cReplacing tires with those not originally
specified by NISSAN could affect the
proper operation of the TPMS.
cDo not inject any tire liquid or aerosol
tire sealant into the tires, as this may
cause a malfunction of the tire pressure
sensors.
CAUTION
Do not place metalized film or any metal
parts (antenna, etc.) on the windows. This
may cause poor reception of the signals
from the tire pressure sensors, and the
TPMS will not function properly.
Some devices and transmitters may temporarily
interfere with the operation of the TPMS and
cause the low tire pressure warning light to illu-
minate.
Some examples are:
– Facilities or electric devices using similar radio
frequencies are near the vehicle.
– If a transmitter set to similar frequencies is
being used in or near the vehicle.
– If a computer (or similar equipment) or a
DC/AC converter is being used in or near the
vehicle.
5-4Starting and driving
ZREVIEW COPYÐ2007 Altima(alt)
Owners ManualÐUSA_English(nna)
10/27/06Ðdebbie
X
Page 220 of 344
WARNING
cDo not operate the push-button ignition
switch while driving the vehicle except
in an emergency. (The engine will stop
when the ignition switch is pushed 3
consecutive times or the ignition switch
is pushed and held for more than 2
seconds.) If the engine stops while the
vehicle is being driven, this could lead
to a crash and serious injury.
cWhen the battery of the Intelligent Key
runs down, insert the Intelligent Key
into the Intelligent Key port until a click
sounds. And then, push the ignition
switch to start the engine.
cIf the steering lock release malfunction
indicator appears on the vehicle infor-
mation display, push the push-button
ignition switch again while lightly turn-
ing the steering wheel right and left.
See “Vehicle information display” in the
“Instruments and controls” section.When the ignition switch is pushed without de-
pressing the brake pedal (CVT) or the clutch
pedal (MT) , the ignition switch position will illu-
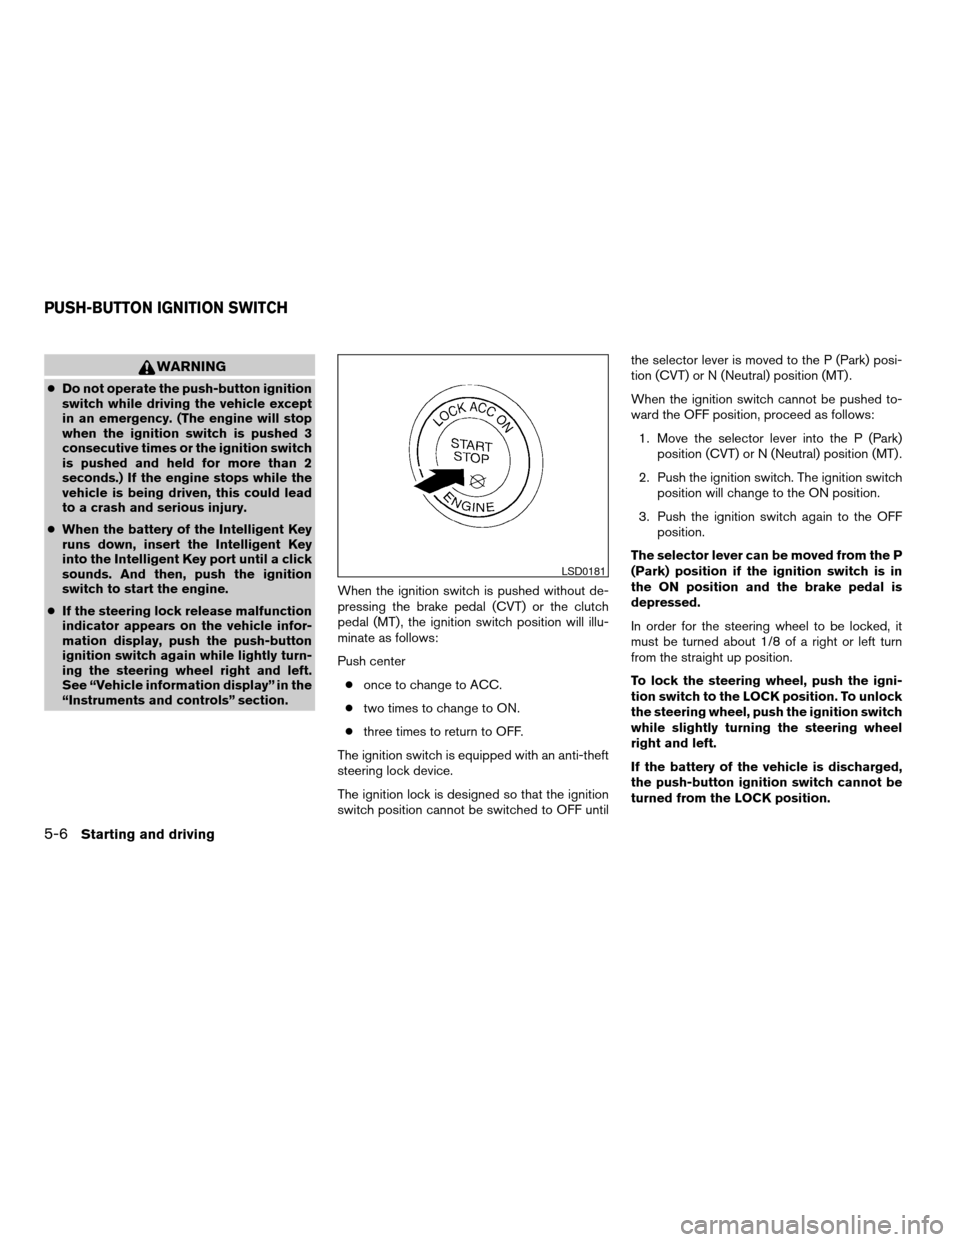
minate as follows:
Push center
conce to change to ACC.
ctwo times to change to ON.
cthree times to return to OFF.
The ignition switch is equipped with an anti-theft
steering lock device.
The ignition lock is designed so that the ignition
switch position cannot be switched to OFF untilthe selector lever is moved to the P (Park) posi-
tion (CVT) or N (Neutral) position (MT) .
When the ignition switch cannot be pushed to-
ward the OFF position, proceed as follows:
1. Move the selector lever into the P (Park)
position (CVT) or N (Neutral) position (MT) .
2. Push the ignition switch. The ignition switch
position will change to the ON position.
3. Push the ignition switch again to the OFF
position.
The selector lever can be moved from the P
(Park) position if the ignition switch is in
the ON position and the brake pedal is
depressed.
In order for the steering wheel to be locked, it
must be turned about 1/8 of a right or left turn
from the straight up position.
To lock the steering wheel, push the igni-
tion switch to the LOCK position. To unlock
the steering wheel, push the ignition switch
while slightly turning the steering wheel
right and left.
If the battery of the vehicle is discharged,
the push-button ignition switch cannot be
turned from the LOCK position.
LSD0181
PUSH-BUTTON IGNITION SWITCH
5-6Starting and driving
ZREVIEW COPYÐ2007 Altima(alt)
Owners ManualÐUSA_English(nna)
10/27/06Ðdebbie
X
Page 221 of 344
Some indicators and warnings for operation are
displayed on the vehicle information display. See
“Vehicle information display” in the “Instruments
and controls” section.
PUSH-BUTTON IGNITION SWITCH
POSITIONS
LOCK (Normal parking position):
The ignition switch can only be locked in this
position.
The ignition switch will be unlocked when it is
pushed to the ACC position while carrying the
Intelligent Key or with the Intelligent Key inserted
in the port.
The ignition switch will lock when any door is
opened or closed with the ignition switched off.
OFF:
The ignition switch is in the off position when the
engine is turned off using the ignition switch. No
lights will illuminate on the ignition switch.
ACC (Accessories):
This position activates electrical accessories
such as the radio, when the engine is not running.
ON (Normal operating position):
This position turns on the ignition system and
electrical accessories.
CAUTION
Do not leave the vehicle with the ignition
switch in ACC or ON positions when the
engine is not running for an extended pe-
riod. This can discharge the battery.
INTELLIGENT KEY BATTERY
DISCHARGE
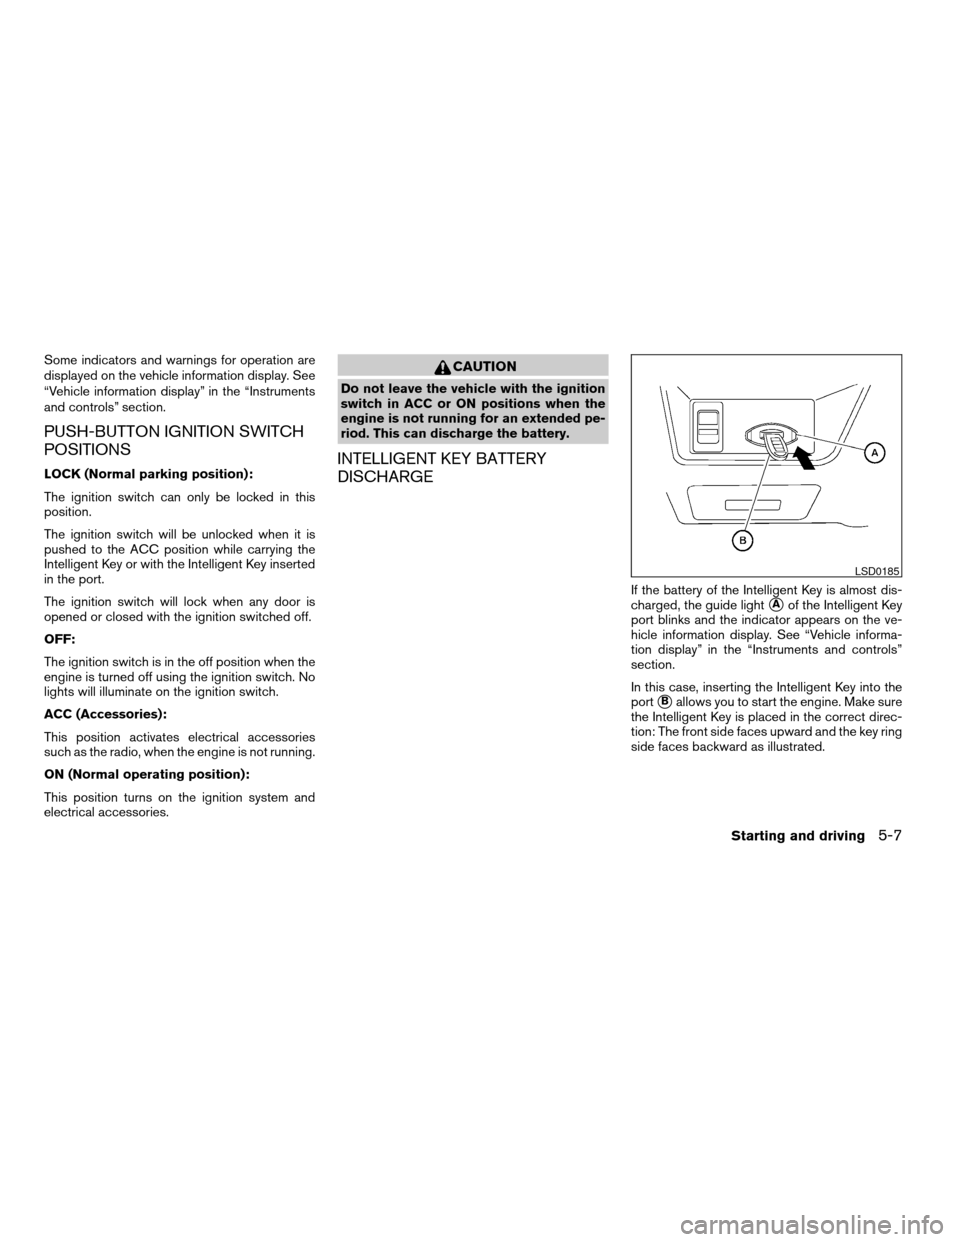
If the battery of the Intelligent Key is almost dis-
charged, the guide light
sAof the Intelligent Key
port blinks and the indicator appears on the ve-
hicle information display. See “Vehicle informa-
tion display” in the “Instruments and controls”
section.
In this case, inserting the Intelligent Key into the
port
sBallows you to start the engine. Make sure
the Intelligent Key is placed in the correct direc-
tion: The front side faces upward and the key ring
side faces backward as illustrated.
LSD0185
Starting and driving5-7
ZREVIEW COPYÐ2007 Altima(alt)
Owners ManualÐUSA_English(nna)
10/27/06Ðdebbie
X
Page 222 of 344
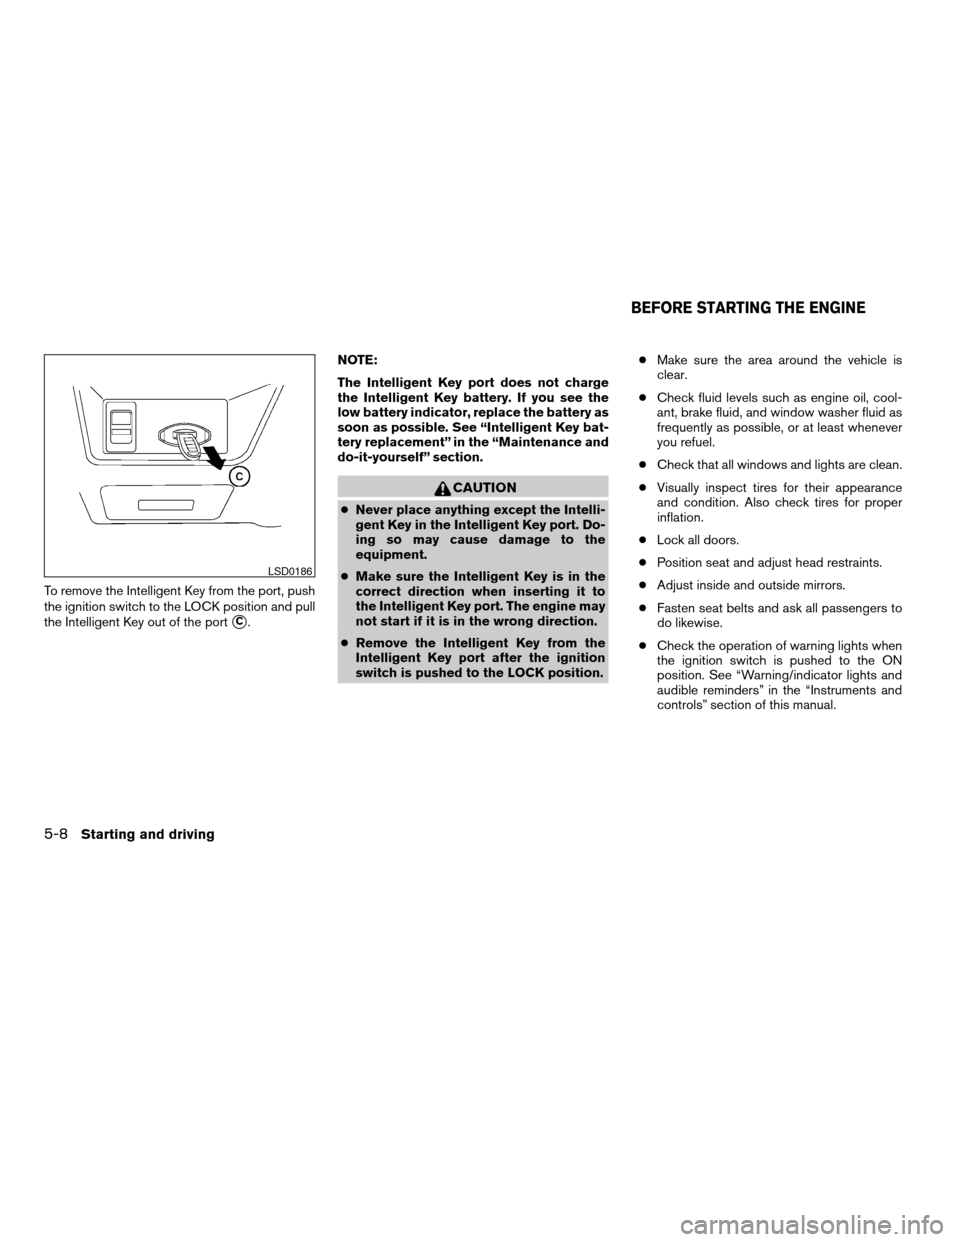
To remove the Intelligent Key from the port, push
the ignition switch to the LOCK position and pull
the Intelligent Key out of the port
sC.NOTE:
The Intelligent Key port does not charge
the Intelligent Key battery. If you see the
low battery indicator, replace the battery as
soon as possible. See “Intelligent Key bat-
tery replacement” in the “Maintenance and
do-it-yourself” section.
CAUTION
cNever place anything except the Intelli-
gent Key in the Intelligent Key port. Do-
ing so may cause damage to the
equipment.
cMake sure the Intelligent Key is in the
correct direction when inserting it to
the Intelligent Key port. The engine may
not start if it is in the wrong direction.
cRemove the Intelligent Key from the
Intelligent Key port after the ignition
switch is pushed to the LOCK position.cMake sure the area around the vehicle is
clear.
cCheck fluid levels such as engine oil, cool-
ant, brake fluid, and window washer fluid as
frequently as possible, or at least whenever
you refuel.
cCheck that all windows and lights are clean.
cVisually inspect tires for their appearance
and condition. Also check tires for proper
inflation.
cLock all doors.
cPosition seat and adjust head restraints.
cAdjust inside and outside mirrors.
cFasten seat belts and ask all passengers to
do likewise.
cCheck the operation of warning lights when
the ignition switch is pushed to the ON
position. See “Warning/indicator lights and
audible reminders” in the “Instruments and
controls” section of this manual.
LSD0186
BEFORE STARTING THE ENGINE
5-8Starting and driving
ZREVIEW COPYÐ2007 Altima(alt)
Owners ManualÐUSA_English(nna)
10/27/06Ðdebbie
X
Page 227 of 344
Shift lock release
If the battery charge is low or discharged, the
shift selector lever may not be moved from the P
(Park) position even with the brake pedal de-
pressed and the selector lever button pushed.
If the battery is discharged completely, the steer-
ing wheel cannot be locked or unlocked. Do not
move the vehicle with the steering wheel locked.
It will be necessary to jump start or have your
battery charged, see “Jump starting” in the “In
case of emergency” section. Contact your
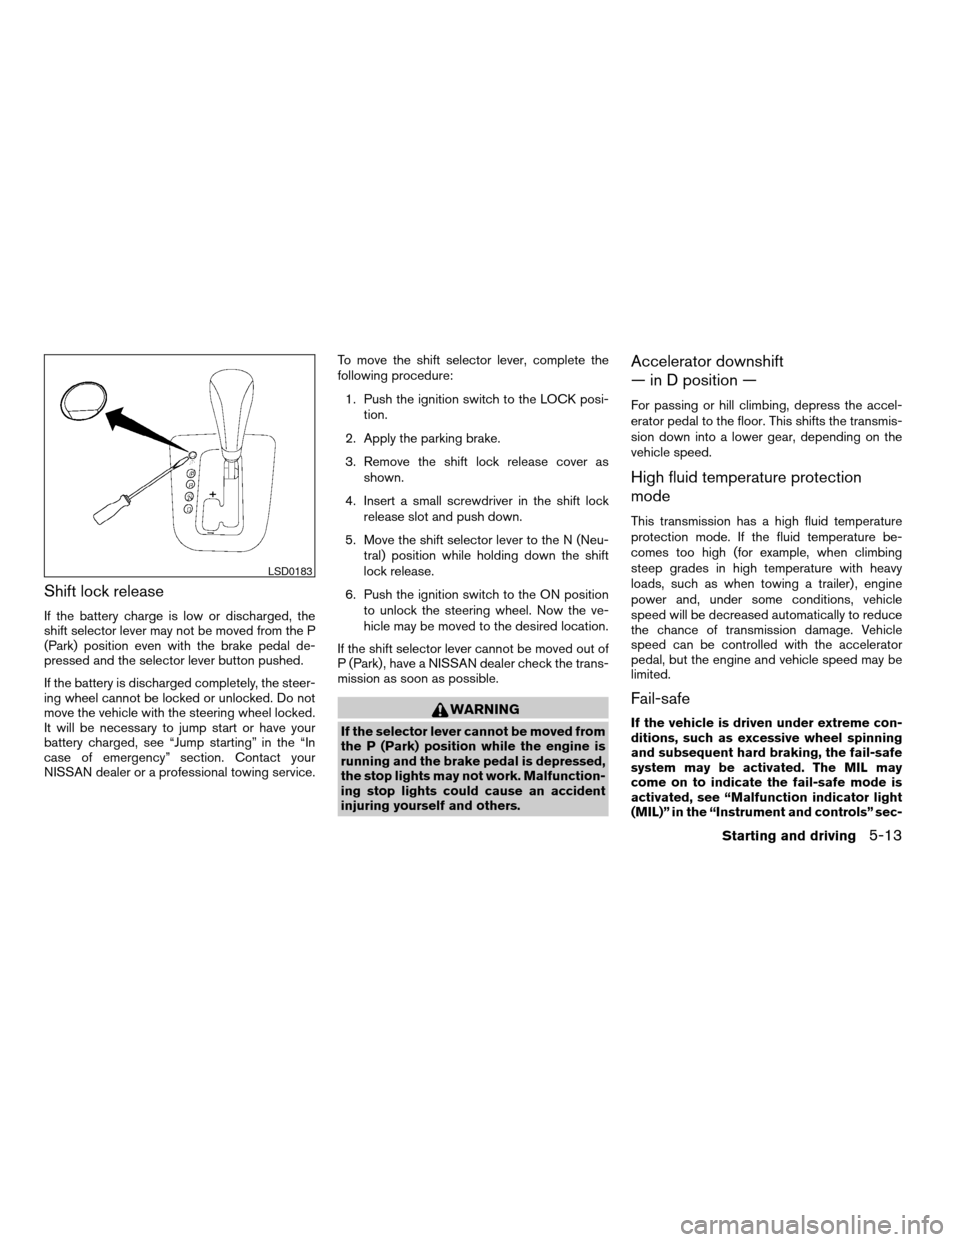
NISSAN dealer or a professional towing service.To move the shift selector lever, complete the
following procedure:
1. Push the ignition switch to the LOCK posi-
tion.
2. Apply the parking brake.
3. Remove the shift lock release cover as
shown.
4. Insert a small screwdriver in the shift lock
release slot and push down.
5. Move the shift selector lever to the N (Neu-
tral) position while holding down the shift
lock release.
6. Push the ignition switch to the ON position
to unlock the steering wheel. Now the ve-
hicle may be moved to the desired location.
If the shift selector lever cannot be moved out of
P (Park) , have a NISSAN dealer check the trans-
mission as soon as possible.
WARNING
If the selector lever cannot be moved from
the P (Park) position while the engine is
running and the brake pedal is depressed,
the stop lights may not work. Malfunction-
ing stop lights could cause an accident
injuring yourself and others.
Accelerator downshift
— in D position —
For passing or hill climbing, depress the accel-
erator pedal to the floor. This shifts the transmis-
sion down into a lower gear, depending on the
vehicle speed.
High fluid temperature protection
mode
This transmission has a high fluid temperature
protection mode. If the fluid temperature be-
comes too high (for example, when climbing
steep grades in high temperature with heavy
loads, such as when towing a trailer) , engine
power and, under some conditions, vehicle
speed will be decreased automatically to reduce
the chance of transmission damage. Vehicle
speed can be controlled with the accelerator
pedal, but the engine and vehicle speed may be
limited.
Fail-safe
If the vehicle is driven under extreme con-
ditions, such as excessive wheel spinning
and subsequent hard braking, the fail-safe
system may be activated. The MIL may
come on to indicate the fail-safe mode is
activated, see “Malfunction indicator light
(MIL)” in the “Instrument and controls” sec-
LSD0183
Starting and driving5-13
ZREVIEW COPYÐ2007 Altima(alt)
Owners ManualÐUSA_English(nna)
10/27/06Ðcathy
X