66 Safety and Security
Occupant safety
Air bags
Warning!G
Air bags are designed to reduce the poten-
tial of injury in certain frontal impacts (front
air bags, knee bags), or side impacts
(head-thorax air bags) which may cause
significant injuries. However, no system
available today can completely eliminate
injuries and fatalities.
The deployment of the air bags temporarily
releases a small amount of dust from the air
bags. This dust, however, is neither injurious
to your health, nor does it indicate a fire in
the vehicle. The dust might cause some tem-
porary breathing difficulty for people with
asthma or other breathing trouble. To avoid
this, you may wish to get out of the vehicle
as soon as it is safe to do so. If you have any
breathing difficulty but cannot get out of the
vehicle after the air bag inflates, then get
fresh air by opening a window or door.
Warning!G
To reduce the risk of injury when the front
air bags inflate, it is very important for the
driver and passenger to always be in a prop-
erly seated position and to wear their seat
belts.
For maximum protection in the event of a
collision always be in normal seated position
with your back against the backrest.
Fasten your seat belt and ensure it is prop-
erly positioned on your body (
�page 48).
Since the air bag inflates with considerable
speed and force, a proper seating and hands
on steering wheel position will help to keep
you at a safe distance from the air bag.
Occupants who are unbelted, out of position
or too close to the air bag can be seriously
injured or killed by an air bag as it inflates
with great force in the blink of an eye:
�Sit properly belted in a position that is
as upright as possible with your back
against the seat backrest.
�Adjust the driver’s seat as far as possi-
ble rearward, still permitting proper
operation of vehicle controls. The dis-
tance from the center of the driver’s
breastbone to the center of the air bag
cover on the steering wheel must be at
least 10 inches (25 cm) or more. You
should be able to accomplish this by a
combination of adjustments to the seat
and steering wheel. If you have any
problems, please contact an authorized
Mercedes-Benz Center.
�Do not lean your head or chest close to
the steering wheel or dashboard.
�Keep hands on the outside of the steer-
ing wheel rim. Placing hands and arms
inside the rim can increase the risk and
potential severity of hand/arm injury
when the driver’s front air bag inflates.
�Adjust the passenger seat as far as pos-
sible rearward from the dashboard when
the seat is occupied.
134 Controls in detail
Control system
Selecting satellite radio station*
(USA only)
The Sirius satellite radio is treated as a
radio application.
�Select satellite radio with the corre-
sponding soft key (SAT) in the radio
menu.
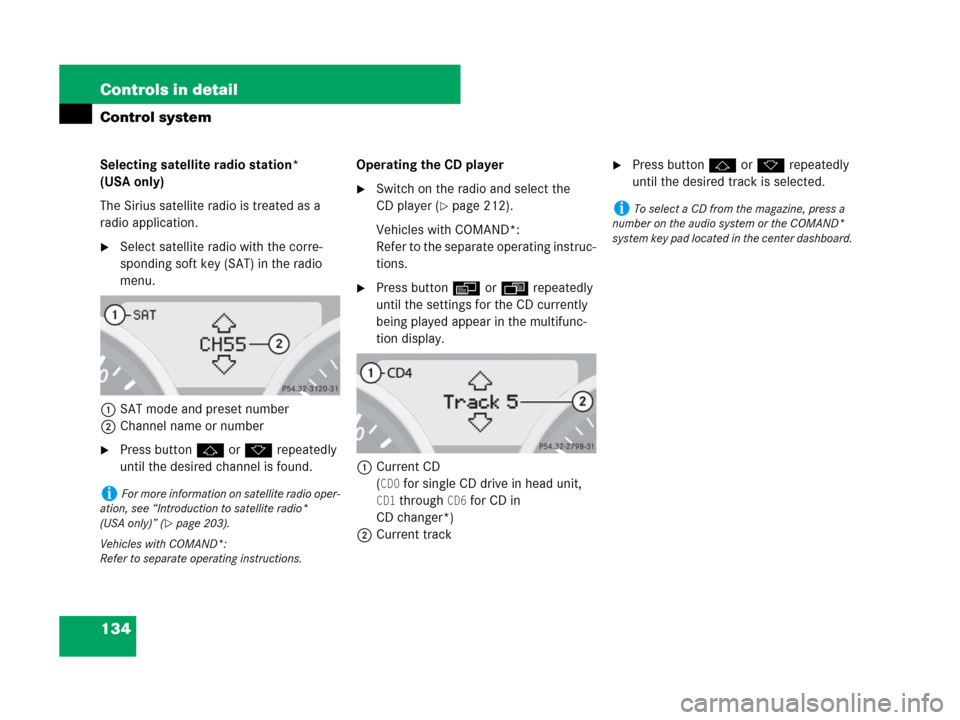
1SAT mode and preset number
2Channel name or number
�Press buttonjork repeatedly
until the desired channel is found.Operating the CD player
�Switch on the radio and select the
CD player (
�page 212).
Vehicles with COMAND*:
Refer to the separate operating instruc-
tions.
�Press buttonèorÿ repeatedly
until the settings for the CD currently
being played appear in the multifunc-
tion display.
1Current CD
(
CD0 for single CD drive in head unit,
CD1 through CD6 for CD in
CD changer*)
2Current track
�Press buttonjork repeatedly
until the desired track is selected.
iFor more information on satellite radio oper-
ation, see “Introduction to satellite radio*
(USA only)” (
�page 203).
Vehicles with COMAND*:
Refer to separate operating instructions.
iTo select a CD from the magazine, press a
number on the audio system or the COMAND*
system key pad located in the center dashboard.
168 Controls in detail
Good visibility
For information on the windshield wipers,
see “Windshield wipers” (
�page 56).
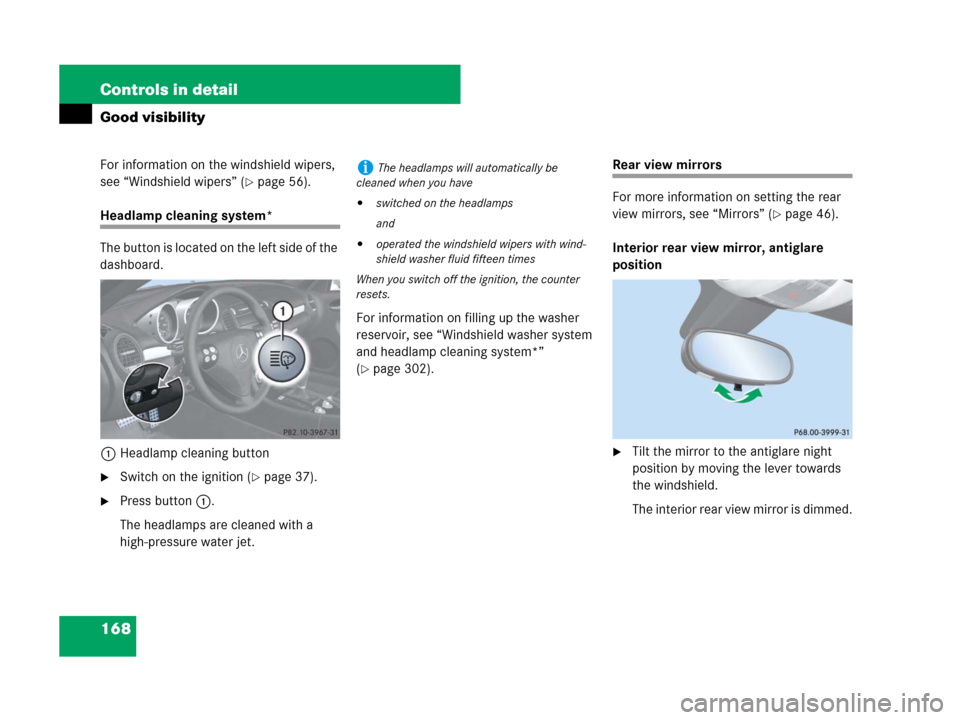
Headlamp cleaning system*
The button is located on the left side of the
dashboard.
1Headlamp cleaning button
�Switch on the ignition (�page 37).
�Press button1.
The headlamps are cleaned with a
high-pressure water jet.For information on filling up the washer
reservoir, see “Windshield washer system
and headlamp cleaning system*”
(
�page 302).
Rear view mirrors
For more information on setting the rear
view mirrors, see “Mirrors” (
�page 46).
Interior rear view mirror, antiglare
position
�Tilt the mirror to the antiglare night
position by moving the lever towards
the windshield.
The interior rear view mirror is dimmed.
iThe headlamps will automatically be
cleaned when you have
�switched on the headlamps
and
�operated the windshield wipers with wind-
shield washer fluid fifteen times
When you switch off the ignition, the counter
resets.
, or side impacts
(head-thor")