Page 47 of 473

46 Getting started
Adjusting
Mirrors
Adjust the interior and exterior rear view
mirrors before driving so that you have a
good view of the road and traffic condi-
tions.
Interior rear view mirror
�Adjust the interior rear view mirror
manually.
For more information, see “Rear view
mirrors” (
�page 168).Exterior rear view mirrors
Warning!G
Let the system complete the adjustment
procedure before setting the vehicle in mo-
tion. All steering wheel adjustment must be
completed before setting the vehicle in mo-
tion. Driving off with the steering wheel still
adjusting could cause the driver to lose con-
trol of the vehicle.Warning!G
Exercise care when using the passen-
ger-side exterior rear view mirror. The mirror
surface is convex (outwardly curved surface
for a wider field of view). Objects in mirror
are closer than they appear. Check your in-
terior rear view mirror or glance over your
shoulder before changing lanes.
!If an exterior rear view mirror housing is
forcibly pushed forward (hit from the rear) or
rearward (hit from the front), reposition it by
applying firm pressure until it snaps into place.
The exterior rear view mirror housing is now
properly positioned and you can adjust the
mirror in the usual manner.
Page 48 of 473

47 Getting started
Adjusting
The buttons are located on the lower part
of the center console.
1Driver’s side exterior rear view mirror
button
2Adjustment button
3Passenger-side exterior rear view
mirror button
�Switch on the ignition (�page 37).
�Press button1 for the driver’s side
exterior rear view mirror or button3
for passenger-side exterior rear view
mirror.
The indicator lamp in the respective
button comes on for approximately
10 seconds.
�Press adjustment button2 up, down,
left, or right according to the desired
setting.
iIf you do not make adjustments to the
selected exterior rear view mirror within
10 seconds, the indicator lamp goes out. You will
then have to select the desired exterior rear view
mirror again before any adjustments can be
made. Adjustments can only be made with the
indicator lamp for the respective exterior rear
view mirror button illuminated.
iAt low ambient temperatures, the exterior
rear view mirrors will be heated automatically.
iThe memory function* (�page 107) lets
you store the settings for the exterior rear view
mirrors together with the settings for the steer-
ing wheel and the driver’s seat position.
Page 108 of 473

107 Controls in detail
Memory function*
�Memory function*
Prior to operating the vehicle, the driver
should check and adjust the seat height,
seat position fore and aft, and seat back-
rest angle if necessary, to ensure adequate
control, reach and comfort. The head re-
straint should also be adjusted for proper
height. See also the section on air bags
(
�page 66) for proper seat positioning.
In addition, adjust the steering wheel to
ensure adequate control, reach, operation
and comfort. Both the interior and exterior
rear view mirrors should be adjusted for
adequate rear vision.
Fasten seat belts. Infants and small
children should be seated in an appropri-
ate infant or child restraint system which is
properly secured by a lap-shoulder belt
and that complies with U.S. Federal Motor
Vehicle Safety Standards 213 and 255
and Canadian Motor Vehicle Safety
Standards 213 and 210.2.With the memory function you can store up
to three different configurations.
Each store position on the driver’s side
includes the following settings:
�Seat position
�Steering wheel position
�Exterior rear view mirrors’ position
Each store position on the passenger side
includes the following setting:
�Seat positionThe memory button and memory position
switch are located on the outer side of
each seat.
1Memory buttonM
2Memory position switch
�Switch on the ignition (�page 37).
or
�Open the respective door.
Warning!G
Do not activate the memory function while
driving. Activating the memory function
while driving could cause the driver to lose
control of the vehicle.
Page 109 of 473
108 Controls in detail
Memory function*
Storing positions into memory
�Adjust the seat, on the driver’s side
also the steering wheel and exterior
rear view mirrors, to the desired
positions (
�page 39).
�Press memory buttonM.
�Release memory buttonM and press a
memory position switch 2 within
3 seconds.
All settings are stored to the selected
position.
Recalling positions from memory
�Press and hold desired memory
position switch2 until the seat, on
the driver’s side also the steering
wheel and exterior rear view mirrors,
have completely moved to the stored
positions.
!Do not operate the power seats using the
memory position switches if the seat backrest is
in an excessively reclined position. Doing so
could cause damage to the seats.
iReleasing the memory position switches
immediately stops movement to the stored
positions.
Page 118 of 473

117 Controls in detail
Lighting
Activating
�Press automatic control switch2 until
it is flush to the other switches.
The interior lighting switches on in
darkness, when you
�unlock the vehicle
�remove the SmartKey from the
starter switch
�open a door
The interior lighting switches off automati-
cally following a preset time delay.
For more information, see “Setting interior
lighting delayed shut-off” (
�page 145).Manual control
Switching interior lighting on and off
�Press interior lighting switch1.
The interior lighting switches on.
�Press interior lighting switch1 again.
The interior lighting switches off.
Switching reading lamps on and off
The standard reading lamps are located to
the left and right of the overhead control
panel. Reading lamps as part of the interior
lighting package* are located on the lower
edge of the interior rear view mirror.
�Press reading lamp switch3or4 to
switch on the desired reading lamp.
�Press reading lamp switch3or4
again to switch off the respective
reading lamp.
Door entry lamps
For better orientation in the dark, the
corresponding door entry lamps will switch
on in darkness when you open a door and
the automatic control is activated.
The door entry lamps switch off when the
corresponding door is closed.
iIf the door remains open, the interior lighting
switches off automatically after approximately
5minutes.
iThe footwell lighting* is switched on and off
simultaneously with the manual control.iIf you turn the SmartKey in the starter
switch to position0 and switch off the exterior
headlamps, the door entry lamps will remain lit
for approximately 5 minutes.
Page 169 of 473
168 Controls in detail
Good visibility
For information on the windshield wipers,
see “Windshield wipers” (
�page 56).
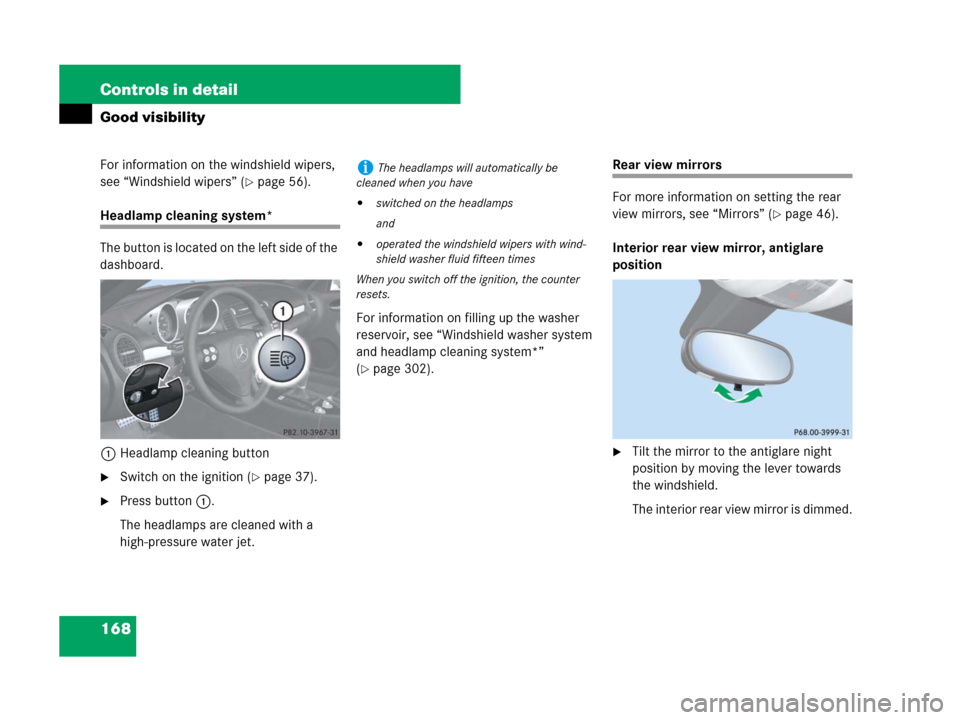
Headlamp cleaning system*
The button is located on the left side of the
dashboard.
1Headlamp cleaning button
�Switch on the ignition (�page 37).
�Press button1.
The headlamps are cleaned with a
high-pressure water jet.For information on filling up the washer
reservoir, see “Windshield washer system
and headlamp cleaning system*”
(
�page 302).
Rear view mirrors
For more information on setting the rear
view mirrors, see “Mirrors” (
�page 46).
Interior rear view mirror, antiglare
position
�Tilt the mirror to the antiglare night
position by moving the lever towards
the windshield.
The interior rear view mirror is dimmed.
iThe headlamps will automatically be
cleaned when you have
�switched on the headlamps
and
�operated the windshield wipers with wind-
shield washer fluid fifteen times
When you switch off the ignition, the counter
resets.
Page 170 of 473

169 Controls in detail
Good visibility
Auto-dimming rear view mirrors*
The reflection brightness of the exterior
rear view mirrors and the interior rear view
mirror will respond automatically to glare
when
�ignition is switched on
and
�incoming light from headlamps falls on
the sensor in the interior rear view
mirror
The rear view mirrors will not react if
�reverse gearR is engaged
�interior lighting is switched on
Warning!G
The auto-dimming function does not react if
incoming light is not aimed directly at sen-
sors in the interior rear view mirror.
The interior rear view mirror and the exterior
rear view mirror on the driver’s side do not
react, for example, if the wind screen* is
installed.
Light hitting the mirror(s) at certain angles
(incident light) could blind you. As a result,
you may not be able to observe traffic
conditions and could cause an accident.
Warning!G
Exercise care when using the passen-
ger-side exterior rear view mirror. The mirror
surface is convex (outwardly curved surface
for a wider field of view). Objects in mirror
are closer than they appear. Check your
interior rear view mirror or glance over your
shoulder before changing lanes.
Page 171 of 473

170 Controls in detail
Good visibility
Sun visors
The sun visors protect you from sun glare
while driving.
1Mirror lamp*
2Mounting
3Mirror cover
4Sun visor
�Swing sun visors down when you
experience glare.
�To use mirror and switch on mirror
lamp*, lift up mirror cover3.
Rear window defroster
The rear window defroster uses a large
amount of power. To keep the battery
drain to a minimum, switch off the defrost-
er as soon as the rear window is clear.
The defroster is automatically deactivated
after approximately 6 to 17 minutes of
operation depending on the outside
temperature.
Warning!G
Do not use the vanity mirror while driving.
Keep the mirrors in the sun visors closed
while vehicle is in motion. Reflected glare
can endanger you and others.
iVehicles with interior lighting package*:
If sunlight enters through a side window, disen-
gage sun visor from mounting2 and pivot it to
the side. You then can slide the sun visor along
the pivot arm to a different position if so desired.
Mirror lamp*1 will switch off as soon as sun
visor is disengaged from mounting2.
!Vehicles with interior lighting package*:
Close mirror cover3 if open before you
disengage the sun visor4 from mounting2
and pivot it to the side.
Warning!G
Any accumulation of snow and ice should be
removed from the rear window before driv-
ing. Visibility could otherwise be impaired,
endangering you and others.