Page 48 of 473

47 Getting started
Adjusting
The buttons are located on the lower part
of the center console.
1Driver’s side exterior rear view mirror
button
2Adjustment button
3Passenger-side exterior rear view
mirror button
�Switch on the ignition (�page 37).
�Press button1 for the driver’s side
exterior rear view mirror or button3
for passenger-side exterior rear view
mirror.
The indicator lamp in the respective
button comes on for approximately
10 seconds.
�Press adjustment button2 up, down,
left, or right according to the desired
setting.
iIf you do not make adjustments to the
selected exterior rear view mirror within
10 seconds, the indicator lamp goes out. You will
then have to select the desired exterior rear view
mirror again before any adjustments can be
made. Adjustments can only be made with the
indicator lamp for the respective exterior rear
view mirror button illuminated.
iAt low ambient temperatures, the exterior
rear view mirrors will be heated automatically.
iThe memory function* (�page 107) lets
you store the settings for the exterior rear view
mirrors together with the settings for the steer-
ing wheel and the driver’s seat position.
Page 98 of 473
97 Controls in detail
Locking and unlocking
Selective setting
If you frequently travel alone, you may wish
to reprogram the SmartKey so that press-
ing buttonŒ only unlocks the driver’s
door, the storage/telephone* compart-
ment under the armrest, the glove box, and
the fuel filler flap.
�Press and hold buttonsŒand‹
simultaneously for about 5 seconds
until battery check lamp5
(
�page 94) flashes twice.
The SmartKey will then function as fol-
lows:Unlocking driver’s door and fuel filler
flap
�Press buttonŒ once.
�All turn signal lamps flash once.
�An acoustic warning sounds once
(if equipped and feature activated).
For more information, see “Factory
setting” (
�page 96).
�The locking knob in the driver’s
door moves up.
�The anti-theft alarm system is
disarmed.Global unlocking
�Press buttonŒ twice.
�All turn signal lamps flash once.
�An acoustic warning sounds once
(if equipped and feature activated).
For more information, see “Factory
setting” (
�page 96).
�The locking knobs in the doors
move up.
�The anti-theft alarm system is
disarmed.
Page 99 of 473
98 Controls in detail
Locking and unlocking
Global locking
�Press button‹.
With all doors and the trunk closed:
�All turn signal lamps flash three
times.
�An acoustic warning sounds three
times (if equipped and feature acti-
vated). For more information, see
“Factory setting” (
�page 96).
�The locking knobs in the doors
move down.
�The anti-theft alarm system is
armed.Restoring to factory setting
�Press and hold buttonsŒand‹
simultaneously for about 5 seconds
until battery check lamp5
(
�page 94) flashes twice.
Checking the batteries
�Press button‹orŒ.
The battery check lamp (
�page 94)
comes on briefly to indicate that the
SmartKey batteries are in order.Loss of SmartKey or mechanical key
If you lose a SmartKey or mechanical key,
you should do the following:
�Have the SmartKey deactivated by an
authorized Mercedes-Benz Center.
�Report the loss of the SmartKey or the
mechanical key to your car insurance
company immediately.
�If necessary have the mechanical lock
replaced.
Your authorized Mercedes-Benz Center
will be glad to supply you with a replace-
ment.
iIf the battery check lamp (�page 94) does
not come on briefly during check, the SmartKey
batteries are discharged.
�Replace the batteries (�page 391).
You can obtain the required batteries at any
authorized Mercedes-Benz Center.
iIf the batteries are checked within signal
range of the vehicle, pressing
button‹orŒ will lock or unlock the
vehicle accordingly.
Page 101 of 473
100 Controls in detail
Locking and unlocking
Opening the trunk
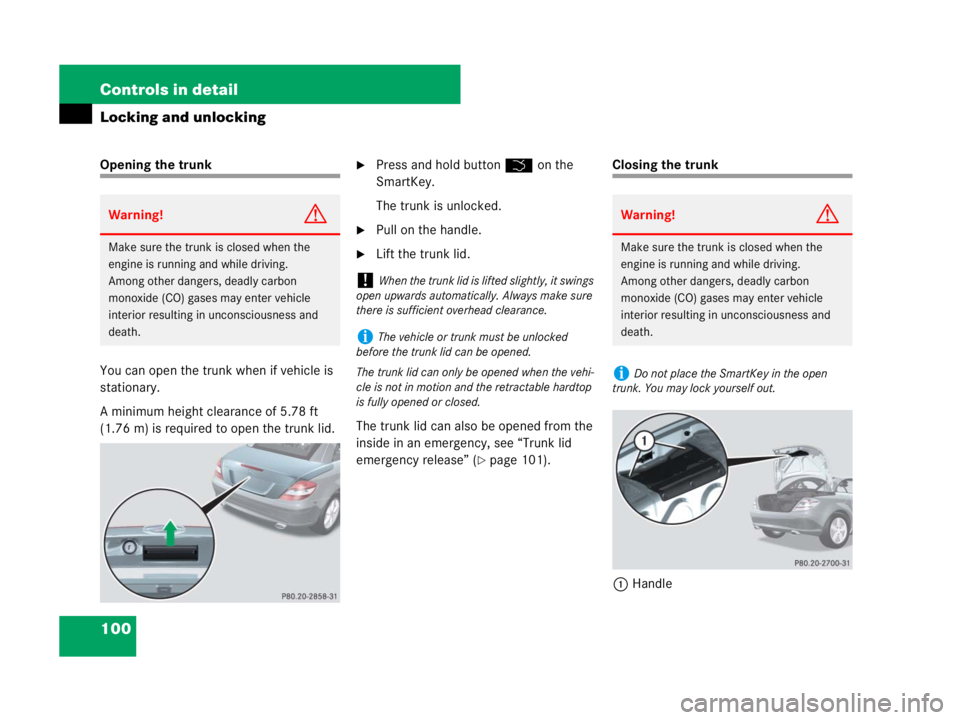
You can open the trunk when if vehicle is
stationary.
A minimum height clearance of 5.78 ft
(1.76 m) is required to open the trunk lid.�Press and hold buttonŠ on the
SmartKey.
The trunk is unlocked.
�Pull on the handle.
�Lift the trunk lid.
The trunk lid can also be opened from the
inside in an emergency, see “Trunk lid
emergency release” (
�page 101).
Closing the trunk
1Handle
Warning!G
Make sure the trunk is closed when the
engine is running and while driving.
Among other dangers, deadly carbon
monoxide (CO) gases may enter vehicle
interior resulting in unconsciousness and
death.
!When the trunk lid is lifted slightly, it swings
open upwards automatically. Always make sure
there is sufficient overhead clearance.
iThe vehicle or trunk must be unlocked
before the trunk lid can be opened.
The trunk lid can only be opened when the vehi-
cle is not in motion and the retractable hardtop
is fully opened or closed.
Warning!G
Make sure the trunk is closed when the
engine is running and while driving.
Among other dangers, deadly carbon
monoxide (CO) gases may enter vehicle
interior resulting in unconsciousness and
death.
iDo not place the SmartKey in the open
trunk. You may lock yourself out.
Page 123 of 473
122 Controls in detail
Control system
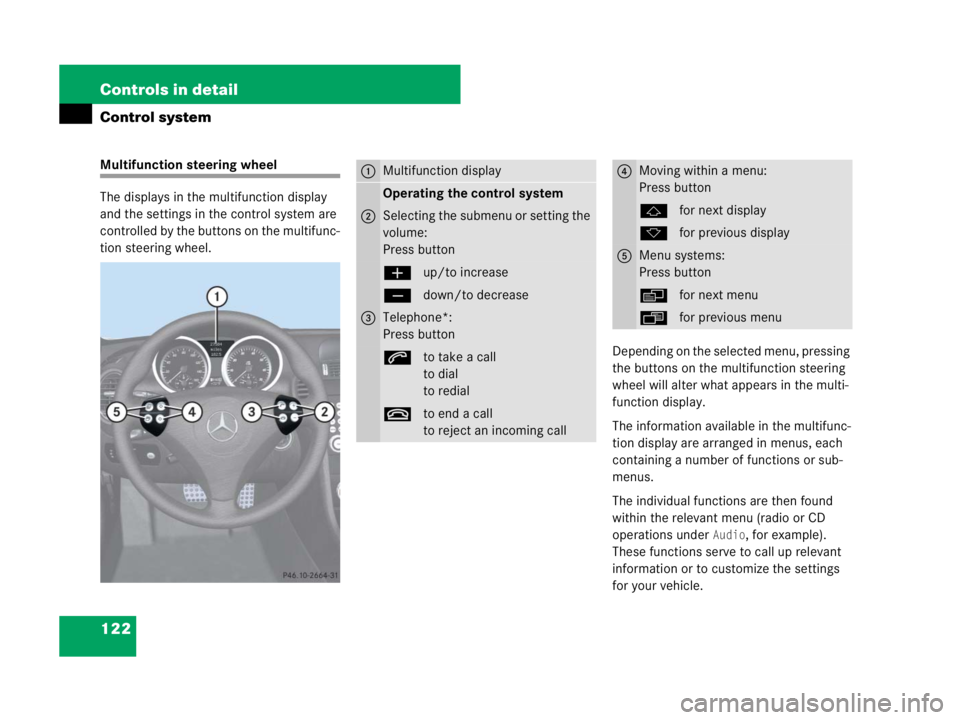
Multifunction steering wheel
The displays in the multifunction display
and the settings in the control system are
controlled by the buttons on the multifunc-
tion steering wheel.
Depending on the selected menu, pressing
the buttons on the multifunction steering
wheel will alter what appears in the multi-
function display.
The information available in the multifunc-
tion display are arranged in menus, each
containing a number of functions or sub-
menus.
The individual functions are then found
within the relevant menu (radio or CD
operations under
Audio, for example).
These functions serve to call up relevant
information or to customize the settings
for your vehicle.
1Multifunction display
Operating the control system
2Selecting the submenu or setting the
volume:
Press button
æup/to increase
çdown/to decrease
3Telephone*:
Press button
sto take a call
to dial
to redial
tto end a call
to reject an incoming call
4Moving within a menu:
Press button
jfor next display
kfor previous display
5Menu systems:
Press button
èfor next menu
ÿfor previous menu
Page 130 of 473
129 Controls in detail
Control system
�Use buttons k or j to select the
following functions in the AMG menu:Vehicle supply voltage
�Press button è or ÿ repeatedly
until you see the AMG menu.
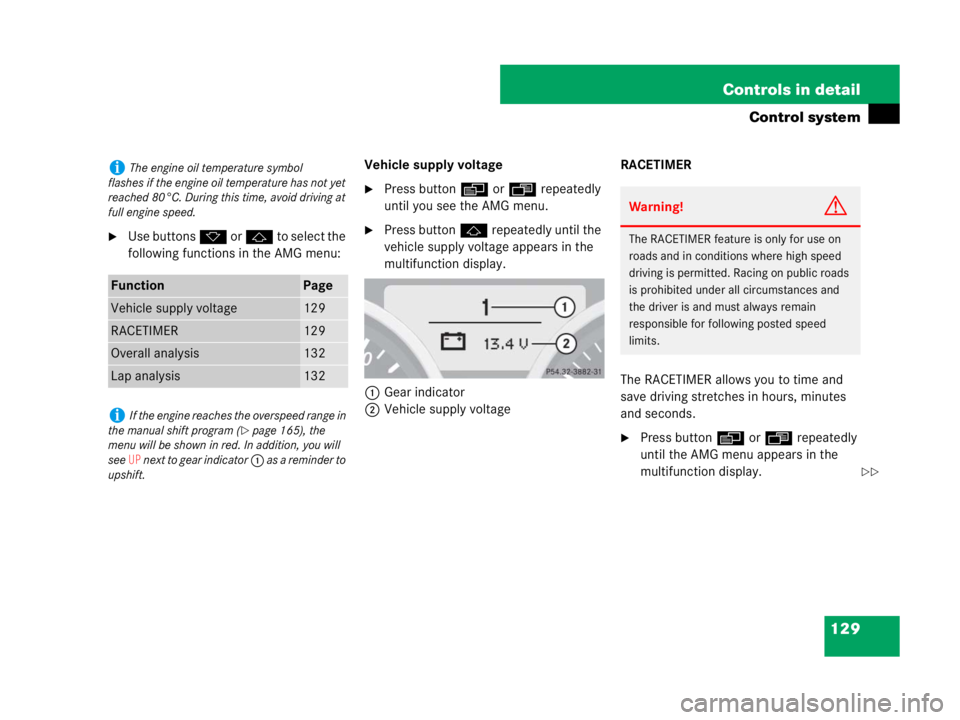
�Press button j repeatedly until the
vehicle supply voltage appears in the
multifunction display.
1Gear indicator
2Vehicle supply voltageRACETIMER
The RACETIMER allows you to time and
save driving stretches in hours, minutes
and seconds.
�Press button è or ÿ repeatedly
until the AMG menu appears in the
multifunction display.
iThe engine oil temperature symbol
flashes if the engine oil temperature has not yet
reached 80°C. During this time, avoid driving at
full engine speed.
FunctionPage
Vehicle supply voltage129
RACETIMER129
Overall analysis132
Lap analysis132
iIf the engine reaches the overspeed range in
the manual shift program (
�page 165), the
menu will be shown in red. In addition, you will
see
UP n e x t t o g e a r i n d i c a t o r 1 as a reminder to
upshift.
Warning!G
The RACETIMER feature is only for use on
roads and in conditions where high speed
driving is permitted. Racing on public roads
is prohibited under all circumstances and
the driver is and must always remain
responsible for following posted speed
limits.
��
Page 131 of 473
130 Controls in detail
Control system
�Press button j repeatedly until the
RACETIMER appears in the
multifunction display.
1Gear indicator
2RACETIMER
3Lap numberStarting the RACETIMER
�Press button æ.
The timer starts.
Displaying intermediate time
�Press button ç while the timer is
running.
The intermediate time is shown for
5 seconds.Stopping the RACETIMER
�Press button æ.
The timer stops.
iYou can start the RACETIMER when the
engine is running or the starter switch is in
position2 (
�page 37).
iWhile the RACETIMER is being displayed,
you cannot adjust the audio volume using
buttonsæ or ç.
iWhen you stop the vehicle and turn the
SmartKey to position 1 (
�page 37), the
RACETIMER stops timing. Timing is resumed
when you switch the ignition back on
(
�page 37) or restart the engine (�page 51)
and then press the æbutton.
��
Page 138 of 473
137 Controls in detail
Control system
�Press the reset button Jon the
instrument cluster (
�page 26) for
approximately 3 seconds.
The request to press the reset
buttonJonce more to confirm
appears in the multifunction display.
�Press the reset buttonJonce more.
The functions of all submenus will be
reset to the factory settings.
The message
Reset to factory
settings
appears in the multifunction
display.Submenus in the Settings menu
�Press buttonèorÿ repeatedly
until the
Settings... menu appears in
the multifunction display.
�Press buttonj.
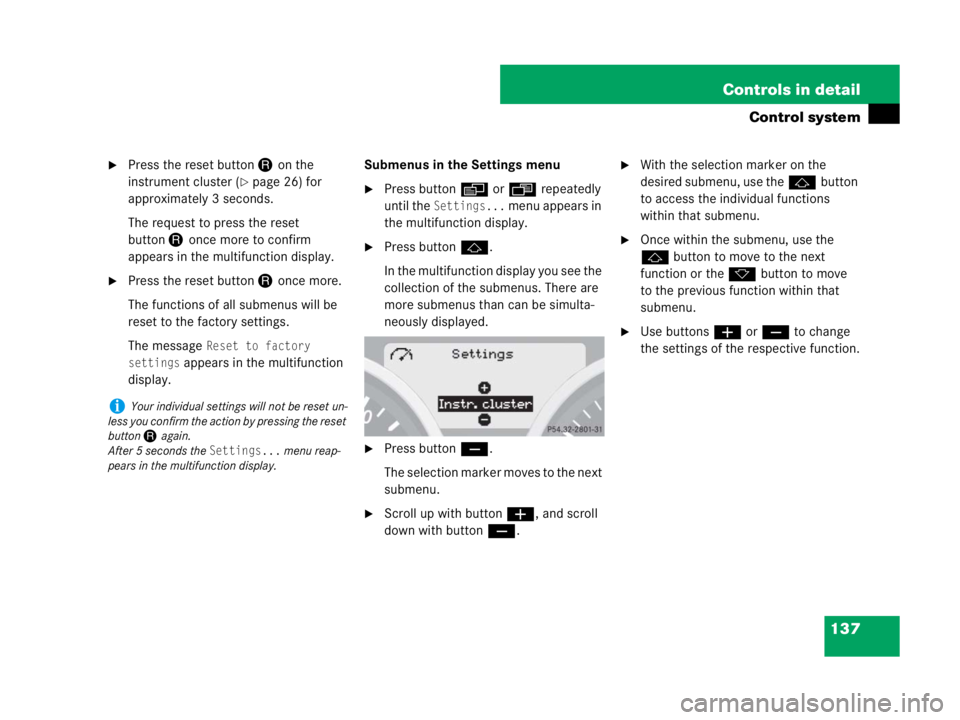
In the multifunction display you see the
collection of the submenus. There are
more submenus than can be simulta-
neously displayed.
�Press buttonç.
The selection marker moves to the next
submenu.
�Scroll up with buttonæ, and scroll
down with buttonç.
�With the selection marker on the
desired submenu, use thejbutton
to access the individual functions
within that submenu.
�Once within the submenu, use the
jbutton to move to the next
function or the kbutton to move
to the previous function within that
submenu.
�Use buttonsæorç to change
the settings of the respective function.
iYour individual settings will not be reset un-
less you confirm the action by pressing the reset
button Jagain.
After 5 seconds the
Settings... menu reap-
pears in the multifunction display.