Page 144 of 473
143 Controls in detail
Control system
Lighting submenu
Access the
Lighting submenu via the
Settings... menu. Use the Lighting sub-
menu to change the lamp and lighting
settings on your vehicle.
The following functions are available:Setting daytime running lamp mode
(USA only)
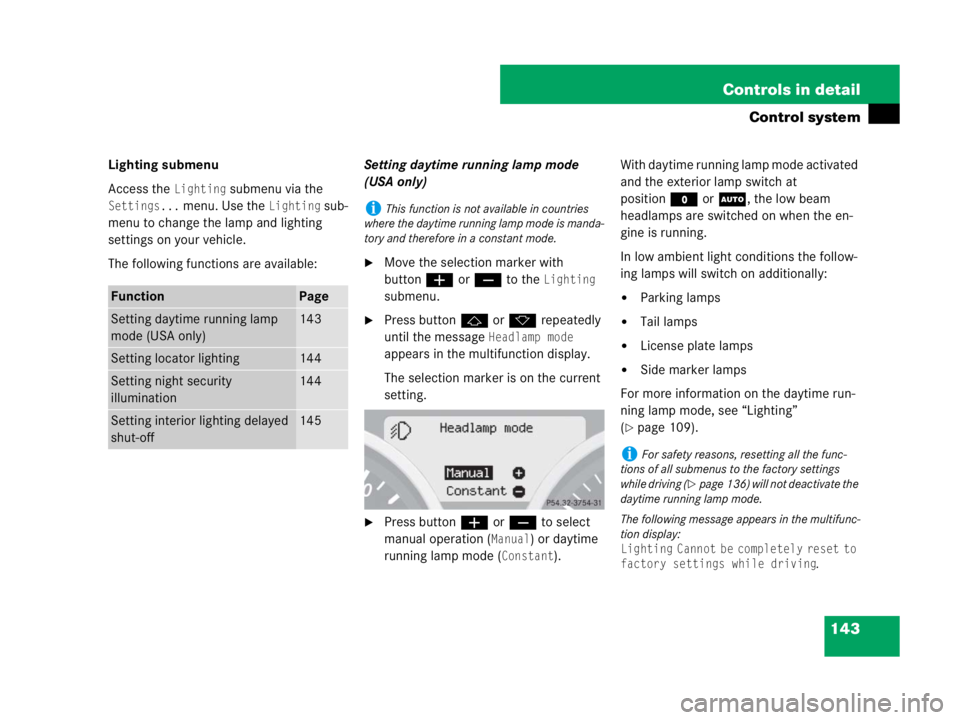
�Move the selection marker with
buttonæorç to the
Lighting
submenu.
�Press buttonjork repeatedly
until the message
Headlamp mode
appears in the multifunction display.
The selection marker is on the current
setting.
�Press buttonæorç to select
manual operation (
Manual) or daytime
running lamp mode (
Constant).With daytime running lamp mode activated
and the exterior lamp switch at
positionMorU, the low beam
headlamps are switched on when the en-
gine is running.
In low ambient light conditions the follow-
ing lamps will switch on additionally:
�Parking lamps
�Tail lamps
�License plate lamps
�Side marker lamps
For more information on the daytime run-
ning lamp mode, see “Lighting”
(
�page 109).
FunctionPage
Setting daytime running lamp
mode (USA only)143
Setting locator lighting144
Setting night security
illumination144
Setting interior lighting delayed
shut-off 145
iThis function is not available in countries
where the daytime running lamp mode is manda-
tory and therefore in a constant mode.
iFor safety reasons, resetting all the func-
tions of all submenus to the factory settings
while driving (
�page 136) will not deactivate the
daytime running lamp mode.
The following message appears in the multifunc-
tion display:
Lighting Cannot be completely reset to
factory settings while driving
.
Page 145 of 473
144 Controls in detail
Control system
Setting locator lighting
With the locator lighting feature activated
and the exterior lamp switch in
positionU, the following lamps will
switch on during darkness when the vehi-
cle is unlocked with the SmartKey:
�Parking lamps
�Tail lamps
�License plate lamps
�Side marker lamps
�Front fog lamps
The locator lighting switches off when the
driver’s door is opened.
If you do not open a door after unlocking
the vehicle with the SmartKey, the lamps
will switch off automatically after approxi-
mately 40 seconds.
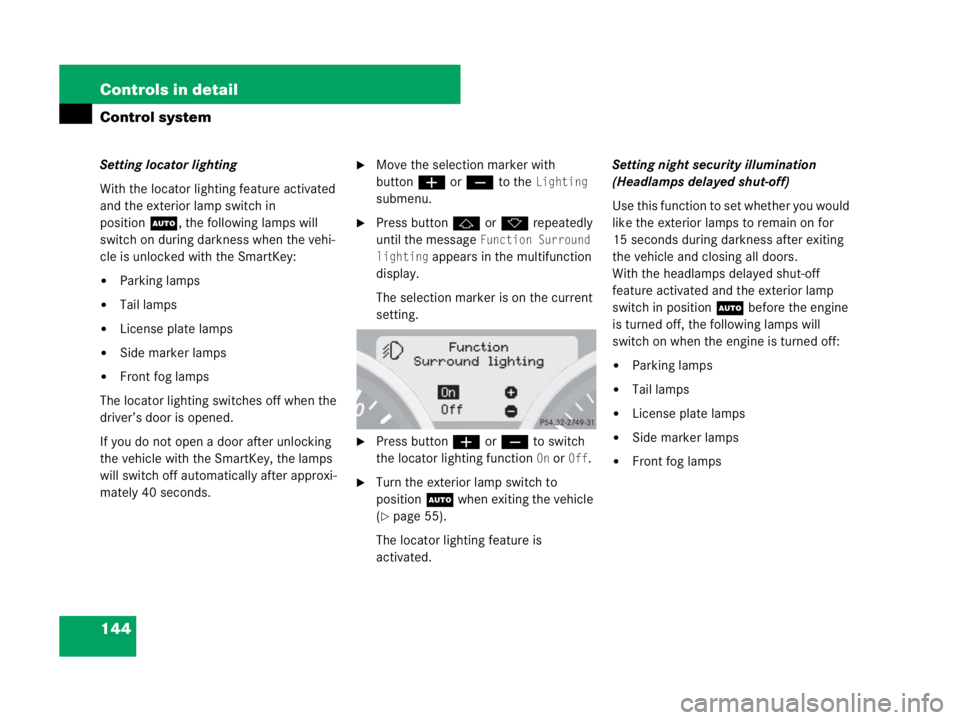
�Move the selection marker with
buttonæorç to the
Lighting
submenu.
�Press buttonjork repeatedly
until the message
Function Surround
lighting
appears in the multifunction
display.
The selection marker is on the current
setting.
�Press buttonæorç to switch
the locator lighting function
On or Off.
�Turn the exterior lamp switch to
positionU when exiting the vehicle
(
�page 55).
The locator lighting feature is
activated.Setting night security illumination
(Headlamps delayed shut-off)
Use this function to set whether you would
like the exterior lamps to remain on for
15 seconds during darkness after exiting
the vehicle and closing all doors.
With the headlamps delayed shut-off
feature activated and the exterior lamp
switch in positionU before the engine
is turned off, the following lamps will
switch on when the engine is turned off:
�Parking lamps
�Tail lamps
�License plate lamps
�Side marker lamps
�Front fog lamps
Page 158 of 473
157 Controls in detail
Automatic transmission*
Gear selector lever positions
The current gear selector lever position
appears in the multifunction display.
1Current gear selector lever positionEffect
ìPark position
Gear selector lever position
when the vehicle is parked. Place
gear selector lever in park
positionP only when vehicle is
stopped. The park position is not
intended to serve as a brake
when the vehicle is parked.
Rather, the driver should always
set the parking brake in addition
to placing the gear selector lever
in park positionP to secure the
vehicle.
Effect
The SmartKey can only be
removed from the starter switch
with the gear selector lever in
park positionP. With the
SmartKey removed, the gear
selector lever is locked in park
positionP.
If the vehicle’s electrical system
is malfunctioning, the gear
selector lever could remain
locked in park positionP
(
�page 389).
íReverse gear
Place gear selector lever in
positionR only when vehicle is
stopped.
Page 202 of 473
201 Controls in detail
Audio system
Manual tuning
�Select desired waveband.
�PressGorHbutton for
approximately 3 seconds.
�Press button repeatedly until the
desired frequency has been reached.
Step-by-step station tuning takes place
in ascending or descending order. Each
time the button is pressed, the radio
tunes further by 0.2 MHz. During
manual tuning, the radio is muted.
Automatic seek tuning
�Select desired waveband.
�PressGorHbutton briefly.
The radio will tune to the next highest
or next lowest receivable frequency.Scan search
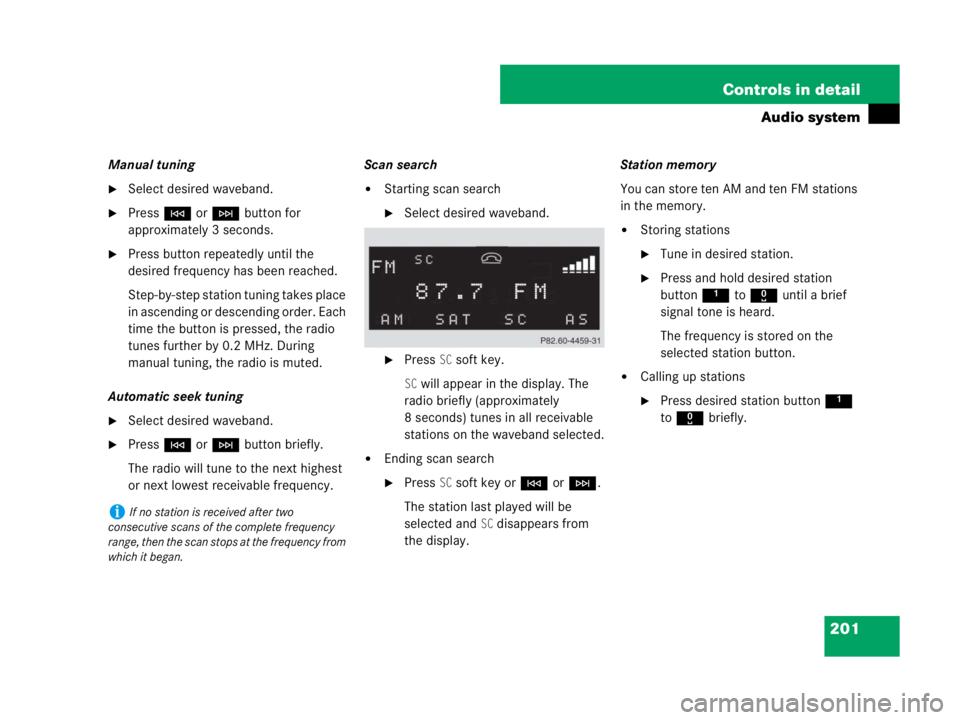
�Starting scan search
�Select desired waveband.
�Press SC soft key.
SC will appear in the display. The
radio briefly (approximately
8 seconds) tunes in all receivable
stations on the waveband selected.
�Ending scan search
�Press SC soft key orGorH.
The station last played will be
selected and
SC disappears from
the display.Station memory
You can store ten AM and ten FM stations
in the memory.
�Storing stations
�Tune in desired station.
�Press and hold desired station
button1 to R until a brief
signal tone is heard.
The frequency is stored on the
selected station button.
�Calling up stations
�Press desired station button1
to R briefly.
iIf no station is received after two
consecutive scans of the complete frequency
range, then the scan stops at the frequency from
which it began.
Page 204 of 473

203 Controls in detail
Audio system
Search
�PressGorHbutton to tune in
the next receivable weather band
station.Scan search�Starting scan search
�Press SC soft key.
SC will appear in the display. The
radio briefly (approximately
8 seconds) tunes in all receivable
weather band stations.
�Ending scan search
�Press SC soft key orGorH.
The weather band station last
played will be selected and
SC
disappears from the display.Introduction to satellite radio*
(USA only)
SIRIUS satellite radio provides 100 chan-
nels of digital-quality radio, among others
music, sports, news, and entertainment,
free of commercials. SIRIUS satellite radio
uses a fleet of high-power satellites to
broadcast 24 hours per day, coast to
coast, in the contiguous U.S.
This diverse, satellite-delivered program-
ming is available for a monthly subscrip-
tion fee.
For more information and service
availability, call the SIRIUS Service Center
(
�page 208), or contact www.sirius.com
iIf no weather band station is received
after three consecutive scans of the complete
frequency range, then the scan stops at the
channel with which it began and
NO WB FOUND
appears in the display.
If this happens, switch back to standard radio
mode.
Page 248 of 473

247 Controls in detail
Driving systems
�Driving systems
The driving system of your vehicle is
described on the following pages:
�Cruise control, with which the vehicle
can maintain a preset speed.
The BAS, ABS and ESP
® driving systems
are described in the “Safety and Security”
section (
�page 84).
Cruise control
The cruise control automatically maintains
the speed you set for your vehicle.
Use of cruise control is recommended for
driving at a constant speed for extended
periods of time.
You can set or resume cruise control at any
speed over 20 mph (30 km/h).
The cruise control function is operated by
means of the cruise control lever.
The cruise control lever is the uppermost
lever on the left-hand side of the steering
column (
�page 24).
Warning!G
The cruise control is a convenience system
designed to assist the driver during vehicle
operation. The driver is and must remain at
all times responsible for the vehicle speed
and for safe brake operation.
Only use the cruise control if the road,
traffic, and weather conditions make it
advisable to travel at a steady speed.
�The use of cruise control can be danger-
ous on winding roads or in heavy traffic
because conditions do not allow safe
driving at a steady speed.
�The use of cruise control can be danger-
ous on slippery roads. Rapid changes in
tire traction can result in wheel spin and
loss of control.
�Deactivate the cruise control when driv-
ing in fog.
The “Resume” function should only be oper-
ated if the driver is fully aware of the previ-
ously set speed and wishes to resume this
particular preset speed.
Page 253 of 473
252 Controls in detail
Useful features
Storage compartments Glove box
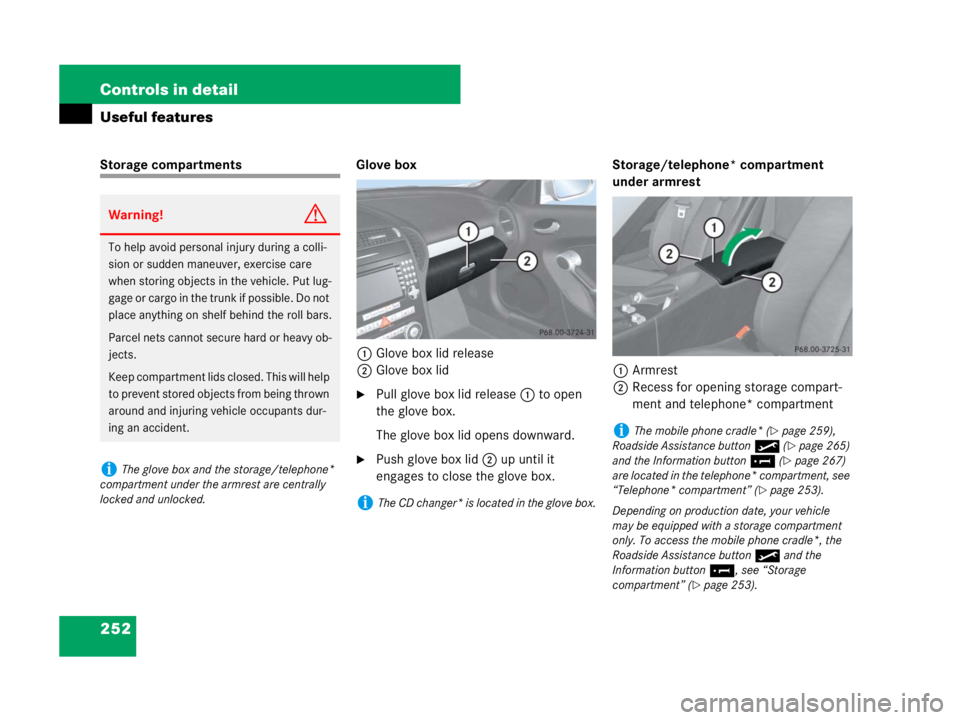
1Glove box lid release
2Glove box lid
�Pull glove box lid release1 to open
the glove box.
The glove box lid opens downward.
�Push glove box lid2 up until it
engages to close the glove box.Storage/telephone* compartment
under armrest
1Armrest
2Recess for opening storage compart-
ment and telephone* compartment
Warning!G
To help avoid personal injury during a colli-
sion or sudden maneuver, exercise care
when storing objects in the vehicle. Put lug-
gage or cargo in the trunk if possible. Do not
place anything on shelf behind the roll bars.
Parcel nets cannot secure hard or heavy ob-
jects.
Keep compartment lids closed. This will help
to prevent stored objects from being thrown
around and injuring vehicle occupants dur-
ing an accident.
iThe glove box and the storage/telephone*
compartment under the armrest are centrally
locked and unlocked.
iThe CD changer* is located in the glove box.
iThe mobile phone cradle* (�page 259),
Roadside Assistance button• (
�page 265)
and the Information button¡ (
�page 267)
are located in the telephone* compartment, see
“Telephone* compartment” (
�page 253).
Depending on production date, your vehicle
may be equipped with a storage compartment
only. To access the mobile phone cradle*, the
Roadside Assistance button• and the
Information button¡, see “Storage
compartment” (
�page 253).
Page 256 of 473
255 Controls in detail
Useful features
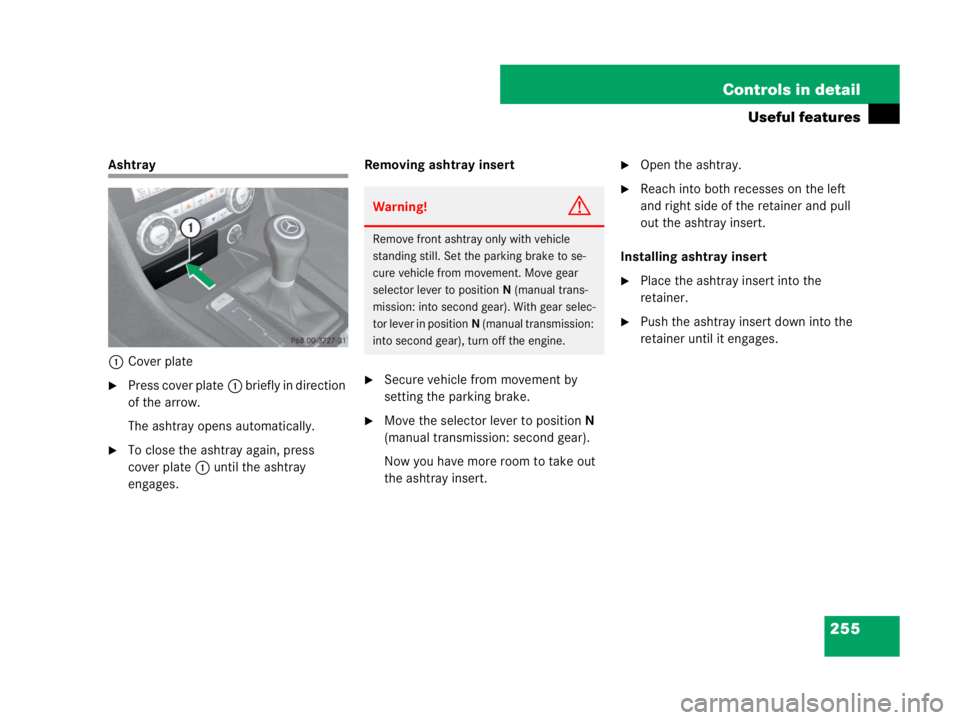
Ashtray
1Cover plate
�Press cover plate1 briefly in direction
of the arrow.
The ashtray opens automatically.
�To close the ashtray again, press
cover plate1 until the ashtray
engages.Removing ashtray insert
�Secure vehicle from movement by
setting the parking brake.
�Move the selector lever to positionN
(manual transmission: second gear).
Now you have more room to take out
the ashtray insert.
�Open the ashtray.
�Reach into both recesses on the left
and right side of the retainer and pull
out the ashtray insert.
Installing ashtray insert
�Place the ashtray insert into the
retainer.
�Push the ashtray insert down into the
retainer until it engages.
Warning!G
Remove front ashtray only with vehicle
standing still. Set the parking brake to se-
cure vehicle from movement. Move gear
selector lever to positionN (manual trans-
mission: into second gear). With gear selec-
tor lever in positionN (manual transmission:
into second gear), turn off the engine.