Page 227 of 473

226 Controls in detailDriving systemsThe vehicle chassis ride height is raised or
lowered according to the selected level
setting and to the vehicle speed:�
With increasing speed, ride height is re-
duced by up to approximately 0.5 inch
(12 mm).
�
With decreasing speed, the ride height
is again raised to the selected vehicle
level.The following vehicle level settings can be
selected when the vehicle is stationary:
Select the level 1 and level 2 settings only
when required by current driving condi-
tions. Otherwise:
�
Fuel consumption may increase.
�
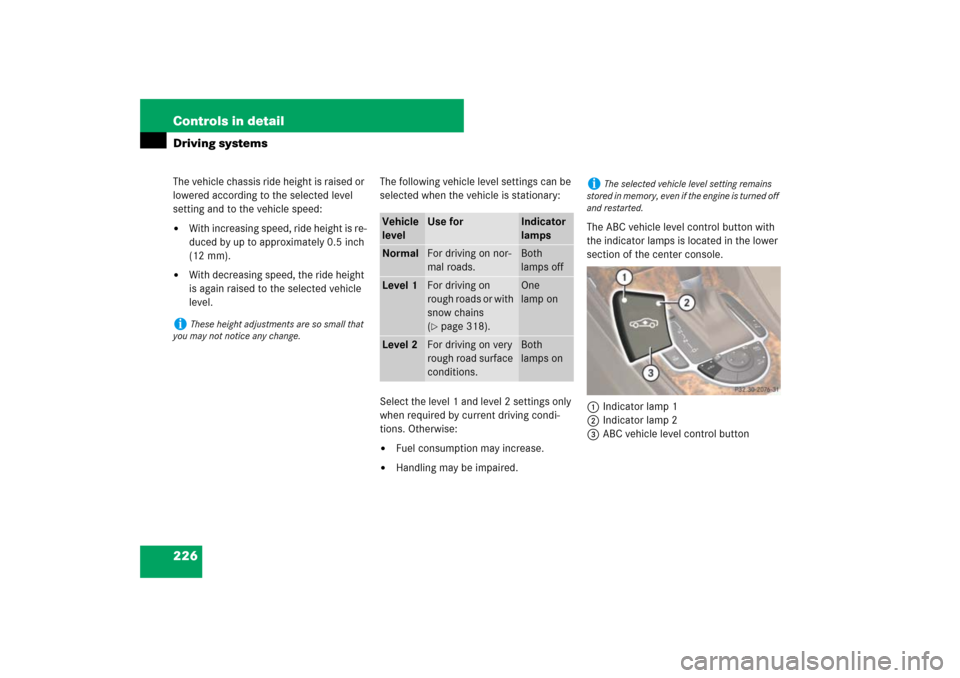
Handling may be impaired.The ABC vehicle level control button with
the indicator lamps is located in the lower
section of the center console.
1Indicator lamp 1
2Indicator lamp 2
3ABC vehicle level control button
i
These height adjustments are so small that
you may not notice any change.
Vehicle
level
Use for
Indicator
lamps
Normal
For driving on nor-
mal roads.
Both
lamps off
Level 1
For driving on
rough roads or with
snow chains
(�page 318).
One
lamp on
Level 2
For driving on very
rough road surface
conditions.
Both
lamps on
i
The selected vehicle level setting remains
stored in memory, even if the engine is turned off
and restarted.
Page 228 of 473

227 Controls in detail
Driving systems
�
Start the engine (
�page 52).
�
Briefly press button3 to change from
one level setting to the next.�
The normal level is selected if both
indicator lamps are off.
�
At level 1, indicator lamp1 is on.
�
At level 2, both indicator lamps are
on.
When the vehicle is at level 2, pressing
the button will return the vehicle to nor-
mal level.Suspension tuning
The suspension tuning is set according to:
�
Your driving style
�
Road surface conditions
�
The vehicle loading
�
Your choice of suspension style
You can set the following suspension
styles:
�
Regular (Comfort)
�
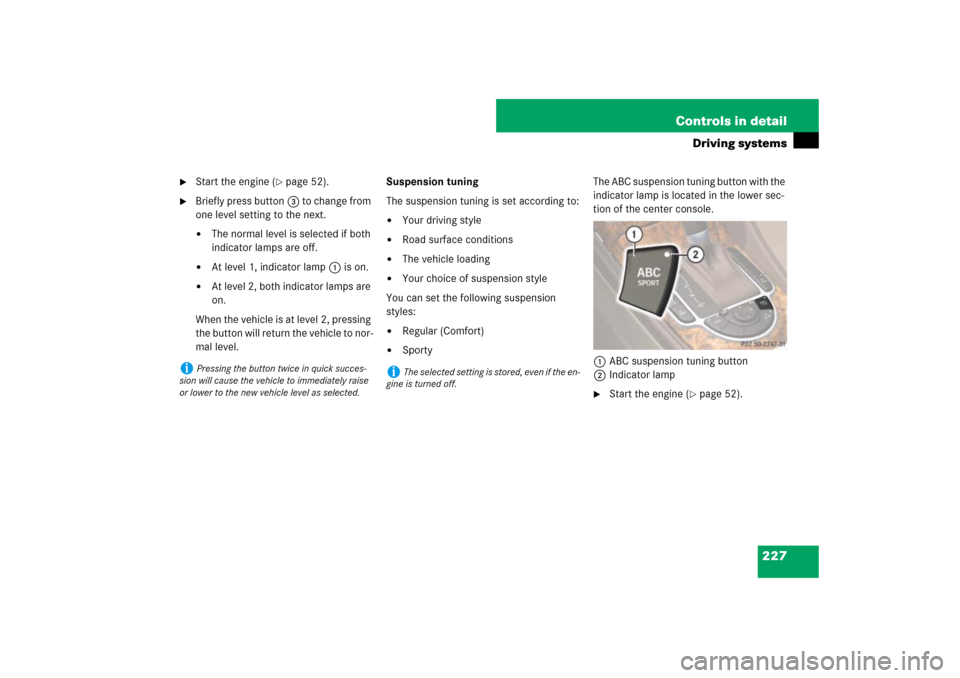
SportyThe ABC suspension tuning button with the
indicator lamp is located in the lower sec-
tion of the center console.
1ABC suspension tuning button
2Indicator lamp
�
Start the engine (
�page 52).
i
Pressing the button twice in quick succes-
sion will cause the vehicle to immediately raise
or lower to the new vehicle level as selected.
i
The selected setting is stored, even if the en-
gine is turned off.
Page 232 of 473

231 Controls in detail
Driving systems
As your vehicle approaches an object, one
or more distance segments will illuminate,
depending on the distance. When the
eighth distance segment illuminates, you
have reached the minimum distance.�
Front area: An intermittent acoustic
warning will sound as the first red dis-
tance segment illuminates and a con-
stant acoustic warning lasting a
maximum of 2 seconds will sound for
the second distance segment. The sig-
nal is canceled when the gear selector
lever is placed in position P or the park-
ing brake is set.
�
Rear area: An intermittent acoustic
warning will sound when the first dis-
tance segment illuminates. This signal
quickens with each additional distance
segment lit. When the eighth distance
segment illuminates, the acoustic
warning becomes a constant signal.
The signal is canceled when the gear
selector lever is placed in positionD
orP or the parking brake is set.Switching the Parktronic system
on/off
You can switch off the Parktronic system
manually.
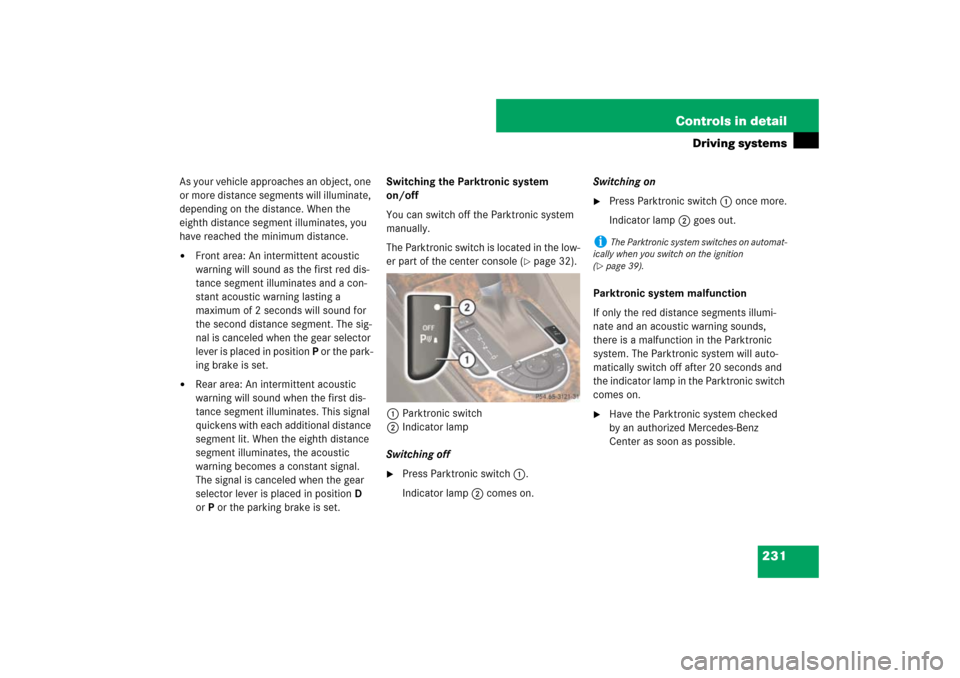
The Parktronic switch is located in the low-
er part of the center console (
�page 32).
1Parktronic switch
2Indicator lamp
Switching off
�
Press Parktronic switch1.
Indicator lamp2 comes on.Switching on
�
Press Parktronic switch1 once more.
Indicator lamp2 goes out.
Parktronic system malfunction
If only the red distance segments illumi-
nate and an acoustic warning sounds,
there is a malfunction in the Parktronic
system. The Parktronic system will auto-
matically switch off after 20 seconds and
the indicator lamp in the Parktronic switch
comes on.
�
Have the Parktronic system checked
by an authorized Mercedes-Benz
Center as soon as possible.
i
The Parktronic system switches on automat-
ically when you switch on the ignition
(
�page 39).
Page 394 of 473

393 Practical hints
Locking/unlocking in an emergency
Locking the vehicle
If you cannot lock the vehicle with the
SmartKey, lock it with the mechanical key
as follows:�
Close the passenger door and the
trunk.
�
Press the central locking switch in the
center console (
�page 119).
�
Check whether the locking knob on the
passenger door has moved down.
�
If necessary push it down manually.
�
Remove the mechanical key from of
the SmartKey (
�page 391).
�
Check whether the trunk is locked.
�
If necessary, lock the trunk with the
mechanical key (
�page 117).
Except for the driver’s door, the vehicle
should now be locked.1Locking
2Mechanical key
�
Insert mechanical key 2 (
�page 391)
into the driver’s door lock until it stops.
�
Turn mechanical key 2 clockwise to
position 1.
The driver’s door is locked.
i
Unlocking the glove box with the mechanical
key will trigger the anti-theft alarm system. To
cancel the alarm, do one of the following:
�
Press button Œ or ‹ on the
SmartKey.
�
Insert the SmartKey in the starter switch.
�
Press the KEYLESS-GO* start/stop button
(�page 40).
�
Grasp an outside door handle (vehicles with
KEYLESS-GO* only).
i
This procedure does not arm the anti-theft
alarm system, nor does it lock the fuel filler flap
and the storage compartments.
The storage compartments can be locked
separately (
�page 235).
Page 456 of 473

455 Index
Center console
Lower part 32
Upper part 31
Central locking
Automatic 119, 162
Central locking/unlocking switch 31,
119
Locking/unlocking from inside 119
Certification label 430
Check engine see Lamps, indicator and
warning
Checking tire pressure electronically with
the Advanced Tire Pressure Monitoring
System (Advanced TPMS)*,
(Canada only) 298
Children in the vehicle
Air bags 83
Front passenger front air bag off indica-
tor lamp 76, 345
Infant and child restraint systems 83
Occupant Classification System
(OCS) 72
Cigarette lighter 239
Clock 25, 157
Cockpit 24
Cold tire inflation pressure 312COMAND system 31
Driving instructions 268
Combination switch
High beam 56, 133
Turn signals 56
Windshield wipers 57
Consumer battery 281
Control and operation of radio
transmitters 268
Control system 139, 142
Control system menus
AMG Menu 146
AUDIO 149
NAV 151
Settings 153
Standard display 145
TEL* 165
Trip computer 163
Vehicle status message memory 152
Control system submenus 143
Convenience 162
Instrument cluster 156
Lighting 159
Time 157
Vehicle 162
Convenience feature 201Coolant 449
Anticorrosion/antifreeze mixing ratio
and quantity 451
Checking coolant level 280
Coolant warning lamp 337
Messages in the multifunction
display 371, 373
Temperature 270
Temperature gauge 137
Corner-illuminating front fog lamps 132
Corner-illuminating front fog lamps*
Replacing bulbs 397
Courtesy lighting 135
Cruise control 209
Messages in the multifunction
display 352, 353
Cup holder 238
Curb weight 312
D
Daytime running lamp mode 130
Setting 159
Deep water see Standing water
Defogging, Windshield 191
Defrosting, Front 190
Defrosting, Rear 183
Page 467 of 473

466 Index
Loss of 110
Messages in display 379
Reprogramming 109
Selective setting 109
Unlocking 106
Snow chains 318
Spare fuses 424
Spare fuses see Vehicle tool kit
Spare tire see Spare wheel 405
Spare wheel 388, 389, 405, 440
Collapsible tire 410, 440
Inflating collapsible tire 410
Tire inflation pressure 410
Speed settings
Cruise control 212
Speedometer 27
Setting units 156
Sporty driving style 228
SRS
Indicator lamp 342
Messages in the multifunction
display 361
Standing lamps 128, 398
Standing water
Driving instructions 267
Starter battery 281, 414Starter switch 25, 40
Starter switch positions 39
Starting difficulties 53
Starting position 40
Starting the engine
With the SmartKey 52
With the SmartKey with
KEYLESS-GO* 53
Steering column
In/out adjustment 46
Length adjustment 46
Up/down adjustment 46
Steering wheel
Adjusting 45
Buttons 30
Cleaning 328
Heating* 240
Height adjustment 46
Steering wheel adjustment lever 25
Steering wheel gearshift control* 175
Stopping
Windows 198
Storage compartment
Center console 234Storage compartments 233
Armrest 234
Cup holder 238
Glove box 233
In door 233
Locking compartments
separately 235
Locking storage compartments 235
Parcel net 236
Rear 235
Seats 234
Storage tray 234
Unlocking compartments
separately 236
Unlocking storage
compartments 236, 392
Ventilated glove box 195
Storing tires 285
Submenus 143
Convenience 162
Instrument cluster 156, 157
Lighting 159
Selecting 154
Settings menus 154
Time 157
Vehicle 162
Page:
< prev 1-8 9-16 17-24