Page 223 of 473
222 Controls in detailDriving systemsDriving with Distronic
This section describes a number of driving
situations where special precaution is re-
quired on the part of the driver. Be pre-
pared to brake in such situations. This will
deactivate the Distronic system.The most likely cause for a malfunctioning
system is a dirty sensor (located behind
the hood grille), especially at times of snow
and ice or heavy rain. In such a case,
Distronic will switch off, and the message
Distronic Currently unavailable. See
Oper. Manual
appears in the multifunction
display.
For cleaning and care of the Distronic sen-
sor, see “Cleaning the Distronic* system
sensor cover” (�page 325).
Warning!
G
Distronic works to maintain the speed se-
lected by the driver unless a moving obsta-
cle proceeding directly ahead of it in the
same travel direction is detected (e.g. fol-
lowing another vehicle ahead of you at your
set distance. This means that:�
Your vehicle can pass another vehicle
after you have changed lanes.
�
While in a sharp turn or if the preceding
vehicle is in a sharp turn, Distronic could
lose sight of the preceding vehicle. Your
vehicle could then accelerate to the pre-
viously set speed.
Distronic regulates only the distance be-
tween your vehicle and those directly ahead
of it, but does not register stationary objects
in the road, e.g.: �
a stopped vehicle in a traffic jam
�
a disabled vehicle
�
an oncoming vehicle
The driver must always be alert, observe all
traffic and intercede as required by means
of steering or braking the vehicle.
Warning!
G
Distronic should not be used in snowy or icy
road conditions.
i
If the message
Distronic available
again
appears in the multifunction display dur-
ing driving, the dirt (e.g. slush) has dissolved.
Distronic is available again if you reactivate it
(
�page 218).
Page 229 of 473
228 Controls in detailDriving systemsSuspension for sporty driving style
The setting for sporty driving is selected
when indicator lamp2 is illuminated.�
Press button1.
Indicator lamp2 comes on.
Suspension for regular driving style
The setting for regular driving is selected
when the indicator lamp2 is off.
�
Press button1.
Indicator lamp2 goes out.
Parktronic system* (Parking assist)
The Parktronic system is an electronic aid
with ultrasonic sensors. It is designed to
assist the driver during parking maneu-
vers. It visually and audibly indicates the
relative distance between the vehicle and
an obstacle.
The Parktronic system is automatically ac-
tivated when you switch on the ignition, re-
lease the parking brake, or place the gear
selector lever in position D, R, or N. The
Parktronic system deactivates at speeds
exceeding approximately 11 mph
(18 km/h). At lower vehicle speeds the
Parktronic system turns on again. Warning!
G
Parktronic is a supplemental system. It is
not intended to, nor does it replace, the
need for extreme care. The responsibility
during parking and other critical maneuvers
always rests with the driver.
Special attention must be paid to objects
with smooth surfaces or low silhouettes
(e.g. trailer couplings, painted posts, or road
curbs). Such objects may not be detected by
the system and can damage the vehicle.
The operational function of the Parktronic
system can be affected by dirty sensors, es-
pecially at times of snow and ice. See
“Cleaning the Parktronic* system sensors”
(�page 326).
Warning!
G
Make sure no persons or animals are in the
area in which you are maneuvering. Other-
wise you run the risk of causing injury.!
Interference caused by other ultrasonic sig-
nals (e.g. working jackhammers, car wash, or the
air brakes of trucks) can cause the system to
send erratic indications, and should be taken
into consideration.
Page 230 of 473
229 Controls in detail
Driving systems
The Parktronic system also deactivates
when you place the gear selector lever in
position P or depress the parking brake
pedal.
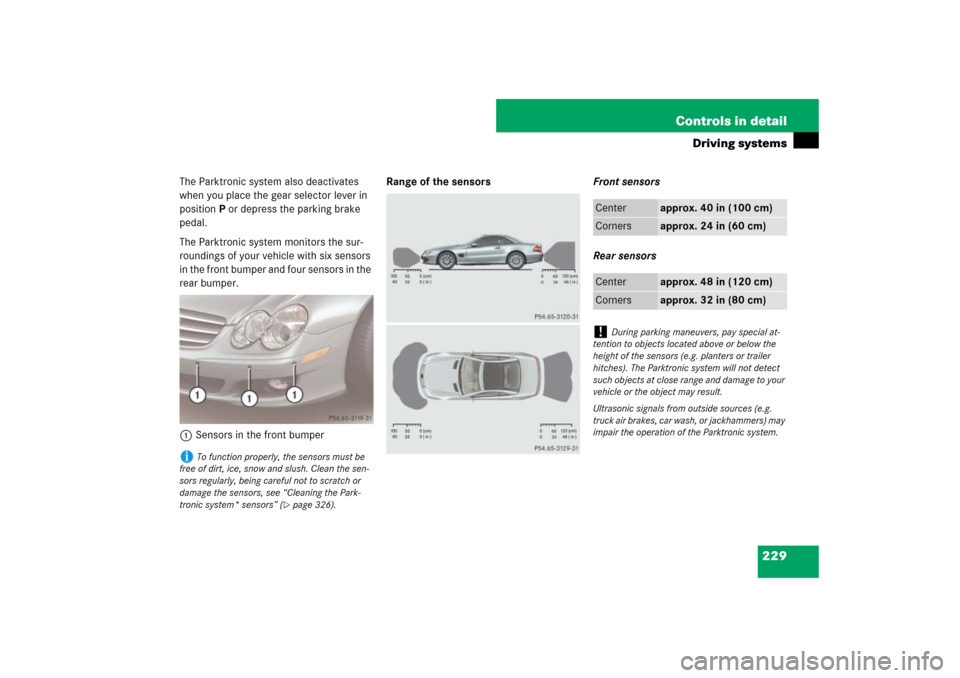
The Parktronic system monitors the sur-
roundings of your vehicle with six sensors
in the front bumper and four sensors in the
rear bumper.
1Sensors in the front bumperRange of the sensorsFront sensors
Rear sensorsi
To function properly, the sensors must be
free of dirt, ice, snow and slush. Clean the sen-
sors regularly, being careful not to scratch or
damage the sensors, see “Cleaning the Park-
tronic system* sensors” (
�page 326).
Center
approx. 40 in (100 cm)
Corners
approx. 24 in (60 cm)
Center
approx. 48 in (120 cm)
Corners
approx. 32 in (80 cm)
!
During parking maneuvers, pay special at-
tention to objects located above or below the
height of the sensors (e.g. planters or trailer
hitches). The Parktronic system will not detect
such objects at close range and damage to your
vehicle or the object may result.
Ultrasonic signals from outside sources (e.g.
truck air brakes, car wash, or jackhammers) may
impair the operation of the Parktronic system.
Page 233 of 473
232 Controls in detailDriving systemsIf only the red distance segments illumi-
nate and no acoustic warning sounds, the
Parktronic system sensors are dirty or
there is an interference from other radio or
ultrasonic signals. The Parktronic system
will automatically switch off after
20 seconds and the indicator lamp in the
Parktronic switch comes on.�
Switch off the ignition (
�page 39).
�
Clean the Parktronic system sensors
(�page 326).
�
Switch on the ignition (
�page 39).
or
�
Check the Parktronic system operation
at another location to rule out interfer-
ence from outside radio or ultrasonic
signals.
Page 273 of 473
272 OperationAt the gas station�
Insert fuel cap 2 into fuel filler neck
and turn fuel cap clockwise until it au-
dibly engages.
�
Close fuel filler flap 1.
You should hear the latch close shut.
Check regularly and before a long trip
For information on quantities and require-
ments of operating agents, see “Fuels,
coolants, lubricants, etc.” (
�page 444).
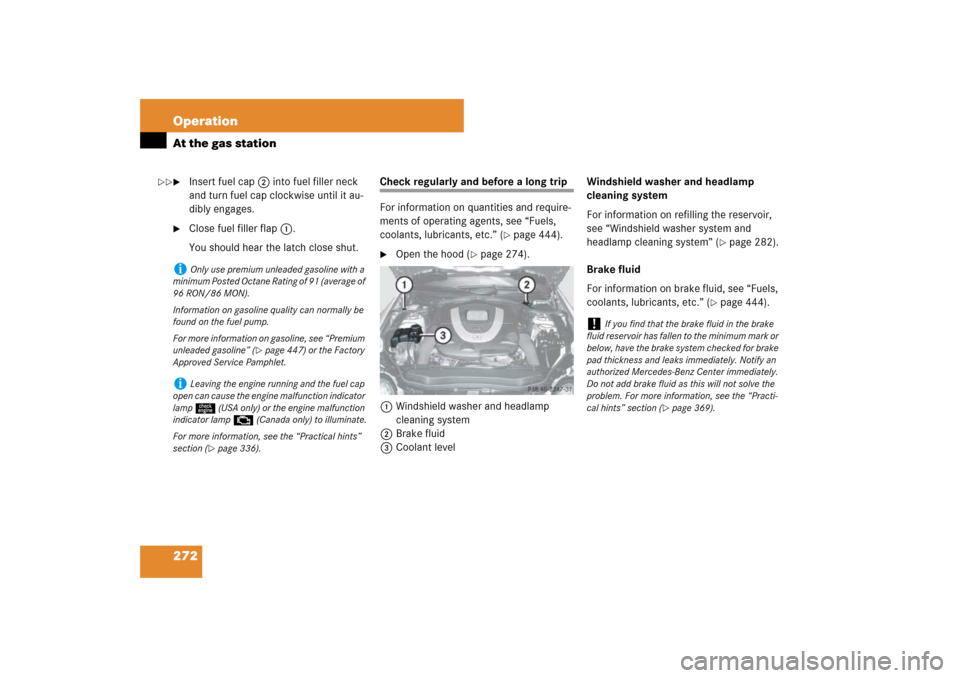
�
Open the hood (
�page 274).
1Windshield washer and headlamp
cleaning system
2Brake fluid
3Coolant levelWindshield washer and headlamp
cleaning system
For information on refilling the reservoir,
see “Windshield washer system and
headlamp cleaning system” (
�page 282).
Brake fluid
For information on brake fluid, see “Fuels,
coolants, lubricants, etc.” (
�page 444).
i
Only use premium unleaded gasoline with a
minimum Posted Octane Rating of 91 (average of
96 RON/86 MON).
Information on gasoline quality can normally be
found on the fuel pump.
For more information on gasoline, see “Premium
unleaded gasoline” (
�page 447) or the Factory
Approved Service Pamphlet.
i
Leaving the engine running and the fuel cap
open can cause the engine malfunction indicator
lamp ú (USA only) or the engine malfunction
indicator lamp ± (Canada only) to illuminate.
For more information, see the “Practical hints”
section (
�page 336).
!
If you find that the brake fluid in the brake
fluid reservoir has fallen to the minimum mark or
below, have the brake system checked for brake
pad thickness and leaks immediately. Notify an
authorized Mercedes-Benz Center immediately.
Do not add brake fluid as this will not solve the
problem. For more information, see the “Practi-
cal hints” section (
�page 369).
��
Page 274 of 473
273 Operation
At the gas station
Coolant level
For information on checking the coolant
level, see “Coolant” (
�page 280).
Engine oil level
For more information on checking the en-
gine oil level, see “Engine oil”
(
�page 275).
Vehicle lighting
Check function and cleanliness. For more
information, see “Replacing bulbs”
(�page 397).
Exterior lamp switch, see “Switching on
headlamps” (
�page 55).
Tire inflation pressure
For information on checking the tire infla-
tion pressure, see “Checking tire inflation
pressure” (
�page 292).
Page 279 of 473
278 OperationEngine compartmentChecking engine oil level with the oil
dipstick (SL 550 only)
When checking the oil level�
the vehicle must be parked on level
ground
�
the vehicle must have been stationary
for at least 5 minutes with the engine
turned off
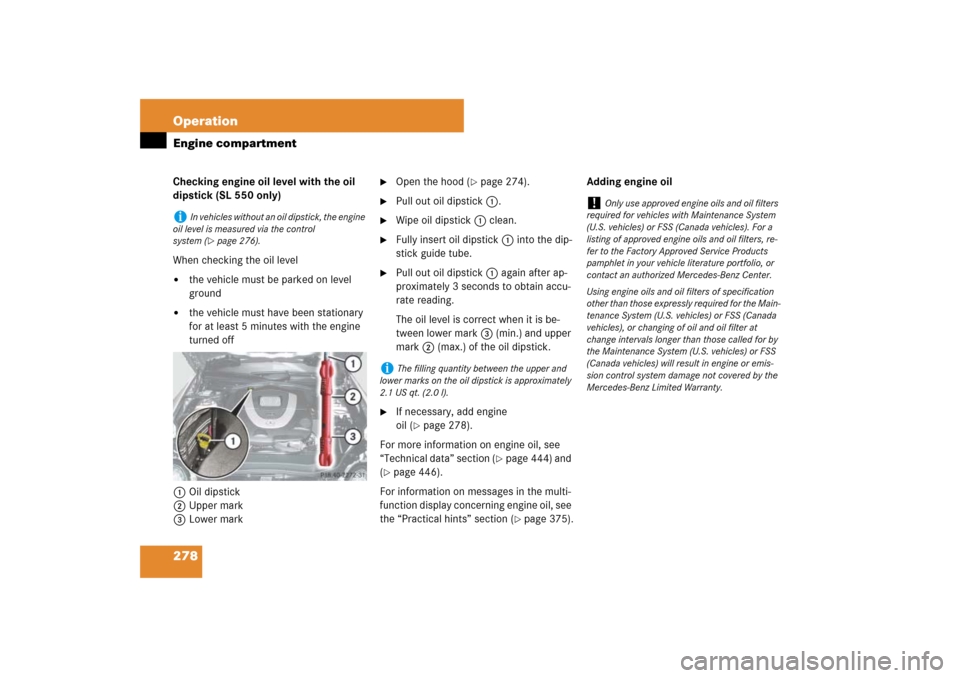
1Oil dipstick
2Upper mark
3Lower mark
�
Open the hood (
�page 274).
�
Pull out oil dipstick 1.
�
Wipe oil dipstick 1 clean.
�
Fully insert oil dipstick 1 into the dip-
stick guide tube.
�
Pull out oil dipstick 1 again after ap-
proximately 3 seconds to obtain accu-
rate reading.
The oil level is correct when it is be-
tween lower mark 3 (min.) and upper
mark 2 (max.) of the oil dipstick.
�
If necessary, add engine
oil (
�page 278).
For more information on engine oil, see
“Technical data” section (
�page 444) and
(
�page 446).
For information on messages in the multi-
function display concerning engine oil, see
the “Practical hints” section (
�page 375).Adding engine oil
i
In vehicles without an oil dipstick, the engine
oil level is measured via the control
system (
�page 276).
i
The filling quantity between the upper and
lower marks on the oil dipstick is approximately
2.1 US qt. (2.0 l).
!
Only use approved engine oils and oil filters
required for vehicles with Maintenance System
(U.S. vehicles) or FSS (Canada vehicles). For a
listing of approved engine oils and oil filters, re-
fer to the Factory Approved Service Products
pamphlet in your vehicle literature portfolio, or
contact an authorized Mercedes-Benz Center.
Using engine oils and oil filters of specification
other than those expressly required for the Main-
tenance System (U.S. vehicles) or FSS (Canada
vehicles), or changing of oil and oil filter at
change intervals longer than those called for by
the Maintenance System (U.S. vehicles) or FSS
(Canada vehicles) will result in engine or emis-
sion control system damage not covered by the
Mercedes-Benz Limited Warranty.
Page 283 of 473
282 OperationEngine compartmentWindshield washer system and headlamp cleaning system
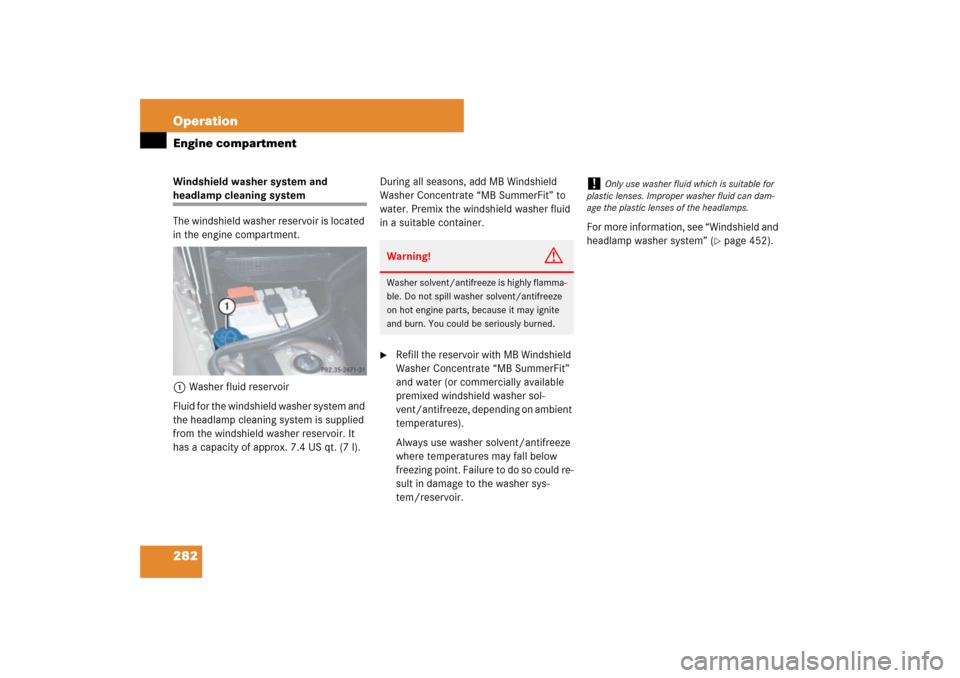
The windshield washer reservoir is located
in the engine compartment.
1Washer fluid reservoir
Fluid for the windshield washer system and
the headlamp cleaning system is supplied
from the windshield washer reservoir. It
has a capacity of approx. 7.4 US qt. (7 l).During all seasons, add MB Windshield
Washer Concentrate “MB SummerFit” to
water. Premix the windshield washer fluid
in a suitable container.
�
Refill the reservoir with MB Windshield
Washer Concentrate “MB SummerFit”
and water (or commercially available
premixed windshield washer sol-
vent/antifreeze, depending on ambient
temperatures).
Always use washer solvent/antifreeze
where temperatures may fall below
f r e e z i n g p o i n t . F a i l u r e t o d o s o c o u l d r e -
sult in damage to the washer sys-
tem/reservoir.For more information, see “Windshield and
headlamp washer system” (
�page 452).
Warning!
G
Washer solvent/antifreeze is highly flamma-
ble. Do not spill washer solvent/antifreeze
on hot engine parts, because it may ignite
and burn. You could be seriously burned.
!
Only use washer fluid which is suitable for
plastic lenses. Improper washer fluid can dam-
age the plastic lenses of the headlamps.