Page 383 of 473

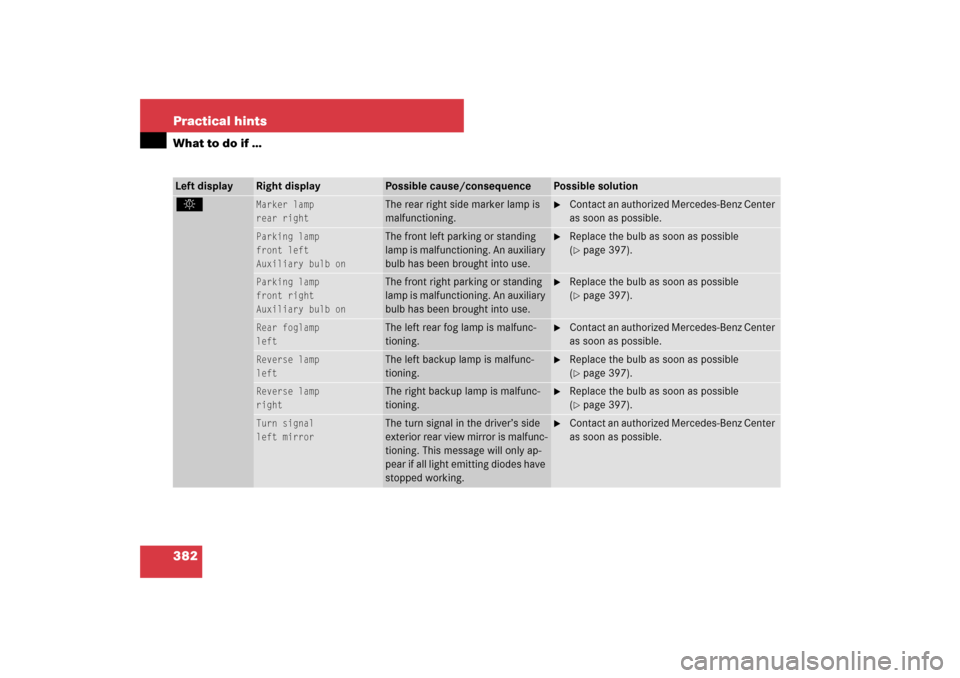
382 Practical hintsWhat to do if …Left display
Right display
Possible cause/consequence
Possible solution
.
Marker lamp
rear right
The rear right side marker lamp is
malfunctioning.
�
Contact an authorized Mercedes-Benz Center
as soon as possible.
Parking lamp
front left
Auxiliary bulb on
The front left parking or standing
lamp is malfunctioning. An auxiliary
bulb has been brought into use.
�
Replace the bulb as soon as possible
(�page 397).
Parking lamp
front right
Auxiliary bulb on
The front right parking or standing
lamp is malfunctioning. An auxiliary
bulb has been brought into use.
�
Replace the bulb as soon as possible
(�page 397).
Rear foglamp
left
The left rear fog lamp is malfunc-
tioning.
�
Contact an authorized Mercedes-Benz Center
as soon as possible.
Reverse lamp
left
The left backup lamp is malfunc-
tioning.
�
Replace the bulb as soon as possible
(�page 397).
Reverse lamp
right
The right backup lamp is malfunc-
tioning.
�
Replace the bulb as soon as possible
(�page 397).
Turn signal
left mirror
The turn signal in the driver’s side
exterior rear view mirror is malfunc-
tioning. This message will only ap-
pear if all light emitting diodes have
stopped working.
�
Contact an authorized Mercedes-Benz Center
as soon as possible.
Page 384 of 473

383 Practical hints
What to do if …
Left display
Right display
Possible cause/consequence
Possible solution
.
Turn signal
right mirror
The turn signal in the passenger
side exterior rear view mirror is mal-
functioning. This message will only
appear if all light emitting diodes
have stopped working.
�
Contact an authorized Mercedes-Benz Center
as soon as possible.
Tail lamp
left
Auxiliary bulb on
The left tail lamp is malfunctioning.
An auxiliary bulb has been brought
into use.
�
Contact an authorized Mercedes-Benz Center
as soon as possible.
Tail lamp
right
Auxiliary bulb on
The right tail lamp is malfunction-
ing. An auxiliary bulb has been
brought into use.
�
Contact an authorized Mercedes-Benz Center
as soon as possible.
Turn off
lights
You have removed the SmartKey
from the starter switch and opened
the driver’s door or removed the
SmartKey with KEYLESS-GO* from
the vehicle and left the headlamps
on.
�
Turn the exterior lamp switch toM
orU.
Turn signal
front left
Auxiliary bulb on
The left front turn signal lamp is
malfunctioning. An auxiliary bulb
has been brought into use.
�
Replace the bulb as soon as possible
(�page 397).
Turn signal
front right
Auxiliary bulb on
The right front turn signal lamp is
malfunctioning. An auxiliary bulb
has been brought into use.
�
Replace the bulb as soon as possible
(�page 397).
Page 385 of 473

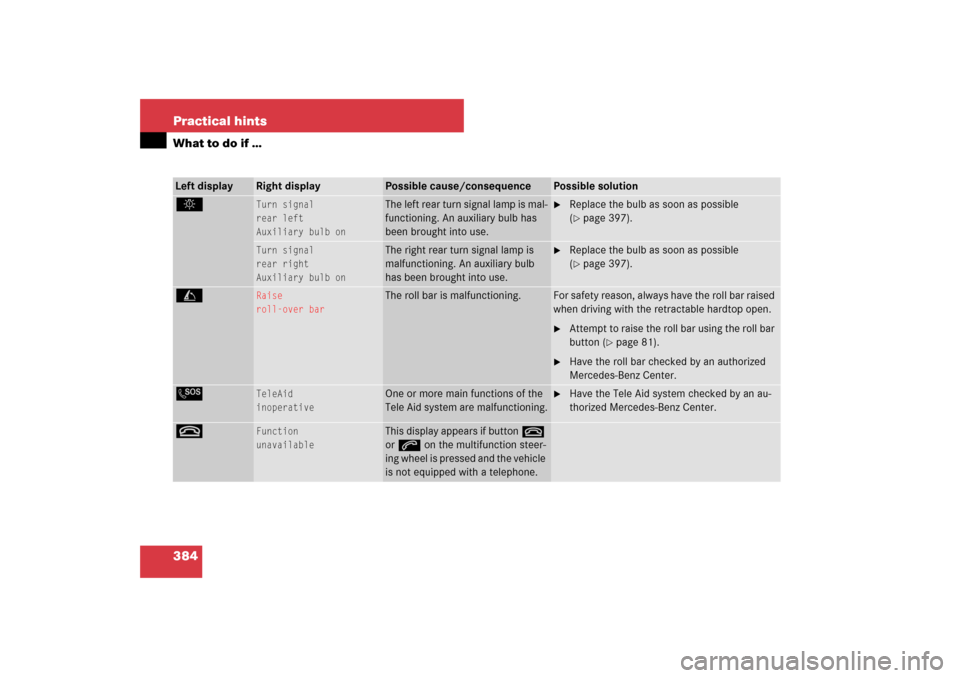
384 Practical hintsWhat to do if …Left display
Right display
Possible cause/consequence
Possible solution
.
Turn signal
rear left
Auxiliary bulb on
The left rear turn signal lamp is mal-
functioning. An auxiliary bulb has
been brought into use.
�
Replace the bulb as soon as possible
(�page 397).
Turn signal
rear right
Auxiliary bulb on
The right rear turn signal lamp is
malfunctioning. An auxiliary bulb
has been brought into use.
�
Replace the bulb as soon as possible
(�page 397).
C
Raise
roll-over bar
The roll bar is malfunctioning.
For safety reason, always have the roll bar raised
when driving with the retractable hardtop open.�
Attempt to raise the roll bar using the roll bar
button (
�page 81).
�
Have the roll bar checked by an authorized
Mercedes-Benz Center.
L
TeleAid
inoperative
One or more main functions of the
Tele Aid system are malfunctioning.
�
Have the Tele Aid system checked by an au-
thorized Mercedes-Benz Center.
t
Function
unavailable
This display appears if button t
or s on the multifunction steer-
ing wheel is pressed and the vehicle
is not equipped with a telephone.
Page 386 of 473

385 Practical hints
What to do if …
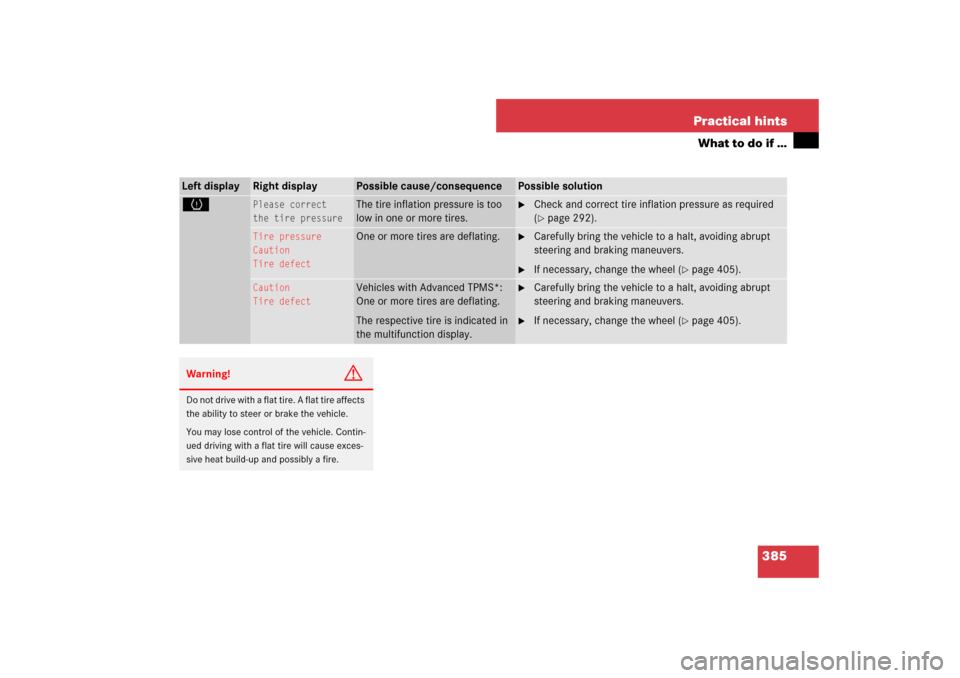
Left display
Right display
Possible cause/consequence
Possible solution
H
Please correct
the tire pressure
The tire inflation pressure is too
low in one or more tires.
�
Check and correct tire inflation pressure as required
(�page 292).
Tire pressure
Caution
Tire defect
One or more tires are deflating.
�
Carefully bring the vehicle to a halt, avoiding abrupt
steering and braking maneuvers.
�
If necessary, change the wheel (
�page 405).
Caution
Tire defect
Vehicles with Advanced TPMS*:
One or more tires are deflating.
The respective tire is indicated in
the multifunction display.
�
Carefully bring the vehicle to a halt, avoiding abrupt
steering and braking maneuvers.
�
If necessary, change the wheel (
�page 405).
Warning!
G
Do not drive with a flat tire. A flat tire affects
the ability to steer or brake the vehicle.
You may lose control of the vehicle. Contin-
ued driving with a flat tire will cause exces-
sive heat build-up and possibly a fire.
Page 387 of 473
386 Practical hintsWhat to do if …Left display
Right display
Possible cause/consequence
Possible solution
H
Tire pressure
Check tires
The tire pressure in one or more
tires is already below the mini-
mum value.
�
Carefully bring the vehicle to a halt, avoiding abrupt
steering and braking maneuvers.
�
Check and adjust tire pressure as required.
�
If necessary, change the wheel.
Check tires
Vehicles with Advanced TPMS*:
The tire pressure in one or more
tires is already below the mini-
mum value.
The respective tire is indicated in
the multifunction display.
�
Carefully bring the vehicle to a halt, avoiding abrupt
steering and braking maneuvers.
�
Check and adjust tire pressure as required.
�
If necessary, change the wheel.
Warning!
G
Do not drive with a flat tire. A flat tire affects
the ability to steer or brake the vehicle.
You may lose control of the vehicle. Contin-
ued driving with a flat tire will cause exces-
sive heat build-up and possibly a fire.
Page 388 of 473
387 Practical hints
What to do if …
Left display
Right display
Possible cause/consequence
Possible solution
Ê
This message will appear when the
trunk lid is open and you are trying
to open or close the retractable
hardtop.
�
Close the trunk lid.
M
Close
trunk partition
You are trying to open or close the
retractable hardtop even though
the luggage cover in the trunk is not
closed and/or properly engaged.
�
Close the luggage cover and engage it into
side holders (
�page 205).
W
Washer fluid
Please refill
The washer fluid in the washer fluid
reservoir has fallen below the mini-
mum level.
�
Add washer fluid (
�page 282).
Warning!
G
Do not spill antifreeze on hot engine parts.
Antifreeze contains ethylene glycol which
may ignite when if it comes into contact with
hot engine parts. You could be seriously
burned.
Page 414 of 473

413 Practical hints
Flat tire
MOExtended system*
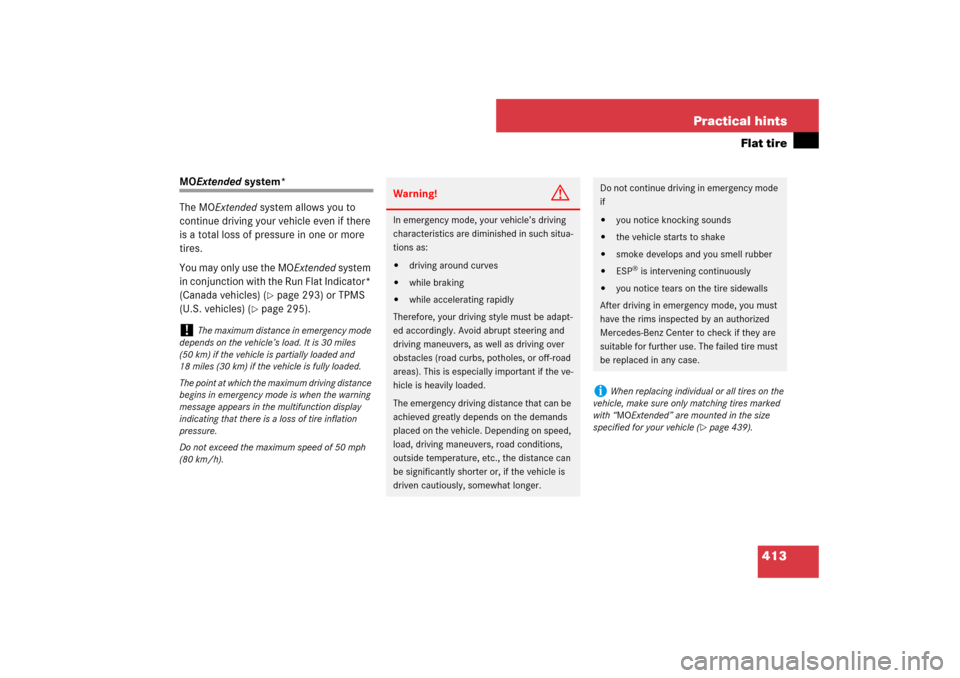
The MOExtended system allows you to
continue driving your vehicle even if there
is a total loss of pressure in one or more
tires.
You may only use the MOExtended system
in conjunction with the Run Flat Indicator*
(Canada vehicles) (
�page 293) or TPMS
(U.S. vehicles) (
�page 295).
!
The maximum distance in emergency mode
depends on the vehicle’s load. It is 30 miles
(50 km) if the vehicle is partially loaded and
18 miles (30 km) if the vehicle is fully loaded.
The point at which the maximum driving distance
begins in emergency mode is when the warning
message appears in the multifunction display
indicating that there is a loss of tire inflation
pressure.
Do not exceed the maximum speed of 50 mph
(80 km/h).
Warning!
G
In emergency mode, your vehicle’s driving
characteristics are diminished in such situa-
tions as:�
driving around curves
�
while braking
�
while accelerating rapidly
Therefore, your driving style must be adapt-
ed accordingly. Avoid abrupt steering and
driving maneuvers, as well as driving over
obstacles (road curbs, potholes, or off-road
areas). This is especially important if the ve-
hicle is heavily loaded.
The emergency driving distance that can be
achieved greatly depends on the demands
placed on the vehicle. Depending on speed,
load, driving maneuvers, road conditions,
outside temperature, etc., the distance can
be significantly shorter or, if the vehicle is
driven cautiously, somewhat longer.
Do not continue driving in emergency mode
if�
you notice knocking sounds
�
the vehicle starts to shake
�
smoke develops and you smell rubber
�
ESP
® is intervening continuously
�
you notice tears on the tire sidewalls
After driving in emergency mode, you must
have the rims inspected by an authorized
Mercedes-Benz Center to check if they are
suitable for further use. The failed tire must
be replaced in any case.
i
When replacing individual or all tires on the
vehicle, make sure only matching tires marked
with “MOExtended” are mounted in the size
specified for your vehicle (
�page 439).
Page 454 of 473

453 Index
A
ABC 225
Messages in display 349
Oil level 279
ABS 87
Indicator lamp 29, 334
Messages in the multifunction
display 351, 352
Warning lamp 27, 332
Accelerator position, automatic
transmission 171
Accessory weight 312
Accident 59
Active Body Control see ABC
Air bags 68
Children in the vehicle 83
Front 71
Front passenger front air bag off
indicator lamp 76
Head-thorax 72
Knee bag 72
Occupant Classification System
(OCS) 72
Passenger 72
Air conditioning system see Automatic cli-
mate control systemAir distribution 188, 189
Air pressure 312
Tire inflation pressure 291
Air pump 410
Air recirculation mode 191
Air vents 185
Air volume 188, 190
Alarm system see Anti-theft systems
Alignment bolt (vehicle tool kit) 409
Anticorrosion/antifreeze 445, 451
Antiglare, Interior rear view mirror 180
Antilock Brake System see ABS
Anti-theft systems
Anti-theft alarm system 96
Immobilizer 96
Tow-away alarm 98
Aquaplaning see Hydroplaning
Armrest 234
Ashtray 31, 239
Aspect ratio 312
ATF 279
Auto-dimming, Rear view mirrors 180
Automatic central locking 119
Control system 162Automatic climate control system 184
Air conditioning, Cooling 193
Air conditioning refrigerant 446
Air distribution 188, 189
Air recirculation mode 191
Air vents 185
Air volume 188, 190
Control panel 185
Deactivating system 187
Defrosting 183, 190
Residual heat utilization 194
Temperature 188
Temperature sensor 33
Ventilated glove box 195
Automatic lighting control, Interior
lighting 135
Automatic locking when driving 119
Automatic shift program 173
Automatic transmission 168
Accelerator position 171
Comfort program mode 173
Emergency operation
(Limp-Home Mode) 179
Gear ranges 172
Gear selector lever 32, 168
Gear selector lever position 168, 170