Page 619 of 705
618 Practical hintsResetting activated head restraints (S 600 only)If the luxury active head restraints
(front seats) have been triggered in an ac-
cident, the active head restraints must be
reset. Otherwise, the active head re-
straints cannot offer any additional protec-
tion in the event of another rear-end
collision.
�
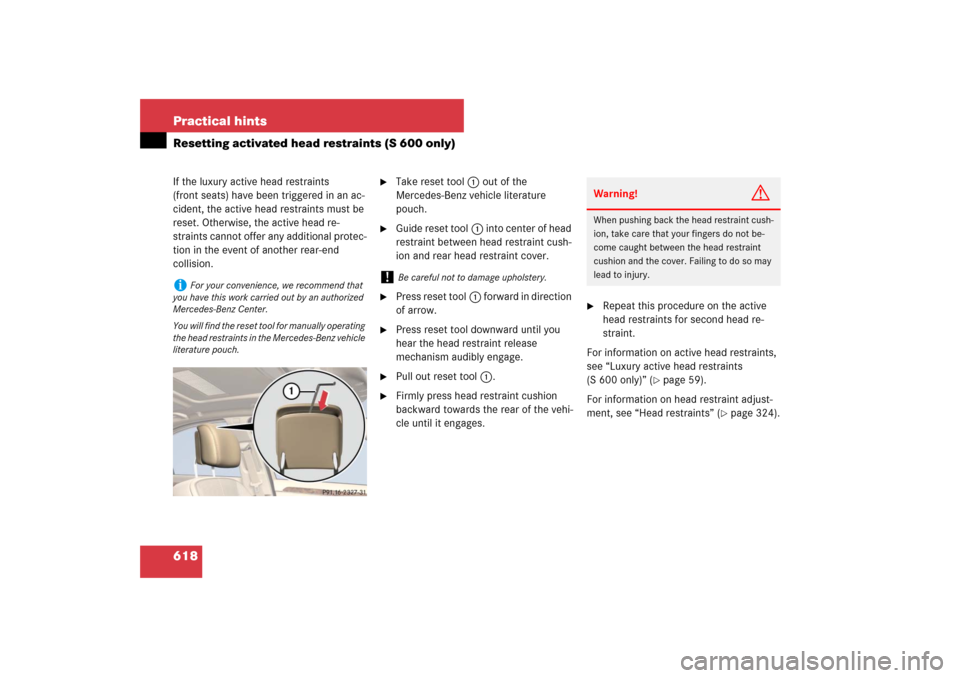
Take reset tool1 out of the
Mercedes-Benz vehicle literature
pouch.
�
Guide reset tool1 into center of head
restraint between head restraint cush-
ion and rear head restraint cover.
�
Press reset tool1 forward in direction
of arrow.
�
Press reset tool downward until you
hear the head restraint release
mechanism audibly engage.
�
Pull out reset tool1.
�
Firmly press head restraint cushion
backward towards the rear of the vehi-
cle until it engages.
�
Repeat this procedure on the active
head restraints for second head re-
straint.
For information on active head restraints,
see “Luxury active head restraints
(S 600 only)” (
�page 59).
For information on head restraint adjust-
ment, see “Head restraints” (
�page 324).
i
For your convenience, we recommend that
you have this work carried out by an authorized
Mercedes-Benz Center.
You will find the reset tool for manually operating
the head restraints in the Mercedes-Benz vehicle
literature pouch.
!
Be careful not to damage upholstery.
Warning!
G
When pushing back the head restraint cush-
ion, take care that your fingers do not be-
come caught between the head restraint
cushion and the cover. Failing to do so may
lead to injury.
Page 620 of 705
619 Practical hints
Replacing SmartKey batteries
�Replacing SmartKey batteries
If the batteries in the SmartKey or the
SmartKey with KEYLESS-GO* are dis-
charged, the vehicle can no longer be
locked or unlocked. It is recommended to
have the batteries replaced at an autho-
rized Mercedes-Benz Center.Batteries contain materials that can harm
the environment if disposed of improperly.
Recycling of batteries is the preferred
method of disposal. Many states require
sellers of batteries to accept old batteries
for recycling.SmartKey/SmartKey with
KEYLESS-GO*
Replacement batteries: Lithium, type
CR 2025 or equivalent.�
Remove the mechanical key out of the
SmartKey or the SmartKey with
KEYLESS-GO* (
�page 614).
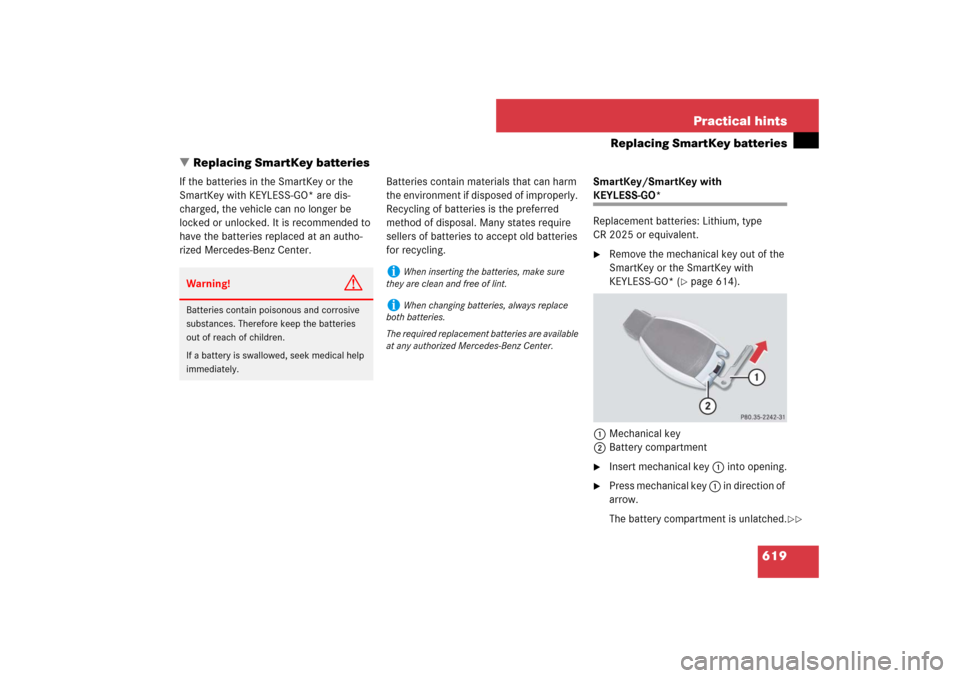
1Mechanical key
2Battery compartment
�
Insert mechanical key 1 into opening.
�
Press mechanical key 1 in direction of
arrow.
The battery compartment is unlatched.
Warning!
G
Batteries contain poisonous and corrosive
substances. Therefore keep the batteries
out of reach of children.
If a battery is swallowed, seek medical help
immediately.
i
When inserting the batteries, make sure
they are clean and free of lint.
i
When changing batteries, always replace
both batteries.
The required replacement batteries are available
at any authorized Mercedes-Benz Center.
��
Page 621 of 705
620 Practical hintsReplacing SmartKey batteries�
Pull battery compartment 2 out of the
housing.
3Batteries
4Contact springs
�
Pull out batteries3.
�
Using a line-free cloth, insert new bat-
teries 3 under contact springs 4 with
the positive terminal (+) side facing up.
�
Return battery compartment 2
(�page 619) into housing until it locks
into place.
�
Slide the mechanical key back into the
SmartKey/SmartKey with
KEYLESS-GO*.
�
Check the operation of the SmartKey/
KEYLESS-GO*.
��
Page 622 of 705
621 Practical hints
Replacing bulbs
�Replacing bulbs
Safe vehicle operation depends on proper
exterior lighting and signaling. It is there-
fore essential that all bulbs and lamp as-
semblies are in good working order at all
times.
Correct headlamp adjustment is extremely
important. Have headlamps checked and
readjusted at regular intervals and when a
bulb has been replaced. See an authorized
Mercedes-Benz Center for headlamp ad-
justment.
i
If the headlamps or front fog lamps are
fogged up on the inside as a result of high humid-
ity, driving the vehicle a distance with the lights
on should clear up the fogging.
i
Substitute bulbs will be brought into use
when the following lamps malfunction:
�
Brake lamps
�
Rear fog lamps
�
Front parking lamps
�
Tail lamps
�
Turn signal lamps
Observe the messages in the multifunction dis-
play (�page 557).
Page 624 of 705
623 Practical hints
Replacing bulbs
Notes on bulb replacement
�
Only use 12-volt-bulbs of the same
type and with the specified watt rating.
�
Switch lights off before changing a bulb
to prevent short circuits.
�
Always use a clean lint-free cloth when
handling bulbs.
�
Your hands should be dry and free of oil
and grease.
�
If the newly installed bulb does not
come on, visit an authorized
Mercedes-Benz Center.
Have the LEDs and bulbs for the following
lamps replaced by an authorized
Mercedes-Benz Center.
�
the Bi-Xenon lamps
�
the front turn signal lamps
�
the front fog lamps
�
the additional turn signal lamps in the
exterior rear view mirrors
�
the parking and standing lamps
�
the front side marker lamps
�
the high mounted brake lamps
�
the brake, tail and rear standing lamps
�
the rear side marker lamps
�
the rear fog lamp
�
the rear turn signal lamps
�
the rear side marker lamps
�
the license plate lamps
Replacing bulbs for front lamps
Before you start to replace a bulb for a
front lamp, do the following first:�
Turn the exterior lamp switch to M
(�page 342).
�
Open the hood (
�page 492) (except
for side marker lamps).
Warning!
G
Keep bulbs out of reach of children.
Bulbs and bulb sockets can be very hot. Al-
low the lamp to cool down before changing
a bulb.
Halogen lamps contain pressurized gas. A
bulb can explode if you:�
touch or move it when hot
�
drop the bulb
�
scratch the bulb
Wear eye and hand protection.
Because of high voltage in Xenon lamps, it is
dangerous to replace the bulb or repair the
lamp and its components. We recommend
that you have such work done by a qualified
technician.
i
Have the headlamp adjustment checked
regularly.
Page 626 of 705
625 Practical hints
Replacing bulbs
High beam flasher lamp
In vehicles with Bi-Xenon headlamps, you
can only change the halogen bulb for the
high-beam flasher lamp.
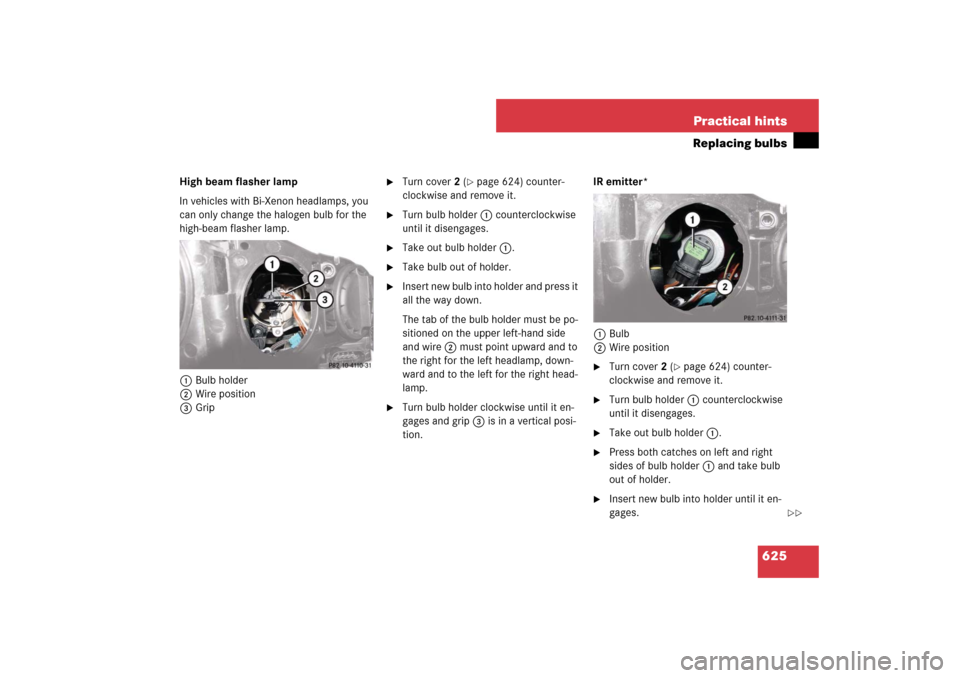
1Bulb holder
2Wire position
3Grip
�
Turn cover2 (
�page 624) counter-
clockwise and remove it.
�
Turn bulb holder1 counterclockwise
until it disengages.
�
Take out bulb holder1.
�
Take bulb out of holder.
�
Insert new bulb into holder and press it
all the way down.
The tab of the bulb holder must be po-
sitioned on the upper left-hand side
and wire2 must point upward and to
the right for the left headlamp, down-
ward and to the left for the right head-
lamp.
�
Turn bulb holder clockwise until it en-
gages and grip3 is in a vertical posi-
tion.IR emitter*
1Bulb
2Wire position
�
Turn cover2 (
�page 624) counter-
clockwise and remove it.
�
Turn bulb holder1 counterclockwise
until it disengages.
�
Take out bulb holder1.
�
Press both catches on left and right
sides of bulb holder1 and take bulb
out of holder.
�
Insert new bulb into holder until it en-
gages.
��
Page 627 of 705
626 Practical hintsReplacing bulbs�
Insert bulb holder1 into guide in
headlamp. Wire2 must point down-
ward and to the right.
�
Turn bulb holder1 clockwise until it
engages and wire2 points downward
and to the left.
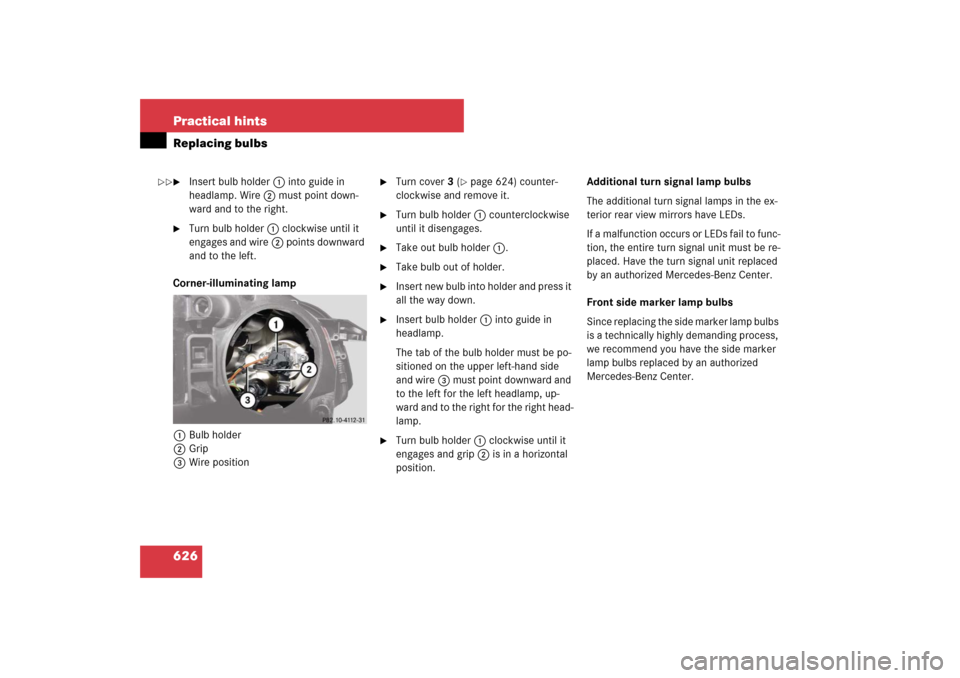
Corner-illuminating lamp
1Bulb holder
2Grip
3Wire position
�
Turn cover3 (
�page 624) counter-
clockwise and remove it.
�
Turn bulb holder1 counterclockwise
until it disengages.
�
Take out bulb holder1.
�
Take bulb out of holder.
�
Insert new bulb into holder and press it
all the way down.
�
Insert bulb holder1 into guide in
headlamp.
The tab of the bulb holder must be po-
sitioned on the upper left-hand side
and wire3 must point downward and
to the left for the left headlamp, up-
ward and to the right for the right head-
lamp.
�
Turn bulb holder1 clockwise until it
engages and grip2 is in a horizontal
position.Additional turn signal lamp bulbs
The additional turn signal lamps in the ex-
terior rear view mirrors have LEDs.
If a malfunction occurs or LEDs fail to func-
tion, the entire turn signal unit must be re-
placed. Have the turn signal unit replaced
by an authorized Mercedes-Benz Center.
Front side marker lamp bulbs
Since replacing the side marker lamp bulbs
is a technically highly demanding process,
we recommend you have the side marker
lamp bulbs replaced by an authorized
Mercedes-Benz Center.
��
Page 628 of 705
627 Practical hints
Replacing wiper blades
�Replacing wiper blades
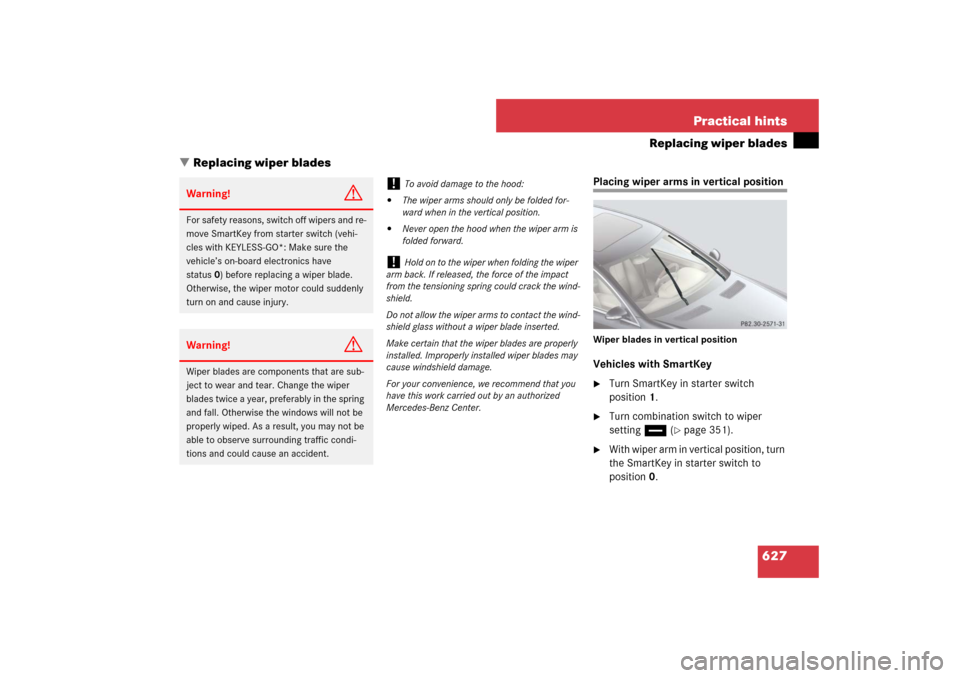
Placing wiper arms in vertical positionWiper blades in vertical positionVehicles with SmartKey�
Turn SmartKey in starter switch
position1.
�
Turn combination switch to wiper
settingu (
�page 351).
�
With wiper arm in vertical position, turn
the SmartKey in starter switch to
position0.
Warning!
G
For safety reasons, switch off wipers and re-
move SmartKey from starter switch (vehi-
cles with KEYLESS-GO*: Make sure the
vehicle’s on-board electronics have
status0) before replacing a wiper blade.
Otherwise, the wiper motor could suddenly
turn on and cause injury. Warning!
G
Wiper blades are components that are sub-
ject to wear and tear. Change the wiper
blades twice a year, preferably in the spring
and fall. Otherwise the windows will not be
properly wiped. As a result, you may not be
able to observe surrounding traffic condi-
tions and could cause an accident.
!
To avoid damage to the hood:
�
The wiper arms should only be folded for-
ward when in the vertical position.
�
Never open the hood when the wiper arm is
folded forward.
!
Hold on to the wiper when folding the wiper
arm back. If released, the force of the impact
from the tensioning spring could crack the wind-
shield.
Do not allow the wiper arms to contact the wind-
shield glass without a wiper blade inserted.
Make certain that the wiper blades are properly
installed. Improperly installed wiper blades may
cause windshield damage.
For your convenience, we recommend that you
have this work carried out by an authorized
Mercedes-Benz Center.