Page 593 of 705

592 Practical hintsWhat to do if …?Display
Possible cause/consequence
Possible solution
Key
not recognized
The SmartKey with KEYLESS-GO* is not
recognized while the engine is running be-
cause the SmartKey with KEYLESS-GO* is
not in the vehicle.
�
Stop the vehicle in a safe location as soon as
it is safe to do so.
�
Search for the SmartKey.
Otherwise the vehicle cannot be centrally
locked nor can the engine be started again
after the engine is stopped.
The SmartKey with KEYLESS-GO* is not
recognized while the engine is running be-
cause there is strong radio-frequency inter-
ference.
�
Stop the vehicle in a safe location as soon as
it is safe to do so.
�
Remove KEYLESS-GO* button from over
starter switch (
�page 316).
�
Operate the vehicle with the SmartKey in the
starter switch.
The SmartKey with KEYLESS-GO* is mo-
mentarily not recognized.
�
Change the position of the SmartKey in the
vehicle.
�
If necessary, operate vehicle using SmartKey
with KEYLESS-GO* in starter switch under
KEYLESS-GO* button (
�page 316).
Page 594 of 705
593 Practical hints
What to do if …?
Display
Possible cause/consequence
Possible solution
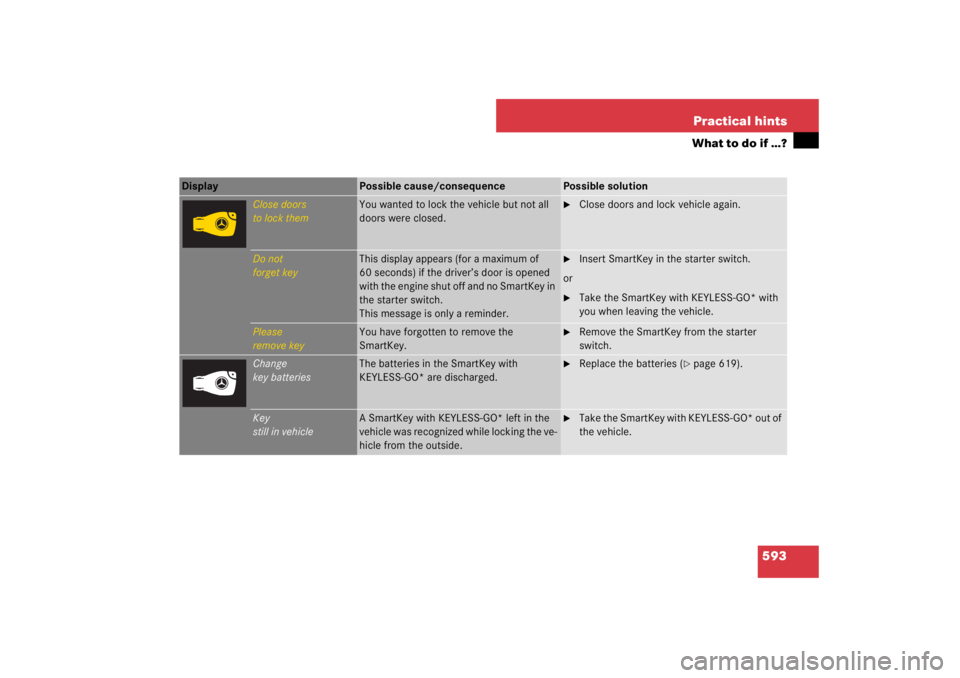
Close doors
to lock them
You wanted to lock the vehicle but not all
doors were closed.
�
Close doors and lock vehicle again.
Do not
forget key
This display appears (for a maximum of
60 seconds) if the driver’s door is opened
with the engine shut off and no SmartKey in
the starter switch.
This message is only a reminder.
�
Insert SmartKey in the starter switch.
or
�
Take the SmartKey with KEYLESS-GO* with
you when leaving the vehicle.
Please
remove key
You have forgotten to remove the
SmartKey.
�
Remove the SmartKey from the starter
switch.
Change
key batteries
The batteries in the SmartKey with
KEYLESS-GO* are discharged.
�
Replace the batteries (
�page 619).
Key
still in vehicle
A SmartKey with KEYLESS-GO* left in the
vehicle was recognized while locking the ve-
hicle from the outside.
�
Take the SmartKey with KEYLESS-GO* out of
the vehicle.
Page 603 of 705
602 Practical hintsWhat to do if …?Display
Possible cause/consequence
Possible solution
Night View Assist
Lights ON or AUTO,
not in R gear
You have tried to switch on Night View As-
sist* but the light switch is not set to *
or B.
In addition, the automatic transmission is in
positionR.
�
Turn the exterior lamp switch to * or
B (
�page 342).
�
Shift the automatic transmission to P, N or D
(�page 367).
Night View Assist
only when
it is dark
You have tried to switch on Night View As-
sist* by daylight.
You can only switch on Night View Assist* when
it is dark.
Engine oil level
Stop vehicle!
Switch engine off
S 600 only:
There is no oil in the engine. There is a dan-
ger of engine damage.
�
Carefully bring the vehicle to a halt as soon
as it is safe to do so in a safe location.
�
Turn off the engine.
�
Add engine oil (
�page 494) and check the
engine oil level (�page 494).
Page 604 of 705
603 Practical hints
What to do if …?
Display
Possible cause/consequence
Possible solution
USA only:
Add 1.0 qts. engine oil
at next refueling
Canada only:
Add 1.0 l engine oil
at next refueling
S 600 only:
The engine oil level is too low.
�
Check the engine oil level (
�page 494) and
add engine oil as required (�page 494).
�
If you must add engine oil frequently, have
the engine checked for possible leaks.
Check engine oil level
at next refueling
S 550 only:
The engine oil level has dropped to approx-
imately the minimum level.
�
Check the engine oil level (
�page 495) and
add engine oil as required (�page 494).
�
If you must add engine oil frequently, have
the engine checked for possible leaks.
Page 605 of 705
 or “Add 1.0 qts.
(Canada:1.0 l) engine oil at next refueling”
(S 600) appears while")
604 Practical hintsWhat to do if …?When the message “Check engine oil level
at next refueling” (S 550) or “Add 1.0 qts.
(Canada:1.0 l) engine oil at next refueling”
(S 600) appears while the engine is run-
ning and at operating temperature, the en-
gine oil level has dropped to approximately
the minimum level.When this occurs, the warning will first
come on intermittently and then stay on if
the oil level drops further.
Visually check for oil leaks. If no obvious oil
leaks are noted, drive to the nearest ser-
vice station where the engine oil should be
topped to the required level with an ap-
proved oil specified in the Factory Ap-
proved Service Products pamphlet.Display
Possible cause/consequence
Possible solution
Engine oil level
cannot be
measured
S 600 only:
The measuring system is malfunctioning.
�
Have the measuring system checked by an
authorized Mercedes-Benz Center.
Engine oil level
Reduce oil level
S 600 only:
You have added too much engine oil.
There is a risk of damaging:�
the engine
�
the catalytic converter
�
Have excess oil siphoned or drained off. Con-
tact an authorized Mercedes-Benz Center.
!
The engine oil level warnings should not be
ignored. Extended driving with the symbol dis-
played could result in serious engine damage
that is not covered by the Mercedes-Benz Limit-
ed Warranty.
Page 611 of 705
610 Practical hintsWhat to do if …?Display
Possible cause/consequence
Possible solution
Shift to 'P'
You have attempted to turn off the engine
with the KEYLESS-GO* start/stop button
and opened the driver’s door with the auto-
matic transmission not shift to positionP.
�
Shift the automatic transmission toP
(�page 367).
or
�
Close the driver’s door.
You are driving with the trunk open.
�
Close the trunk (
�page 437).
Washer fluid,
please refill
The water level has dropped to approx.
1.1 US qts (1.0 l).
�
Add washer fluid (
�page 498).
Page 625 of 705

624 Practical hintsReplacing bulbs1Cover 1
2Cover 2
3Cover 3
Removing and installing washer fluid
reservoir on left-hand side
Vehicles with Airmatic*
You must remove the washer fluid reser-
voir in order to change the bulbs of the
front headlamp on the left-hand side. The
washer fluid reservoir is on the front
left-hand side of the engine compartment.
Washer fluid reservoir (example illustration
from S 550)1Retaining screw
Removing�
Turn retaining screw1 counterclock-
wise.
�
Take washer fluid reservoir out of
mounting.
�
Place washer fluid reservoir to the side
and do not disconnect any wires or ca-
bles.Installing
�
Guide washer fluid reservoir into
mounting so that the bottom retaining
lug slides into the rubber sleeve on the
longitudinal member.
�
Turn retaining screw1 clockwise.
Bi-Xenon headlampsWarning!
G
Do not remove the cover for the Bi-Xenon
headlamp. Because of high voltage in Xenon
lamps, it is dangerous to replace the bulb or
repair the lamp and its components. We rec-
om me n d tha t yo u hav e su ch work don e by a
qualified technician.
Page 629 of 705
628 Practical hintsReplacing wiper bladesVehicles with KEYLESS-GO*�
Turn off the engine (
�page 366).
�
Take foot off brake pedal.
�
Turn combination switch to wiper
settingu (
�page 351).
�
Press KEYLESS-GO start/stop button
(�page 317) repeatedly until wind-
shield wipers start.
�
Press KEYLESS-GO start/stop button
(�page 317) when the wiper arms are
in a vertical position.
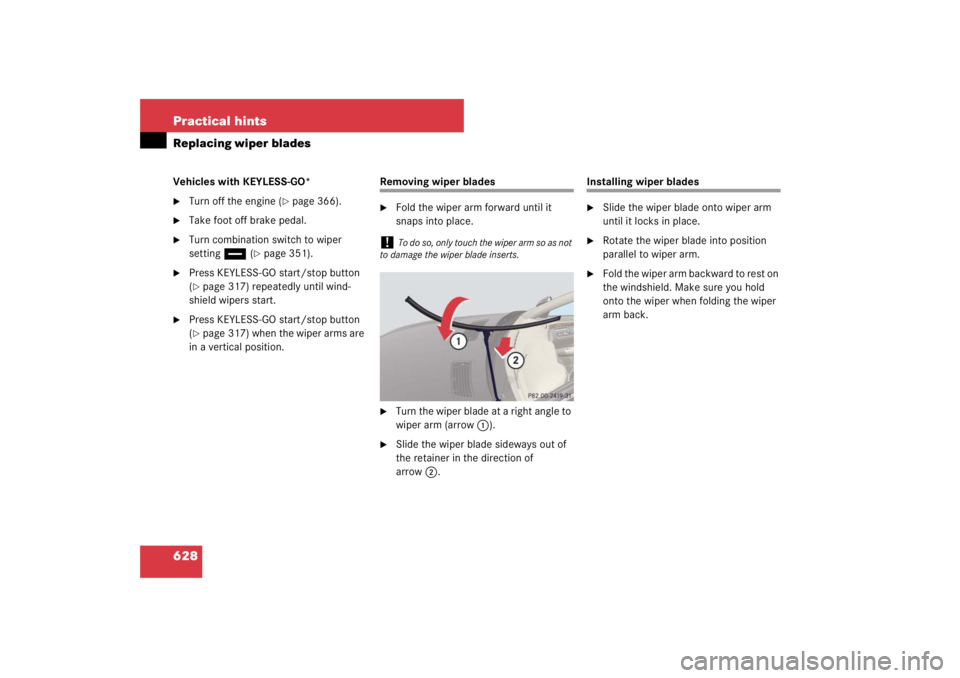
Removing wiper blades�
Fold the wiper arm forward until it
snaps into place.
�
Turn the wiper blade at a right angle to
wiper arm (arrow 1).
�
Slide the wiper blade sideways out of
the retainer in the direction of
arrow2.
Installing wiper blades�
Slide the wiper blade onto wiper arm
until it locks in place.
�
Rotate the wiper blade into position
parallel to wiper arm.
�
Fold the wiper arm backward to rest on
the windshield. Make sure you hold
onto the wiper when folding the wiper
arm back.
!
To do so, only touch the wiper arm so as not
to damage the wiper blade inserts.