Page 169 of 570
168 Controls in detail
Control system
AMG menu
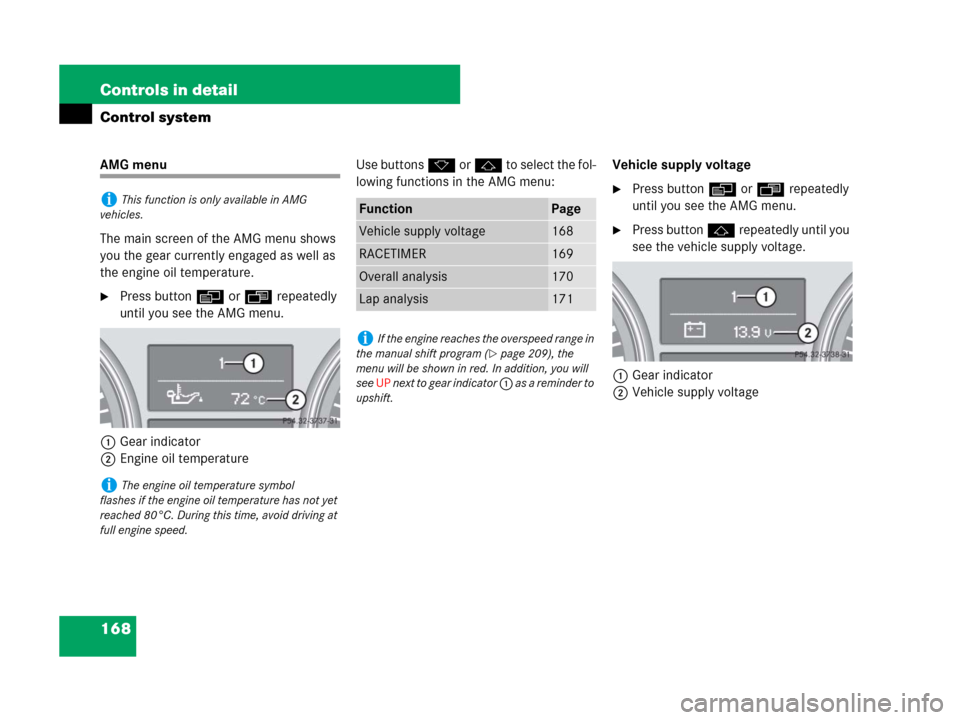
The main screen of the AMG menu shows
you the gear currently engaged as well as
the engine oil temperature.
�Press button è or ÿ repeatedly
until you see the AMG menu.
1Gear indicator
2Engine oil temperatureUse buttons k or j to select the fol-
lowing functions in the AMG menu:Vehicle supply voltage
�Press button è or ÿ repeatedly
until you see the AMG menu.
�Press button j repeatedly until you
see the vehicle supply voltage.
1Gear indicator
2Vehicle supply voltage
iThis function is only available in AMG
vehicles.
iThe engine oil temperature symbol
flashes if the engine oil temperature has not yet
reached 80°C. During this time, avoid driving at
full engine speed.
FunctionPage
Vehicle supply voltage168
RACETIMER169
Overall analysis170
Lap analysis171
iIf the engine reaches the overspeed range in
the manual shift program (
�page 209), the
menu will be shown in red. In addition, you will
see UP next to gear indicator 1 as a reminder to
upshift.
Page 170 of 570
169 Controls in detail
Control system
RACETIMER
The RACETIMER allows you to time and
save driving stretches in hours, minutes
and seconds.�Press button è or ÿ repeatedly
until you see the AMG menu.
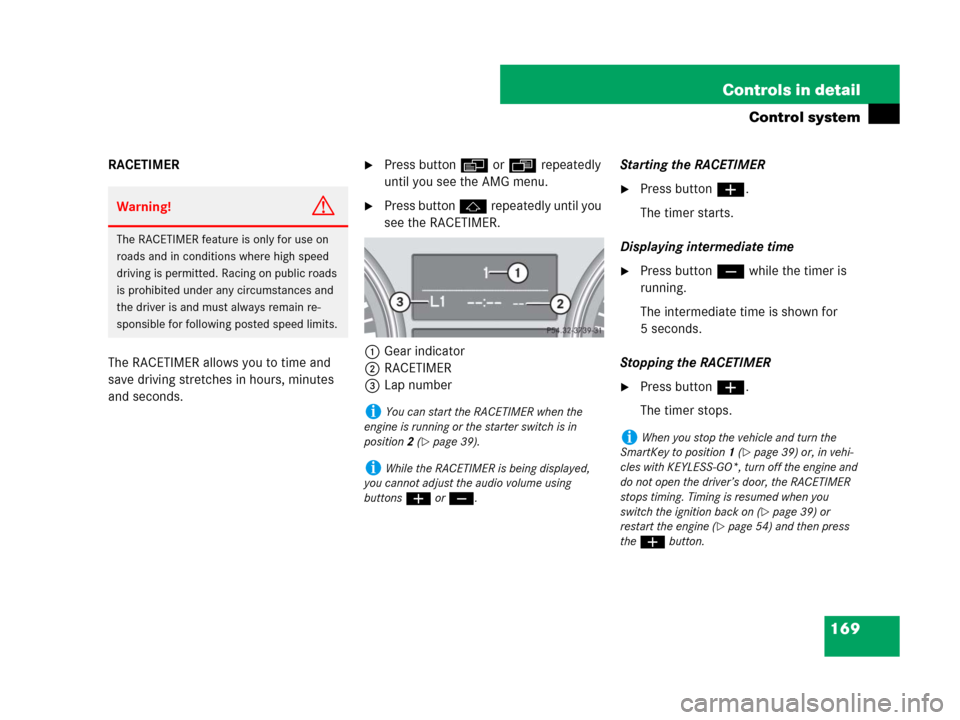
�Press button j repeatedly until you
see the RACETIMER.
1Gear indicator
2RACETIMER
3Lap numberStarting the RACETIMER
�Press button æ.
The timer starts.
Displaying intermediate time
�Press button ç while the timer is
running.
The intermediate time is shown for
5 seconds.
Stopping the RACETIMER
�Press button æ.
The timer stops.
Warning!G
The RACETIMER feature is only for use on
roads and in conditions where high speed
driving is permitted. Racing on public roads
is prohibited under any circumstances and
the driver is and must always remain re-
sponsible for following posted speed limits.
iYou can start the RACETIMER when the
engine is running or the starter switch is in
position2 (
�page 39).
iWhile the RACETIMER is being displayed,
you cannot adjust the audio volume using
buttonsæ or ç.
iWhen you stop the vehicle and turn the
SmartKey to position 1 (
�page 39) or, in vehi-
cles with KEYLESS-GO*, turn off the engine and
do not open the driver’s door, the RACETIMER
stops timing. Timing is resumed when you
switch the ignition back on (
�page 39) or
restart the engine (
�page 54) and then press
the æbutton.
Page 171 of 570
170 Controls in detail
Control system
Saving lap time and starting a new lap
�Press button ç while the timer is
running.
The intermediate time will be shown for
5 seconds.
�Press button ç within 5 seconds.
The intermediate time shown will be
saved as a lap time.
The RACETIMER begins timing the new
lap. The new lap begins to be timed as
soon as the intermediate time is called
up.
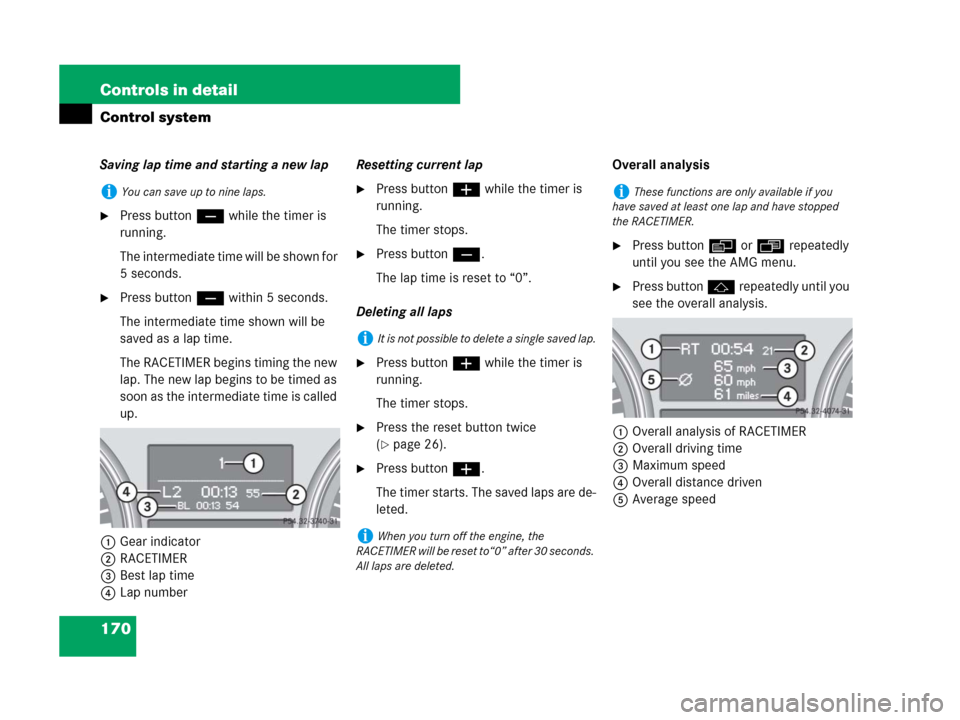
1Gear indicator
2RACETIMER
3Best lap time
4Lap numberResetting current lap
�Press button æ while the timer is
running.
The timer stops.
�Press button ç.
The lap time is reset to “0”.
Deleting all laps
�Press button æ while the timer is
running.
The timer stops.
�Press the reset button twice
(
�page 26).
�Press button æ.
The timer starts. The saved laps are de-
leted.Overall analysis
�Press button è or ÿ repeatedly
until you see the AMG menu.
�Press button j repeatedly until you
see the overall analysis.
1Overall analysis of RACETIMER
2Overall driving time
3Maximum speed
4Overall distance driven
5Average speed
iYou can save up to nine laps.
iIt is not possible to delete a single saved lap.
iWhen you turn off the engine, the
RACETIMER will be reset to“0” after 30 seconds.
All laps are deleted.
iThese functions are only available if you
have saved at least one lap and have stopped
the RACETIMER.
Page 176 of 570

175 Controls in detail
Control system
�Press buttonè orÿ repeatedly
until the vehicle status message
memory appears in the multifunction
display.If conditions have occurred causing status
messages to be recorded, the number of
messages appears in the multifunction
display:
�Press buttonk orj.
The stored messages will now be
displayed in the order in which they
have occurred. For malfunctions and
warning messages, see “Vehicle status
messages in the multifunction display”
(
�page 433).Should the vehicle’s system record any
conditions while driving, the number of
messages will reappear in the multifunc-
tion display
�when the SmartKey in the starter
switch is turned to position0 or
removed from the starter switch
or
�when you turn off the engine by
pressing the KEYLESS-GO* start/stop
button (
�page 67) in the starter
switch once and open the driver’s door
(this puts the starter switch in
position0, same as with the SmartKey
removed from the starter switch)
Warning!G
Malfunction and warning messages are only
indicated for certain systems and are inten-
tionally not very detailed. The malfunction
and warning messages are simply a remind-
er with respect to the operation of certain
systems and do not replace the owner’s
and/or driver’s responsibility to maintain
the vehicle’s operating safety by having all
required maintenance and safety checks
performed on the vehicle and by bringing
the vehicle to an authorized Mercedes-Benz
Light Truck Center to address the malfunc-
tion and warning messages (
�page 433).
iAfter you have scrolled through all recorded
status messages, the first recorded message
appears again.
iThe vehicle status message memory will
be cleared when you turn the SmartKey in the
starter switch to position1 or2, or when you
press the KEYLESS-GO* start/stop button once
or twice without depressing the brake pedal. You
will then only see high priority messages in the
multifunction display (
�page 433).
Page 184 of 570
183 Controls in detail
Control system
Lighting submenu
Access the
Lighting submenu via the
Settings menu. Use the Lighting
submenu to change the lamp and lighting
settings on your vehicle.
The following functions are available:Setting daytime running lamp mode
(USA only)
�Move the selection marker with
buttonæ orç to the
Lighting
submenu.
�Press buttonj ork repeatedly
until the message
Lamp circuit
headlamp
appears in the multifunction
display.
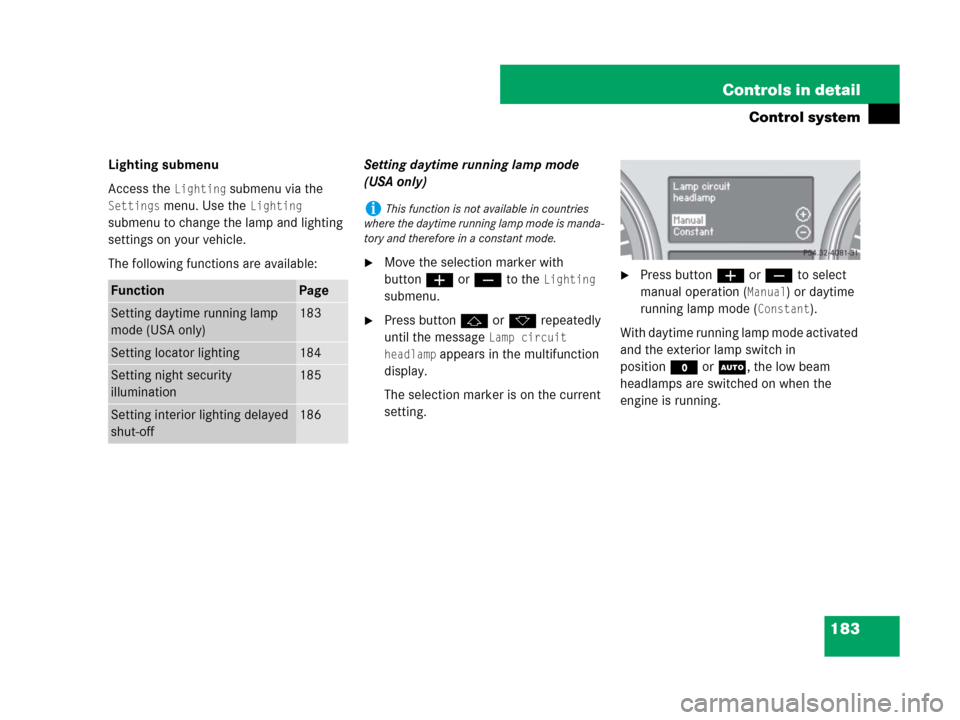
The selection marker is on the current
setting.
�Press buttonæ orç to select
manual operation (
Manual) or daytime
running lamp mode (
Constant).
With daytime running lamp mode activated
and the exterior lamp switch in
positionM orU, the low beam
headlamps are switched on when the
engine is running.
FunctionPage
Setting daytime running lamp
mode (USA only)183
Setting locator lighting184
Setting night security
illumination185
Setting interior lighting delayed
shut-off186
iThis function is not available in countries
where the daytime running lamp mode is manda-
tory and therefore in a constant mode.
Page 186 of 570
185 Controls in detail
Control system
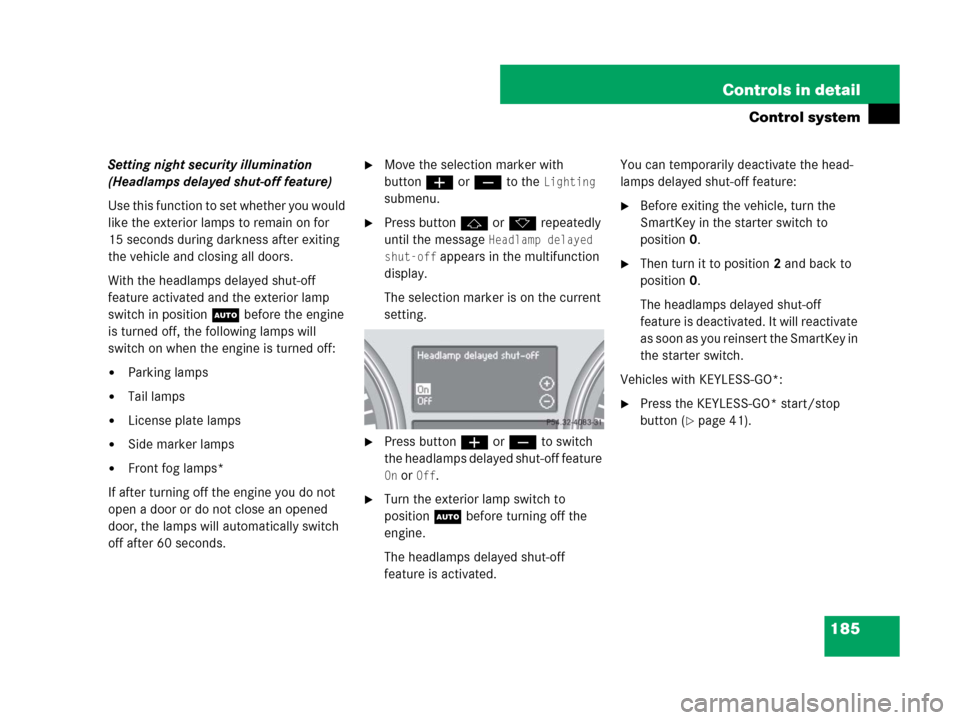
Setting night security illumination
(Headlamps delayed shut-off feature)
Use this function to set whether you would
like the exterior lamps to remain on for
15 seconds during darkness after exiting
the vehicle and closing all doors.
With the headlamps delayed shut-off
feature activated and the exterior lamp
switch in positionU before the engine
is turned off, the following lamps will
switch on when the engine is turned off:
�Parking lamps
�Tail lamps
�License plate lamps
�Side marker lamps
�Front fog lamps*
If after turning off the engine you do not
open a door or do not close an opened
door, the lamps will automatically switch
off after 60 seconds.
�Move the selection marker with
buttonæ orç to the
Lighting
submenu.
�Press buttonj ork repeatedly
until the message
Headlamp delayed
shut-off
appears in the multifunction
display.
The selection marker is on the current
setting.
�Press buttonæ orç to switch
the headlamps delayed shut-off feature
On or Off.
�Turn the exterior lamp switch to
positionU before turning off the
engine.
The headlamps delayed shut-off
feature is activated.You can temporarily deactivate the head-
lamps delayed shut-off feature:
�Before exiting the vehicle, turn the
SmartKey in the starter switch to
position0.
�Then turn it to position2 and back to
position0.
The headlamps delayed shut-off
feature is deactivated. It will reactivate
as soon as you reinsert the SmartKey in
the starter switch.
Vehicles with KEYLESS-GO*:
�Press the KEYLESS-GO* start/stop
button (
�page 41).
Page 188 of 570
187 Controls in detail
Control system
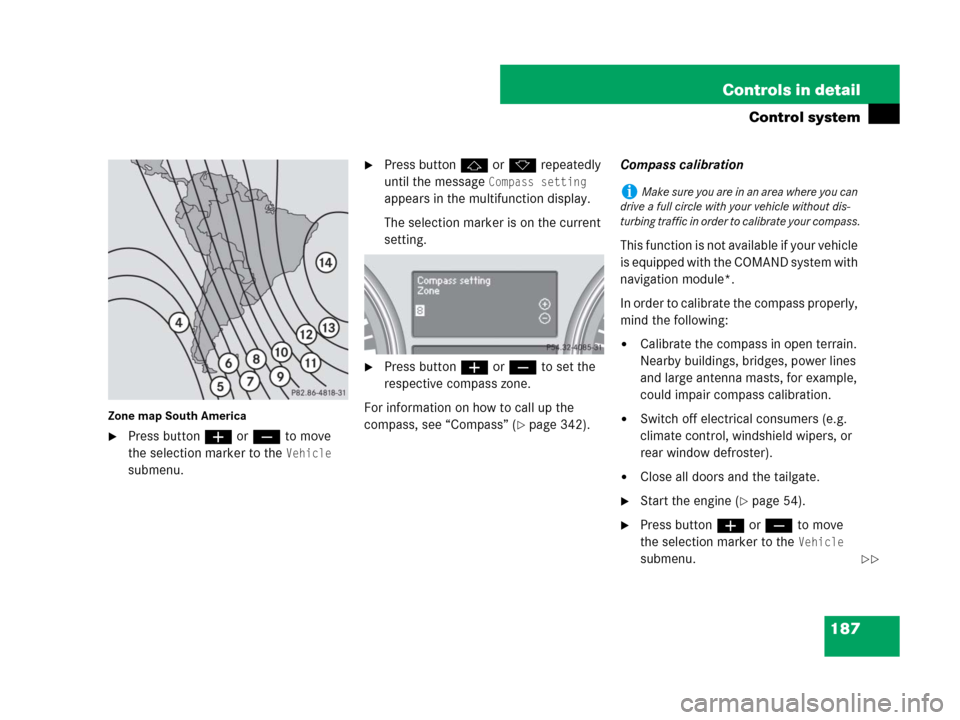
Zone map South America
�Press buttonæ orç to move
the selection marker to the
Vehicle
submenu.
�Press buttonj ork repeatedly
until the message
Compass setting
appears in the multifunction display.
The selection marker is on the current
setting.
�Press buttonæ orç to set the
respective compass zone.
For information on how to call up the
compass, see “Compass” (
�page 342).Compass calibration
This function is not available if your vehicle
is equipped with the COMAND system with
navigation module*.
In order to calibrate the compass properly,
mind the following:
�Calibrate the compass in open terrain.
Nearby buildings, bridges, power lines
and large antenna masts, for example,
could impair compass calibration.
�Switch off electrical consumers (e.g.
climate control, windshield wipers, or
rear window defroster).
�Close all doors and the tailgate.
�Start the engine (�page 54).
�Press buttonæ orç to move
the selection marker to the
Vehicle
submenu.
iMake sure you are in an area where you can
drive a full circle with your vehicle without dis-
turbing traffic in order to calibrate your compass.
��
Page 193 of 570
192 Controls in detail
Control system
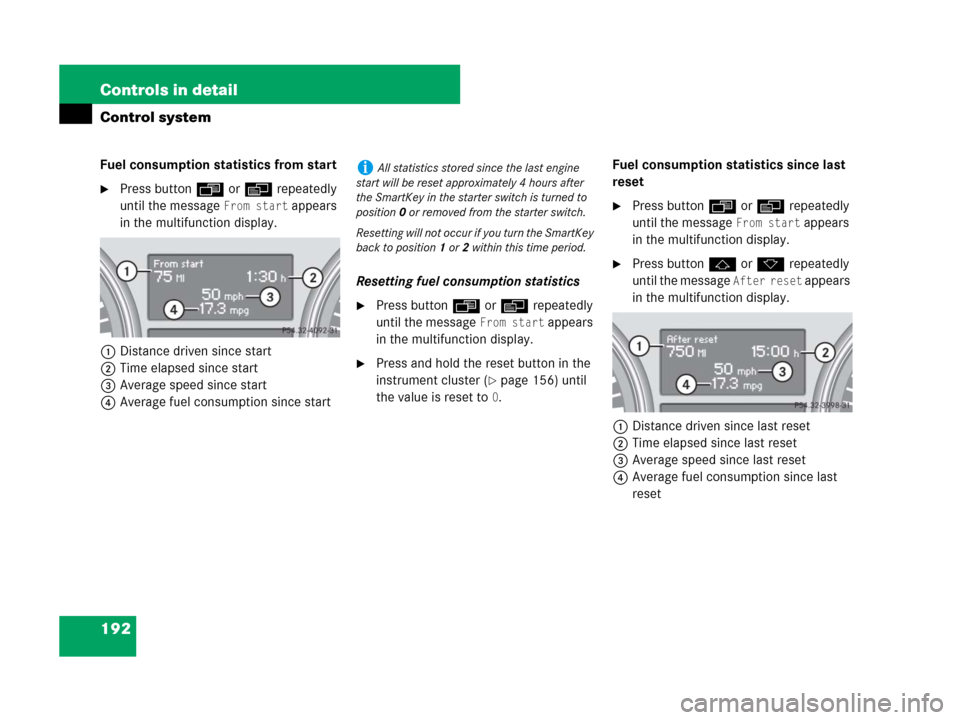
Fuel consumption statistics from start
�Press buttonÿ orè repeatedly
until the message
From start appears
in the multifunction display.
1Distance driven since start
2Time elapsed since start
3Average speed since start
4Average fuel consumption since startResetting fuel consumption statistics
�Press buttonÿ orè repeatedly
until the message
From start appears
in the multifunction display.
�Press and hold the reset button in the
instrument cluster (
�page 156) until
the value is reset to
0.Fuel consumption statistics since last
reset
�Press buttonÿ orè repeatedly
until the message
From start appears
in the multifunction display.
�Press buttonj ork repeatedly
until the message
After reset appears
in the multifunction display.
1Distance driven since last reset
2Time elapsed since last reset
3Average speed since last reset
4Average fuel consumption since last
reset
iAll statistics stored since the last engine
start will be reset approximately 4 hours after
the SmartKey in the starter switch is turned to
position0 or removed from the starter switch.
Resetting will not occur if you turn the SmartKey
back to position1 or2 within this time period.