Page 31 of 242
29 At a glance
Multifunction steering wheel
�Switch the multifunction display to the
respective system if you wish to
operate the system using the buttons
on the multifunction steering wheel.
�On the multifunction steering wheel,
press è or ÿ repeatedly until
one of the following, Radio, Single CD
or MP3 CD, CD changer*, Satellite
radio*, Telephone* or AUX/Rear Seat
Entertainment* display appears in the
multifunction display of the instrument
cluster.Radio operation
1Waveband
2Station frequency
Single CD/ CD changer*operation
1Current CD
2Current trackMP3 CD operation
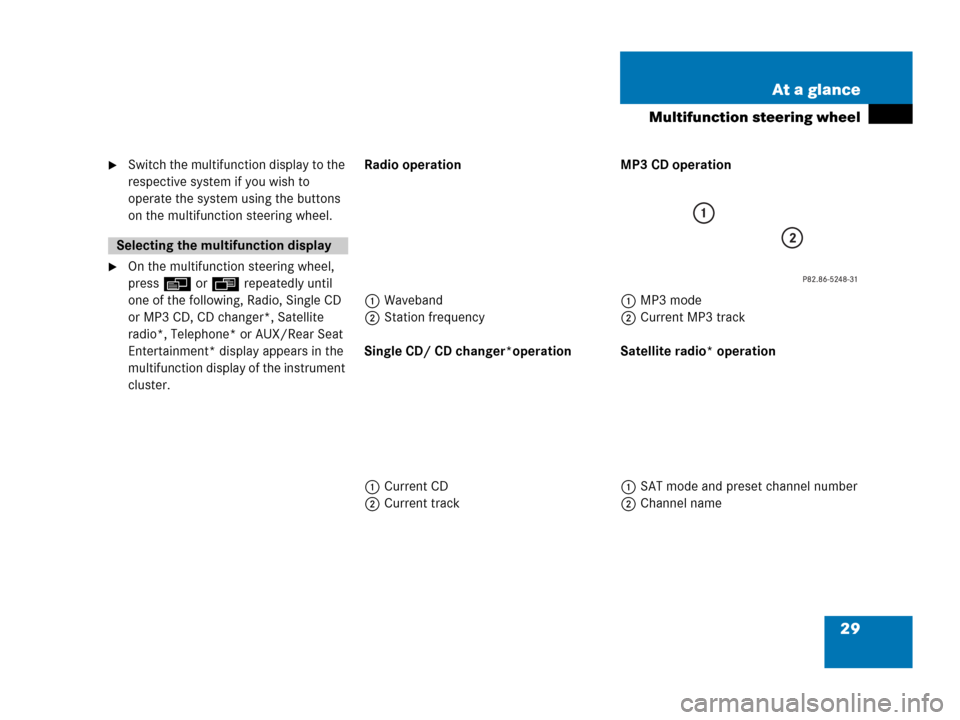
1MP3 mode
2Current MP3 track
Satellite radio* operation
1SAT mode and preset channel number
2Channel name
Selecting the multifunction display
Page 32 of 242

30 At a glance
Multifunction steering wheel
Telephone* operation
List with a phone book entry
On display will appear either:
�the main display with the READY
message
�a list with either a phone book entry or
one of the last 10 outgoing calls
�In order to close the list display,
press t.
This switches to the telephone main
display.AUX or Rear Seat Entertainment*
operation
1AUX mode
This allows you to choose whether the
radio automatic seek tuning function
selects stations via frequency or memory
preset (�page 46).
�frequenc.
The radio will tune by frequency.
�memory
The radio will tune by preset stations.
�On the multifunction steering wheel,
pressè or ÿ repeatedly until
the
Settings... menu appears in
the multifunction display of the
instrument cluster.
�Pressj.
A collection of submenus appears in
the multifunction display.
�Press ç repeatedly to select the
Vehicle submenu.
�Pressj and select Audio search
function
.
�Select frequenc. or memory by
pressing æ or ç.
Audio search functioni
Memory is set as factory setting.
Page 113 of 242
 operation*
Selecting the language
�Turn the thumb wheel to highlight the
Lang. soft key and press to select.
The languages list will appear.
�Press")
111 Rear Audio/Video*
Rear Seat Entertainment (RSE) operation*
Selecting the language
�Turn the thumb wheel to highlight the
Lang. soft key and press to select.
The languages list will appear.
�Press G or g to select the desired
language.
or
�Select Instrument cluster.
The display will use the same language
as is set in instrument cluster.
�Press E.
The setting is applied. The System
menu will appear.Selecting the source of the speakers
If two audio sources (eg audio CD and
AUX 2) are playing back simultaneously,
one at the left monitor the other at the
right monitor, you can select which source
can be played through the vehicle
speakers via the COMAND AUX channel.
At the COMAND, you can set the volume,
bass and treble, balance and fader and
sound functions* (
�page 82).
�Turn the thumb wheel to highlight the
Speaker soft key and press to select.
�Press G or g to select Left
source
or Right source.
�Press E.
The setting is applied. The System
menu will appear.RSE is set to playback
�At the COMAND open the Audio menu
(
�page 42).
�Press the AUX soft key.
Playback begins.
�Press during playback (CD or
MP3 CD mode, DVD mode).
The respective operation is muted and
theß symbol is displayed in the status
bar of the corresponding main menu.
�Press again.
Playback will resume.
The ß disappears from the status bar.
RSE audio playback through
speakers
Muting on/off
Page 173 of 242

171 Navigation*
Destination input
To cancel the compass screen in vehicles
with Navigation
�Press any soft key, then press the Back
soft key.
or
�Press b or c.
To cancel the Compass screen in vehicles
without Navigation
�Press the A, B, a or C
buttons.Compass screen
1Pointer shows the steering angle on a
half circle scale in degrees
2Steering icon shows the position of the
vehicle wheels
3Dynamic compass displays the driving
direction at the top of the screen, the
white arrow always points to North
If your vehicle is equipped with Navigation
4Height indication, the scale scrolls as
the the vehicle's altitude changes
5Status bar shows GPS coordinates,
height above sea level and the number
of currently received satellites
i
Compass screen is activated during
route guidance:
COMAND continues to provide route
guidance via voice instructions
(
�page 174). The Navigation screens
are visible in the instrument cluster
multifunction display.
i
Keep in mind, steering angle 1 and the
steering icon 2 are approximations.
Page 174 of 242
172 Navigation*
Destination input
Additional information for 1, 3 and 4
IndicationRemarks and
value range
1 Steering angle Pointer shows to the
left
-35° to 0°
Pointer shows to the
right
0° to +35°
3 Dynamic
compass card 0° to 360°
4 Height above
the sea level i
The white indicator
is fixed, the scale
scrolls as vehicle
altitude changes
Scale range:
The display unit is
set to miles
-328 ft to 19680 ft
The display unit is
set to km
-100 m to 6000 m
IndicationRemarks and
value rangei
Using the control system, the display
unit can be changed between km or
miles (see your vehicle’s Operator’s
Manual).
�When the instrument cluster
multifunction display is set to miles,
the COMAND will indicate
distances in miles (mi) or feet (ft)
�When the instrument cluster
multifunction display is set to
kilometers, the COMAND will
indicate distances in kilometers
(km) or meters (m)
Page 177 of 242

175 Navigation*
Route guidance
The navigation displays are only visible
while route guidance is active.
To switch to the navigation display from
another display, e.g. from CD operation:
�Press b or c.
Two examples are shown below:
Display example 1:The road you are currently driving on is
shown on the status bar, in this case
EAST I-90. The indication 571 mi is the
distance to the next driving maneuver.Important map symbols:�Current vehicle location and direction
of travel y
If the map orientation
Heading Up
(�page 193) is chosen, the arrow will
always point upward.
�The remaining route section is
highlighted in blue color.
Navigation displays
i
Using the control system, the display
unit can be changed between km or
miles (see your vehicle’s Operator’s
Manual).
�When the instrument cluster
multifunction display is set to miles,
the COMAND will indicate
distances in miles (mi) or feet (ft)
�When the instrument cluster
multifunction display is set to
kilometers, the COMAND will
indicate distances in kilometers
(km) or meters (m)
i
The colored highlight only appears
when the system has completed the
route calculation.
Page 178 of 242

176 Navigation*
Route guidance
Display example 2:
1Current vehicle location and direction
of travel y, remaining route section
2Name of the road you are to turn onto
3Symbol for the next driving maneuver,
distance bar and distance to the next
driving maneuver
4The road you are currently driving on
In the right half of the display, the symbol
for the next driving maneuver is indicated
(here: right turn).On the very right side of the display next to
the turn symbol is the distance bar. It
indicates the distance to the next driving
maneuver (here: 800 ft).
The status bar shows the name of the
street after the driving maneuver, if
available, here:
MAIN ST
The destination is marked with a flag $ on
the map, an intermediate destination is
marked with a flag showing the letter
S.
i
If full view of map is displayed:
Status bar 4 indicates one of the
following depending on which option is
selected in the Display in Map screen
(
�page 194)
�the estimated time of arrival and
the distance to destination
�GPS coordinates of the current
position or
�the road you are currently driving
on
i
Using the control system, the display
unit can be changed between km or
miles (see your vehicle’s Operator’s
Manual).
�When the instrument cluster
multifunction display is set to miles,
the COMAND will indicate
distances in miles (mi) or feet (ft)
�When the instrument cluster
multifunction display is set to
kilometers, the COMAND will
indicate distances in kilometers
(km) or meters (m)
Page 224 of 242
222 System settings
System settings
�Select Instr. cluster setting.
COMAND will use the same language
as is set in instrument cluster.
or
�Push the joystick to g or G to
select the desired language.
�Press E.
The System settings menu will appear
with the display text in the language
selected.
�In the System settings menu, press the
Tones soft key.
The Tones menu will appear.
�Push the joystick to g or G to
select an entry.
�Press E.
The respective tones are activated or
deactivated. You hear the tone when
you activate it.
�Press the Back soft key.
The System settings menu will appear.
The setting is saved.
Switching verification and
notification tones on and off
OptionSymbol
Tone activatedQ
Tone deactivatedq