Page 496 of 595
495 Practical hints
Where will I find ...?
�Where will I find ...?
First aid kit
The first aid kit is located on the driver’s
side in the cargo compartment behind the
cover.
1Lock
2Cover in left side trim panel
�Turn lock1 90° in direction of arrow.
�Fold down cover2.
The first aid kit can be removed.
Vehicle tool kit
The vehicle tool kit is stored under the
cargo compartment floor.
The vehicle tool kit includes:
�Towing eye bolt
�Wheel wrench
�Alignment bolt
�Vehicle jack
�Fuse chart
�Spare fuses
�Fuse extractor
�Collapsible wheel chock
�Wheel bolts for spare wheel1Cargo compartment floor, lowered
2Handle cover
�Open the tailgate (�page 124).
�Push in handle cover2 as indicated
by arrow and pull handle.
�Lift cargo compartment floor1.
iCheck expiration dates and contents for
completeness at least once a year and replace
missing/expired items.
��
Page 497 of 595
496 Practical hints
Where will I find ...?
3Securing hook
�Release securing hook3 (located be-
low the floor handle) from holder.3Securing hook
4Cargo compartment floor, raised
5Upper cargo compartment lip
�Engage securing hook3 on upper
cargo compartment lip5.
You can now access the vehicle tool kit. To
remove the vehicle tool kit storage well
casing, proceed as described on
(
�page 499).6Alignment bolt
7Towing eye bolt
8Wheel wrench
9Velcro strap
aVehicle jack
bWheel bolts for 18" light alloy rims or
Minispare wheel
cCollapsible wheel chock
dSpare fuses, fuse chart, fuse extractor
eVehicle tool kit storage well casing
�To remove vehicle jacka, loosen vel-
cro strap9.
!With the cargo compartment cover blind
installed behind the third-row seats
(
�page 312), disengage cargo compartment
cover blind and flip it forward. Otherwise the
strap of the securing hook could damage the
cargo compartment cover blind.
��
Page 527 of 595
526 Practical hints
Flat tire
Removing the wheel
1Alignment bolt
�Unscrew upper-most wheel bolt and
remove it.
�Replace this wheel bolt with alignment
bolt1 supplied with the tool kit
(
�page 495).
�Remove the remaining bolts.
�Remove the wheel.Mounting the new wheel
1Wheel bolt for 19" and 20" light alloy
wheels
2Wheel bolt for Minispare wheel (locat-
ed in vehicle tool kit (
�page 495))
�Clean contact surfaces of wheel and
wheel hub.
Warning!G
The jack is intended only for lifting the
vehicle briefly for wheel changes. It is not
suited for performing maintenance work
under the vehicle.
�Never start the engine when the vehicle
is raised.
�Never lie down under the raised vehicle.
!Do not place wheel bolts in sand or dirt. This
could result in damage to the bolts and wheel
hub threads.
!Wheel bolts2 must be used when mount-
ing the Minispare wheel. The use of any wheel
bolts other than wheel bolts2 for the Minispare
wheel will damage the vehicle’s brakes.
��
Page 528 of 595

527 Practical hints
Flat tire
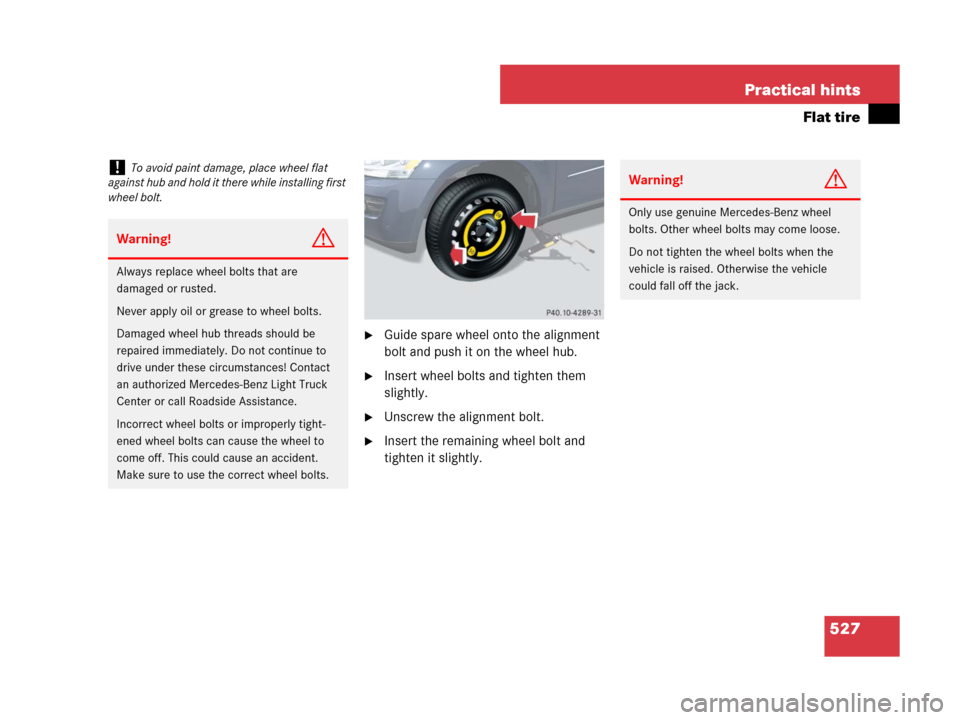
�Guide spare wheel onto the alignment
bolt and push it on the wheel hub.
�Insert wheel bolts and tighten them
slightly.
�Unscrew the alignment bolt.
�Insert the remaining wheel bolt and
tighten it slightly.
!To avoid paint damage, place wheel flat
against hub and hold it there while installing first
wheel bolt.
Warning!G
Always replace wheel bolts that are
damaged or rusted.
Never apply oil or grease to wheel bolts.
Damaged wheel hub threads should be
repaired immediately. Do not continue to
drive under these circumstances! Contact
an authorized Mercedes-Benz Light Truck
Center or call Roadside Assistance.
Incorrect wheel bolts or improperly tight-
ened wheel bolts can cause the wheel to
come off. This could cause an accident.
Make sure to use the correct wheel bolts.
Warning!G
Only use genuine Mercedes-Benz wheel
bolts. Other wheel bolts may come loose.
Do not tighten the wheel bolts when the
vehicle is raised. Otherwise the vehicle
could fall off the jack.
Page 544 of 595
543 Practical hints
Towing the vehicle
Installing cover
�Engage cover1 at top and press at
bottom.
Stranded vehicle
Freeing a stranded vehicle, on which the
wheels are dug into sand or mud, should
be done with the greatest of care, especial-
ly if the vehicle is heavily loaded.
Avoid pulling the vehicle abruptly or diago-
nally, since it could result in damage to the
chassis alignment.
Never try to free a vehicle that is still cou-
pled to a trailer.
If possible, a vehicle equipped with trailer
hitch receiver should be pulled backward
in its own previously made tracks.