Page 283 of 595

282 Controls in detail
Driving systems
The parked vehicle begins adjusting to the
set vehicle level as soon the doors and tail-
gate are
�unlocked
or
�opened or closed with the vehicle
unlocked
In order to operate the vehicle level control
switch (
�page 283), however, the engine
must be running.
For information on off-road driving, see
“Off-road driving” (
�page 357).
Warning!G
Make sure that no one is near the wheel
housing or under the vehicle when you lower
the vehicle while it is standing still. Limbs
could become wedged into or under the ve-
hicle.
For safety reasons, the vehicle can only be
lowered with all doors and the tailgate
closed. Lowering is interrupted if a door or
the tailgate is opened and will continue after
the door is closed again.
Warning!G
Please be aware that by raising the vehicle
level, the center of gravity also rises. There-
fore, always ensure that the vehicle level is
as low as possible. With higher ride height
the ESP
® may activate earlier in certain
situations.
Adapt your speed and driving to possible
changed driving behavior of the vehicle after
changing the vehicle level. The ESP
® cannot
prevent accidents, including those resulting
from excessive speed. The ESP
® cannot pre-
vent the natural laws of physics from acting
on the vehicle.
!Keep in mind that in rough or uneven ter-
rain, adjusting the vehicle to a lower level may
cause the vehicle underbody to come in contact
with the ground and result in damage to the vehi-
cle underbody. Always make sure the vehicle has
sufficient ground clearance before adjusting it to
a lower level.
!Before jacking up the vehicle with equip-
ment that lifts one or more of the wheels com-
pletely off of the ground, remove the SmartKey
from the starter switch.
!Please also note the information in the sec-
tion on towing (
�page 540).
Page 498 of 595

497 Practical hints
Where will I find ...?
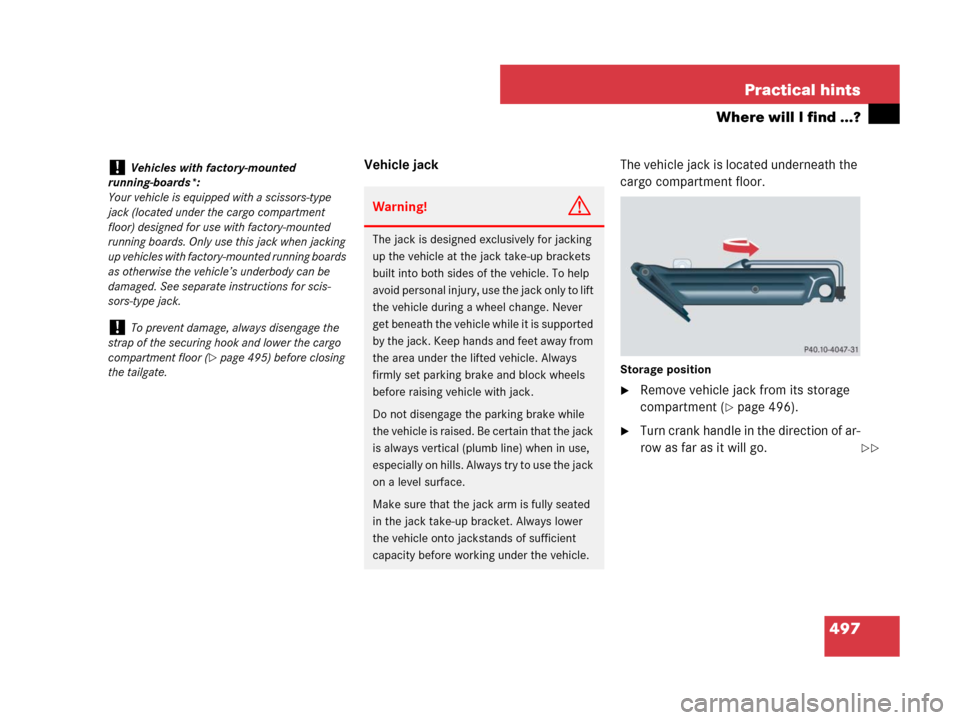
Vehicle jackThe vehicle jack is located underneath the
cargo compartment floor.
Storage position
�Remove vehicle jack from its storage
compartment (
�page 496).
�Turn crank handle in the direction of ar-
row as far as it will go.
!Vehicles with factory-mounted
running-boards*:
Your vehicle is equipped with a scissors-type
jack (located under the cargo compartment
floor) designed for use with factory-mounted
running boards. Only use this jack when jacking
up vehicles with factory-mounted running boards
as otherwise the vehicle’s underbody can be
damaged. See separate instructions for scis-
sors-type jack.
!To prevent damage, always disengage the
strap of the securing hook and lower the cargo
compartment floor (
�page 495) before closing
the tailgate.
Warning!G
The jack is designed exclusively for jacking
up the vehicle at the jack take-up brackets
built into both sides of the vehicle. To help
avoid personal injury, use the jack only to lift
the vehicle during a wheel change. Never
get beneath the vehicle while it is supported
by the jack. Keep hands and feet away from
the area under the lifted vehicle. Always
firmly set parking brake and block wheels
before raising vehicle with jack.
Do not disengage the parking brake while
the vehicle is raised. Be certain that the jack
is always vertical (plumb line) when in use,
especially on hills. Always try to use the jack
on a level surface.
Make sure that the jack arm is fully seated
in the jack take-up bracket. Always lower
the vehicle onto jackstands of sufficient
capacity before working under the vehicle.
��
Page 525 of 595

524 Practical hints
Flat tire
Mounting the spare wheel
Preparing the vehicle
�Prepare the vehicle as described
(
�page 523).
�Take the wheel wrench, the collapsible
wheel chock, and the vehicle jack out
of the cargo compartment
(
�page 495).
�Take the Minispare wheel out of the
cargo compartment (
�page 499).Lifting the vehicle
�Prevent the vehicle from rolling away
by blocking wheels with wheel chocks
or other sizeable objects.
One collapsible wheel chock is includ-
ed with the vehicle tool kit
(
�page 495). For information on set-
ting up the collapsible wheel chock,
see (
�page 498).
When changing wheel on a level surface:
�Place one wheel chock in front of and
another sizeable object behind the
wheel that is diagonally opposite to the
wheel being changed.
Always try lifting the vehicle using the jack
on a level surface. However, should
circumstances require you to do so on a
hill, place the wheel chock and another
sizeable object as follows:
�Place the wheel chock and another
sizeable object on the downhill side
blocking both wheels of the axle not
being worked on.
!Vehicles with factory-mounted
running-boards*:
Your vehicle is equipped with a scissors-type
jack (located under the cargo compartment
floor) designed for use with factory-mounted
running boards. Only use this jack when jacking
up vehicles with factory-mounted running boards
as otherwise the vehicle’s underbody can be
damaged. See separate instructions for
scissors-type jack.
Warning!G
The jack is designed exclusively for jacking
up the vehicle at the jack take-up brackets
built into both sides of the vehicle. To help
avoid personal injury, use the jack only to lift
the vehicle during a wheel change. Never
get beneath the vehicle while it is supported
by the jack. Keep hands and feet away from
the area under the lifted vehicle. Always
firmly set parking brake and block wheels
before raising vehicle with jack.
Do not disengage parking brake while the
vehicle is raised. Be certain that the jack is
always vertical (plumb line) when in use,
especially on hills. Always try to use the jack
on level surface. Make sure that the jack
arm is fully seated in the jack take-up brack-
et. Always lower the vehicle onto sufficient
capacity jackstands before working under
the vehicle.
Page 526 of 595

525 Practical hints
Flat tire
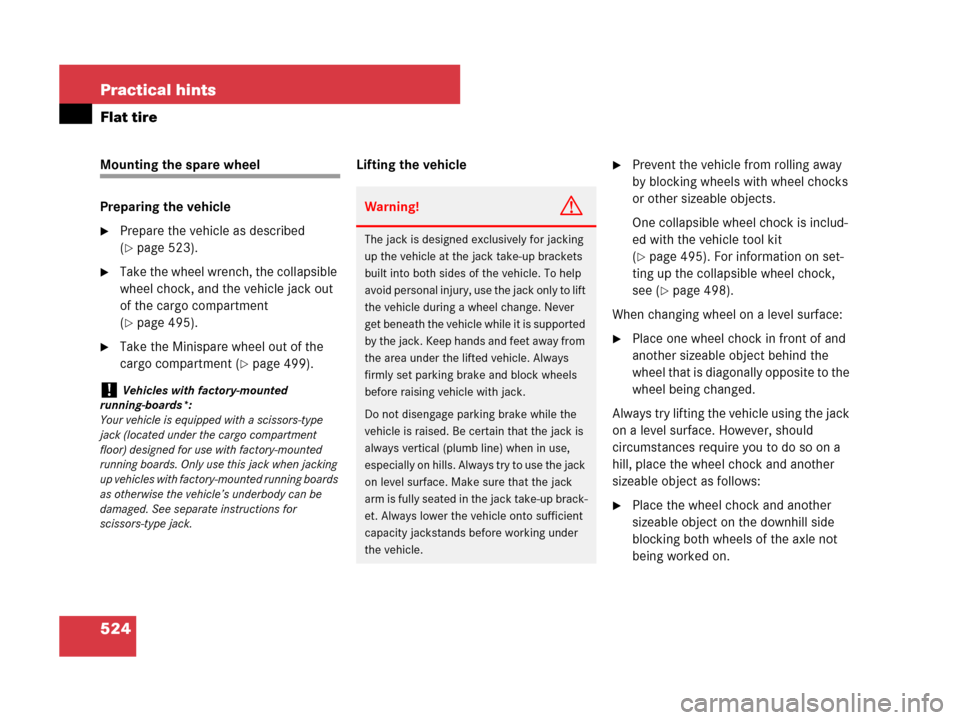
1Wheel wrench
�On whee l to b e c hang ed, l oose n but d o
not yet remove the wheel bolts
(approximately one full turn with wheel
wrench1).
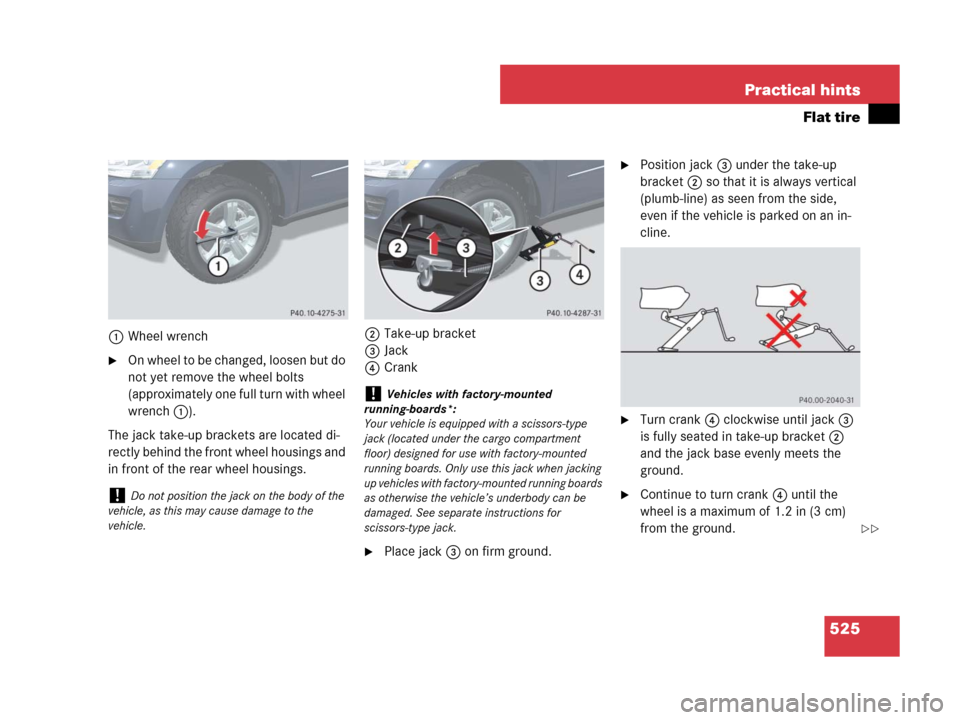
The jack take-up brackets are located di-
rectly behind the front wheel housings and
in front of the rear wheel housings.2Take-up bracket
3Jack
4Crank
�Place jack3 on firm ground.
�Position jack3 under the take-up
bracket2 so that it is always vertical
(plumb-line) as seen from the side,
even if the vehicle is parked on an in-
cline.
�Turn crank4 clockwise until jack3
is fully seated in take-up bracket2
and the jack base evenly meets the
ground.
�Continue to turn crank4 until the
wheel is a maximum of 1.2 in (3 cm)
from the ground.!Do not position the jack on the body of the
vehicle, as this may cause damage to the
vehicle.
!Vehicles with factory-mounted
running-boards*:
Your vehicle is equipped with a scissors-type
jack (located under the cargo compartment
floor) designed for use with factory-mounted
running boards. Only use this jack when jacking
up vehicles with factory-mounted running boards
as otherwise the vehicle’s underbody can be
damaged. See separate instructions for
scissors-type jack.
��