Page 153 of 595

152 Controls in detail
Lighting
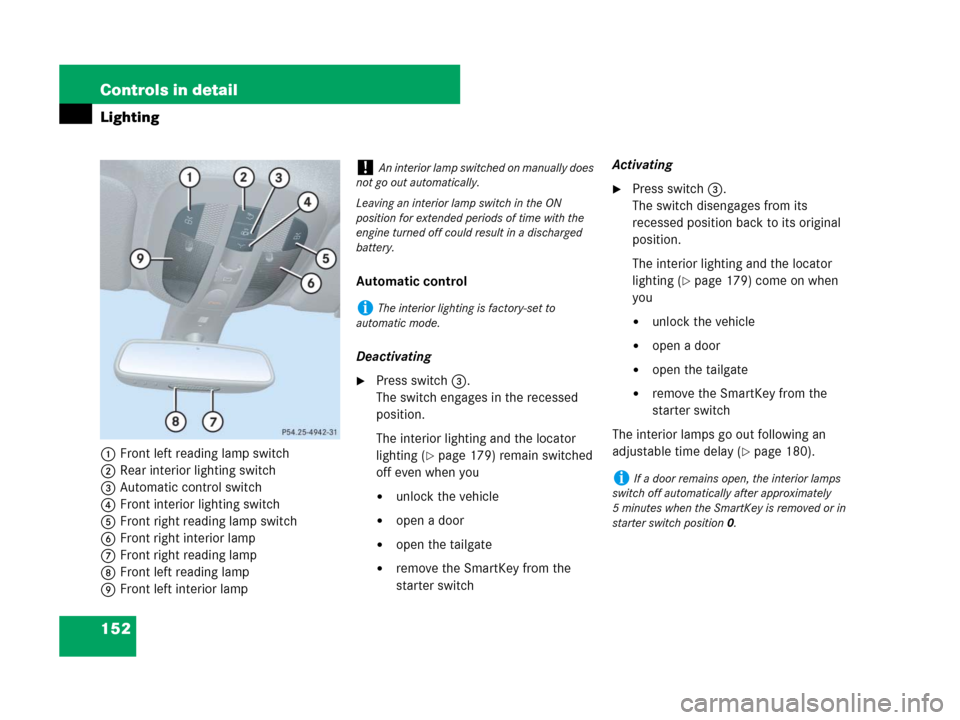
1Front left reading lamp switch
2Rear interior lighting switch
3Automatic control switch
4Front interior lighting switch
5Front right reading lamp switch
6Front right interior lamp
7Front right reading lamp
8Front left reading lamp
9Front left interior lampAutomatic control
Deactivating
�Press switch3.
The switch engages in the recessed
position.
The interior lighting and the locator
lighting (
�page 179) remain switched
off even when you
�unlock the vehicle
�open a door
�open the tailgate
�remove the SmartKey from the
starter switchActivating
�Press switch3.
The switch disengages from its
recessed position back to its original
position.
The interior lighting and the locator
lighting (
�page 179) come on when
you
�unlock the vehicle
�open a door
�open the tailgate
�remove the SmartKey from the
starter switch
The interior lamps go out following an
adjustable time delay (
�page 180).
!An interior lamp switched on manually does
not go out automatically.
Leaving an interior lamp switch in the ON
position for extended periods of time with the
engine turned off could result in a discharged
battery.
iThe interior lighting is factory-set to
automatic mode.
iIf a door remains open, the interior lamps
switch off automatically after approximately
5 minutes when the SmartKey is removed or in
starter switch position0.
Page 155 of 595
154 Controls in detail
Lighting
�Press rear reading lamp switch1
or2 to switch on the respective rear
reading lamp.
�Press rear reading lamp switch1
or2 again to switch off the respective
rear reading lamp.
Door entry lamps
For better orientation in the dark, the
corresponding door entry lamps comes on
when you open a door and the automatic
control is activated.
The door entry lamps will switch off when
the corresponding door is closed.Cargo compartment lamp
The cargo compartment lamp comes on
when the tailgate is opened.
If you leave the tailgate open for an extend-
ed period of time, the cargo compartment
lamp will switch off automatically after ap-
proximately 5 minutes.
iThe rear interior lighting is switched on and
off using the button on the front overhead con-
trol panel (
�page 151).iIf you turn the SmartKey in the starter
switch to position0 or remove the SmartKey
from the starter switch, the door entry lamps will
remain lit for approximately 5 minutes.
Page 174 of 595
173 Controls in detail
Control system
The table below shows what settings can
be changed within the various menus.
Detailed instructions on making individual
settings can be found on the following
pages.
INSTRUMENT CLUSTERTIME/DATELIGHTINGVEHICLECOMFORT*
(�page 174)(�page 176)(�page 178)(�page 181)(�page 184)
Selecting speedometer
display modeSetting the time (hours)Setting daytime running
lamp mode (USA only)Compass adjustmentActivating
easy-entry/exit fea-
ture*
Selecting languageSetting the time (minutes)Setting locator lightingCompass calibrationSetting fold-in func-
tion* for exterior rear
view mirrors
Selecting display (digital
speedometer or outside
temperature) for status in-
dicatorSetting the date (month)Setting night security
illuminationAudio search function
Setting the date (day)Setting interior lighting de-
layed shut-offSetting automatic
locking
Setting the date (year)Limiting opening
height of tailgate*
Page 182 of 595
181 Controls in detail
Control system
Vehicle submenu
Access the
Vehicle submenu via the
Settings menu. Use the Vehicle submenu
to make general vehicle settings.
The following functions are available:Compass adjustment
This function is not available if your vehicle
is equipped with the COMAND system and
navigation module*.
Determine your location on the basis of the
following zone maps.
Zone map North AmericaZone map South America
�Press buttonæ orç to move
the selection marker to the
Vehicle
submenu.
FunctionPage
Compass adjustment181
Compass calibration182
Audio search function183
Setting automatic locking183
Limiting opening height of
tailgate*184
��
Page 183 of 595

182 Controls in detail
Control system
�Press buttonj ork repeatedly
until the message
Compass setting
Zone
appears in the multifunction
display.
The selection marker is on the current
setting.
�Press buttonæ orç to set the
respective compass zone.
For information on how to call up the
compass, see “Compass” (
�page 345).Compass calibration
This function is not available if your vehicle
is equipped with the COMAND system and
navigation module*.
In order to calibrate the compass properly,
mind the following:
�Calibrate the compass in open terrain.
Nearby buildings, bridges, power lines
and large antenna masts, for example,
could impair compass calibration.
�Switch off electrical consumers (e.g.
climate control, windshield wipers, or
rear window defroster).
�Close all doors and the tailgate.
�Start the engine (�page 57).
�Press buttonæ orç to move
the selection marker to the
Vehicle
submenu.
�Press buttonj ork repeatedly
until the message
Compass Calibration appears in the
multifunction display.
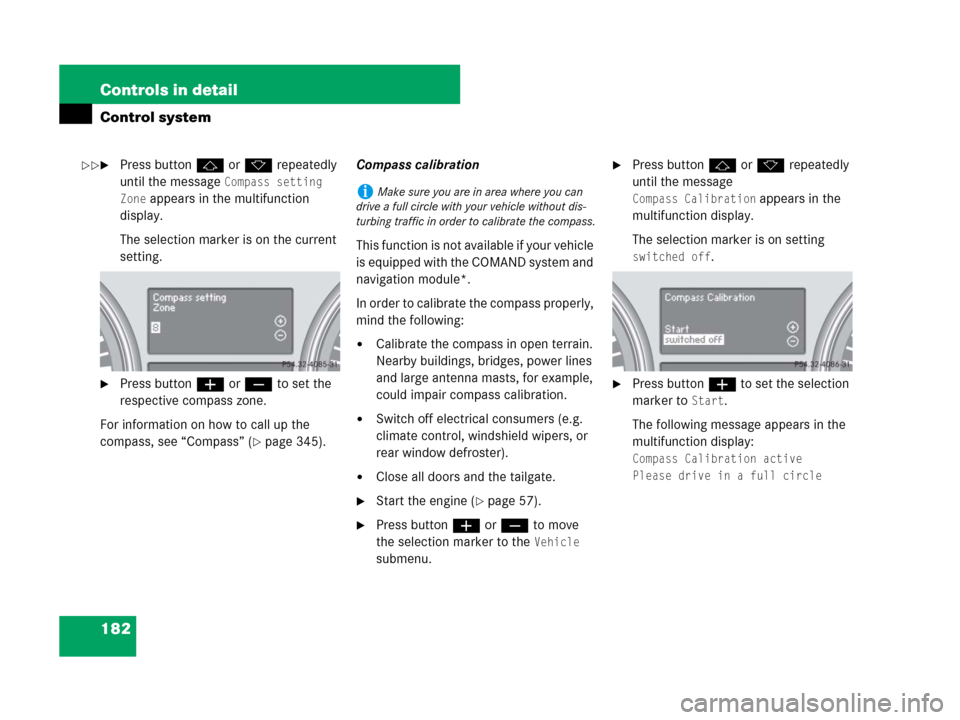
The selection marker is on setting
switched off.
�Press buttonæ to set the selection
marker to
Start.
The following message appears in the
multifunction display:
Compass Calibration active
Please drive in a full circle
iMake sure you are in area where you can
drive a full circle with your vehicle without dis-
turbing traffic in order to calibrate the compass.
��
Page 185 of 595

184 Controls in detail
Control system
Limiting opening height of tailgate*
Use this function to activate or deactivate
the limiting opening height of the tailgate.
�Move the selection marker with
buttonæ orç to the
Vehicle
submenu.
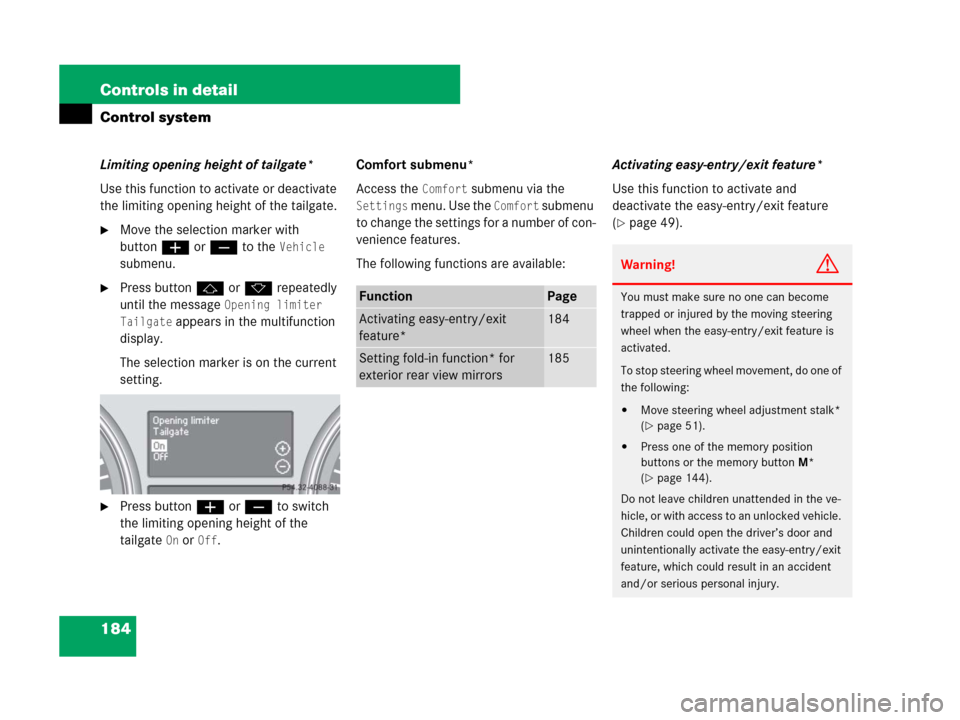
�Press buttonj ork repeatedly
until the message
Opening limiter
Tailgate
appears in the multifunction
display.
The selection marker is on the current
setting.
�Press buttonæ orç to switch
the limiting opening height of the
tailgate
On or Off.Comfort submenu*
Access the
Comfort submenu via the
Settings menu. Use the Comfort submenu
to change the settings for a number of con-
venience features.
The following functions are available:Activating easy-entry/exit feature*
Use this function to activate and
deactivate the easy-entry/exit feature
(
�page 49).
FunctionPage
Activating easy-entry/exit
feature*184
Setting fold-in function* for
exterior rear view mirrors185
Warning!G
You must make sure no one can become
trapped or injured by the moving steering
wheel when the easy-entry/exit feature is
activated.
To stop steering wheel movement, do one of
the following:
�Move steering wheel adjustment stalk*
(
�page 51).
�Press one of the memory position
buttons or the memory buttonM*
(
�page 144).
Do not leave children unattended in the ve-
hicle, or with access to an unlocked vehicle.
Children could open the driver’s door and
unintentionally activate the easy-entry/exit
feature, which could result in an accident
and/or serious personal injury.
Page 283 of 595

282 Controls in detail
Driving systems
The parked vehicle begins adjusting to the
set vehicle level as soon the doors and tail-
gate are
�unlocked
or
�opened or closed with the vehicle
unlocked
In order to operate the vehicle level control
switch (
�page 283), however, the engine
must be running.
For information on off-road driving, see
“Off-road driving” (
�page 357).
Warning!G
Make sure that no one is near the wheel
housing or under the vehicle when you lower
the vehicle while it is standing still. Limbs
could become wedged into or under the ve-
hicle.
For safety reasons, the vehicle can only be
lowered with all doors and the tailgate
closed. Lowering is interrupted if a door or
the tailgate is opened and will continue after
the door is closed again.
Warning!G
Please be aware that by raising the vehicle
level, the center of gravity also rises. There-
fore, always ensure that the vehicle level is
as low as possible. With higher ride height
the ESP
® may activate earlier in certain
situations.
Adapt your speed and driving to possible
changed driving behavior of the vehicle after
changing the vehicle level. The ESP
® cannot
prevent accidents, including those resulting
from excessive speed. The ESP
® cannot pre-
vent the natural laws of physics from acting
on the vehicle.
!Keep in mind that in rough or uneven ter-
rain, adjusting the vehicle to a lower level may
cause the vehicle underbody to come in contact
with the ground and result in damage to the vehi-
cle underbody. Always make sure the vehicle has
sufficient ground clearance before adjusting it to
a lower level.
!Before jacking up the vehicle with equip-
ment that lifts one or more of the wheels com-
pletely off of the ground, remove the SmartKey
from the starter switch.
!Please also note the information in the sec-
tion on towing (
�page 540).
Page 296 of 595

295 Controls in detail
Driving systems
Rear view camera*
Warning!G
The rear view camera is only an aid and may
display obstacles from a distorted perspec-
tive or inaccurately, or may not display ob-
stacles at all. The rear view camera does not
relieve you of the responsibility to be cau-
tious, take care and pay careful attention.
The rear view camera may not show objects
which are:
�very close to the rear bumper
�under the rear bumper
�above the tailgate handle
You are responsible for safety at all times
and must continue to pay attention to the
immediate surroundings when parking and
maneuvering. This includes the area behind,
in front of and beside the vehicle. Otherwise
you could endanger yourself or others.
Warning!G
Make sure that no persons or animals are in
or near the area in which you are
parking/maneuvering. Otherwise, they
could be injured.
Warning!G
The rear view camera either will not function
or will not function to its full capability if:
�the tailgate is open
�it is raining very hard, snowing or foggy
�it is night or you are parking/maneuver-
ing your vehicle in an area where it is
very dark
�the camera is exposed to a very bright
white light
�the immediate surroundings are illumi-
nated with fluorescent light (the display
may flicker)
�there is a sudden change in tempera-
ture, e.g. if you drive into a heated ga-
rage from the cold (lens condensation)
�the camera lens is dirty or covered
�the rear of your vehicle is damaged
In this case, have the position and set-
ting of the camera checked by a quali-
fied specialist workshop.
Mercedes-Benz recommends that you
visit a Mercedes-Benz Light Truck
Center for this purpose.
Do not use the rear view camera in these sit-
uations. Otherwise you could injure yourself
or others and/or damage property including
your vehicle while parking/maneuvering.