Page 182 of 595
181 Controls in detail
Control system
Vehicle submenu
Access the
Vehicle submenu via the
Settings menu. Use the Vehicle submenu
to make general vehicle settings.
The following functions are available:Compass adjustment
This function is not available if your vehicle
is equipped with the COMAND system and
navigation module*.
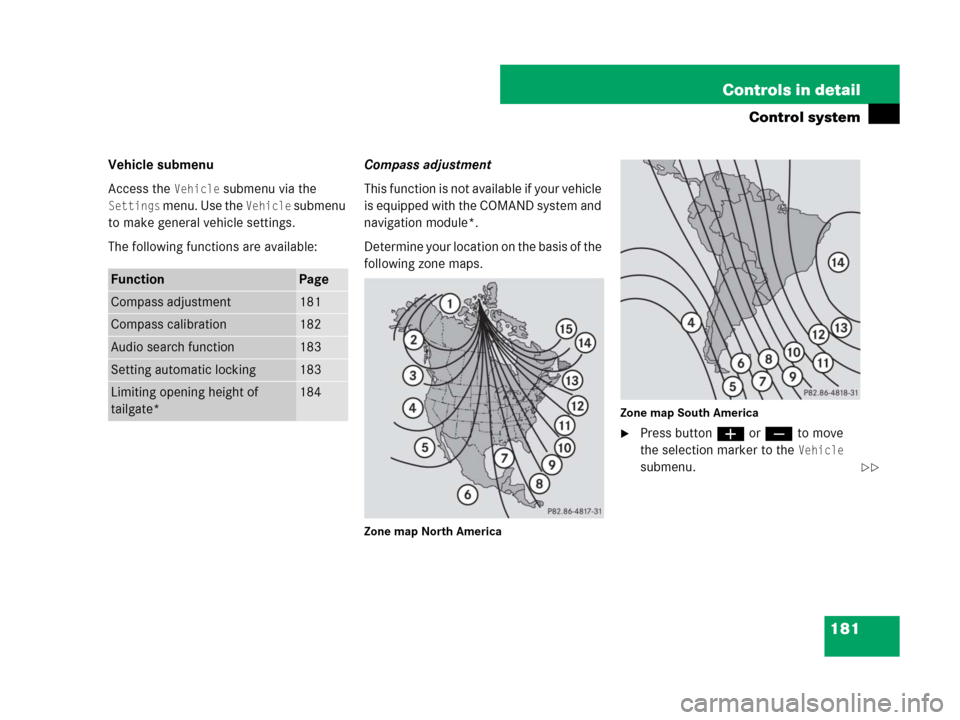
Determine your location on the basis of the
following zone maps.
Zone map North AmericaZone map South America
�Press buttonæ orç to move
the selection marker to the
Vehicle
submenu.
FunctionPage
Compass adjustment181
Compass calibration182
Audio search function183
Setting automatic locking183
Limiting opening height of
tailgate*184
��
Page 183 of 595
182 Controls in detail
Control system
�Press buttonj ork repeatedly
until the message
Compass setting
Zone
appears in the multifunction
display.
The selection marker is on the current
setting.
�Press buttonæ orç to set the
respective compass zone.
For information on how to call up the
compass, see “Compass” (
�page 345).Compass calibration
This function is not available if your vehicle
is equipped with the COMAND system and
navigation module*.
In order to calibrate the compass properly,
mind the following:
�Calibrate the compass in open terrain.
Nearby buildings, bridges, power lines
and large antenna masts, for example,
could impair compass calibration.
�Switch off electrical consumers (e.g.
climate control, windshield wipers, or
rear window defroster).
�Close all doors and the tailgate.
�Start the engine (�page 57).
�Press buttonæ orç to move
the selection marker to the
Vehicle
submenu.
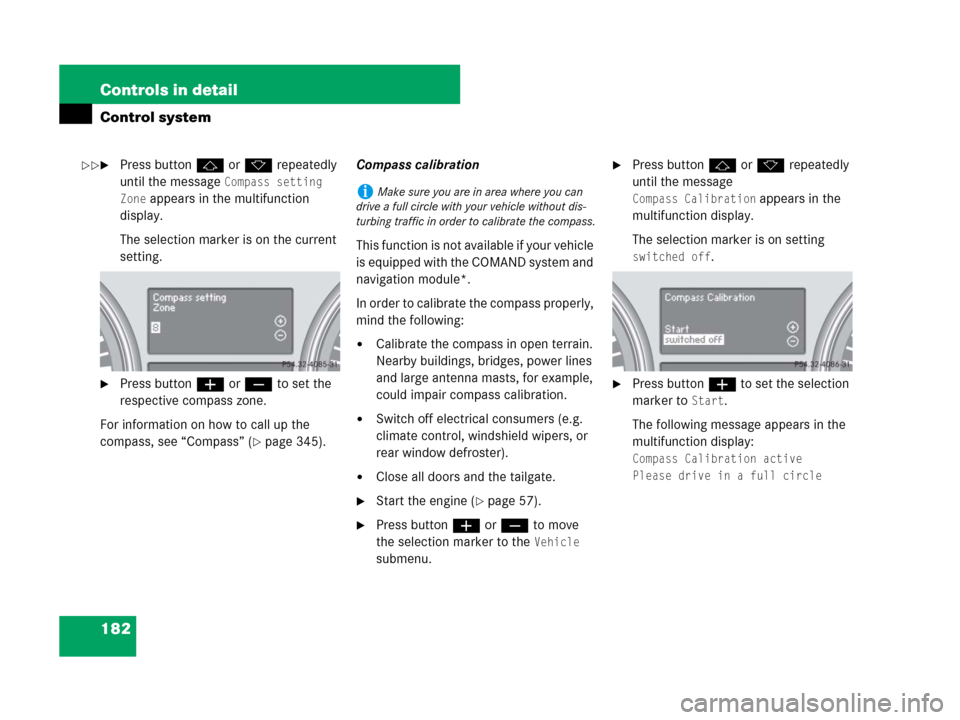
�Press buttonj ork repeatedly
until the message
Compass Calibration appears in the
multifunction display.
The selection marker is on setting
switched off.
�Press buttonæ to set the selection
marker to
Start.
The following message appears in the
multifunction display:
Compass Calibration active
Please drive in a full circle
iMake sure you are in area where you can
drive a full circle with your vehicle without dis-
turbing traffic in order to calibrate the compass.
��
Page 190 of 595
189 Controls in detail
Control system
TEL* menu
You can use the functions in the
Tel menu
to operate your telephone, provided it is
connected to a hands-free system and
switched on.
�Switch on the telephone and COMAND
system.
�Press buttonÿ orè on the
multifunction steering wheel repeated-
ly until the message
Tel appears in the
multifunction display.Which messages will appear in the multi-
function display depends on whether your
telephone is switched on or off:
�If the telephone is off, the message
Phone off appears in the multifunction
display.
�If the telephone is on:
The telephone will then search for a
network. During this time the multi-
function display is empty.
As soon as the telephone has found a
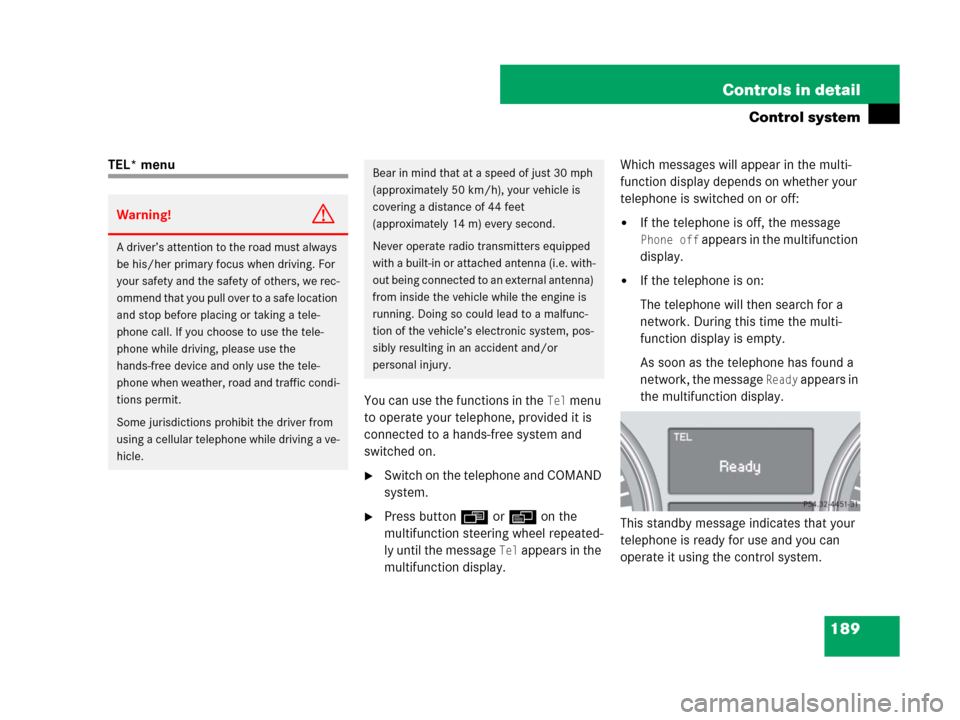
network, the message
Ready appears in
the multifunction display.
This standby message indicates that your
telephone is ready for use and you can
operate it using the control system.
Warning!G
A driver’s attention to the road must always
be his/her primary focus when driving. For
your safety and the safety of others, we rec-
ommend that you pull over to a safe location
and stop before placing or taking a tele-
phone call. If you choose to use the tele-
phone while driving, please use the
hands-free device and only use the tele-
phone when weather, road and traffic condi-
tions permit.
Some jurisdictions prohibit the driver from
using a cellular telephone while driving a ve-
hicle.
Bear in mind that at a speed of just 30 mph
(approximately 50 km/h), your vehicle is
covering a distance of 44 feet
(approximately 14 m) every second.
Never operate radio transmitters equipped
with a built-in or attached antenna (i.e. with-
out being connected to an external antenna)
from inside the vehicle while the engine is
running. Doing so could lead to a malfunc-
tion of the vehicle’s electronic system, pos-
sibly resulting in an accident and/or
personal injury.
Page 229 of 595
228 Controls in detail
Climate control
Rear climate control*
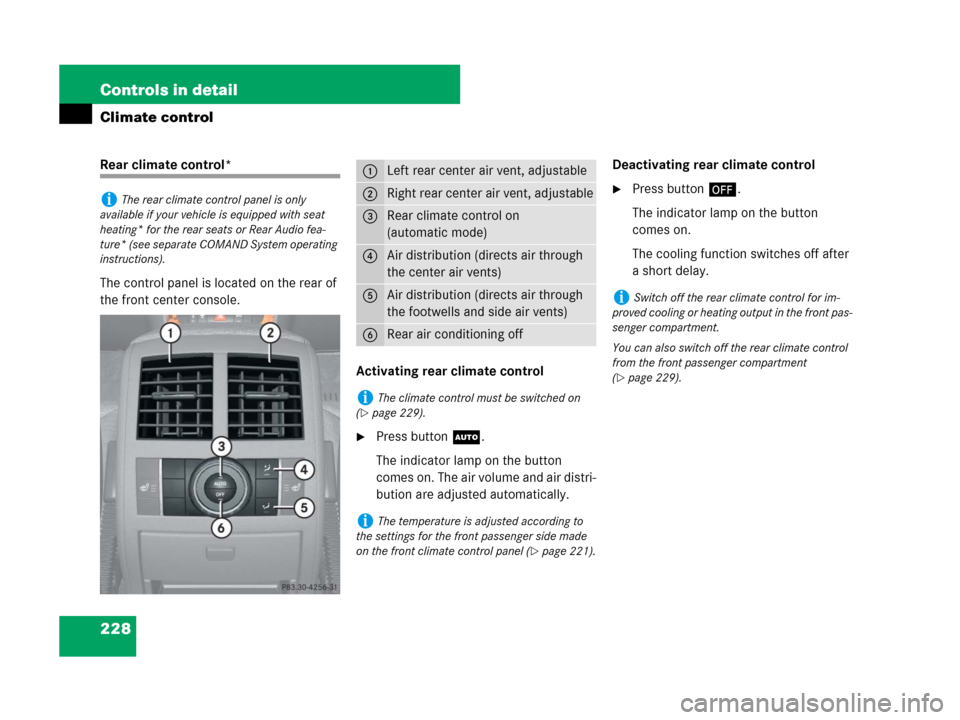
The control panel is located on the rear of
the front center console.
Activating rear climate control
�Press buttonU.
The indicator lamp on the button
comes on. The air volume and air distri-
bution are adjusted automatically.Deactivating rear climate control
�Press button´.
The indicator lamp on the button
comes on.
The cooling function switches off after
a short delay.iThe rear climate control panel is only
available if your vehicle is equipped with seat
heating* for the rear seats or Rear Audio fea-
ture* (see separate COMAND System operating
instructions).
1Left rear center air vent, adjustable
2Right rear center air vent, adjustable
3Rear climate control on
(automatic mode)
4Air distribution (directs air through
the center air vents)
5Air distribution (directs air through
the footwells and side air vents)
6Rear air conditioning off
iThe climate control must be switched on
(
�page 229).
iThe temperature is adjusted according to
the settings for the front passenger side made
on the front climate control panel (
�page 221).
iSwitch off the rear climate control for im-
proved cooling or heating output in the front pas-
senger compartment.
You can also switch off the rear climate control
from the front passenger compartment
(
�page 229).
Page 297 of 595
296 Controls in detail
Driving systems
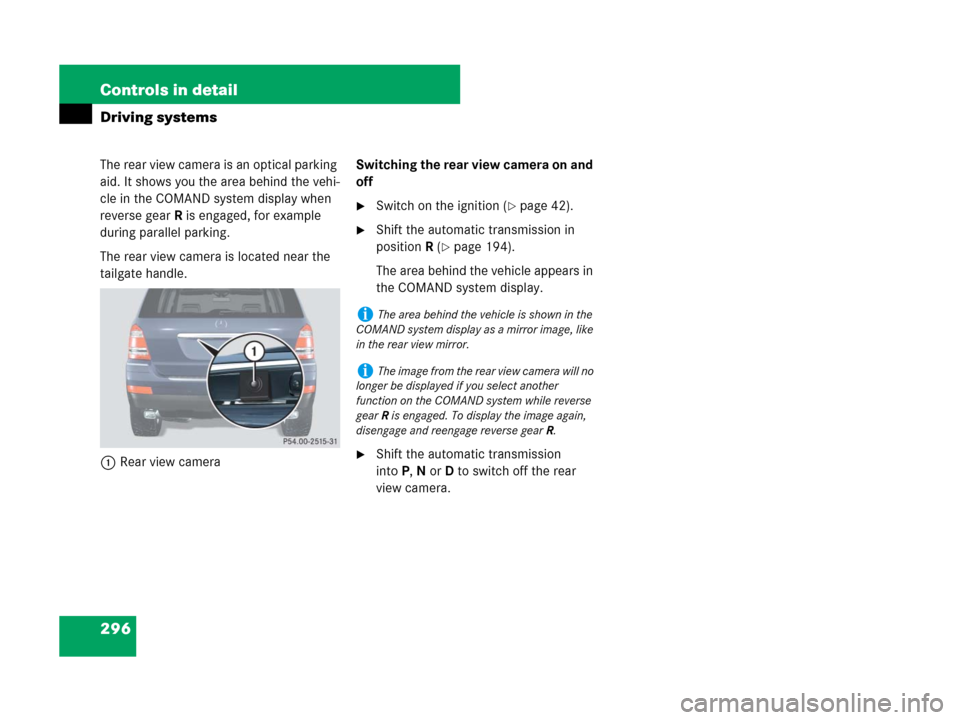
The rear view camera is an optical parking
aid. It shows you the area behind the vehi-
cle in the COMAND system display when
reverse gearR is engaged, for example
during parallel parking.
The rear view camera is located near the
tailgate handle.
1Rear view cameraSwitching the rear view camera on and
off
�Switch on the ignition (�page 42).
�Shift the automatic transmission in
positionR (
�page 194).
The area behind the vehicle appears in
the COMAND system display.
�Shift the automatic transmission
intoP,N orD to switch off the rear
view camera.
iThe area behind the vehicle is shown in the
COMAND system display as a mirror image, like
in the rear view mirror.
iThe image from the rear view camera will no
longer be displayed if you select another
function on the COMAND system while reverse
gearR is engaged. To display the image again,
disengage and reengage reverse gearR.
Page 317 of 595

316 Controls in detail
Useful features
Storage compartments Glove box/CD changer
1Glove box lid release
2Glove box lid
Opening the glove box
�Pull lid release1 in direction of arrow.
Glove box lid2 opens downward.
Closing the glove box
�Push glove box lid2 up to close.Releasing CD changer
1Release button
2AUX-socket (Vehicles without Rear
Seat Entertainment System*)
3CD changer
�Open the glove box (�page 316).
�Press release button1.
CD changer3 is released and swings
down automatically.
For information on CD changer operation,
see separate COMAND system operating
instructions.
Warning!G
To help avoid personal injury during a colli-
sion or sudden maneuver, exercise care
when storing objects in the vehicle. Put lug-
gage or cargo in the cargo compartment if
possible. Do not pile luggage or cargo higher
than the seat backs.
If so equipped, always use the cargo net*
when transporting cargo. The cargo net*
cannot secure hard or heavy objects.
Parcel nets cannot secure hard or heavy ob-
jects.
Keep compartment lids closed. This will help
to prevent stored objects from being thrown
about and injuring vehicle occupants during
�braking
�vehicle maneuvers
�an accident
Page 318 of 595
317 Controls in detail
Useful features
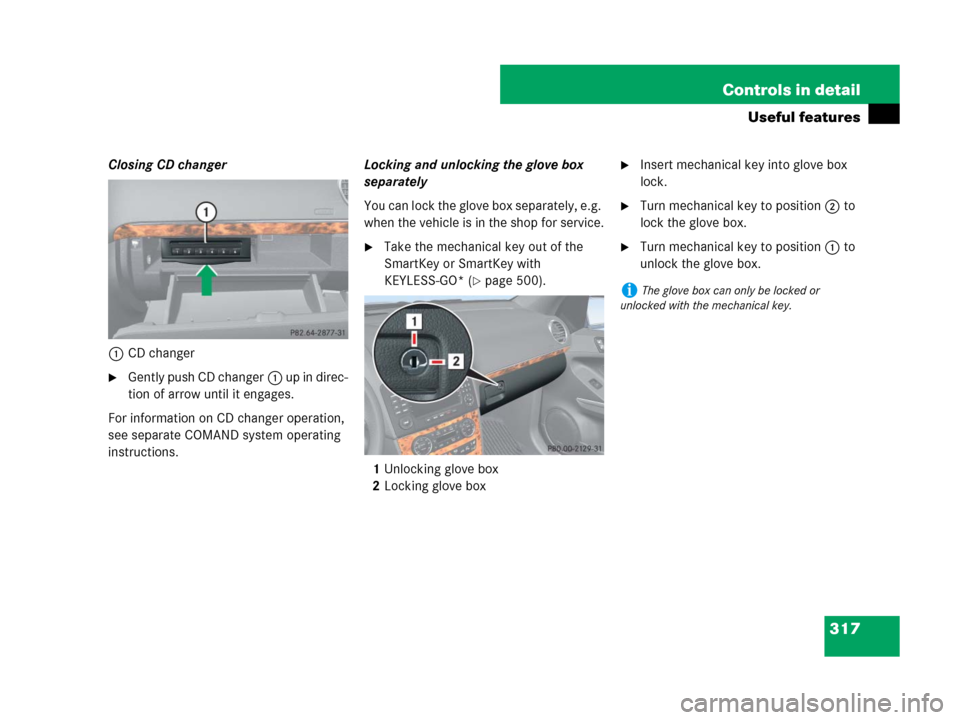
Closing CD changer
1CD changer
�Ge ntly pu sh CD c ha nger1 up in direc-
tion of arrow until it engages.
For information on CD changer operation,
see separate COMAND system operating
instructions.Locking and unlocking the glove box
separately
You can lock the glove box separately, e.g.
when the vehicle is in the shop for service.
�Take the mechanical key out of the
SmartKey or SmartKey with
KEYLESS-GO* (
�page 500).
1Unlocking glove box
2Locking glove box
�Insert mechanical key into glove box
lock.
�Turn mechanical key to position2 to
lock the glove box.
�Turn mechanical key to position1 to
unlock the glove box.
iThe glove box can only be locked or
unlocked with the mechanical key.
Page 330 of 595
329 Controls in detail
Useful features
Telephone*
Radio transmitters, such as a portable tele-
phone or a citizens band unit, should only
be used inside the vehicle if they are con-
nected to an antenna that is installed on
the outside of the vehicle.
The external antenna must be approved by
Mercedes-Benz. Please contact an autho-
rized Mercedes-Benz Light Truck Center
for information on the installation of an ap-
proved external antenna. Refer to the radio
transmitter operation instructions regard-
ing use of an external antenna.When the mobile phone is inserted in the
cradle, you can operate the telephone us-
ing the following devices:
�mobile phone keypad
�COMAND system (see separate operat-
ing instructions)
�buttonss andt on the multi-
function steering wheel (
�page 158)
�Voice Control System* (see separate
operating instructions)
Please note that these functions are only
available with Mercedes-Benz approved
mobile phones.
Warning!G
Never operate radio transmitters equipped
with a built-in or attached antenna (i.e. with-
out being connected to an external antenna)
from inside the vehicle while the engine is
running. Doing so could lead to a malfunc-
tion of the vehicle’s electronic system, pos-
sibly resulting in an accident and/or serious
personal injury.
Warning!G
Please do not forget that your primary re-
sponsibility is to drive the vehicle. A driver’s
attention to the road must always be
his /her primary focus when driving. For
your safety and the safety of others, we rec-
ommend that you pull over to a safe location
and stop before placing or taking a tele-
phone call.
If you choose to use the telephone
1 while
driving, please use the hands-free device
and only use the telephone when road,
weather and traffic conditions permit. Some
jurisdictions prohibit the driver from using a
cellular telephone while driving a vehicle.
Only operate the COMAND system
1 if road,
weather and traffic conditions permit.
Bear in mind that at a speed of just 30 mph
(approximately 50 km/h), your vehicle is
covering a distance of 44 feet (approximate-
ly 14 m) every second.
1Observe all legal requirements
iVarious mobile phone cradles can be in-
stalled in the front center armrest, see separate
installation instructions for the mobile phone
cradle. These mobile phone cradles can be ob-
tained from an authorized Mercedes-Benz Light
Truck Center.
The functions and services available to you while
using the mobile phone depend on your service
provider and the type of mobile phone you are
using. See also separate operating manual for in-
structions on how to use your mobile phone.