Page 439 of 522
438 Practical hintsUnlocking/locking in an emergency�
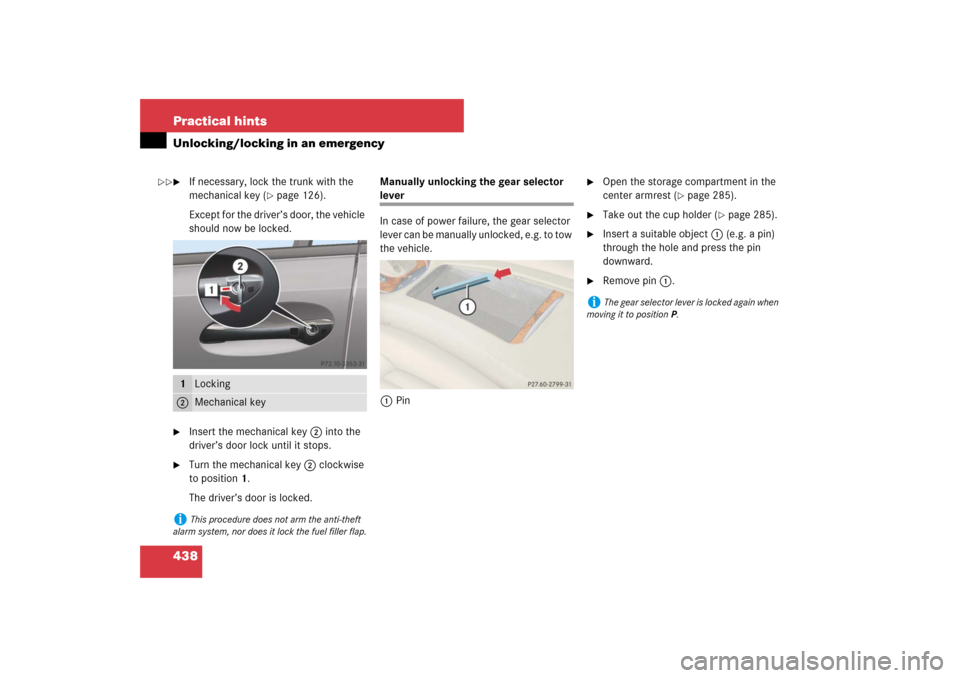
If necessary, lock the trunk with the
mechanical key (
�page 126).
Except for the driver’s door, the vehicle
should now be locked.
�
Insert the mechanical key2 into the
driver’s door lock until it stops.
�
Turn the mechanical key2 clockwise
to position1.
The driver’s door is locked.Manually unlocking the gear selector
lever
In case of power failure, the gear selector
lever can be manually unlocked, e.g. to tow
the vehicle.
1Pin
�
Open the storage compartment in the
center armrest (
�page 285).
�
Take out the cup holder (
�page 285).
�
Insert a suitable object1 (e.g. a pin)
through the hole and press the pin
downward.
�
Remove pin1.
1
Locking
2
Mechanical key
i
This procedure does not arm the anti-theft
alarm system, nor does it lock the fuel filler flap.
i
The gear selector lever is locked again when
moving it to positionP.
��
Page 440 of 522
439 Practical hints
Opening/closing in an emergency
�Opening/closing in an emergency
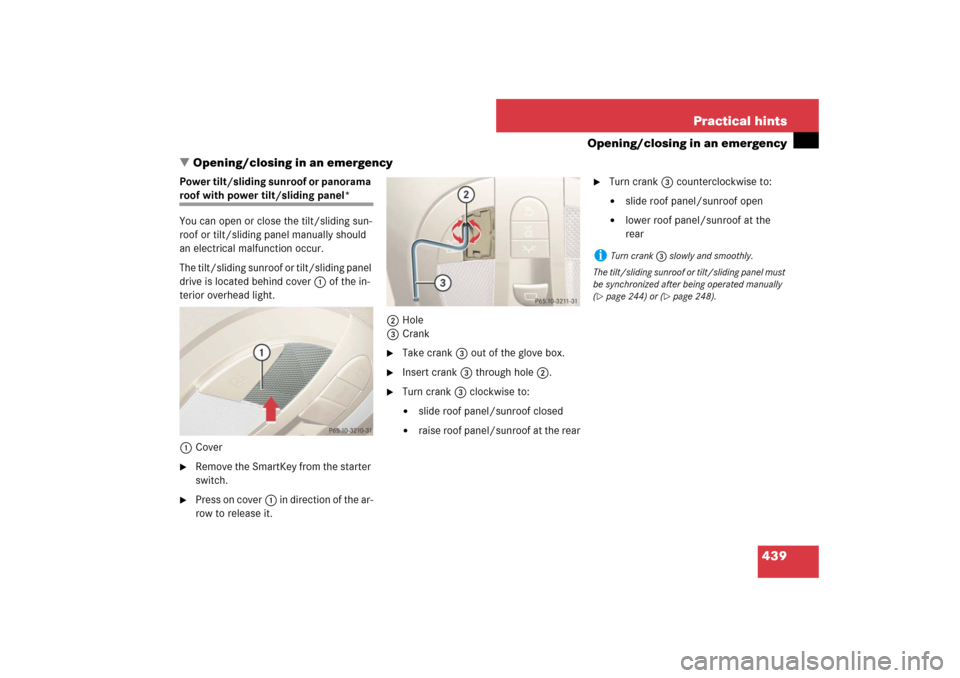
Power tilt/sliding sunroof or panorama roof with power tilt/sliding panel*
You can open or close the tilt/sliding sun-
roof or tilt/sliding panel manually should
an electrical malfunction occur.
The tilt/sliding sunroof or tilt/sliding panel
drive is located behind cover1 of the in-
terior overhead light.
1Cover�
Remove the SmartKey from the starter
switch.
�
Press on cover1 in direction of the ar-
row to release it.2Hole
3Crank
�
Take crank3 out of the glove box.
�
Insert crank3 through hole2.
�
Turn crank3 clockwise to:�
slide roof panel/sunroof closed
�
raise roof panel/sunroof at the rear
�
Turn crank3 counterclockwise to:�
slide roof panel/sunroof open
�
lower roof panel/sunroof at the
rear
i
Turn crank3 slowly and smoothly.
The tilt/sliding sunroof or tilt/sliding panel must
be synchronized after being operated manually
(
�page 244) or (
�page 248).
Page 442 of 522

441 Practical hints
Replacing SmartKey batteries
�Replacing SmartKey batteries
If the batteries in the SmartKey/SmartKey
with KEYLESS-GO* are discharged, the ve-
hicle can no longer be locked or unlocked.
It is recommended to have the batteries re-
placed at an authorized Mercedes-Benz
Center.Batteries contain materials that can harm
the environment if disposed of improperly.
Recycling of batteries is the preferred
method of disposal. Many states require
sellers of batteries to accept old batteries
for recycling.SmartKey/SmartKey with
KEYLESS-GO*
Replacement batteries: Lithium, type
CR 2025 or equivalent.�
Remove the mechanical key1 out of
the SmartKey/SmartKey with
KEYLESS-GO* (
�page 436).
1Mechanical key
2Battery compartment
�
Insert mechanical key1 into opening.
�
Press mechanical key1 in direction of
arrow.
The battery compartment is unlatched.
Warning!
G
Batteries contain poisonous and corrosive
substances. Therefore keep the batteries
out of reach of children.
If a battery is swallowed, seek medical help
immediately.
i
When inserting the batteries, make sure
they are clean and free of lint.
i
When replacing batteries, always replace
both batteries.
The required replacement batteries are available
at any Mercedes-Benz Center.
��
Page 443 of 522
442 Practical hintsReplacing SmartKey batteries�
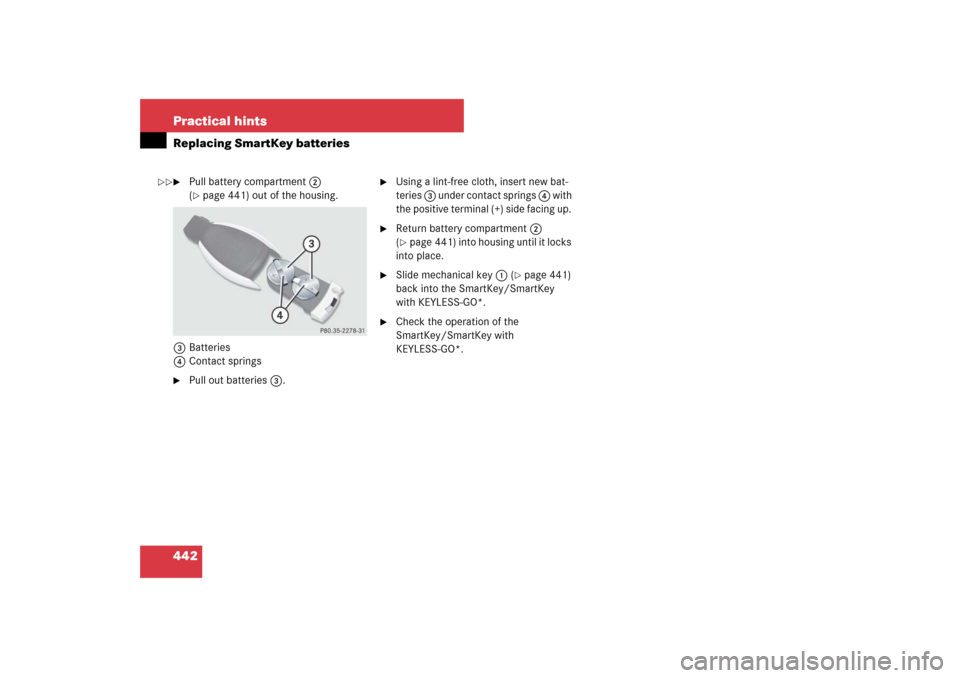
Pull battery compartment2
(�page 441) out of the housing.
3Batteries
4Contact springs
�
Pull out batteries3.
�
Using a lint-free cloth, insert new bat-
teries 3 under contact springs 4 with
the positive terminal (+) side facing up.
�
Return battery compartment 2
(�page 441) into housing until it locks
into place.
�
Slide mechanical key 1 (
�page 441)
back into the SmartKey/SmartKey
with KEYLESS-GO*.
�
Check the operation of the
SmartKey/SmartKey with
KEYLESS-GO*.
��
Page 451 of 522
.
�
Turn")
450 Practical hintsReplacing wiper blades
Placing wiper arms in vertical positionWiper blades in vertical positionVehicles with SmartKey�
Turn SmartKey to starter switch
position1 (
�page 37).
�
Turn combination switch to wiper
settingu (
�page 58).
�
With wiper arms in the vertical position,
turn SmartKey in starter switch to
position0.
�
Remove SmartKey from starter switch.
Warning!
G
For safety reasons, switch off wipers and re-
move SmartKey from starter switch (vehi-
cles with KEYLESS-GO*: Make sure the
vehicle’s on-board electronics have
status0) before replacing a wiper blade.
Otherwise, the wiper motor could suddenly
turn on and cause injury. Warning!
G
Wiper blades are components that are sub-
ject to wear and tear. Change the wiper
blades twice a year, preferably in the spring
and fall. Otherwise the windows will not be
properly wiped. As a result, you may not be
able to observe surrounding traffic condi-
tions and could cause an accident.
!
To avoid damage to the hood:
�
The wiper arms should only be folded for-
ward when in the vertical position.
�
Never open the hood when the wiper arm is
folded forward.
!
Hold on to the wiper when folding the wiper
arm back. If released, the force of the impact
from the tensioning spring could crack the wind-
shield.
Do not allow the wiper arms to contact the wind-
shield glass without a wiper blade inserted.
Make sure the wiper blades are properly in-
stalled. Improperly installed wiper blades may
cause windshield damage.
For your convenience, we recommend that you
have this work carried out by an authorized
Mercedes-Benz Center.
Page 452 of 522
451 Practical hints
Replacing wiper blades
Vehicles with KEYLESS-GO*�
Turn off the engine (
�page 64).
With the driver’s door closed, the start-
er switch is now in position1.
�
Turn combination switch to wiper
setting U (
�page 58).
�
With wiper arms in the vertical position,
open the driver’s door.
The starter switch is set to position0,
same as SmartKey removed from start-
er switch.
�
Turn combination switch to wiper
setting0 (
�page 58).
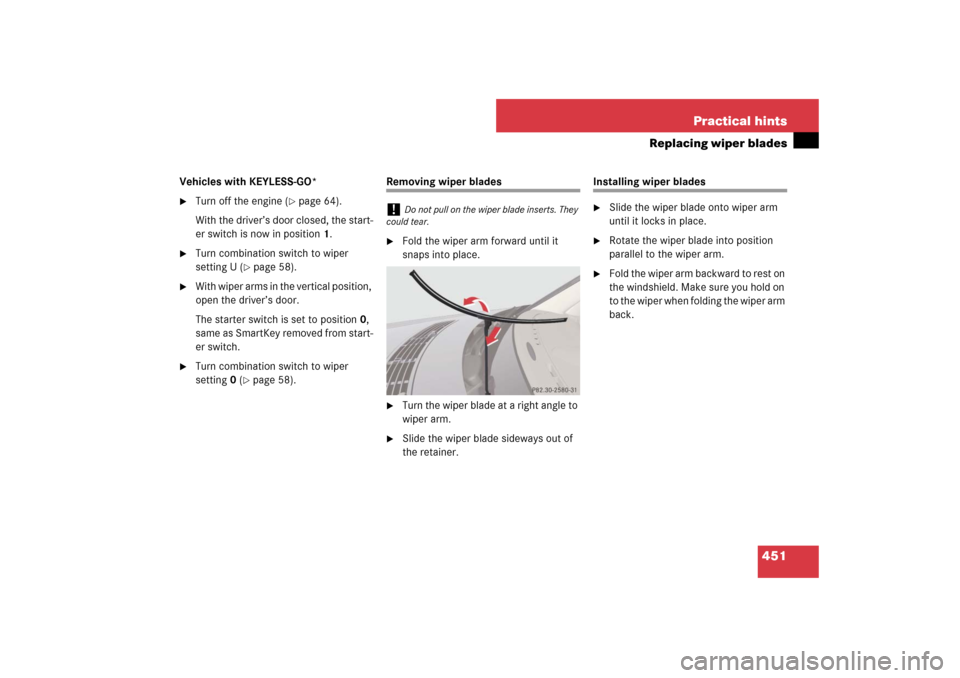
Removing wiper blades�
Fold the wiper arm forward until it
snaps into place.
�
Turn the wiper blade at a right angle to
wiper arm.
�
Slide the wiper blade sideways out of
the retainer.
Installing wiper blades�
Slide the wiper blade onto wiper arm
until it locks in place.
�
Rotate the wiper blade into position
parallel to the wiper arm.
�
Fold the wiper arm backward to rest on
the windshield. Make sure you hold on
to the wiper when folding the wiper arm
back.
!
Do not pull on the wiper blade inserts. They
could tear.
Page 453 of 522
.
�")
452 Practical hintsFlat tirePreparing the vehicle�
Park the vehicle in a safe distance from
moving traffic on a hard, flat surface
when possible.
�
Turn on the hazard warning flasher
(�page 144).
�
Turn the steering wheel so that the
front wheels are in a straight ahead po-
sition.
�
Set the parking brake (
�page 62).
�
Move the gear selector lever toP.
Vehicles with SmartKey:
�
Turn off the engine (
�page 63).
�
Remove the SmartKey from the starter
switch.Vehicles with SmartKey with
KEYLESS-GO*:
�
Turn off the engine by pressing the
KEYLESS-GO* start/stop button on the
gear selector lever once (
�page 64).
�
Open the driver’s door (this puts the ig-
nition in position0, same as with the
SmartKey removed from the starter
switch). The driver’s door then can be
closed again.
�
Have any passenger exit the vehicle at
a safe distance from the roadway.
Mounting the spare wheel
i
Open door only when conditions are safe to
do so.
Warning!
G
The dimensions of the spare wheel
(Minispare or collapsible tire) are different
from those of the road wheels. As a result,
the vehicle handling characteristics change
when driving with a spare wheel mounted.
Adapt your driving style accordingly.
The spare wheel is for temporary use only.
When driving with spare wheel mounted,
ensure proper tire pressure and do not ex-
ceed a vehicle speed of 50 mph (80 km/h).
Drive to the nearest Mercedes-Benz Center
as soon as possible to have the spare wheel
replaced with a regular road wheel.
Never operate the vehicle with more than
one spare wheel mounted.
Do not switch off the ESP
® when a
Minispare or collapsible tire is mounted.
Page 458 of 522

457 Practical hints
Flat tire
1Flap
2On/off switch
3Electrical plug
4Air hose with pressure gauge and vent
screw
5Union nut�
Open flap 1 on electric air pump.
�
Pull out electrical plug 3 and air hose
with pressure gauge 4.
�
Remove the valve cap from the
collapsible tire valve.
�
Screw union nut5 onto the collaps-
ible tire valve.
�
Insert electrical plug 3 into vehicle
cigarette lighter socket.
�
Turn the SmartKey in the starter switch
to position1.
�
PressI on electric air pump switch 2.
The electric air pump should now
switch on and inflate the collapsible
tire.
�
Inflate the tire to approximately 51 psi
(3.5 bar).
This takes about 5 minutes for the col-
lapsible tire. Air hose 4 and union
nut5 can become hot during infla-
tion. Exercise proper caution to avoid
burning yourself when using the equip-
ment.
�
Press0 on electric air pump switch 2.
�
Turn the SmartKey in the starter switch
to position0.
�
If the tire pressure is above 51 psi
(3.5 bar), release excess tire pressure
using the vent screw.
�
Detach the electric air pump.
!
Do not operate the electric air pump longer
than 8 minutes without interruption. Otherwise it
may overheat.
You may operate the electric air pump again af-
ter it has cooled off.
Warning!
G
Follow recommend tire inflation pressures.
Do not overinflate tires. Overinflating tires
can result in sudden deflation (blowout) be-
cause they are more likely to become punc-
tured or damaged by road debris, potholes,
etc.
Do not underinflate tires. Underinflated tires
wear unevenly, adversely affect handling
and fuel economy, and are more likely to fail
from being overheated.
��