Page 164 of 522

163 Controls in detail
Control system
NAV* menu
The
NAV
menu contains the functions
needed to operate your navigation system.
�
Press buttonè orÿ repeatedly
until you see the message
NAV
in the
multifunction display.
�
If COMAND is switched off, the mes-
sage
NAV off
appears in the multifunc-
tion display.
�
With COMAND switched on but route
guidance not activated, the direction of
travel and, if available, the name of the
street currently traveled on appear in
the multifunction display.
�
With COMAND switched on and route
guidance activated, the direction of
travel and maneuver instructions ap-
pear in the multifunction display.
Please refer to the COMAND manual for in-
structions on how to activate the route
guidance system.
Distronic* menu
Use the Distronic menu to display the cur-
rent settings for your Distronic system.
What information is shown in the multi-
function display depends on whether the
Distronic system is active or inactive.
Please refer to the “Driving systems” sec-
tion of this manual (
�page 252) for in-
structions on how to activate Distronic.
�
Press buttonè orÿ repeatedly
until you see one of the following two
pictures in the multifunction display.
i
Level of information displayed will vary de-
pending on the information contained on the
MP3-CD insert in the single CD player of the
COMAND system.
To select a MP3-CD from the CD changer maga-
zine, press a number on the COMAND system
key pad located in the center console.
Page 185 of 522
184 Controls in detailAutomatic transmissionFor more information on driving with an
automatic transmission, see “Automatic
transmission” (
�page 52).
Your vehicle’s transmission adapts its gear
shifting process to your individual driving
style by continually adjusting the shift
points up or down. These shift point adjust-
ments are performed based on current
operating and driving conditions.
If the operating conditions change, the
automatic transmission reacts by
adjusting its shift program.
Gear selector lever
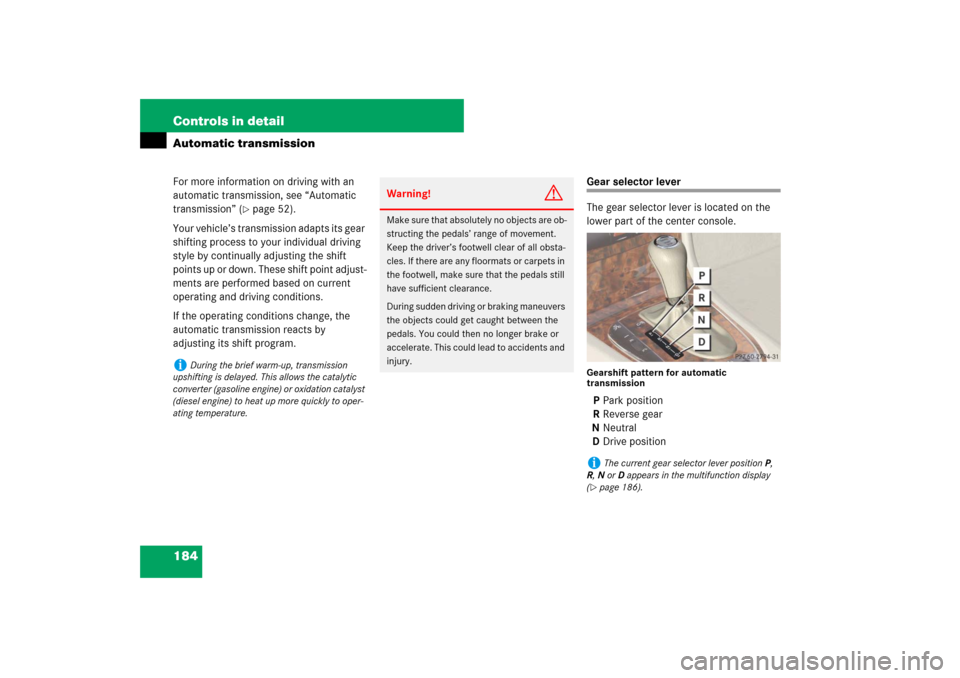
The gear selector lever is located on the
lower part of the center console.Gearshift pattern for automatic
transmissionPPark position
RReverse gear
NNeutral
DDrive position
i
During the brief warm-up, transmission
upshifting is delayed. This allows the catalytic
converter (gasoline engine) or oxidation catalyst
(diesel engine) to heat up more quickly to oper-
ating temperature.
Warning!
G
Make sure that absolutely no objects are ob-
structing the pedals’ range of movement.
Keep the driver’s footwell clear of all obsta-
cles. If there are any floormats or carpets in
the footwell, make sure that the pedals still
have sufficient clearance.
During sudden driving or braking maneuvers
the objects could get caught between the
pedals. You could then no longer brake or
accelerate. This could lead to accidents and
injury.
i
The current gear selector lever positionP,
R,N orD appears in the multifunction display
(
�page 186).
Page 191 of 522
190 Controls in detailAutomatic transmissionAutomatic shift program
The program mode selector switch is
located on the lower part of the center
console.Program mode selector switchC Comfort For comfort driving
S Sport For standard driving
Program mode selector switch
(E 63 AMG only)M Manual For manual gear shifting
(
�page 194)
C Comfort For standard driving
S Sport For sporty drivingThe selected program mode appears in the
multifunction display.
1Current program mode
!
Never change the program mode when the
gear selector lever is out of park positionP. This
could result in a change of driving characteristics
for which you may not be prepared.
i
The last selected program mode (CorS) is
switched on when the engine is restarted.
Page 196 of 522
195 Controls in detail
Automatic transmission
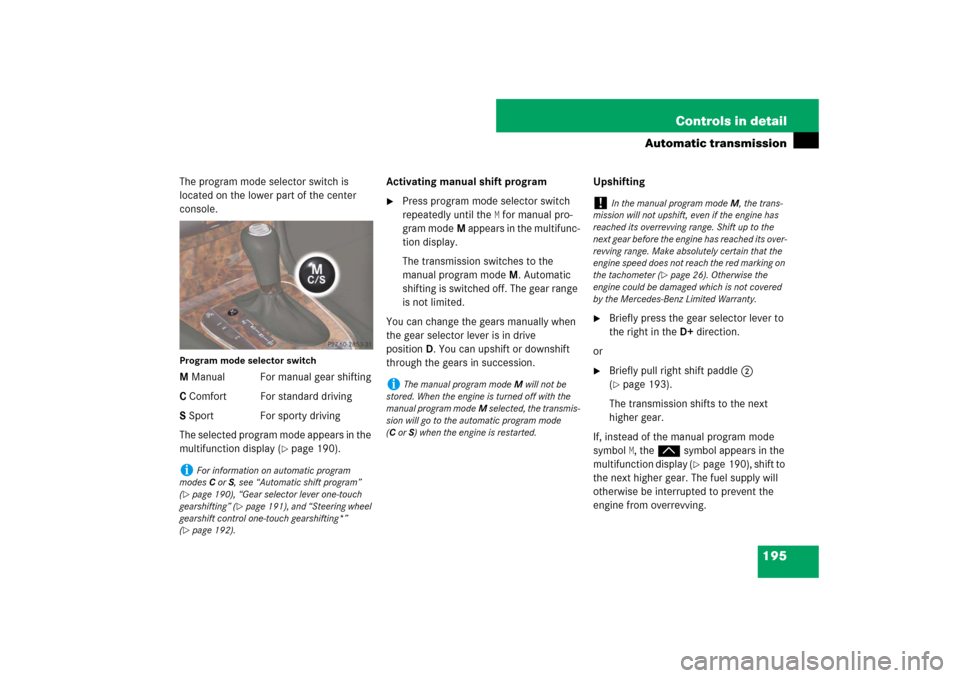
The program mode selector switch is
located on the lower part of the center
console.Program mode selector switchM Manual For manual gear shifting
C Comfort For standard driving
S Sport For sporty driving
The selected program mode appears in the
multifunction display (
�page 190).Activating manual shift program
�
Press program mode selector switch
repeatedly until the
M for manual pro-
gram modeM appears in the multifunc-
tion display.
The transmission switches to the
manual program modeM. Automatic
shifting is switched off. The gear range
is not limited.
You can change the gears manually when
the gear selector lever is in drive
positionD. You can upshift or downshift
through the gears in succession.Upshifting
�
Briefly press the gear selector lever to
the right in theD+direction.
or
�
Briefly pull right shift paddle2
(�page 193).
The transmission shifts to the next
higher gear.
If, instead of the manual program mode
symbolM, thep symbol appears in the
multifunction display (
�page 190), shift to
the next higher gear. The fuel supply will
otherwise be interrupted to prevent the
engine from overrevving.
i
For information on automatic program
modesC orS, see “Automatic shift program”
(
�page 190), “Gear selector lever one-touch
gearshifting” (
�page 191), and “Steering wheel
gearshift control one-touch gearshifting*”
(
�page 192).
i
The manual program modeM will not be
stored. When the engine is turned off with the
manual program modeM selected, the transmis-
sion will go to the automatic program mode
(CorS) when the engine is restarted.
!
In the manual program modeM, the trans-
mission will not upshift, even if the engine has
reached its overrevving range. Shift up to the
next gear before the engine has reached its over-
revving range. Make absolutely certain that the
engine speed does not reach the red marking on
the tachometer (
�page 26). Otherwise the
engine could be damaged which is not covered
by the Mercedes-Benz Limited Warranty.
Page 203 of 522
202 Controls in detailGood visibilityRear window sunshade*
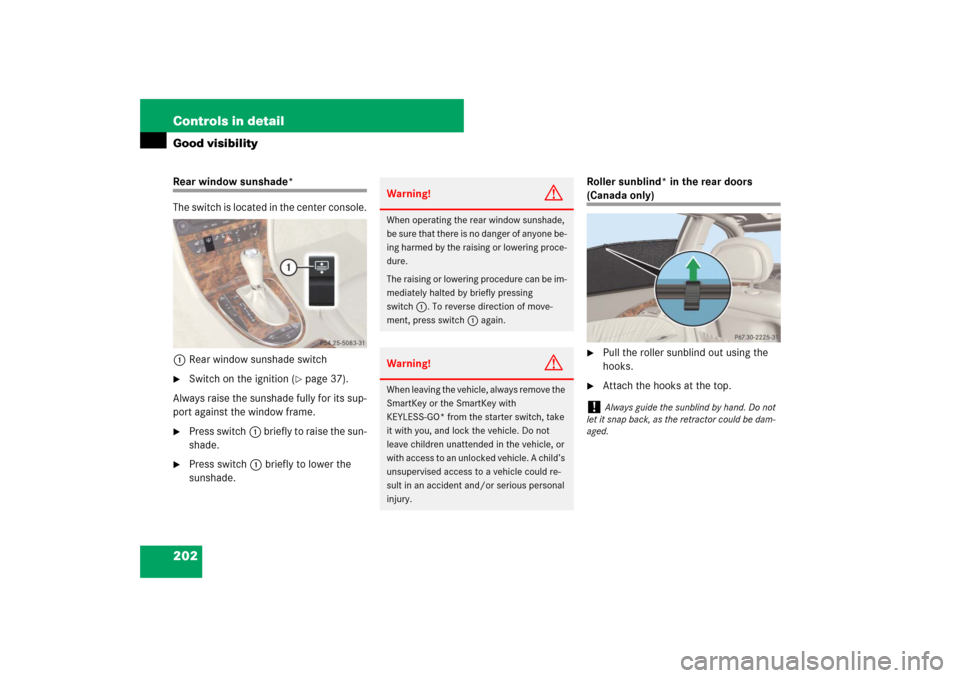
The switch is located in the center console.
1Rear window sunshade switch�
Switch on the ignition (
�page 37).
Always raise the sunshade fully for its sup-
port against the window frame.
�
Press switch1 briefly to raise the sun-
shade.
�
Press switch1 briefly to lower the
sunshade.Roller sunblind* in the rear doors
(Canada only)�
Pull the roller sunblind out using the
hooks.
�
Attach the hooks at the top.
Warning!
G
When operating the rear window sunshade,
be sure that there is no danger of anyone be-
ing harmed by the raising or lowering proce-
dure.
The raising or lowering procedure can be im-
mediately halted by briefly pressing
switch1. To reverse direction of move-
ment, press switch1 again.Warning!
G
When leaving the vehicle, always remove the
SmartKey or the SmartKey with
KEYLESS-GO* from the starter switch, take
it with you, and lock the vehicle. Do not
leave children unattended in the vehicle, or
with access to an unlocked vehicle. A child’s
unsupervised access to a vehicle could re-
sult in an accident and/or serious personal
injury.
!
Always guide the sunblind by hand. Do not
let it snap back, as the retractor could be dam-
aged.
Page 220 of 522
219 Controls in detail
Dual-zone automatic climate control
Rear passenger compartment adjustable air vents
The air conditioning for the rear passenger
compartment is controlled via the climate
control panel (
�page 206) or
(
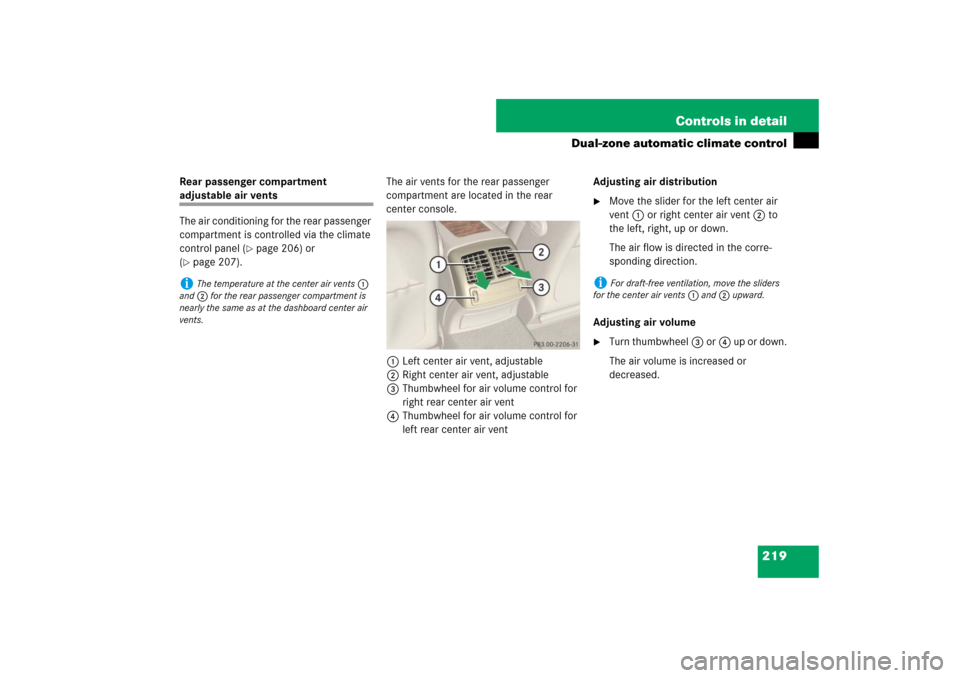
�page 207).The air vents for the rear passenger
compartment are located in the rear
center console.
1Left center air vent, adjustable
2Right center air vent, adjustable
3Thumbwheel for air volume control for
right rear center air vent
4Thumbwheel for air volume control for
left rear center air ventAdjusting air distribution
�
Move the slider for the left center air
vent1 or right center air vent2 to
the left, right, up or down.
The air flow is directed in the corre-
sponding direction.
Adjusting air volume
�
Turn thumbwheel3 or4 up or down.
The air volume is increased or
decreased.
i
The temperature at the center air vents1
and2 for the rear passenger compartment is
nearly the same as at the dashboard center air
vents.
i
For draft-free ventilation, move the sliders
for the center air vents1 and2 upward.
Page 236 of 522
235 Controls in detail
4-zone automatic climate control
Activating�
Switch off the ignition.
�
Press buttonT (
�page 223).
REST
in the display4 (
�page 223)
comes on.
Deactivating
�
Press buttonT (
�page 223) again.
REST
in the display4 (
�page 223)
goes out.
Rear climate control
The rear climate control is adjusted via the
front climate control panel (
�page 222) or
(
�page 223) or the rear climate control
panel.
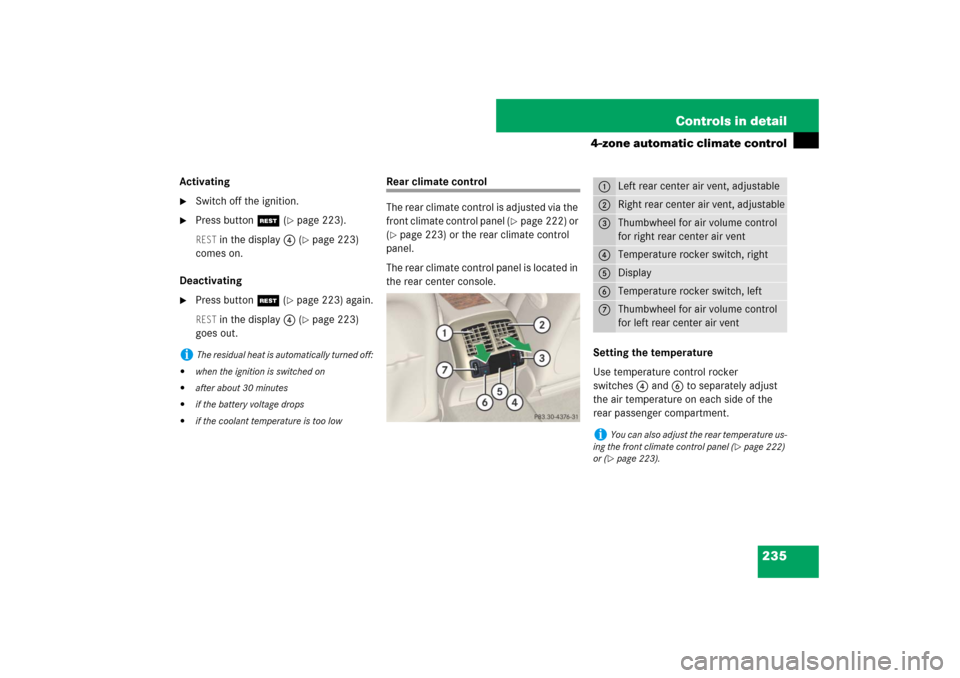
The rear climate control panel is located in
the rear center console.
Setting the temperature
Use temperature control rocker
switches4 and6 to separately adjust
the air temperature on each side of the
rear passenger compartment.
i
The residual heat is automatically turned off:
�
when the ignition is switched on
�
after about 30 minutes
�
if the battery voltage drops
�
if the coolant temperature is too low
1
Left rear center air vent, adjustable
2
Right rear center air vent, adjustable
3
Thumbwheel for air volume control
for right rear center air vent
4
Temperature rocker switch, right
5
Display
6
Temperature rocker switch, left
7
Thumbwheel for air volume control
for left rear center air vent
i
You can also adjust the rear temperature us-
ing the front climate control panel (
�page 222)
or (
�page 223).
Page 262 of 522
261 Controls in detail
Driving systems
Setting the following distance in
Distronic
You can set the specified following dis-
tance for Distronic by varying the time set-
ting between 1.0 and 2.0 seconds. Using
this time setting and the current speed of
your vehicle, Distronic calculates and sets
the required following distance to the vehi-
cle ahead. The set distance will be shown
in the multifunction display.
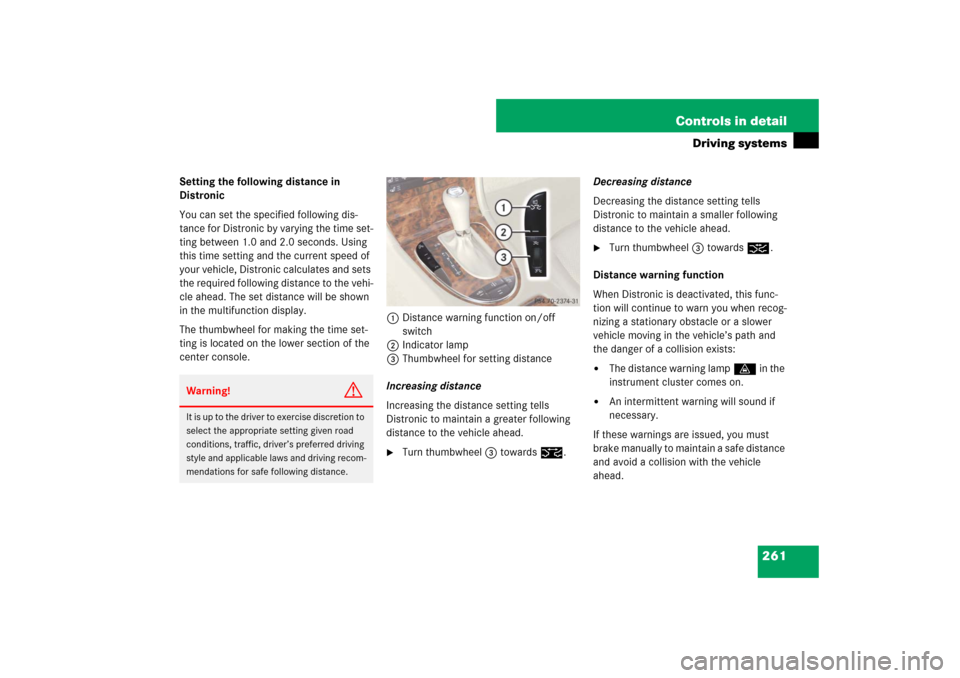
The thumbwheel for making the time set-
ting is located on the lower section of the
center console.1Distance warning function on/off
switch
2Indicator lamp
3Thumbwheel for setting distance
Increasing distance
Increasing the distance setting tells
Distronic to maintain a greater following
distance to the vehicle ahead.
�
Turn thumbwheel3 towards¯.Decreasing distance
Decreasing the distance setting tells
Distronic to maintain a smaller following
distance to the vehicle ahead.
�
Turn thumbwheel3 towards®.
Distance warning function
When Distronic is deactivated, this func-
tion will continue to warn you when recog-
nizing a stationary obstacle or a slower
vehicle moving in the vehicle’s path and
the danger of a collision exists:
�
The distance warning lampl in the
instrument cluster comes on.
�
An intermittent warning will sound if
necessary.
If these warnings are issued, you must
brake manually to maintain a safe distance
and avoid a collision with the vehicle
ahead.
Warning!
G
It is up to the driver to exercise discretion to
select the appropriate setting given road
conditions, traffic, driver’s preferred driving
style and applicable laws and driving recom-
mendations for safe following distance.