Page 267 of 522

266 Controls in detailDriving systemsVehicle level control
Your vehicle automatically adjusts its ride
height to�
increase vehicle safety
�
reduce fuel consumption
The following vehicle chassis ride heights
can be selected:
�
Normal
�
Raised
The vehicle chassis ride height is raised or
lowered according to the selected level
setting and to the vehicle speed:
�
At a speed exceeding approximately
68 mph (110 km/h) with normal level
set or exceeding 75 mph (120 km/h)
with raised level set, the ride height is
reduced automatically. The table on
the next page provides an overview of
the vehicle levels.
�
With decreasing speed, the ride height
is again raised to the normal level.Select the raised level only when required
by current driving conditions. Otherwise
�
handling may be impaired
�
fuel consumption may increase
i
These height adjustments are so small that
you may not notice any change.Warning!
G
To help avoid personal injury, keep hands
and feet away from wheel housing area, and
stay away from under the vehicle when low-
ering the vehicle chassis.
Page 268 of 522
267 Controls in detail
Driving systems
The following vehicle level settings can be
selected when the vehicle is stationary and
the engine is running:Vehicle level
when stationary
Indicator lamp
Suspension
tuning
Use for
Ride height increase
over normal
Automatic lowering
Normal
Lamp off
Comfort
For driving on normal
roads
None
Max. approx. 0.4 in (10 mm)
Normal
Lamp off
Sport 1 or 2
For driving on normal
roads
None
Max. approx. 0.6 in (15 mm)
Raised
Lamp on
Comfort
For driving on rough
roads or with snow
chains
Approx. 0.8 in (20 mm)
Max. approx. 1.2 in (30 mm)
Raised
Lamp on
Sport 1 or 2
For driving on rough
roads or with snow
chains
Approx. 0.8 in (20 mm)
Max. approx. 1.4 in (35 mm)
Page 271 of 522
270 Controls in detailDriving systems
Front sensors
Rear sensorsMinimum distance
If the system detects an obstacle in this
range, all the distance warning segments
illuminate and you hear a warning signal. If
the obstacle is closer than the minimum
distance, the actual distance might no
longer be indicated by the system.Center
approx. 40 in (100 cm)
Corners
approx. 24 in (60 cm)
Center
approx. 48 in (120 cm)
Corners
approx. 32 in (80 cm)
!
During parking maneuvers, pay special at-
tention to objects located above or below the
height of the sensors (e.g. planters or trailer
hitches). The Parktronic system will not detect
such objects at close range and damage to your
vehicle or the object may result.
Ultrasonic signals from outside sources (e.g.
truck air brakes, car wash or jackhammers) may
impair the operation of the Parktronic system.
Center
approx. 8in (20cm)
Corners
approx. 6in (15cm)
Page 285 of 522

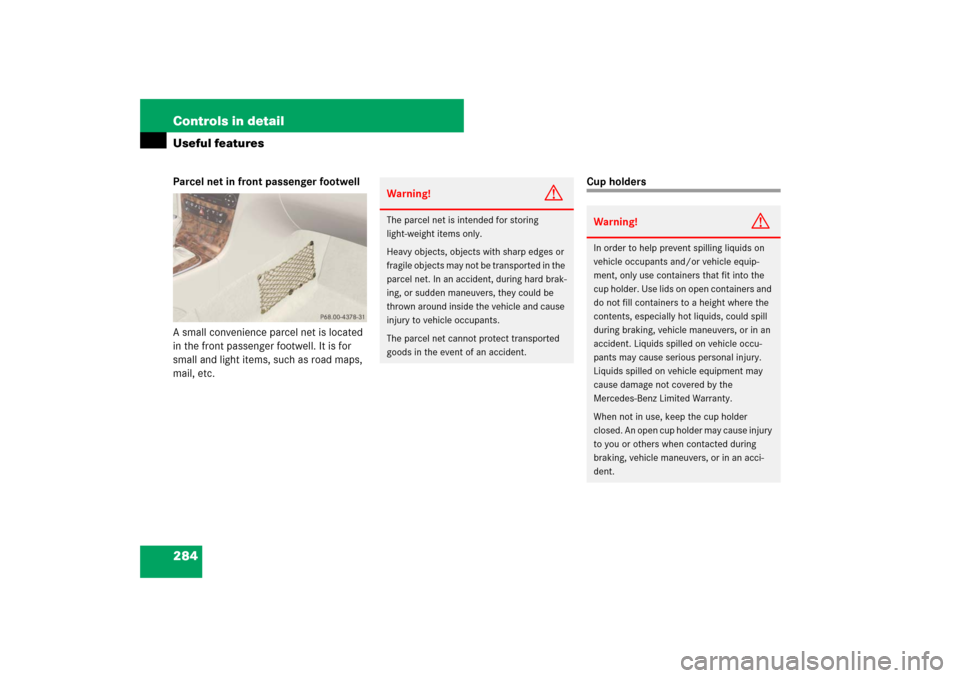
284 Controls in detailUseful featuresParcel net in front passenger footwell
A small convenience parcel net is located
in the front passenger footwell. It is for
small and light items, such as road maps,
mail, etc.
Cup holders
Warning!
G
The parcel net is intended for storing
light-weight items only.
Heavy objects, objects with sharp edges or
fragile objects may not be transported in the
parcel net. In an accident, during hard brak-
ing, or sudden maneuvers, they could be
thrown around inside the vehicle and cause
injury to vehicle occupants.
The parcel net cannot protect transported
goods in the event of an accident.
Warning!
G
In order to help prevent spilling liquids on
vehicle occupants and/or vehicle equip-
ment, only use containers that fit into the
cup holder. Use lids on open containers and
do not fill containers to a height where the
contents, especially hot liquids, could spill
during braking, vehicle maneuvers, or in an
accident. Liquids spilled on vehicle occu-
pants may cause serious personal injury.
Liquids spilled on vehicle equipment may
cause damage not covered by the
Mercedes-Benz Limited Warranty.
When not in use, keep the cup holder
closed. An open cup holder may cause injury
to you or others when contacted during
braking, vehicle maneuvers, or in an acci-
dent.
Page 328 of 522

327 Operation
Engine compartment
�
Pull handle2 to its stop out of radia-
tor grille.
�
Lift bottom of hood at edge of radiator
grille.
The hood will be automatically held
open at shoulder height by gas-filled
struts. Closing
�
Let the hood drop from a height of ap-
proximately 1 ft (30 cm).
The hood will lock audibly.
�
Check to make sure the hood is fully
closed.
If you can raise the hood at a point
above the headlamps, then it is not
properly closed. Open it again and let it
drop with somewhat greater force.
Engine oil
The amount of oil your engine needs will
depend on a number of factors, including
driving style. Higher oil consumption can
occur when�
the vehicle is new
�
the vehicle is driven frequently at
higher engine speeds
Engine oil consumption checks should only
be made after the vehicle break-in period.
Warning!
G
When closing the hood, use extreme caution
not to catch hands or fingers. Be careful that
you do not close the hood on anyone.
Make sure that the hood is securely en-
gaged before driving off. Do not continue
driving if the hood can no longer engage af-
ter an accident, for example. The hood could
otherwise come loose while the vehicle is in
motion and endanger you and others.
i
Do not use any special lubricant additives,
as these may damage the drive assemblies. Us-
ing special additives not approved by
Mercedes-Benz may cause damage not covered
by the Mercedes-Benz Limited Warranty.
More information on this subject is available at
any Mercedes-Benz Center.
Page 352 of 522

351 Operation
Tires and wheels
General:
Depending on the design standards used,
the tire size molded into the sidewall may
have no letter or a letter preceding the tire
size designation.
No letter preceding the size designation
(as illustrated above): Passenger car tire
based on European design standards.
Letter “P” preceding the size designation:
Passenger car tire based on U.S. design
standards.
Letter “LT” preceding the size designation:
Light Truck tire based on U.S. design
standards.
Letter “T” preceding the size designation:
Temporary spare tires which are high
pressure compact spares designed for
temporary emergency use only. Tire width
The tire width1 (
�page 350) indicates
the nominal tire width in mm.
Aspect ratio
The aspect ratio2 (�page 350) is the
dimensional relationship between tire
section height and section width and is
expressed in percentage. The aspect ratio
is arrived at by dividing section height by
section width.
Tire code
The tire code3 (
�page 350) indicates
the tire construction type. The “R” stands
for radial tire type. Letter “D” means
diagonal or bias ply construction; letter “B”
means belted-bias ply construction.
At the tire manufacturer’s option, any tire
with a speed capability above 149 mph
(240 km/h) can include a “ZR” in the size
designation (for example: 245/40 ZR 18).
For additional information, see “Tire speed
rating” (
�page 352).Rim diameter
The rim diameter4 (
�page 350) is the
diameter of the bead seat, not the
diameter of the rim edge. Rim diameter is
indicated in inches (in).
Tire load rating
The tire load rating5 (�page 350) is a
numerical code associated with the
maximum load a tire can support.
For example, a load rating of 91 corre-
sponds to a maximum load of 1 356 lb
(615 kg) the tire is designed to support.
See also “Maximum tire load”
(
�page 356) where the maximum load as-
sociated with the load index is indicated in
kilograms and lb.
Page 360 of 522

359 Operation
Tires and wheels
Tire ply material
1Plies in sidewall
2Plies under tread
This marking tells you about the type of
cord and number of plies in the sidewall
and under the tread.
Tire and loading terminology
Accessory weight
The combined weight (in excess of those
standard items which may be replaced) of
automatic transmission, power steering,
power brakes, power windows, power
seats, radio, and heater, to the extent that
these items are available as
factory-installed equipment (whether
installed or not).
Air pressure
The amount of air inside the tire pressing
outward on each square inch of the tire.
Air pressure is expressed in pounds per
square inch (psi), or kilopascal (kPa) or
bar.
Aspect ratio
Dimensional relationship between tire
section height and section width
expressed in percentage.
Warning!
G
The temperature grade for this tire is estab-
lished for a tire that is properly inflated and
not overloaded. Excessive speed, underin-
flation, or excessive loading, either sepa-
rately or in combination, can cause
excessive heat build-up and possible tire
failure.
i
For illustration purposes only. Actual data
on tires are specific to each vehicle and may vary
from data shown in above illustration.
Page 406 of 522

405 Practical hints
What to do if …
Display message
Possible cause/consequence
Possible solution
(USA only)Front passenger
airbag disabled
See Operator’s Manual
Front passenger front air bag is
deactivated while driving even
though an adult or someone
larger than a small individual is
occupying the front passenger
seat. Forces acting on the seat
may make the system sense a
decrease in weight.
Stop the vehicle in a safe location as soon as possible and check the front
passenger seat for the following:�
Apply the parking brake.
�
Switch off the ignition (
�page 38).
�
Have the front passenger vacate the seat and exit the vehicle.
�
Adjust the seat in a height position (
�page 43).
�
Make sure that no objects which apply forces to the seat are present
(e.g. objects such as books, briefcases etc. lodged underneath, be-
hind or around the seat). Such forces may cause the system to sense
that an occupant of a lesser weight than actually present is on the
front passenger seat.
�
Keep the seat unoccupied, close the front passenger door and turn on
the ignition (
�page 38).
(Continued on next page)