Page 347 of 723

346 Controls in detail
Seats
Seat heating
The buttons for seat heating are located on
the respective door. The red indicator
lamps on the button come on to show the
heating level selected.
1Seat heating button�Switch on the ignition (�page 336).
�Switching on: Press button1 repeat-
edly until the desired heating level is
set.
One or more red indicator lamps on the
button show the selected heating level.
�Switching off: Press button1 repeat-
edly until all indicator lamps go out.
Level
3Three indicator lamps on
(highest level)
The seat heating automatically
switches to level2 after approxi-
mately 8 minutes.
2Two indicator lamps on
The seat heating automatically
switches to level1 after approxi-
mately 10 minutes.
1One indicator lamp on
(lowest level)
The seat heating automatically
switches off after approximately
20 minutes. With seat heating
and seat ventilation* activated
the seat heating will not switch
off after 20 minutes.
offNo indicator lamp on
iIf one or more of the lamps on the seat heat-
ing button are flashing, there is insufficient volt-
age available since too many electrical
consumers are turned on. The seat heating
switches off automatically.
The seat heating will switch back on again auto-
matically as soon as sufficient voltage is avail-
able.
Page 348 of 723

347 Controls in detail
Seats
Seat ventilation*
The buttons for seat ventilation are located
on the respective door. The blue indicator
lamps on the button come on show the
ventilation level selected.
1Seat ventilation button�Switch on the ignition (�page 336).
�Switching on: Press button1 repeat-
edly until the desired ventilation level is
set.
One or more blue indicator lamps on
the button show the selected ventila-
tion level.
�Switching off: Press button1 repeat-
edly until all indicator lamps go out.
Level
3Three indicator lamps on
(highest level)
2Two indicator lamps on
1One indicator lamp on
(lowest level)
offNo indicator lamp on
iThe seat ventilation for the driver’s seat can
be activated using summer opening feature
(
�page 376).
iIf one or more of the lamps on the seat ven-
tilation button are flashing, there is insufficient
voltage available since too many electrical con-
sumers are turned on. The seat ventilation
switches off automatically.
The seat ventilation will switch back on again au-
tomatically as soon as sufficient voltage is avail-
able.
Page 350 of 723

349 Controls in detail
Seats
Rear seat head restraintsFolding head restraints back
The rear seat head restraints can be folded
backward for increased visibility.
1Switch in the front center console
�Switch on the ignition (�page 336).
�Press switch1 in the front center con-
sole briefly.
The rear seat head restraints will fold
backward.
Warning!G
For safety reasons, always drive with the
rear head restraints in the upright position
when the rear seats are occupied.
Otherwise, the back of the head will not be
supported in the event of a collision. That
could cause serious or even fatal injuries.
Rear seat occupants can be seriously in-
jured or killed.
Warning!G
Keep the area around head restraints clear
of articles (e.g. clothing) to not obstruct the
folding operation of the head restraints.
iYou can fold back the rear seat head
restraints,
�with the switch in front center console.
When the rear seat head restraint is in folded
position and a rear seat belt will be fastened,
the respective rear head restraint automati-
cally places upright.
�with fastened rear seat belt and rear seat
head restraint automatically placed upright,
by pressing the switch in the center console
again.
Page 351 of 723
350 Controls in detail
Seats
Placing head restraints upright
�Switch on the ignition (�page 336).
�Press and hold switch1 in the front
center console (
�page 349).
The rear seat head restraints will place
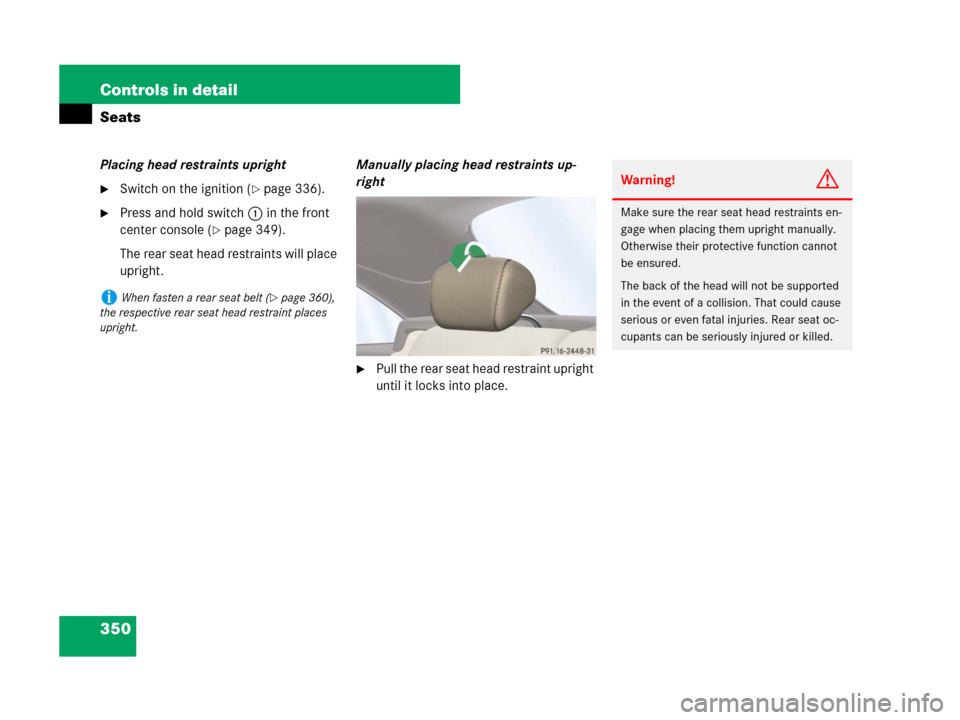
upright.Manually placing head restraints up-
right
�Pull the rear seat head restraint upright
until it locks into place.
iWhen fasten a rear seat belt (�page 360),
the respective rear seat head restraint places
upright.
Warning!G
Make sure the rear seat head restraints en-
gage when placing them upright manually.
Otherwise their protective function cannot
be ensured.
The back of the head will not be supported
in the event of a collision. That could cause
serious or even fatal injuries. Rear seat oc-
cupants can be seriously injured or killed.
Page 352 of 723

351 Controls in detail
Steering wheel
�Steering wheel
Make sure that
�you can reach the steering wheel with
your arms slightly bent at the elbows
�you can move your legs freely
�all displays (including malfunction and
indicator lamps) on the instrument
cluster are clearly visible
Steering wheel adjustment
1Adjusting steering wheel, in or out
2Adjusting steering column, up or down
�Switch on the ignition (�page 336) or
open the driver’s door.
�Adjusting steering wheel in or out:
Move stalk forward or back in the direc-
tion of arrow1 until a comfortable
steering wheel position is reached with
your arms slightly bent at the elbow.
�Adjusting steering wheel up or
down: Move stalk up or down in the di-
rection of arrow2.
Warning!G
Do not adjust the steering wheel while driv-
ing. Adjusting the steering wheel while driv-
ing could cause the driver to lose control of
the vehicle.
When leaving the vehicle, always remove the
SmartKey or SmartKey with KEYLESS-GO*
from the starter switch, take it with you, and
lock the vehicle.
Even with the SmartKey or SmartKey with
KEYLESS-GO* removed from the starter
switch or the SmartKey with KEYLESS-GO*
removed from the vehicle, the steering
wheel adjustment feature can be operated
when the driver’s door is open. Therefore,
do not leave children unattended in the ve-
hicle, or with access to an unlocked vehicle.
A child’s unsupervised access to a vehicle
could result in an accident and/or serious
personal injury.
iThe memory function (�page 357) lets you
store settings for the steering wheel together
with the settings for the seat position and the ex-
terior rear view mirrors.
Page 353 of 723

352 Controls in detail
Steering wheel
Heated steering wheel*
The steering wheel heating warms up the
leather area of the steering wheel.
1Switching on
2Switching off
3Indicator lamp
�Switch on the ignition (�page 336).
�Switching on: T urn s witc h at t he tip of
stalk in the direction of arrow1.
The steering wheel is heated. Indicator
lamp3 comes on.
�Switching off: T u r n s w i t c h a t t h e t i p o f
stalk in the direction of arrow2.
The steering wheel heating is turned
off. Indicator lamp3 goes out.
iThe steering wheel heating will not switch
on, when the temperature of the vehicle interior
is above 86°F (30°C).
iIndicator lamp3 flashes or goes out
�in case of power surge or undervoltage
�in case of a steering wheel heating
malfunction
iThe steering wheel heating switches off
automatically:
�when you remove the SmartKey from the
starter switch
�on vehicles with KEYLESS-GO*, when you
switch off the ignition (
�page 336) and
open the driver’s door
�when the temperature of the vehicle interior
is above 86°F (30°C)
�after approximately 30 minutes
Page 354 of 723

353 Controls in detail
Mirrors
�Mirrors
Adjust the interior and exterior rear view
mirrors before driving so that you have a
good view of the road and traffic condi-
tions.
Interior rear view mirror
�Manually adjust the interior rear view
mirror.
For more information, see “Auto-dimming
rear view mirrors” (
�page 355).
Exterior rear view mirrors1 Selector switch for right or left exterior
mirror
2Adjustment button
�Switch on the ignition (�page 336).
�Press button1 repeatedly until de-
sired exterior mirror is selected.
The left or right indicator lamp in
button1 comes on.
�Push adjustment button2 up, down,
left, or right according to the desired
setting.
Warning!G
Exercise care when using the passenger
side exterior rear view mirror. The mirror
surface is convex (outwardly curved surface
for a wider field of view). Objects in mirror
are closer than they appear. Check your in-
terior rear view mirror or glance over your
shoulder before changing lanes.
iWhen you press button1 for the first time,
the exterior mirror on the driver’s side is always
selected.
If you do not make adjustments to the selected
exterior rear view mirror within 15 seconds, the
indicator lamp goes out. You will then have to se-
lect the desired exterior rear view mirror again
before any adjustments can be made. Adjust-
ments can only be made with the indicator lamp
for the respective exterior rear view mirror but-
ton illuminated.
iAt low ambient temperatures, the exterior
rear view mirrors will be heated automatically.
iThe memory function (�page 357) lets you
store the setting for the exterior rear view mir-
rors together with the setting for the steering
wheel and the seat positions.
Page 355 of 723

354 Controls in detail
Mirrors
Power folding exterior rear view
mirrors
Folding exterior rear view mirrors in
and out automatically
When the corresponding function in the
COMAND system is activated
(
�page 237):
�The exterior rear view mirrors automat-
ically fold in as soon as the vehicle is
locked from the outside.
�The exterior rear view mirrors automat-
ically fold out as soon as the vehicle is
unlocked and the driver’s or passenger
door are subsequently opened.Folding exterior rear view mirrors in
and out manually
The exterior rear view mirrors can vibrate if
they are not folded out completely.
1Folds the exterior mirrors in and out�Switch on the ignition (�page 336).
�Folding in: Press button1.
�Folding out: Press button1 again.
!Before driving the vehicle through an auto-
matic car wash, fold the exterior mirrors in. Oth-
erwise they may get damaged.
iThe mirrors do not fold out if they were pre-
viously folded in manually.
iIf you are driving at more than approximately
9 mph (15 km/h), you will not be able to fold the
exterior mirrors in.
!If an exterior rear view mirror housing is
forcibly pushed forward (hit from the rear), repo-
sition it manually by applying firm pressure until
it snaps back into place.
If an exterior rear view mirror housing is forcibly
pushed rearward (hit from the front), press
button1 to fold mirrors in, then press
button1 again to fold mirrors out. Do not force
mirrors by hand as this may damage the adjust-
ment mechanism.
The mirror housing is then properly positioned
and you can adjust the mirror in the usual
manner.