Page 561 of 723
558 Operation
Vehicle care
Headlamps, tail lamps, side markers,
turn signal lenses
�Use a mild car wash detergent, such as
Mercedes-Benz approved Car
Shampoo, with plenty of water.Cleaning the DISTRONIC Plus*/
PRE-SAFE
® Brake* system sensors
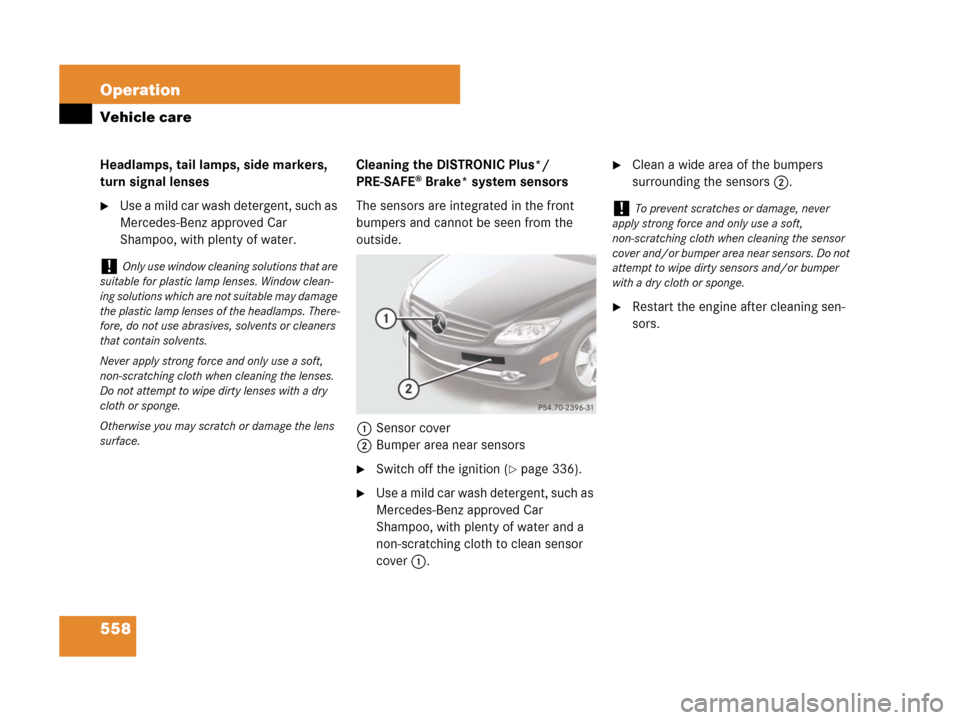
The sensors are integrated in the front
bumpers and cannot be seen from the
outside.
1Sensor cover
2Bumper area near sensors
�Switch off the ignition (�page 336).
�Use a mild car wash detergent, such as
Mercedes-Benz approved Car
Shampoo, with plenty of water and a
non-scratching cloth to clean sensor
cover1.
�Clean a wide area of the bumpers
surrounding the sensors2.
�Restart the engine after cleaning sen-
sors.
!Only use window cleaning solutions that are
suitable for plastic lamp lenses. Window clean-
ing solutions which are not suitable may damage
the plastic lamp lenses of the headlamps. There-
fore, do not use abrasives, solvents or cleaners
that contain solvents.
Never apply strong force and only use a soft,
non-scratching cloth when cleaning the lenses.
Do not attempt to wipe dirty lenses with a dry
cloth or sponge.
Otherwise you may scratch or damage the lens
surface.
!To prevent scratches or damage, never
apply strong force and only use a soft,
non-scratching cloth when cleaning the sensor
cover and/or bumper area near sensors. Do not
attempt to wipe dirty sensors and/or bumper
with a dry cloth or sponge.
Page 580 of 723
577 Practical hints
What to do if …?
Warning!G
Each tire, including the spare (if provided),
should be checked monthly when cold and
inflated to the inflation pressure recom-
mended by the vehicle manufacturer on the
vehicle placard or the tire inflation pressure
label. (If your vehicle has tires of a different
size than the size indicated on the vehicle
placard or the tire inflation pressure label,
you should determine the proper tire infla-
tion pressure for those tires).
As an added safety feature, your vehicle has
been equipped with a Advanced Tire Pres-
sure Monitoring System (Advanced TPMS)
that illuminates a low tire pressure telltale
when one or more of your tires is significant-
ly under-inflated. Accordingly, when the low
tire pressure telltale illuminates, you should
stop and check your tires as soon as possi-
ble, and inflate them to the proper pressure.
Driving on a significantly under-inflated tire
causes the tire to overheat and can lead to
tire failure.
Under-inflation also reduces fuel efficiency
and tire tread life, and may affect the vehi-
cle’s handling and stopping ability. Please
note that the Advanced TPMS is not a sub-
stitute for proper tire maintenance, and it is
the driver’s responsibility to maintain cor-
rect tire pressure, even if under-inflation has
not reached the level to trigger illumination
of the Advanced TPMS low tire pressure
telltale.
Your vehicle has also been equipped with a
Advanced TPMS malfunction indicator to in-
dicate when the system is not operating
properly. The Advanced TPMS malfunction
indicator is combined with the low tire pres-
sure telltale. When the system detects a
malfunction, the telltale will flash for approx-
imately 1 minute and then remain continu-
ously illuminated. This sequence will
continue upon subsequent vehicle start-ups
as long as the malfunction exists. When the
malfunction indicator is illuminated, the sys-
tem may not be able to detect or signal low
tire pressure as intended.Advanced TPMS malfunctions may occur for
a variety of reasons, including the installa-
tion of replacement or alternate tires or
wheels on the vehicle that prevent the Ad-
vanced TPMS from functioning properly. Al-
ways check the Advanced TPMS
malfunction telltale after replacing one or
more tires or wheels on your vehicle to en-
sure that the replacement or alternate tires
and wheels allow the Advanced TPMS to
continue to function properly.
Page 583 of 723
580 Practical hints
What to do if …?
Vehicle status messages in the multi-
function display
Warning and malfunction messages ap-
pear in the multifunction display located in
the instrument cluster.
Certain warning and malfunction messag-
es are accompanied by an audible signal.
High-priority messages are shown in red
on the multifunction display. Messages of
lower priority are also shown in yellow or
white.
Address these messages accordingly and
follow the additional instructions given in
this Operator’s Manual.Certain messages of high priority cannot
be cleared from the multifunction display
using# or L on the multifunction
steering wheel (
�page 257).
Other messages of high priority and mes-
sages of less immediate priority can be
cleared from the multifunction display
using# or L. They are then stored
in the vehicle status message memory
(
�page 270). Remember that clearing a
message will only make the message dis-
appear. Clearing a message will not cor-
rect the condition that caused the
message to appear.
Warning!G
No messages will be displayed if either the
instrument cluster or the multifunction dis-
play is inoperative.
As a result, you will not be able to see infor-
mation about your driving conditions, such
as speed or outside temperature, warn-
ing/indicator lamps, malfunction/warning
messages or the failure of any systems.
Driving characteristics may be impaired.
If you must continue to drive, please do so
with added caution. Contact an authorized
Mercedes-Benz Center as soon as possible.
Page 584 of 723
581 Practical hints
What to do if …?
On the pages that follow, you will find a
compilation of the most important warning
and malfunction messages that may ap-
pear in the malfunction display.
For your convenience the messages are di-
vided into two sections:
�Text messages (�page 582)
�Symbol messages (�page 593)
Warning!G
All categories of messages contain impor-
tant information which should be taken note
of and, where a malfunction is indicated, ad-
dressed as soon as possible at an autho-
rized Mercedes-Benz Center.
Failure to repair condition noted may cause
damage not covered by the Mercedes-Benz
Limited Warranty, or result in property dam-
age or personal injury.
iSwitching on the ignition causes all instru-
ment cluster lamps (except high beam headlamp
indicator lamp and turn signal indicator lamps
unless activated) as well as the multifunction dis-
play to come on. Make sure the lamps and multi-
function display are in working order before
starting your journey.
Page 607 of 723
604 Practical hints
What to do if …?
Display Possible cause/consequencePossible solution
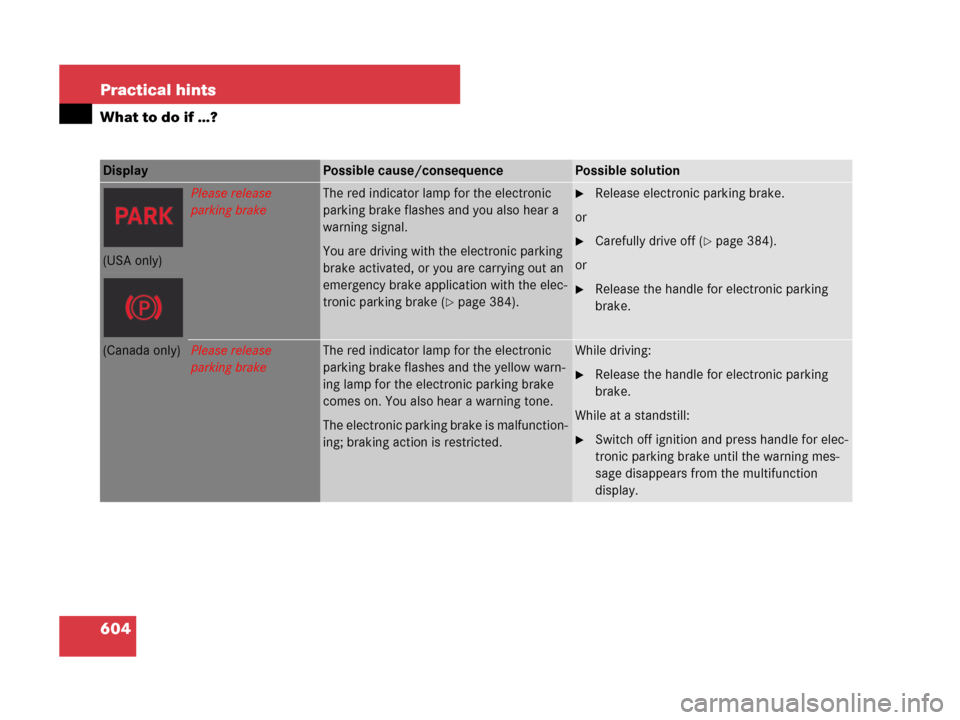
Please release
parking brakeThe red indicator lamp for the electronic
parking brake flashes and you also hear a
warning signal.
You are driving with the electronic parking
brake activated, or you are carrying out an
emergency brake application with the elec-
tronic parking brake (
�page 384).
�Release electronic parking brake.
or
�Carefully drive off (�page 384).
or
�Release the handle for electronic parking
brake.
(USA only)
(Canada only)Please release
parking brakeThe red indicator lamp for the electronic
parking brake flashes and the yellow warn-
ing lamp for the electronic parking brake
comes on. You also hear a warning tone.
The electronic parking brake is malfunction-
ing; braking action is restricted.While driving:
�Release the handle for electronic parking
brake.
While at a standstill:
�Switch off ignition and press handle for elec-
tronic parking brake until the warning mes-
sage disappears from the multifunction
display.
Page 621 of 723
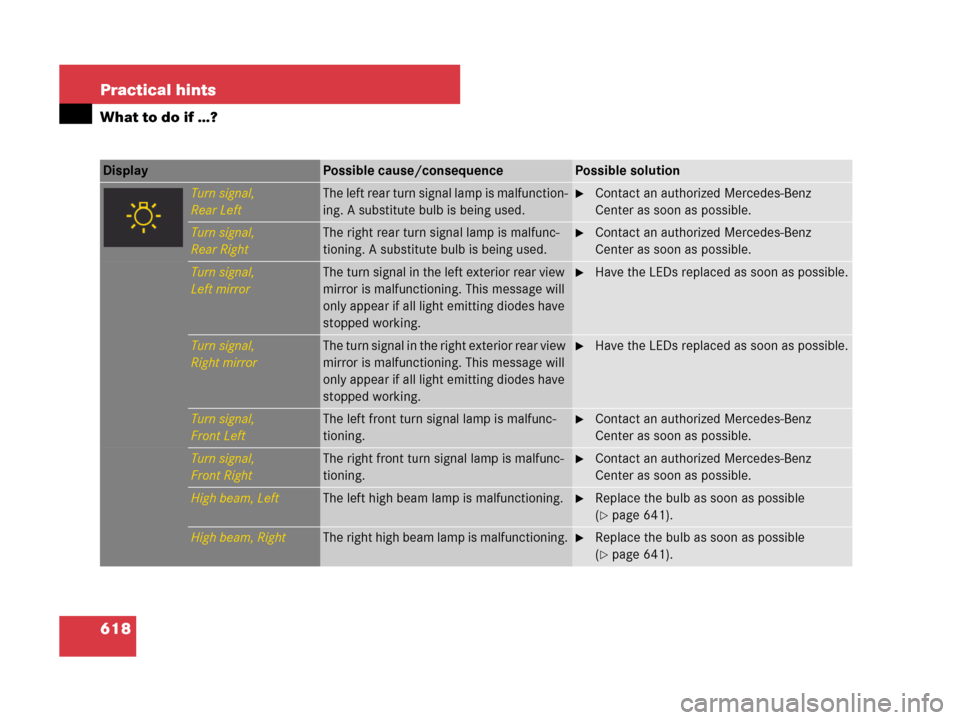
618 Practical hints
What to do if …?
Display Possible cause/consequencePossible solution
Turn signal,
Rear LeftT h e l e f t r e a r t u r n s i g n a l l a m p i s m a l f u n c t i o n -
ing. A substitute bulb is being used.�Contact an authorized Mercedes-Benz
Center as soon as possible.
Turn signal,
Rear RightThe right rear turn signal lamp is malfunc-
tioning. A substitute bulb is being used.�Contact an authorized Mercedes-Benz
Center as soon as possible.
Turn signal,
Left mirrorThe turn signal in the left exterior rear view
mirror is malfunctioning. This message will
only appear if all light emitting diodes have
stopped working.�Have the LEDs replaced as soon as possible.
Turn signal,
Right mirrorThe turn signal in the right exterior rear view
mirror is malfunctioning. This message will
only appear if all light emitting diodes have
stopped working.�Have the LEDs replaced as soon as possible.
Turn signal,
Front LeftThe left front turn signal lamp is malfunc-
tioning.�Contact an authorized Mercedes-Benz
Center as soon as possible.
Turn signal,
Front RightThe right front turn signal lamp is malfunc-
tioning.�Contact an authorized Mercedes-Benz
Center as soon as possible.
High beam, LeftThe left high beam lamp is malfunctioning.�Replace the bulb as soon as possible
(
�page 641).
High beam, RightThe right high beam lamp is malfunctioning.�Replace the bulb as soon as possible
(
�page 641).
Page 644 of 723
641 Practical hints
Replacing bulbs
�Replacing bulbs
Safe vehicle operation depends on proper
exterior lighting and signaling. It is there-
fore essential that all bulbs and lamp as-
semblies are in good working order at all
times.
Correct headlamp adjustment is extremely
important. Have headlamps checked and
readjusted at regular intervals and when a
bulb has been replaced. See an authorized
Mercedes-Benz Center for headlamp ad-
justment.iIf the headlamps or front fog lamps are
fogged up on the inside as a result of high humid-
ity, driving the vehicle a distance with the lights
on should clear up the fogging.iSubstitute bulbs will be brought into use
when the following lamps malfunction:
�Brake lamps
�Rear fog lamps
�Front parking lamps
�Tail lamps
�Turn signal lamps
Read and observe messages in the multifunction
display (
�page 580).
Page 645 of 723
642 Practical hints
Replacing bulbs
Bulbs Front lamps Rear lamps
LampType
1Low and high beam
lamp1
1Bi-Xenon headlamps: Low beam and high beam
use the same D1S-35W lamp. Do not replace the
Bi-Xenon bulbs yourself. Contact an authorized
Mercedes-Benz Center.
D1S-35 W
2Additional turn signal
lampLED
3Parking and standing
lampW5W
4Side marker lampW5W
5High beam flasher lampH7-55 W
IR emitter* (for Night
View Assist*)H11-55 W
6Corner-illuminating
lampH7-55 W
7Fog lampH11-55 W
8Turn signal lampPY 24 W
LampType
9High mounted brake
lampLED
aTurn signal lampHiP 16 W
bBrake lamp/tail lamp
and standing lampLED
cLicense plate lampW5W
dBackup lampHiP 16 W
eSide marker lampLED
fRear fog lamp (driver’s
side only)HiP 19 W