Page 331 of 723

330 Controls in detail
Locking and unlocking
�Global unlocking: Grasp an outside
door handle.
�All turn signal lamps flash once.
�An acoustic signal sounds once.
�The locking knobs in the doors
move up.
�The anti-theft alarm system is dis-
armed.
The vehicle will lock again automatically
and rearm the anti-theft alarm system
within approximately 40 seconds of un-
locking if:
�neither a door nor the trunk is opened
�the central locking/unlocking switch is
not activated
�Global locking: Close both doors and
touch outside of door handle1. Do
not keep your hand in the door handle
recess.
With the trunk and both doors closed:
�All turn signal lamps flash three
times.
�An acoustic signal sounds three
times.
�The locking knobs in the doors
move down.
�The anti-theft alarm system is
armed.Selective setting
If you frequently travel alone, you may wish
to reprogram the SmartKey with
KEYLESS-GO so when you, grasp the driv-
er’s outside door handle only the driver’s
door and the fuel filler flap unlocks.
�Press and hold buttonsŒ and‹
simultaneously for about 5 seconds un-
til battery check lamp5 (
�page 326)
flashes twice.
The SmartKey with KEYLESS-GO will
then function as follows:
�Unlocking driver’s door and fuel fill-
er flap: Grasp the driver’s outside door
handle.
�All turn signal lamps flash once.
�An acoustic signal sounds once.
�The locking knob in the driver’s
door moves up.
�The anti-theft alarm system is dis-
armed.
iThe vehicle could inadvertently be unlocked
if the SmartKey with KEYLESS-GO is within 3 ft
(1 m) of the vehicle and:
�an outside door handle is splashed with
water, or
�you attempt to clean an outside door handle.
iYou can also lock the vehicle using the
KEYLESS-GO lock button on trunk lid, if equipped
(
�page 331) or, with the KEYLESS-GO lock-
ing/closing switch (
�page 464).
Page 332 of 723
331 Controls in detail
Locking and unlocking
�Global unlocking: Grasp the passen-
ger outside door handle.
�All turn signal lamps flash once.
�An acoustic signal sounds once.
�The locking knobs in the doors
move up.
�The anti-theft alarm system is dis-
armed.
�Global locking: Close both doors and
touch outside of door handle1
(
�page 329). Do not keep your hand in
the door handle recess.
With the trunk and both doors closed:
�All turn signal lamps flash three
times.
�An acoustic signal sounds three
times.
�The locking knobs in the doors
move down.
�The anti-theft alarm system is
armed.
�Restoring to factory setting: Press
and hold buttonsŒ and‹ si-
multaneously for about 5 seconds until
battery check lamp5 (
�page 326)
flashes twice.Global locking using KEYLESS-GO lock
button on trunk lid
Depending on production date, your vehi-
cle may be equipped with the KEYLESS-GO
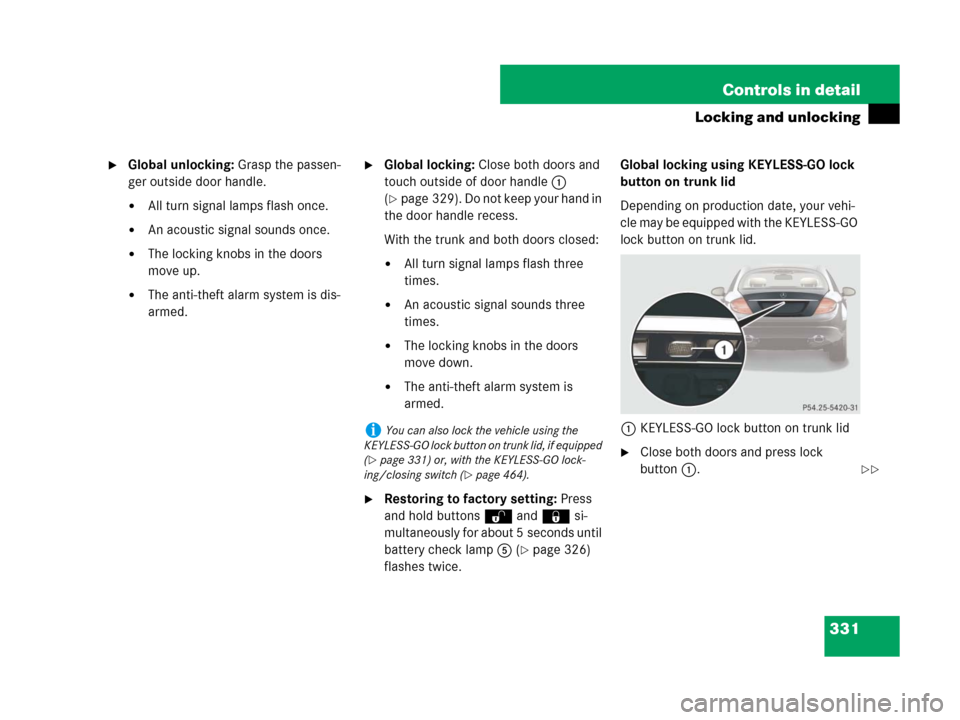
lock button on trunk lid.
1KEYLESS-GO lock button on trunk lid
�Close both doors and press lock
button1.
iYou can also lock the vehicle using the
KEYLESS-GO lock button on trunk lid, if equipped
(
�page 331) or, with the KEYLESS-GO lock-
ing/closing switch (
�page 464).��
Page 347 of 723
346 Controls in detail
Seats
Seat heating
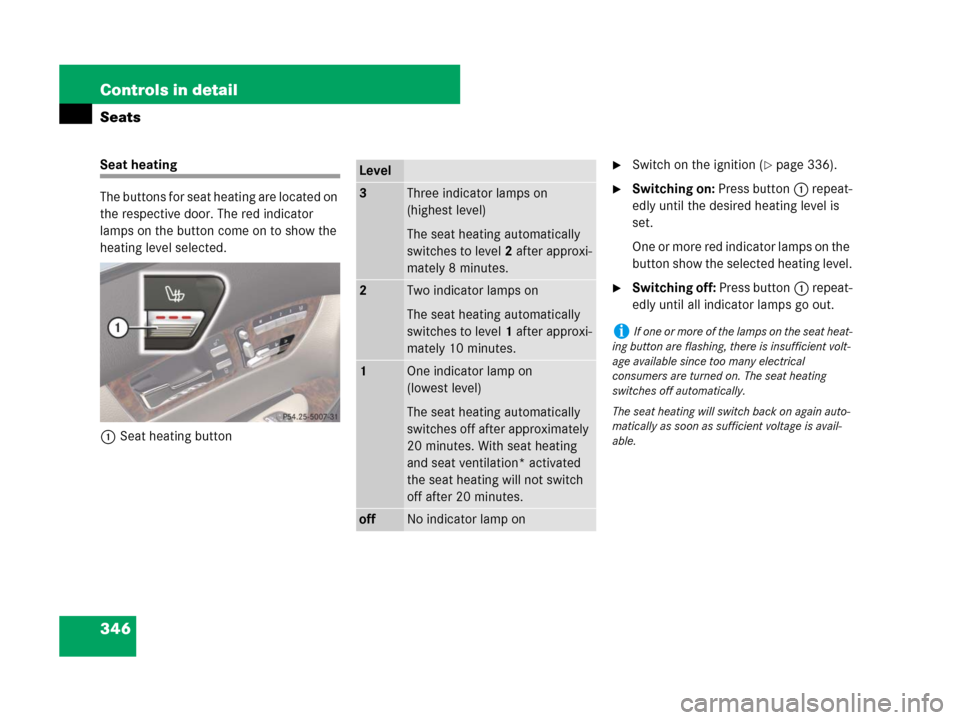
The buttons for seat heating are located on
the respective door. The red indicator
lamps on the button come on to show the
heating level selected.
1Seat heating button�Switch on the ignition (�page 336).
�Switching on: Press button1 repeat-
edly until the desired heating level is
set.
One or more red indicator lamps on the
button show the selected heating level.
�Switching off: Press button1 repeat-
edly until all indicator lamps go out.
Level
3Three indicator lamps on
(highest level)
The seat heating automatically
switches to level2 after approxi-
mately 8 minutes.
2Two indicator lamps on
The seat heating automatically
switches to level1 after approxi-
mately 10 minutes.
1One indicator lamp on
(lowest level)
The seat heating automatically
switches off after approximately
20 minutes. With seat heating
and seat ventilation* activated
the seat heating will not switch
off after 20 minutes.
offNo indicator lamp on
iIf one or more of the lamps on the seat heat-
ing button are flashing, there is insufficient volt-
age available since too many electrical
consumers are turned on. The seat heating
switches off automatically.
The seat heating will switch back on again auto-
matically as soon as sufficient voltage is avail-
able.
Page 348 of 723
347 Controls in detail
Seats
Seat ventilation*
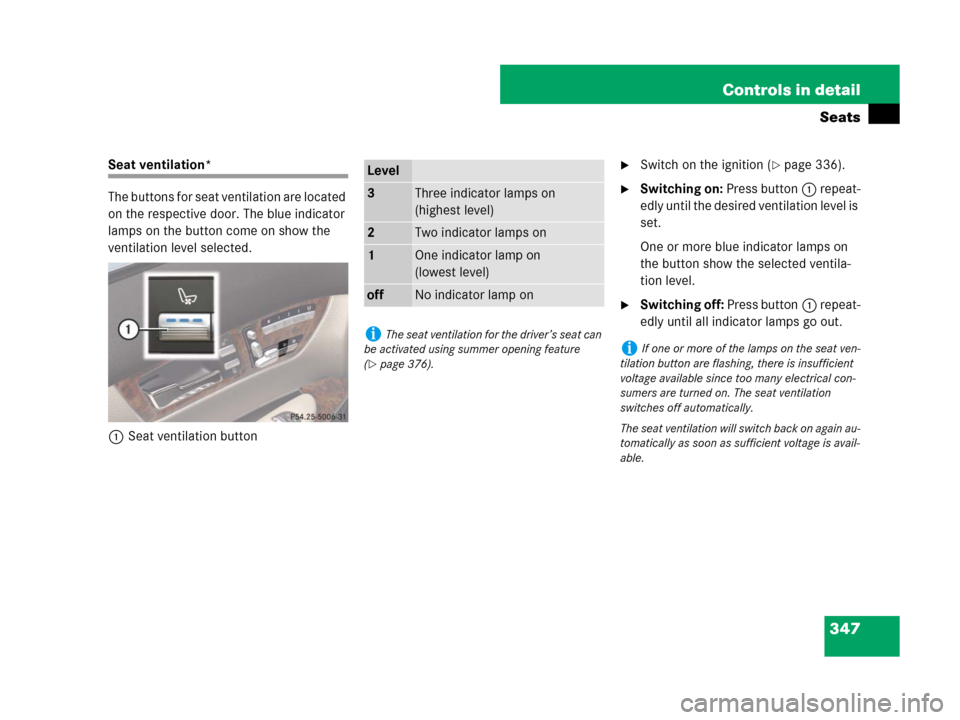
The buttons for seat ventilation are located
on the respective door. The blue indicator
lamps on the button come on show the
ventilation level selected.
1Seat ventilation button�Switch on the ignition (�page 336).
�Switching on: Press button1 repeat-
edly until the desired ventilation level is
set.
One or more blue indicator lamps on
the button show the selected ventila-
tion level.
�Switching off: Press button1 repeat-
edly until all indicator lamps go out.
Level
3Three indicator lamps on
(highest level)
2Two indicator lamps on
1One indicator lamp on
(lowest level)
offNo indicator lamp on
iThe seat ventilation for the driver’s seat can
be activated using summer opening feature
(
�page 376).
iIf one or more of the lamps on the seat ven-
tilation button are flashing, there is insufficient
voltage available since too many electrical con-
sumers are turned on. The seat ventilation
switches off automatically.
The seat ventilation will switch back on again au-
tomatically as soon as sufficient voltage is avail-
able.
Page 358 of 723
357 Controls in detail
Memory function
�Memory function
Prior to operating the vehicle, the driver
should check and adjust the seat height,
seat position fore and aft, and seat back-
rest angle if necessary, to ensure adequate
control, reach, and comfort. The head
restraint should also be adjusted for
proper height. See also the section on
air bags (
�page 42) for proper seat
positioning.
In addition, adjust the steering wheel to
ensure adequate control, reach, operation
and comfort. Both the interior and exterior
rear view mirrors should be adjusted for
adequate rear vision.
Fasten seat belts. Infants and small
children should be seated in a properly se-
cured restraint system that complies with
U.S. Federal Motor Vehicle Safety
Standards 213 and 225 and
Canadian Motor Vehicle Safety Standards
213 and 210.2.With the memory function you can store up
to three different configurations.
The following settings are stored when us-
ing the buttons on the driver’s door:
�Driver’s seat, head restraint height and
backrest position
�Lumbar support (CL 550)
�Drive-dynamic multicontour seat*:
activation/deactivation
�Steering wheel position
�Exterior rear view mirrors positionThe following settings are stored when us-
ing the buttons on the passenger door:
�Front passenger seat, head restraint
high and backrest position
�Lumbar support (CL 550)
�Drive-dynamic multicontour seat*:
activation/deactivation
Warning!G
Do not activate the memory function while
driving. Activating the memory function
while driving could cause the driver to lose
control of the vehicle.
Page 359 of 723
358 Controls in detail
Memory function
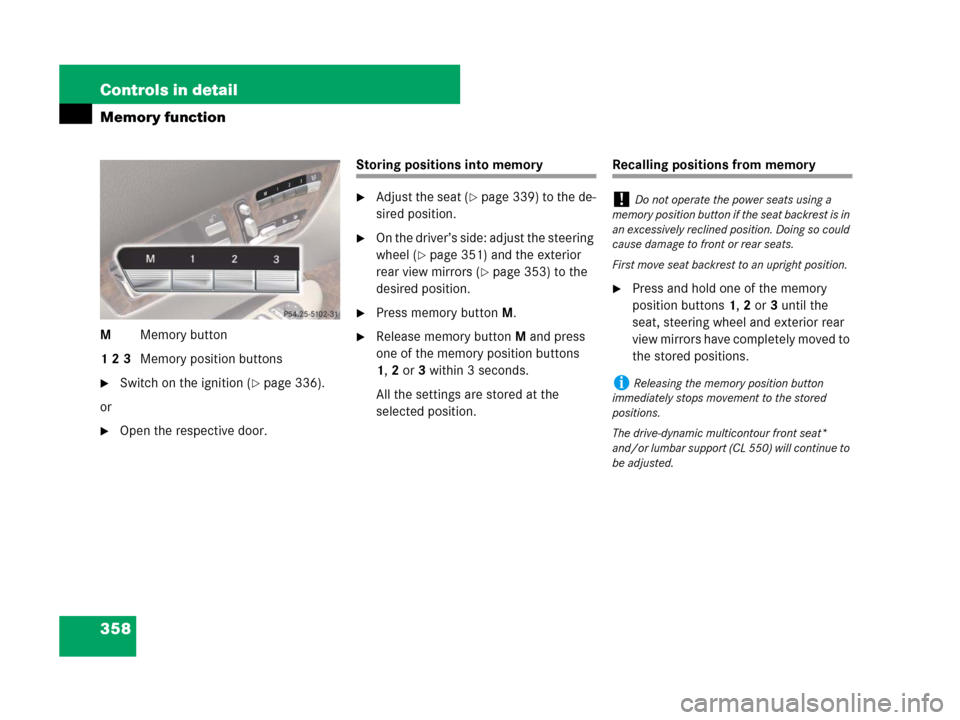
MMemory button
1 2 3Memory position buttons
�Switch on the ignition (�page 336).
or
�Open the respective door.
Storing positions into memory
�Adjust the seat (�page 339) to the de-
sired position.
�On the driver’s side: adjust the steering
wheel (
�page 351) and the exterior
rear view mirrors (
�page 353) to the
desired position.
�Press memory buttonM.
�Release memory buttonM and press
one of the memory position buttons
1,2or3 within 3 seconds.
All the settings are stored at the
selected position.
Recalling positions from memory
�Press and hold one of the memory
position buttons1,2or3 until the
seat, steering wheel and exterior rear
view mirrors have completely moved to
the stored positions.
!Do not operate the power seats using a
memory position button if the seat backrest is in
an excessively reclined position. Doing so could
cause damage to front or rear seats.
First move seat backrest to an upright position.
iReleasing the memory position button
immediately stops movement to the stored
positions.
The drive-dynamic multicontour front seat*
and/or lumbar support (CL 550) will continue to
be adjusted.
Page 360 of 723
359 Controls in detail
Memory function
Storing exterior rear view mirror park-
ing position
For easier parking, you can adjust the pas-
senger-side exterior rear view mirror so
that you can see the right rear wheel as
soon as you engage reverse gearR.
For information on activating the parking
position, see “Activating exterior rear view
mirror parking position” (
�page 356).
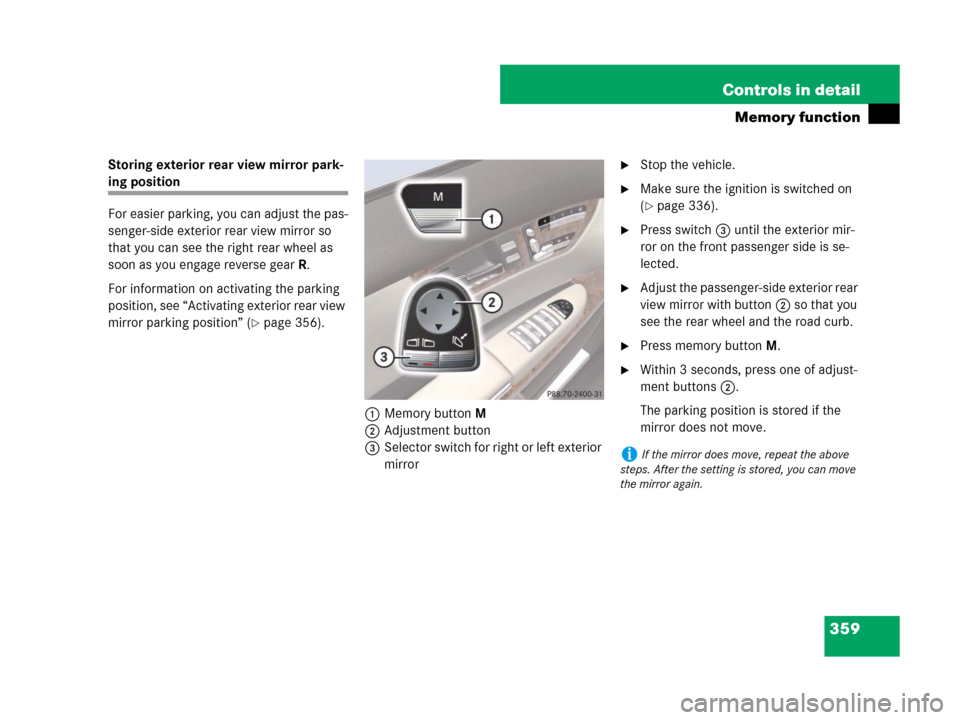
1Memory button M
2Adjustment button
3Selector switch for right or left exterior
mirror
�Stop the vehicle.
�Make sure the ignition is switched on
(
�page 336).
�Press switch3 until the exterior mir-
ror on the front passenger side is se-
lected.
�Adjust the passenger-side exterior rear
view mirror with button2 so that you
see the rear wheel and the road curb.
�Press memory button M.
�Within 3 seconds, press one of adjust-
ment buttons2.
The parking position is stored if the
mirror does not move.
iIf the mirror does move, repeat the above
steps. After the setting is stored, you can move
the mirror again.
Page 370 of 723
369 Controls in detail
Lighting
Hazard warning flasher
The hazard warning flasher can be
switched on at all times, even with the
SmartKey removed from the starter switch
or with the SmartKey with KEYLESS-GO*
removed from the vehicle.
The hazard warning flasher is automatical-
ly switched on if
�an air bag has been triggered
�CL 600 and USA only: you brake the ve-
hicle strongly at a speed of more than
50 mph (70 km/h) and bring it to a
complete stop
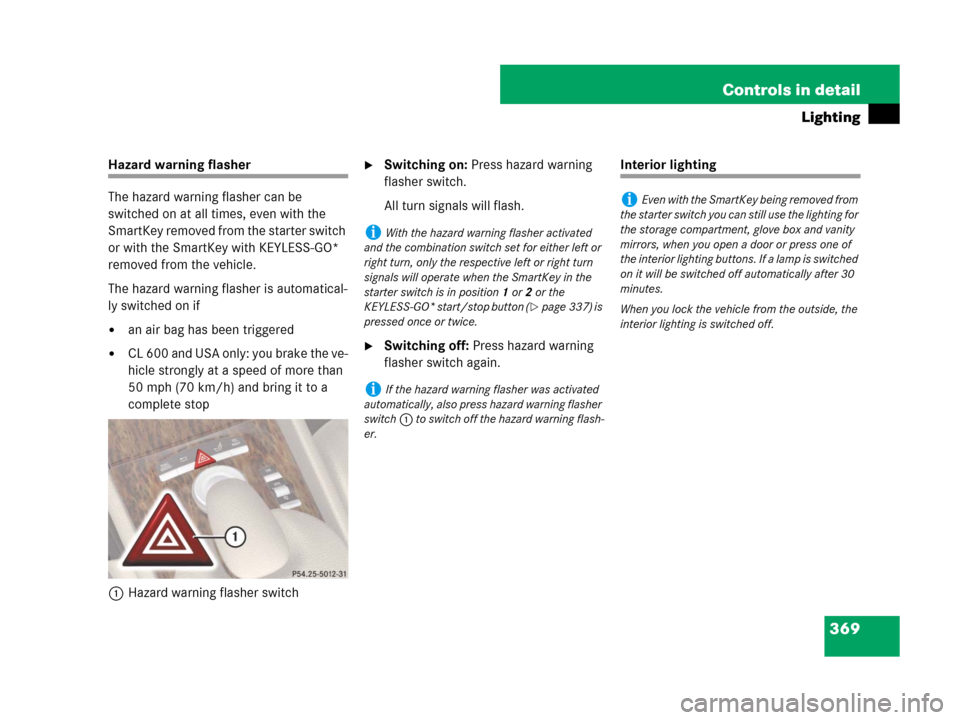
1Hazard warning flasher switch
�Switching on: Press hazard warning
flasher switch.
All turn signals will flash.
�Switching off: Press hazard warning
flasher switch again.
Interior lighting
iWith the hazard warning flasher activated
and the combination switch set for either left or
right turn, only the respective left or right turn
signals will operate when the SmartKey in the
starter switch is in position1 or2 or the
KEYLESS-GO* start/stop button (
�page 337) is
pressed once or twice.
iIf the hazard warning flasher was activated
automatically, also press hazard warning flasher
switch 1 to switch off the hazard warning flash-
er.
iEven with the SmartKey being removed from
the starter switch you can still use the lighting for
the storage compartment, glove box and vanity
mirrors, when you open a door or press one of
the interior lighting buttons. If a lamp is switched
on it will be switched off automatically after 30
minutes.
When you lock the vehicle from the outside, the
interior lighting is switched off.