2007 MERCEDES-BENZ C-CLASS ESTATE trailer
[x] Cancel search: trailerPage 108 of 377
Light
s 105
Headlamp flasher
X
To switch on: briefly pull the combinatio n
switch in the direction of arrow 2. Hazard warning lamps
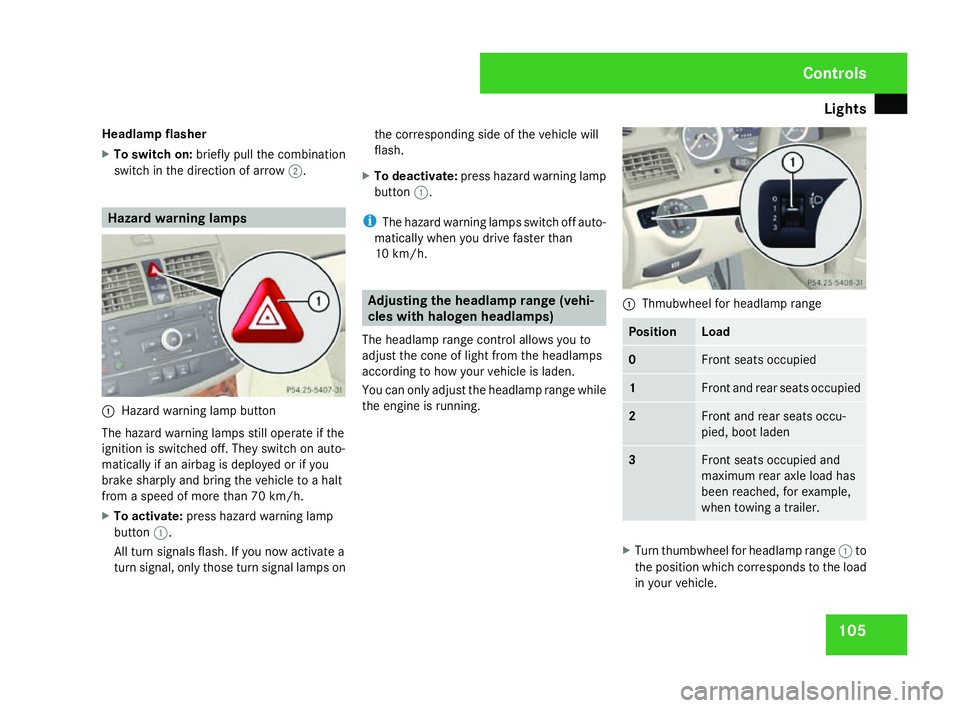
1
Hazard warning lamp button
The hazard warning lamps still operate if the
ignition is switched off. They switch on auto-
matically if an airbag is deployed or if yo u
brake sharply and bring the vehicle to a halt
from a speed of more than 70 km/h.
X To activate :press hazard warning lamp
button 1.
All turn signals flash. If you now activate a
turn signal, only those turn signal lamps on the corresponding side of the vehicle will
flash.
X To deactivate :press hazard warning lamp
button 1.
i The hazard warning lamps switch off auto-
matically when you drive faster than
10 km/h. Adjusting the headlamp range (vehi-
cles with halogen headlamps)
The headlamp range control allows you to
adjust the cone of light from the headlamps
according to how your vehicle is laden.
You can only adjust the headlamp range while
the engine is running. 1
Thmubwheel for headlamp range Position Load
0 Front seats occupied
1 Front and rear seats occupied
2 Front and rear seats occu
-
pied, boot laden 3 Front seats occupied and
maximum rear axle load ha s
been reached, for example,
when towing a trailer. X
Turn thumbwheel for headlamp range 1to
the position which corresponds to the load
in your vehicle. Controls
204_AKB; 2; 3, en-G
B
mkalafa , 2007-06-26T23:11:51+02:00 - Seite 105
Page 123 of 377

Transmission
12
0 ç To use the braking effect of the
engine on downhill gradients and
for driving:
R
on steep mountain roads
R in mountainous terrain
R in arduous conditions æ To use the braking effect of the
engine on extremely steep downhill
gradients and long downhill
stretches.
Program selector button
1
Program selector button S
Spor t For all normal driving con-
ditions
C
Comfort For comfort mod
e !
Only press program selector button 1
when the selector lever is in position P,N
or D.
X Press program selector button 1repeat-
edly until the letter (C/S)for the desired
gearshift program appears in the speed-
ometer display.
Comfort mode Cis characterised by the fol-
lowing :
R the vehicle pulling away more gently in
forward and reverse gears, unless the
accelerator pedal is depressed fully.
R an increase in traction. This improves th e
driving stability of the vehicle on slippery
road surfaces, for example.
R the automatic transmission shifting up
sooner; consequently, the vehicle is driven
at lower engine speeds and the wheels ar e
less likely to spin . Driving tips Accelerator pedal position
Your style of driving influences how the auto-
matic transmission shifts gear :
R little throttle: early upshift s
R more throttle: late upshifts
Kickdown
Use kickdown for maximum acceleration.
X Depress the accelerator pedal beyond the
pressure point.
The transmission shifts to a lower gear
depending on the engine speed.
X Ease off on the accelerator pedal once the
desired speed is reached.
The automatic transmission shifts back up .
Trailer towin g
X Drive in the middle of the engine spee d
range on uphill gradients.
X Shift down to shift range 3or 2
( Y page 119) depending on the incline of
the uphill or downhill gradient, even if
cruise control* is activated. Controls
* optional
204_AKB; 2; 3, en-GB
mkalafa,
2007-06-26T23:11:51+02:00 - Seite 120
Page 148 of 377
Driving sys
tems 14
5
X
Press %or$ to select Reset all
settings? SelectNoorYes .
X Select Yesif you want to reset all the set-
tings .
X Press #to confirm the selection.
The multi-function display shows a confir -
mation message. Driving systems
Your vehicle's driving systems are described
on the following pages:
R Cruise control* and Speedtronic*, whic h
you can use to control the speed of th e
vehicl e
R Hill start assist, which makes pulling away
on steep uphill gradients easie r
R ADVANCED AGILITY package with sports
mode*
R 4MATIC* (permanent four-wheel drive )
R Parktronic*, which assists you in parking
and manoeuvrin g
The ABS, BAS, adaptive brake lights, ESP ®
and EBV (electronic brake-power distribution )
driving safety systems are described in the
"Driving safety systems" section
( Y page 67). Cruise control*
Cruise control maintains a constant road
speed for you. It brakes automatically in order
to avoid exceeding the set speed. On long and
steep downhill gradients, especially if the
vehicle is laden or towing a trailer, you must
shift to a lower gear in good time or select
shift range 1,2 or 3in vehicles with automatic
transmission*. In this way you will make use
of the braking effect of the engine, which
relieves the load on the brake system and
prevents the brakes from overheating and
wearing too quickly. G
Risk of accident
Do not change down for additional engine
braking on a slippery road surface. Thi s
could cause the drive wheels to lose thei r
grip and the vehicle could skid.
Use cruise control only if road and traffic con-
ditions make it appropriate to maintain a
steady speed for a prolonged period. You can
store any road speed above 30 km/h. G
Risk of accident
Cruise control cannot take account of roa d
and traffic conditions. Controls
* optional
204_AKB; 2; 3, en-GB
mkalafa
, 2007-06-26T23:11:51+02:00 - Seite 145 Z
Page 151 of 377
Driving sys
tems 14
8
Making adjustments in 1 km/h incre-
ments X
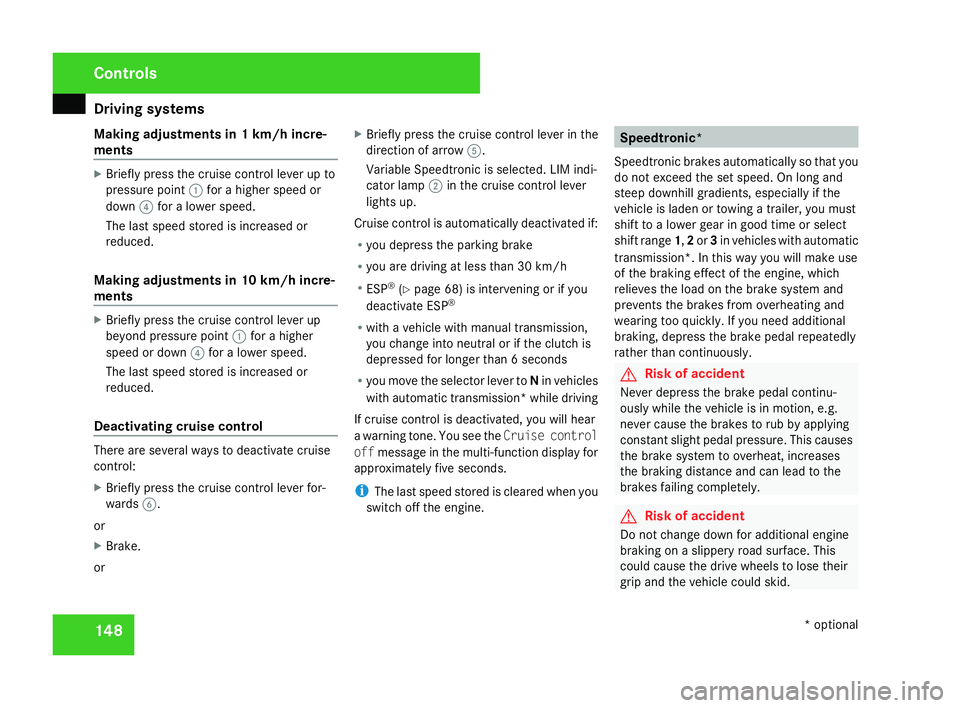
Briefly press the cruise control lever up to
pressure point 1for a higher speed or
down 4for a lower speed.
The last speed stored is increased or
reduced.
Making adjustments in 10 km/h incre-
ments X
Briefly press the cruise control lever up
beyond pressure point 1for a higher
speed or down 4for a lower speed.
The last speed stored is increased or
reduced.
Deactivating cruise control There are several ways to deactivate cruis
e
control :
X Briefly press the cruise control lever for-
wards 6.
or
X Brake .
or X
Briefly press the cruise control lever in the
direction of arrow 5.
Variable Speedtronic is selected. LIM indi-
cator lamp 2in the cruise control lever
lights up.
Cruise control is automatically deactivated if:
R you depress the parking brak e
R you are driving at less than 30 km/h
R ESP ®
(Y page 68) is intervening or if you
deactivate ESP ®
R with a vehicle with manual transmission ,
you change into neutral or if the clutch is
depressed for longer than 6 seconds
R you move the selector lever to Nin vehicles
with automatic transmission* while drivin g
If cruise control is deactivated, you will hear
a warning tone. You see the Cruise control
off message in the multi-function display for
approximately five seconds.
i The last speed stored is cleared when you
switch off the engine. Speedtronic*
Speedtronic brakes automatically so that you
do not exceed the set speed. On long and
steep downhill gradients, especially if the
vehicle is laden or towing a trailer, you must
shift to a lower gear in good time or select
shift range 1,2 or 3in vehicles with automatic
transmission*. In this way you will make use
of the braking effect of the engine, which
relieves the load on the brake system and
prevents the brakes from overheating and
wearing too quickly. If you need additional
braking, depress the brake pedal repeatedly
rather than continuously. G
Risk of accident
Never depress the brake pedal continu -
ously while the vehicle is in motion, e.g.
never cause the brakes to rub by applying
constant slight pedal pressure. This causes
the brake system to overheat, increases
the braking distance and can lead to the
brakes failing completely. G
Risk of accident
Do not change down for additional engine
braking on a slippery road surface. Thi s
could cause the drive wheels to lose thei r
grip and the vehicle could skid. Controls
* optional
204_AKB; 2; 3, en-GB
mkalafa,
2007-06-26T23:11:51+02:00 - Seite 148
Page 157 of 377
Driving sys
tems 15
4
Front sensor
s Centr
e Approximately 100 cm
Corner
s Approximately 60 cm
Rear sensors
Centre Approximately 120 cm
Corner
s Approximately 80 cm
!
Pay particular attention to objects above
or below the sensors when parking, such
as flower pots or trailer towbars. Parktroni c
does not detect such objects when they are
in the immediate vicinity of the vehicle. You
could damage the vehicle or the objects.
Ultrasonic sources such as an automatic
car wash, a lorry's compressed-air brakes
or a pneumatic drill could cause Parktronic
to malfunction .
Minimum distanc eCentr
e Approximately 20 cm
Corner
s Approximately 15 cm If there is an obstacle within this range, al
l
warning displays light up and a tone sounds.
If the distance falls below the minimum clear -
ance, it may no longer be shown.
Warning displays The warning displays show the distanc
e
between the sensors and the obstacle. The
warning display for the front area is located
on the dashboard above the centre air vents.
The warning display for the rear area is in the
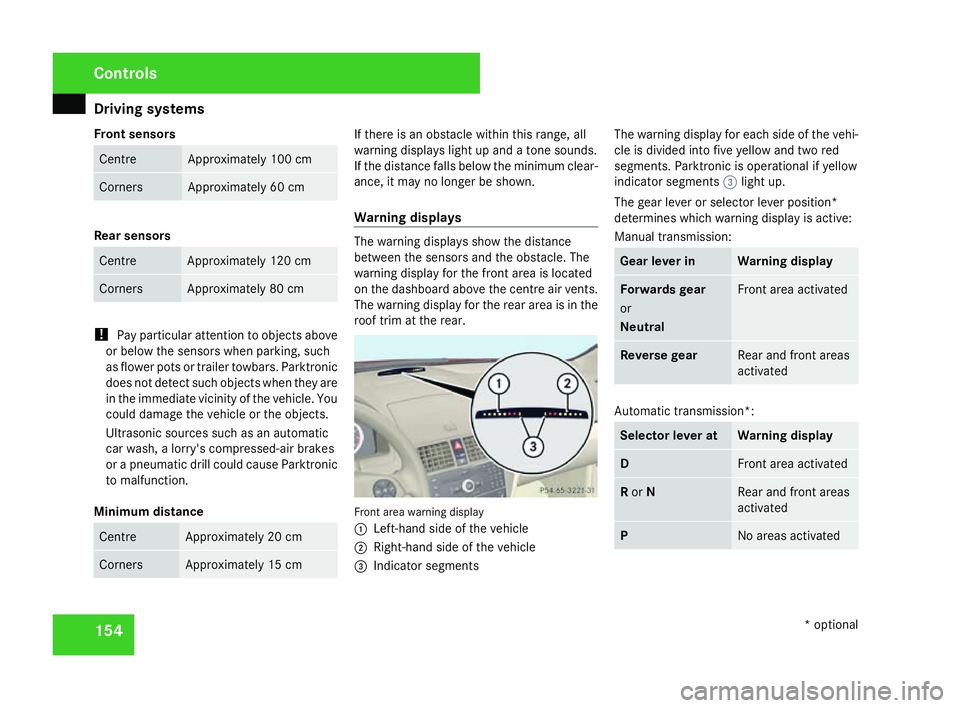
roof trim at the rear. Front area warning display
1
Left-hand side of the vehicle
2 Right-hand side of the vehicl e
3 Indicator segments The warning display for each side of the vehi-
cle is divided into five yellow and two red
segments. Parktronic is operational if yellow
indicator segments
3light up.
The gear lever or selector lever position*
determines which warning display is active:
Manual transmission : Gear lever in Warning display
Forwards gear
or
Neutral Front area activated
Reverse gear Rear and front areas
activated
Automatic transmission*:
Selector lever at Warning displa
y D Front area activate
d R
or N Rear and front area
s
activated P No areas activatedControls
* optional
204_AKB; 2; 3, en-GB
mkalafa,
2007-06-26T23:11:51+02:00 - Seite 154
Page 158 of 377
Driving sys
tems 15
5
One or more segments light up as the vehicle
approaches an obstacle, depending on the
vehicle's distance from the obstacle.
From the:
R sixth segment onwards, you will hear an
intermittent warning tone for approxi-
mately two seconds
R seventh segment onwards, you will hear a
warning tone for approximately two sec -
onds. You have reached the minimum dis-
tance.
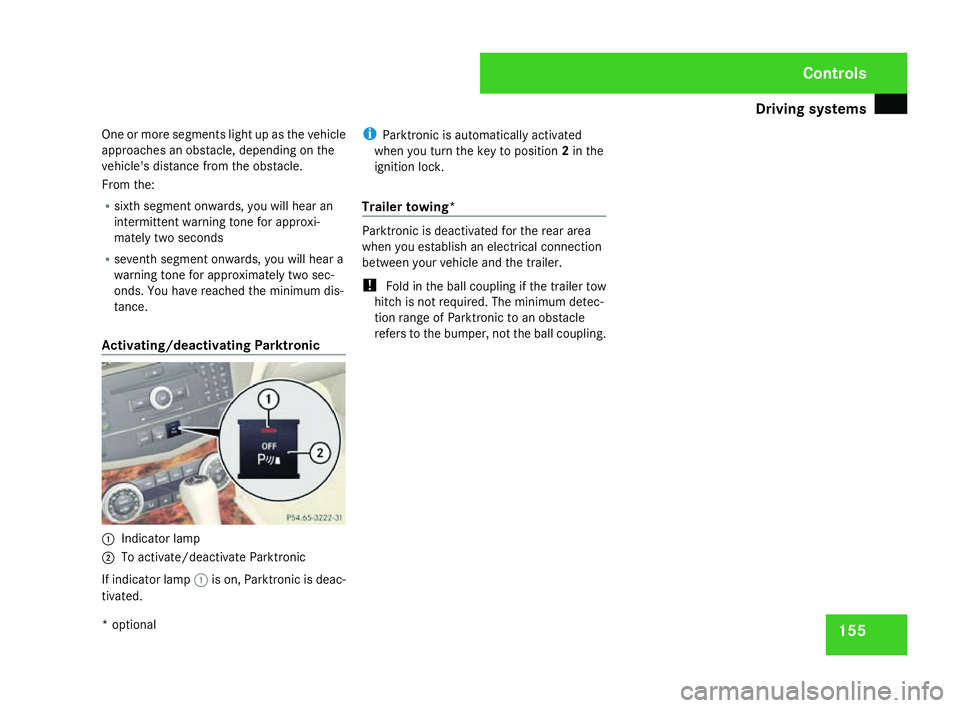
Activating/deactivating Parktronic 1
Indicator lamp
2 To activate/deactivate Parktronic
If indicator lamp 1is on, Parktronic is deac-
tivated. i
Parktronic is automatically activated
when you turn the key to position 2in the
ignition lock .
Trailer towing* Parktronic is deactivated for the rear area
when you establish an electrical connectio
n
between your vehicle and the trailer.
! Fold in the ball coupling if the trailer tow
hitch is not required. The minimum detec -
tion range of Parktronic to an obstacle
refers to the bumper, not the ball coupling . Cont
rols
* optional
204_AKB; 2; 3, en-GB
mkalafa,
2007-06-26T23:11:51+02:00 - Seite 155
Page 206 of 377
203
The first 1,500 km
............................204
Refuelling ........................................... 204
Engine compartment ........................206
Tyres and wheels .............................. 210
Winter driving ................................... 216
Driving tips ........................................ 217
Driving abroad ................................... 220
Trailer towing* .................................. 220
Service ............................................... 226
Care .................................................... 227 Operation
204_AKB; 2; 3, en-GB
mkalafa,
2007-06-26T23:11:51+02:00 - Seite 203
Page 217 of 377
Tyres and wheels
21
4 Tyre pressure loss warning system
G
Risk of accident
The tyre pressure loss warning system*
does not warn you of an incorrectly set tyre
pressure. The table on the inside of the fue l
filler flap will help you decide whether the
tyre pressures should be corrected.
The tyre pressure loss warning system*
does not replace the need to regularly
check your vehicle's tyre pressures, since
an even loss of pressure on several tyres at
the same time cannot be detected by the
tyre pressure loss warning system*.
The tyre pressure loss warning system* is
not able to warn you of a sudden loss of
pressure, e.g. following penetration by a
foreign object.
In the event of a sudden loss of pressure,
bring the vehicle to a halt by braking care-
fully. Do not make any sudden steering
movements when doing so.
While the vehicle is in motion, the tyre pres-
sure loss warning system* monitors the set
tyre pressure using the rotational speed of
the wheels. This enables the system to detect
significant pressure loss in a tyre. If the spee d
of rotation of a wheel changes as a result of a loss of pressure, a corresponding warning
message will appear in the multi-function dis-
play.
The function of the tyre pressure loss warning
system* is limited or delayed if:
R
snow chains are fitted to your vehicle's
tyres
R road conditions are wintry
R you are driving on sand or grave l
R you adopt a very sporty driving style (cor -
nering at high speeds or driving with high
rates of acceleration)
R you are towing a very heavy or large trailer
R you are driving with a heavy load (in th e
vehicle or on the roof)
Restarting the tyre pressure loss warn-
ing system* Restart the tyre pressure loss warning sys-
tem* if you have
:
R changed the tyre pressure
R changed the wheels or tyre s
R fitted new wheels or tyres
X Before restarting, consult the table of tyre
pressures on the inside of the fuel filler fla pto ensure that the tyre pressure in all fou
r
tyres is set correctly for the operating con-
ditions concerned .
X Also observe the notes in the section on
tyre pressures (Y page 213). G
Risk of accident
The tyre pressure loss warning system* can
only give reliable warnings if you have set
the correct tyre pressure.
If an incorrect tyre pressure is set, thes e
incorrect values will be monitored.
A tyre with insufficient pressure results in
an instability of the vehicle when driving,
thus increasing the risk of an accident .
Configuring with the multi-function steer-
ing wheel
X Make sure that the key is in position 2in
the ignition lock .
X Press èto select Tyre pressure
menu: R.
X Press the íbutton.
The following appears in the multi-function
display: RFI active Reactivate: ROperation
* optional
204_AKB; 2; 3, en-GB
mkalafa,
2007-06-26T23:11:51+02:00 - Seite 214