Page 192 of 562
172
2-5. Driving information
Winter driving tips
Carry out the necessary preparations and inspections before driving the
vehicle in winter. Always drive the vehicle in a manner appropriate to the
prevailing weather conditions.
■ Pre-winter preparations
●Use fluids that ar
e appropriate to the prevailing outside tempera -
tures.
• Engine oil
• Engine coolant
• Washer fluid
● Ha
ve a service technician inspect th e level and specific gravity of
battery electrolyte.
● Ha
ve the vehicle fitted with four snow tires or purchase a set of
tire chains for the rear tires.
Ensure that all tires are the same si ze and brand, and that chains match
the size of the tires.
Page 385 of 562
365
4-2. Maintenance
4
Maintenance and care
General maintenance
Engine compartment
ItemsCheck points
Battery• Maintenance-free (P. 3 8 6 )
Brake fluid• At the correct level? (P. 3 8 5 )
Engine coolant• At the correct level? ( P. 3 8 3 )
Engine oil• At the correct level? ( P. 3 7 8 )
Exhaust system• No fumes or strange sounds?
Radiator/condenser/hoses• Not blocked with foreign matter?
( P. 3 8 4 )
Wa s h e r f l u i d• At the correct level? ( P. 3 8 9 )
Listed below are the general maintenance items that should be performed
at the intervals specified in the “Warranty and Services Guide/Owner’s
Manual Supplement”. It is recommend ed that any problem you notice
should be brought to the attention of your Lexus dealer or qualified service
shop for advice.
Page 390 of 562

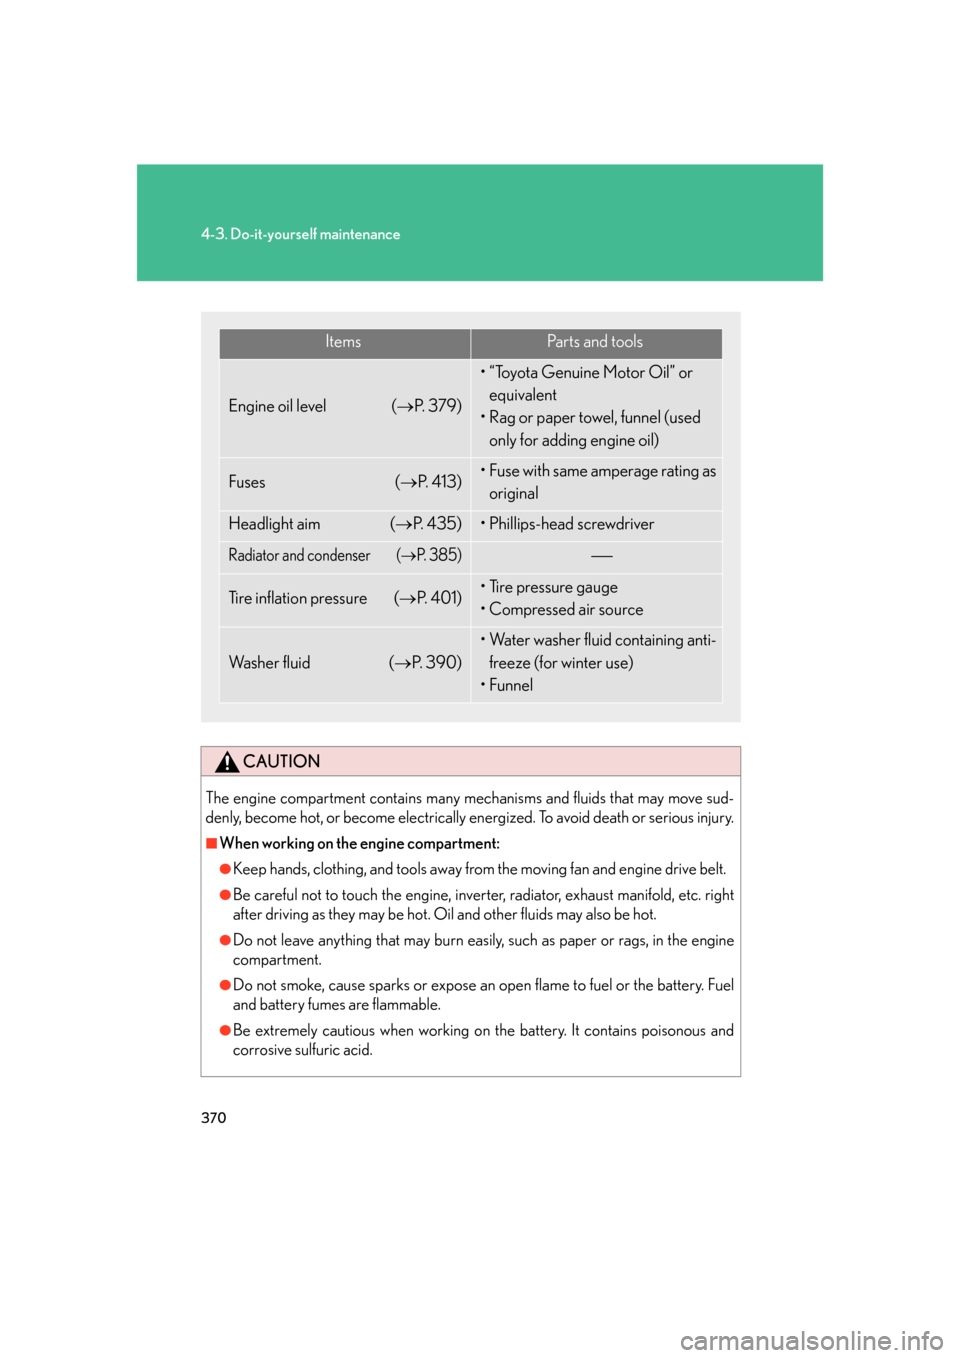
370
4-3. Do-it-yourself maintenance
CAUTION
The engine compartment contains many mechanisms and fluids that may move sud-
denly, become hot, or become electrically energized. To avoid death or serious injury.
■When working on the engine compartment:
●Keep hands, clothing, and tools away from the moving fan and engine drive belt.
●Be careful not to touch the engine, inverter, radiator, exhaust manifold, etc. right
after driving as they may be hot. Oil and other fluids may also be hot.
●Do not leave anything that may burn easily , such as paper or rags, in the engine
compartment.
●Do not smoke, cause sparks or expose an open flame to fuel or the battery. Fuel
and battery fumes are flammable.
●Be extremely cautious when working on the battery. It contains poisonous and
corrosive sulfuric acid.
ItemsPa r t s a n d t o o l s
Engine oil level ( P. 3 7 9 )
• “Toyota Genuine Motor Oil” or
equivalent
• Rag or paper towel, funnel (used
only for adding engine oil)
Fuses ( P. 4 1 3 )• Fuse with same amperage rating as
original
Headlight aim ( P. 4 3 5 )• Phillips-head screwdriver
Radiator and condenser (P. 3 8 5 )
Tire inflation pressure (P. 4 0 1 )• Tire pressure gauge
• Compressed air source
Wa s h e r f l u i d ( P. 3 9 0 )
• Water washer fluid containing anti-
freeze (for winter use)
•Funnel
Page 395 of 562
375
4-3. Do-it-yourself maintenance
4
Maintenance and care
Engine compartment
Engine oil filler cap
( P. 3 7 9 )
Engine oil level dipstick
( P. 380)
Brake fluid reservoir (P. 386)
Fuse box ( P. 413)
Washer fluid tank
( P. 390)Engine coolant reservoir
( P. 384)
Electric cooling fans
Condenser ( P. 385)
Radiator ( P. 385)
Fuse box ( P. 413)
Battery ( P. 387)
GS430
Page 396 of 562
376
4-3. Do-it-yourself maintenance
Engine oil level dipstick
( P. 3 7 9 )
Engine oil filler cap
( P. 380)
Brake fluid reservoir
( P. 386)
Fuse box ( P. 413)
Washer fluid tank
( P. 390)Engine coolant reservoir
( P. 384)
Electric cooling fans
Condenser ( P. 385)
Radiator ( P. 385)
Fuse box ( P. 413)
Battery ( P. 387)
GS350
Page 398 of 562
378
4-3. Do-it-yourself maintenance
■Installing the clips
Open
Insert
Press
Engine oil
With the engine at operating temperat ure and turned off, check the oil
level on the dipstick.
■ Checking the engine oil
Park the vehicle on level ground. A
fter turning off the engine, wait
a few minutes for the oil to drain back into the bottom of the
engine.
Hold a rag under the end and pull the dipstick out.
Wipe the dipstick clean.
Reinsert the dipstick fully.
Holding a rag under the end, pull the dipstick ou
t and check the
oil level.
STEP1
STEP2
GS430GS350
STEP3
STEP4
STEP5
Page 399 of 562
379
4-3. Do-it-yourself maintenance
4
Maintenance and care
Wipe the dipstick and reinsert it fully.Low
Full
■ A
dding engine oil
If the oil level is below or near the lo
w level mark, add engine oil of the
same type as already in the engine.
Make sure to check the oil type and prepare the items needed before
adding oil.
Remove the oil filler cap.
Add engine oil slowly, checking the dipstick.
Install the filler cap, turning it clockwise until you hear a click.
STEP6
Oil gradeILSAC multigrade engine oil
Oil quantity
(Low Full)1.6 qt. (1.5 L, 1.3 Imp. qt.)
ItemsClean funnel
GS430GS350
STEP1
STEP2
STEP3
Page 401 of 562

381
4-3. Do-it-yourself maintenance
4
Maintenance and care
■Engine oil consumption
●The amount of engine oil consumed depends on the oil viscosity, the quality of
the oil and the way the vehicle is driven.
●More oil is consumed under driving conditions such as high speeds and fre -
quent acceleration and deceleration.
●A new engine consumes more oil.
●When judging the amount of oil consumpt ion, keep in mind that the oil may
have become diluted, making it difficult to judge the true level accurately.
●Oil consumption: Max. 1.1 qt./600 miles, 0.9 lmp.qt./600 miles (1.0 L per 1000
km). If the vehicle consumes more than this amount, contact your Lexus dealer.
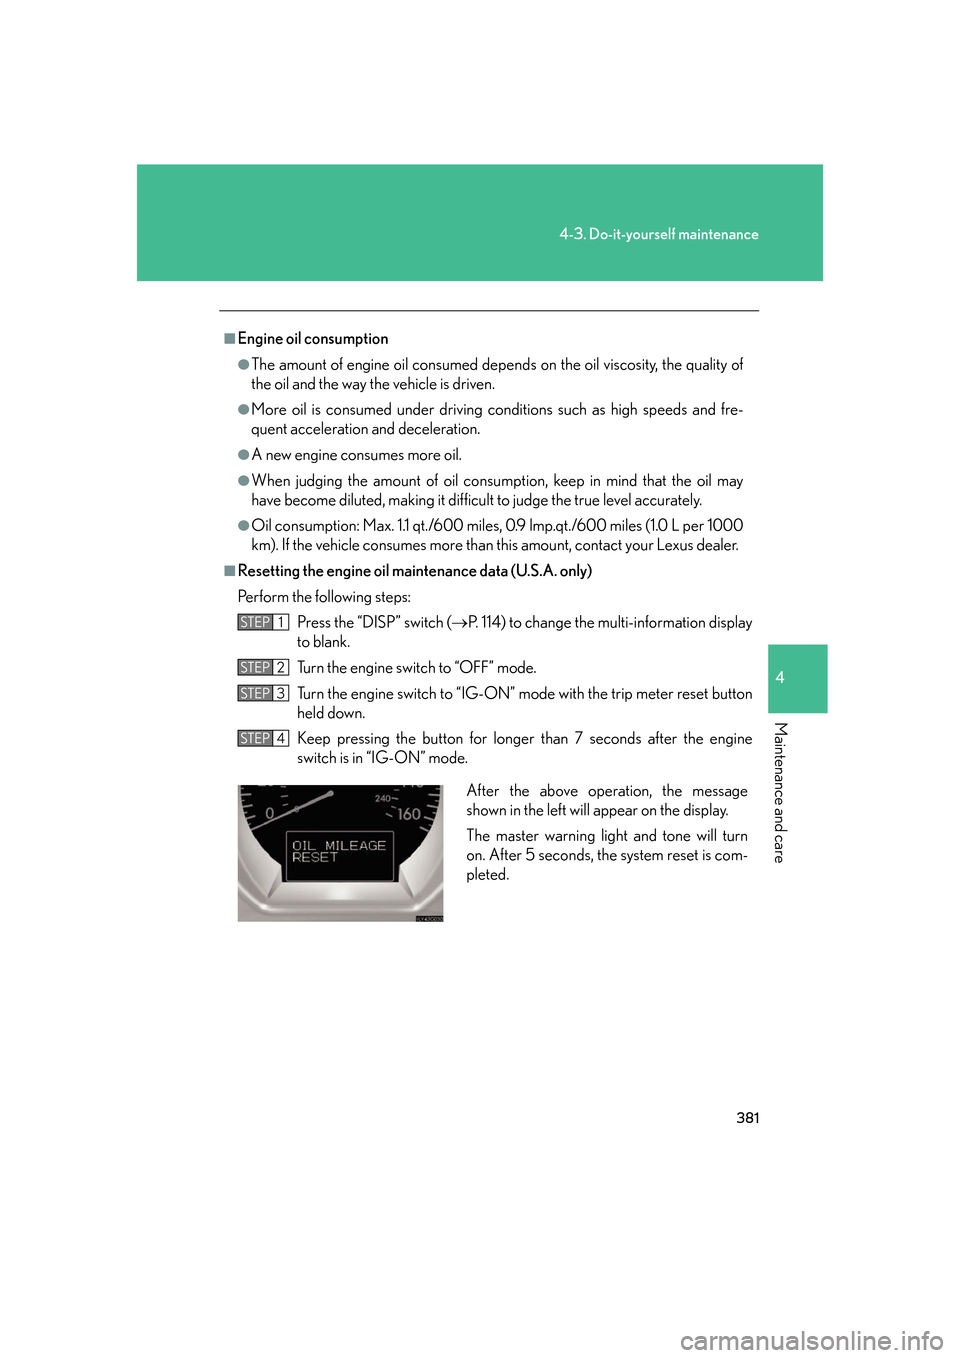
■Resetting the engine oil main tenance data (U.S.A. only)
Perform the following steps:
Press the “DISP” switch ( P. 114 ) to change the multi-information display
to blank.
Turn the engine swit ch to “
OFF” mode.
Turn the engine switch to “IG-ON” mode with the trip meter reset button
held down.
Keep pressing the button for longer than 7 seconds af
ter the engine
switch is in “IG-ON” mode.
STEP1
STEP2
STEP3
STEP4
After the above operation, the message
shown in the left will appear on the display.
The master warning light and tone will turn
on. After 5 seconds, the system reset is com-
pleted.