2007 KIA Sportage immobilizer
[x] Cancel search: immobilizerPage 10 of 350

101
2
3
4
5
6
7
8
9
Keys / 3-2
Remote keyless entry / 3-3
Theft-alarm system / 3-5
Immobilizer system / 3-7
Door locks / 3-9
Window / 3-16
Seat / 3-19
Safety belts / 3-30
Airbags-supplemental restraint system / 3-54
Hood / 3-80
Fuel filler lid / 3-82
Mirrors / 3-85
Interior lights / 3-89
Storage compartment / 3-91
Interior features / 3-94
Sunroof / 3-100
Luggage net / 3-104
Tonneau cover / 3-105
Luggage center box / 3-107
Roof rack / 3-108
Antenna / 3-109
Knowing your vehicle
10
Page 16 of 350

37
Knowing your vehicle
1
2
3
4
5
6
7
8
9
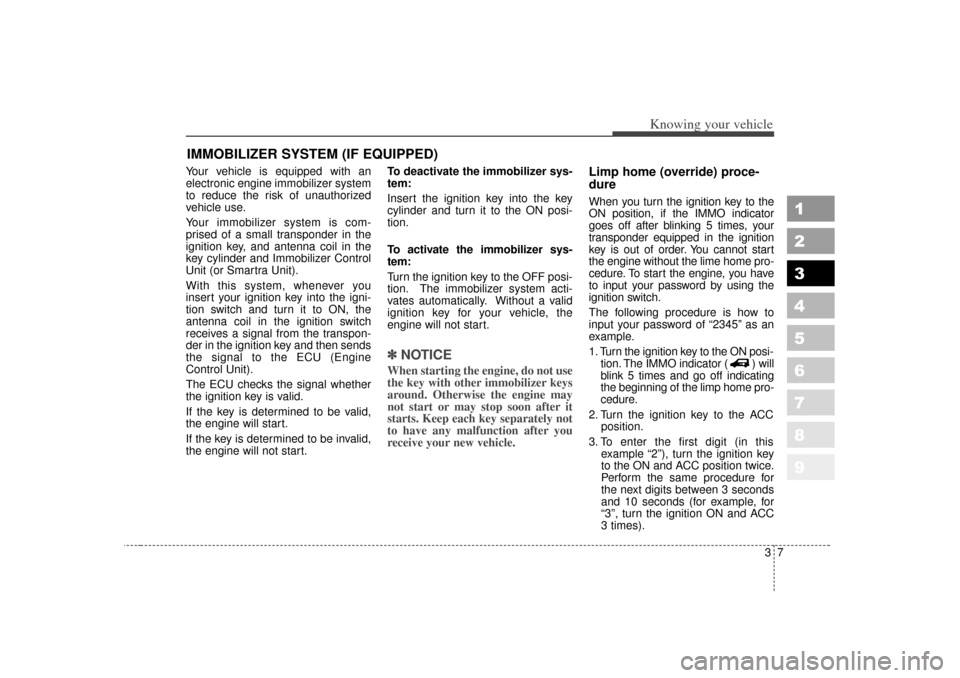
Your vehicle is equipped with an
electronic engine immobilizer system
to reduce the risk of unauthorized
vehicle use.
Your immobilizer system is com-
prised of a small transponder in the
ignition key, and antenna coil in the
key cylinder and Immobilizer Control
Unit (or Smartra Unit).
With this system, whenever you
insert your ignition key into the igni-
tion switch and turn it to ON, the
antenna coil in the ignition switch
receives a signal from the transpon-
der in the ignition key and then sends
the signal to the ECU (Engine
Control Unit).
The ECU checks the signal whether
the ignition key is valid.
If the key is determined to be valid,
the engine will start.
If the key is determined to be invalid,
the engine will not start.To deactivate the immobilizer sys-
tem:
Insert the ignition key into the key
cylinder and turn it to the ON posi-
tion.
To activate the immobilizer sys-
tem:
Turn the ignition key to the OFF posi-
tion. The immobilizer system acti-
vates automatically. Without a valid
ignition key for your vehicle, the
engine will not start.
✽ ✽
NOTICEWhen starting the engine, do not use
the key with other immobilizer keys
around. Otherwise the engine may
not start or may stop soon after it
starts. Keep each key separately not
to have any malfunction after you
receive your new vehicle.
Limp home (override) proce-
dureWhen you turn the ignition key to the
ON position, if the IMMO indicator
goes off after blinking 5 times, your
transponder equipped in the ignition
key is out of order. You cannot start
the engine without the lime home pro-
cedure. To start the engine, you have
to input your password by using the
ignition switch.
The following procedure is how to
input your password of “2345” as an
example.
1. Turn the ignition key to the ON posi-
tion. The IMMO indicator ( ) will
blink 5 times and go off indicating
the beginning of the limp home pro-
cedure.
2. Turn the ignition key to the ACC position.
3. To enter the first digit (in this example “2”), turn the ignition key
to the ON and ACC position twice.
Perform the same procedure for
the next digits between 3 seconds
and 10 seconds (for example, for
“3”, turn the ignition ON and ACC
3 times).
IMMOBILIZER SYSTEM (IF EQUIPPED)
Page 17 of 350

Knowing your vehicle83
1
2
3
4
5
6
7
8
9
4. If all of the digits have been inputsuccessfully, you have to start the
engine within 30 seconds. If you
attempt to start the engine after 30
seconds, the engine will not start
and you will have to input your
password again.
After performing the limp home pro-
cedure, you have to see an autho-
rized Kia dealer immediately to
inspect and repair your ignition key
or immobilizer system.✽ ✽ NOTICEIf you cannot start your engine in
spite of limp home procedure, have
your vehicle towed by an authorized
Kia dealer for inspection and neces-
sary repairs.
✽ ✽NOTICEThe transponder in your ignition
key is an important part of the
immobilizer system. It is designed to
give years of troublefree service,
however you should avoid exposure
to moisture, static electricity and
rough handling. Immobilizer sys-
tem malfunction could occur.✽ ✽NOTICEDo not change, alter or adjust the
immobilizer system because it could
cause the immobilizer system to
malfunction and should only be ser-
viced by an authorized Kia dealer.
Malfunctions caused by improper
alterations, adjustments or modifi-
cations to the immobilizer system
are not covered by your vehicle
manufacturer warranty.
This device complies with
Industry Canada Standard RSS-
210. Operation is subject to the fol-
lowing two conditions:
1. This device may not cause inter- ference, and
2. This device must accept any inter- ference, including interference that
may cause undesired operation of
the device.
WARNING
Changes or modifications not
expressly approved by the party
responsible for compliance
could void the user's authority
to operate the equipment.
Page 166 of 350

Driving your vehicle48
4
1
2
3
4
5
6
7
8
9
Shift pattern indicators
(if equipped)The individual indicators illuminate to
show the automatic transaxle shift
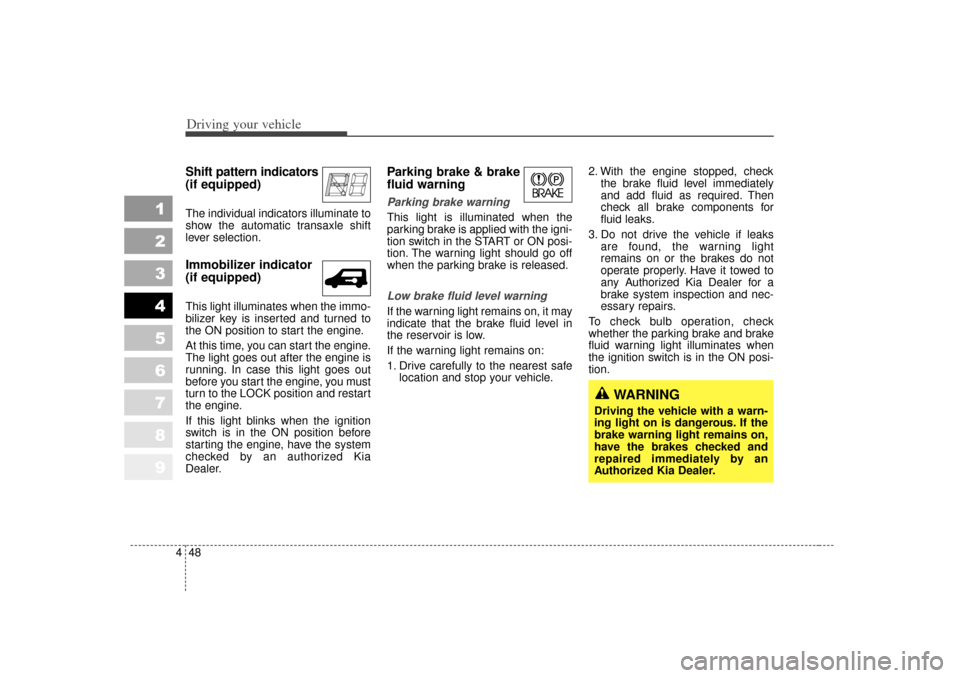
lever selection.Immobilizer indicator
(if equipped)This light illuminates when the immo-
bilizer key is inserted and turned to
the ON position to start the engine.
At this time, you can start the engine.
The light goes out after the engine is
running. In case this light goes out
before you start the engine, you must
turn to the LOCK position and restart
the engine.
If this light blinks when the ignition
switch is in the ON position before
starting the engine, have the system
checked by an authorized Kia
Dealer.
Parking brake & brake
fluid warning Parking brake warning This light is illuminated when the
parking brake is applied with the igni-
tion switch in the START or ON posi-
tion. The warning light should go off
when the parking brake is released.Low brake fluid level warningIf the warning light remains on, it may
indicate that the brake fluid level in
the reservoir is low.
If the warning light remains on:
1. Drive carefully to the nearest safe
location and stop your vehicle. 2. With the engine stopped, check
the brake fluid level immediately
and add fluid as required. Then
check all brake components for
fluid leaks.
3. Do not drive the vehicle if leaks are found, the warning light
remains on or the brakes do not
operate properly. Have it towed to
any Authorized Kia Dealer for a
brake system inspection and nec-
essary repairs.
To check bulb operation, check
whether the parking brake and brake
fluid warning light illuminates when
the ignition switch is in the ON posi-
tion.
WARNING
Driving the vehicle with a warn-
ing light on is dangerous. If the
brake warning light remains on,
have the brakes checked and
repaired immediately by an
Authorized Kia Dealer.
Page 273 of 350

611
In case of an emergency
1
2
3
4
5
6
7
8
9
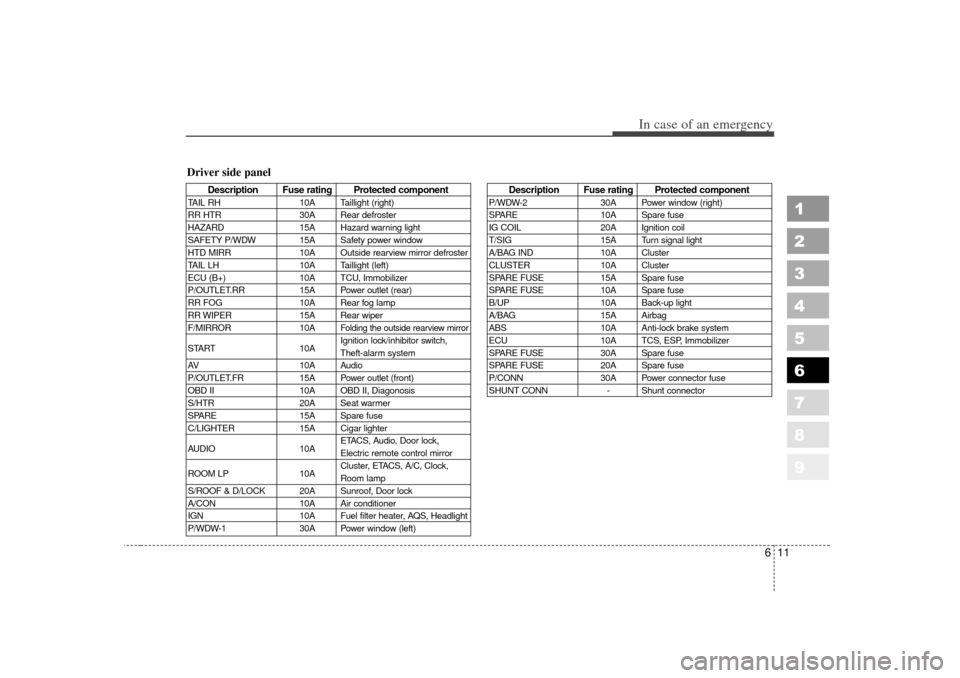
Description Fuse rating Protected component
TAIL RH10A Taillight (right)
RR HTR 30A Rear defroster
HAZARD 15A Hazard warning light
SAFETY P/WDW 15A Safety power window
HTD MIRR 10A Outside rearview mirror defroster
TAIL LH 10A Taillight (left)
ECU (B+) 10A TCU, Immobilizer
P/OUTLET.RR 15A Power outlet (rear)
RR FOG 10A Rear fog lamp
RR WIPER 15A Rear wiper
F/MIRROR 10A
Folding the outside rearview mirror
START10AIgnition lock/inhibitor switch,
Theft-alarm system
AV 10A Audio
P/OUTLET.FR 15A Power outlet (front)
OBD II 10A OBD II, Diagonosis
S/HTR 20A Seat warmer
SPARE 15A Spare fuse
C/LIGHTER 15A Cigar lighter
AUDIO 10AETACS, Audio, Door lock,
Electric remote control mirror
ROOM LP 10ACluster, ETACS, A/C, Clock,
Room lamp
S/ROOF & D/LOCK 20A Sunroof, Door lock
A/CON 10A Air conditioner
IGN 10A Fuel filter heater, AQS, Headlight
P/WDW-1 30A Power window (left)
Description Fuse rating Protected component
P/WDW-230A Power window (right)
SPARE 10A Spare fuse
IG COIL 20A Ignition coil
T/SIG 15A Turn signal light
A/BAG IND 10A Cluster
CLUSTER 10A Cluster
SPARE FUSE 15A Spare fuse
SPARE FUSE 10A Spare fuse
B/UP 10A Back-up light
A/BAG 15A Airbag
ABS 10A Anti-lock brake system
ECU 10A TCS, ESP, Immobilizer
SPARE FUSE 30A Spare fuse
SPARE FUSE 20A Spare fuse
P/CONN 30A Power connector fuse
SHUNT CONN - Shunt connector
Driver side panel
Page 348 of 350

Index29
1
2
3
4
5
6
7
8
9
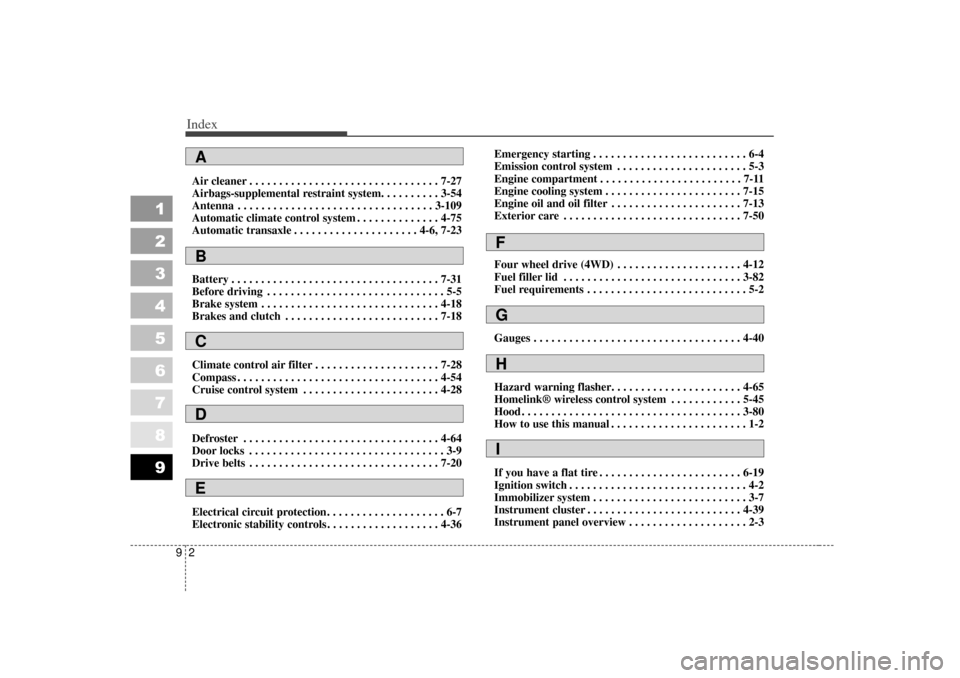
Air cleaner . . . . . . . . . . . . . . . . . . . . . . . . . . . . . . . . 7-27
Airbags-supplemental restraint system. . . . . . . . . . 3-54
Antenna . . . . . . . . . . . . . . . . . . . . . . . . . . . . . . . . . 3-109
Automatic climate control system . . . . . . . . . . . . . . 4-75
Automatic transaxle . . . . . . . . . . . . . . . . . . . . . 4-6, 7-23
Battery . . . . . . . . . . . . . . . . . . . . . . . . . . . . . . . . . . . 7-\
31
Before driving . . . . . . . . . . . . . . . . . . . . . . . . . . . . . . 5-5
Brake system . . . . . . . . . . . . . . . . . . . . . . . . . . . . . . 4-18
Brakes and clutch . . . . . . . . . . . . . . . . . . . . . . . . . . 7-18
Climate control air filter . . . . . . . . . . . . . . . . . . . . . 7-28
Compass . . . . . . . . . . . . . . . . . . . . . . . . . . . . . . . . . . 4-54\
Cruise control system . . . . . . . . . . . . . . . . . . . . . . . 4-28
Defroster . . . . . . . . . . . . . . . . . . . . . . . . . . . . . . . . . 4-64
Door locks . . . . . . . . . . . . . . . . . . . . . . . . . . . . . . . . . 3-9
Drive belts . . . . . . . . . . . . . . . . . . . . . . . . . . . . . . . . 7-20
Electrical circuit protection. . . . . . . . . . . . . . . . . . . . 6-7
Electronic stability controls . . . . . . . . . . . . . . . . . . . 4-36Emergency starting . . . . . . . . . . . . . . . . . . . . . . . . . . 6-4
Emission control system . . . . . . . . . . . . . . . . . . . . . . 5-3
Engine compartment . . . . . . . . . . . . . . . . . . . . . . . . 7-11
Engine cooling system . . . . . . . . . . . . . . . . . . . . . . . 7-15
Engine oil and oil filter . . . . . . . . . . . . . . . . . . . . . . 7-13
Exterior care . . . . . . . . . . . . . . . . . . . . . . . . . . . . . . 7-50
Four wheel drive (4WD) . . . . . . . . . . . . . . . . . . . . . 4-12
Fuel filler lid . . . . . . . . . . . . . . . . . . . . . . . . . . . . . . 3-82
Fuel requirements . . . . . . . . . . . . . . . . . . . . . . . . . . . 5-2
Gauges . . . . . . . . . . . . . . . . . . . . . . . . . . . . . . . . . . . 4-\
40
Hazard warning flasher. . . . . . . . . . . . . . . . . . . . . . 4-65
Homelink® wireless control system . . . . . . . . . . . . 5-45
Hood . . . . . . . . . . . . . . . . . . . . . . . . . . . . . . . . . . . . \
. 3-80
How to use this manual . . . . . . . . . . . . . . . . . . . . . . . 1-2
If you have a flat tire . . . . . . . . . . . . . . . . . . . . . . . . 6-19
Ignition switch . . . . . . . . . . . . . . . . . . . . . . . . . . . . . . 4-2
Immobilizer system . . . . . . . . . . . . . . . . . . . . . . . . . . 3-7
Instrument cluster . . . . . . . . . . . . . . . . . . . . . . . . . . 4-39
Instrument panel overview . . . . . . . . . . . . . . . . . . . . 2-3ABCDE
GFHI