2007 KIA Sedona door lock
[x] Cancel search: door lockPage 72 of 344
363
Features of your vehicle
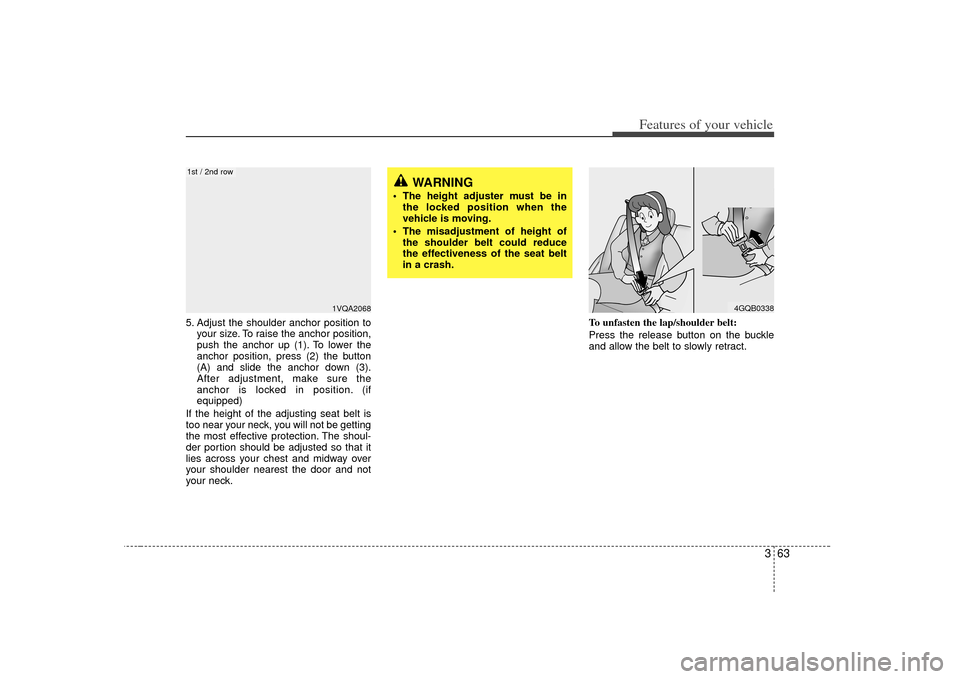
5. Adjust the shoulder anchor position toyour size. To raise the anchor position,
push the anchor up (1). To lower the
anchor position, press (2) the button
(A) and slide the anchor down (3).
After adjustment, make sure the
anchor is locked in position. (if
equipped)
If the height of the adjusting seat belt is
too near your neck, you will not be getting
the most effective protection. The shoul-
der portion should be adjusted so that it
lies across your chest and midway over
your shoulder nearest the door and not
your neck. To unfasten the lap/shoulder belt:
Press the release button on the buckle
and allow the belt to slowly retract.
4GQB0338
WARNING
The height adjuster must be in
the locked position when the
vehicle is moving.
The misadjustment of height of the shoulder belt could reduce
the effectiveness of the seat belt
in a crash.
1VQA2068
1st / 2nd row
Page 99 of 344
Features of your vehicle90
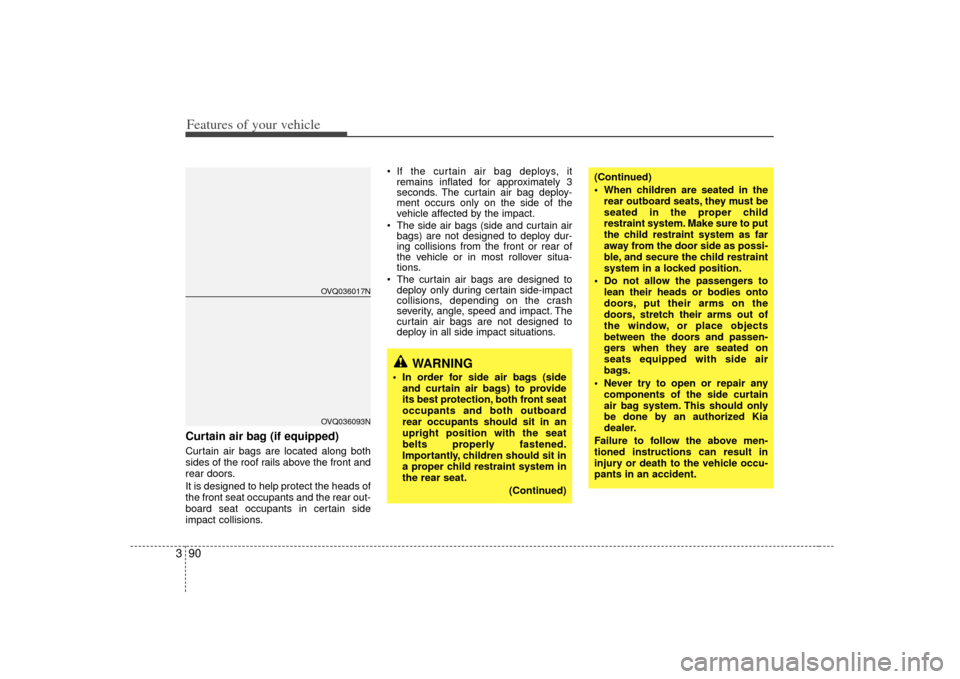
3Curtain air bag (if equipped)Curtain air bags are located along both
sides of the roof rails above the front and
rear doors.
It is designed to help protect the heads of
the front seat occupants and the rear out-
board seat occupants in certain side
impact collisions. If the curtain air bag deploys, it
remains inflated for approximately 3
seconds. The curtain air bag deploy-
ment occurs only on the side of the
vehicle affected by the impact.
The side air bags (side and curtain air bags) are not designed to deploy dur-
ing collisions from the front or rear of
the vehicle or in most rollover situa-
tions.
The curtain air bags are designed to deploy only during certain side-impact
collisions, depending on the crash
severity, angle, speed and impact. The
curtain air bags are not designed to
deploy in all side impact situations.
WARNING
In order for side air bags (side
and curtain air bags) to provide
its best protection, both front seat
occupants and both outboard
rear occupants should sit in an
upright position with the seat
belts properly fastened.
Importantly, children should sit in
a proper child restraint system in
the rear seat.
(Continued)
(Continued)
When children are seated in therear outboard seats, they must be
seated in the proper child
restraint system. Make sure to put
the child restraint system as far
away from the door side as possi-
ble, and secure the child restraint
system in a locked position.
Do not allow the passengers to lean their heads or bodies onto
doors, put their arms on the
doors, stretch their arms out of
the window, or place objects
between the doors and passen-
gers when they are seated on
seats equipped with side air
bags.
Never try to open or repair any components of the side curtain
air bag system. This should only
be done by an authorized Kia
dealer.
Failure to follow the above men-
tioned instructions can result in
injury or death to the vehicle occu-
pants in an accident.
OVQ036017NOVQ036093N
Page 107 of 344

Features of your vehicle98
3Installing a child restraint on a
front passenger’s seat is forbid-
den.Never place a rear-facing child restraint
in the front passenger’s seat. If the air
bag deploys, it would impact the rear-fac-
ing child restraint, causing serious or
fatal injury.
In addition, do not place front-facing child
restraint in the front passenger’s seat
either. If the front passenger air bag
inflates, it would cause serious or fatal
injuries to the child.
Air bag warning lightThe purpose of the air bag warning light
in your instrument panel is to alert you of
a potential problem with your air bag -
Supplemental Restraint System (SRS).
When the ignition switch is turned ON,
the indicator light should blink or illumi-
nate for approximately 6 seconds, then
go off.
Have the system checked if:
The light does not turn on briefly when
you turn the ignition ON.
The light stays on after the engine starts.
The light comes on while the vehicle is in motion.
1JBH3051
WARNING
Never put child restraint in thefront passenger’s seat. If the front
passenger air bag inflates, it
would cause serious or fatal
injuries.
When children are seated in the rear outboard seats in which side
air bags are equipped, be sure to
put the child restraint system as
far away from the door side as
possible, and secure the child
restraint system to be locked in
position.
Inflation of side or curtain air bag
could cause serious injury or
death due to the expansion
impact.
AIR
BAG
Page 131 of 344

Features of your vehicle122
3ESC indicator
(Electronic Stability
Control) (if equipped)The ESC indicator will illuminate when
the ignition switch is turned ON, but
should go off after approximately 3 sec-
onds. When the ESC is on, it monitors
the driving conditions and under normal
driving conditions, the ESC light will
remain off. When a slippery or low trac-
tion condition is encountered, the ESC
will operate, and the ESC indicator will
blink to indicate the ESC is operating.ESC OFF indicator
(if equipped)The ESC OFF indicator will illuminate
when the ignition switch is turned ON,
but should go off after approximately 3
seconds. To switch to ESC OFF mode,
press the ESC OFF button. The ESC
OFF indicator will illuminate indicating
the ESC is deactivated. If this indicator
stays on in the ESC ON mode, the ESC
may have a malfunction. Take your car to
the authorized Kia dealer and have the
system checked.
Cruise indicator (if equipped)CRUISE indicator
The indicator light illuminates when the
cruise control system is enabled.
Cruise SET indicator
The indicator light illuminates when the
cruise function switch (COAST/SET or
RES/ACCEL) is ON.
Lights on warning chimeThe lights on warning chime will sound if
the headlight switch is left in the 1st or
2nd position and the driver’s door is
opened.Key reminder warning chimeIf the driver’s door is opened while the
ignition key is left in the ignition switch
(ACC or LOCK position), the key
reminder warning chime will sound. This
is to prevent you from locking your keys
in the vehicle.
ESCESC
OFF
CRUISESET
Page 132 of 344

3 123
Features of your vehicle
INTERIOR LIGHTS
1VQA21411VQA2140
Main control switchMap light
OFFAny ON OFF
Close ON OFF*
2)
ON ( )Any
Map lights operating logicMain control
switch status Door open/
close status
DOOR Open or
Close \bOpen ON Lamp turns ON,
then turns OFF after about 20 minutes*
1)
Open \bClose
ON
ON
Lamp dims gradually over
a 5-second period*
3)
Map light switch
ON (depressed) DOOR (not depressed)
*1) If other door is opened while the light stays off after about 20 minutes, the light stays on
again for about 20 minutes.*2) When a door is unlocked by the transmitter, the light stays on for about 30 seconds as long
as any door is not opened.
When the ignition switch is turned to the ACC or LOCK position,
the light stays on for about 15 seconds.*3) If the ignition switch is turned to the ON position, the light turns off immediately.Map lightThe lights are turned ON or OFF based on the status of the doors, main control switch
and corresponding light switch.
Page 133 of 344
Features of your vehicle124
3
1VQA21411VQA2333
Main control switch
OFF Any
Close ONOFF*
2)
OFF
ON ( ) Any
Dome lights operating logicMain control
switch status Door open/
close status
DOOR Open or
Close \bOpen ON
ON OFF
OFF
Lamp turns ON,
then turns OFF after about 20 minutes*
1)
Lamp dims
gradually over a 5-second period*
3)
Open \bClose OFF
ON
Dome light switch
ON DOOR OFF
*1) If other door is opened while the light stays off after about 20 minutes, the light stays on
again for about 20 minutes.*2) When a door is unlocked by the transmitter, the light stays on for about 30 seconds as long
as any door is not opened. When the ignition switch is turned to the ACC or LOCK position,
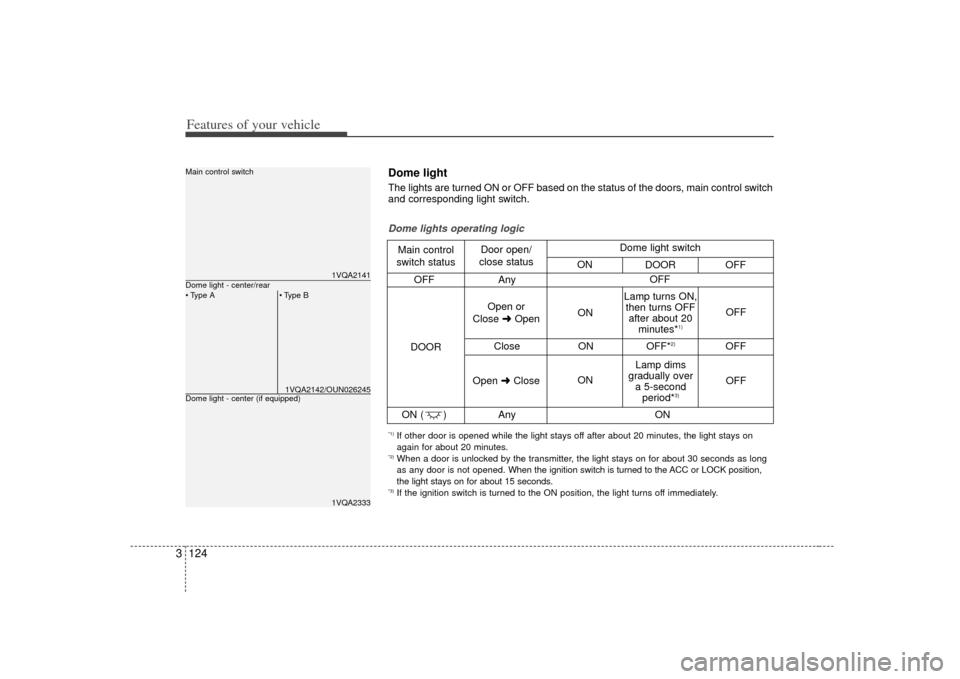
the light stays on for about 15 seconds.*3) If the ignition switch is turned to the ON position, the light turns off immediately.Dome lightThe lights are turned ON or OFF based on the status of the doors, main control switch
and corresponding light switch.
1VQA2142/OUN026245
Dome light - center (if equipped)Dome light - center/rear
Page 176 of 344
3 167
Features of your vehicle
Rolling code programmingTo train a garage door opener (or other
rolling code equipped devices) with the
rolling code feature, follow these instruc-
tions after completing the “Programming”
portion of this text. (A second person
may make the following training proce-
dures quicker & easier.)
4. Locate the “learn” or “smart” button onthe device’s motor head unit. Exact
location and color of the button may
vary by product brand. If there is diffi-
culty locating the “learn” or “smart” but-
ton, reference the device’s owner’s
manual or contact HomeLink at 1-800-
355-3515 or on the internet at
www.homelink.com.
5. Press and release the “learn” or “smart” button on the device’s motor
head unit. You have 30 seconds to
complete step number 6.
6. Return to the vehicle and firmly press and release the programmed
HomeLink button up to three times.
The rolling code equipped device
should now recognize the HomeLink
signal and activate when the
HomeLink button is pressed. The
remaining two buttons may now be
programmed if this has not previously
been done. Refer to the
“Programming” portion of this text.
Operating HomeLink To operate, simply press the pro-
grammed HomeLink button. Activation
will now occur for the trained product
(garage door, security system, entry door
lock, estate gate, or home or office light-
ing). For convenience, the hand-held
transmitter of the device may also be
used at any time. The HomeLink
Wireless Controls System (once pro-
grammed) or the original hand-held
transmitter may be used to activate the
device (e.g. garage door, entry door lock,
etc.). In the event that there are still pro-
gramming difficulties, contact HomeLink
at 1-800-355-3515 or on the internet at
www.homelink.com.
Erasing programmed HomeLink
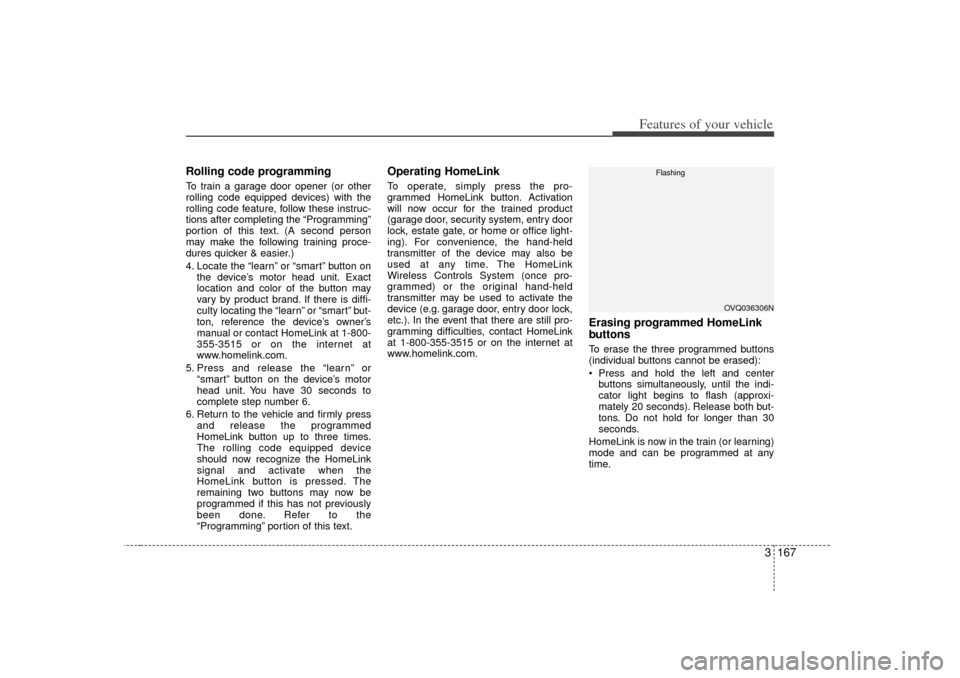
buttonsTo erase the three programmed buttons
(individual buttons cannot be erased):
Press and hold the left and centerbuttons simultaneously, until the indi-
cator light begins to flash (approxi-
mately 20 seconds). Release both but-
tons. Do not hold for longer than 30
seconds.
HomeLink is now in the train (or learning)
mode and can be programmed at any
time.
OVQ036306N
Flashing
Page 181 of 344
Features of your vehicle172
3
Sunglass holder To open the sunglass holder, press the
cover and the holder will slowly open.
Place your sunglasses in the compart-
ment door with the lenses facing out.
Push to close.
Side table (if equipped)The side table is located on the inner por-
tion of the passenger’s seat.
To use the table, pull the table all the way
up until it locks into place. Verify the table
is locked by trying to push it down. If the
table moves down, it is not locked prop-
erly.
You can extend it by pulling the rear por-
tion backward.
To fold down the table, pull up the release
lever and press down the edge of the
table.
1VQA2198
OVQ036339
CAUTION
Since key is not fully inserted into
the glove box key set, do not apply excessive force. Doing so may dam-age the parts.
WARNING
To reduce the risk of injury in an
accident or sudden stop, always
keep the glove box door closed
while driving.
CAUTION
Make sure the sunglass holder isclosed while driving.