Page 179 of 329

Driving your vehicle
44
4
1 23456789
Sedimentor level warning (diesel
engine only)
The light comes on if water in the
sedimentor is accumulated more
than normal. Drain water if the light is
turned on. Safety belt warning chime
Ty p e A
If the driver's seat belt is not fastened
when the ignition key is turned “ON”
or if it is disconnected after the key is
ON, the safety belt warning chime
will sound for approximately 6 sec-
onds.
Ty p e B
If the driver's lap/shoulder belt is not
fastened when the key is turned ON
and you drive over 9km/h, the safety
belt warning chime will sound for
approximately 100 seconds after the
warning light blinks for approximately
one minute.
If the driver's lap/shoulder belt is dis-
connected after the key is turn ON
and you drive over 9km/h, the safety
belt warning chime will sound for
approximately 100 seconds.
But, if the driver's lap/shoulder belt is connected and disconnected twice
within 9 seconds after the belt is fas-
tened, the safety belt warning chime
will not operate.Key reminder warning chime
If the driver’s door is opened and the
ignition key is left in the ignition
switch in the LOCK or ACC position,
the key reminder warning chime will
sound. This is to prevent you from
locking your keys in the vehicle.
Overspeed warning chime (if equipped)
If you drive with the speed of 120
km/h or more, the overspeed warn-
ing chime will sound. This is to pre-
vent you from driving your vehicle
with overspeed.
CAUTION
When the fuel filter warning
light is illuminated, enginepower (vehicle speed & idle speed) may decrease. If youkeep driving with the warninglight on, you can damage yourvehicle's engine parts and injec- tion system of the CommonRail. If this occurs, have yourvehicle checked by an author- ized KIA dealer as soon as pos-sible.
Page 180 of 329

445
1 23456789
Driving your vehicle
Battery saver function
The purpose of this feature is toprevent the battery from being dis-
charged. The system automatically
turns off the small light when the
driver removes the ignition key and
opens the driver- side door.
With this feature, the parklight will be turned off automatically if the
driver parks on the side of road atnight.
If necessary, to keep the lights on
when the ignition key is removed,
perform the following :
1) Open the driver-side door.
2) Turn the parklights OFF and ON again using the light switch on the
steering column. Lighting control
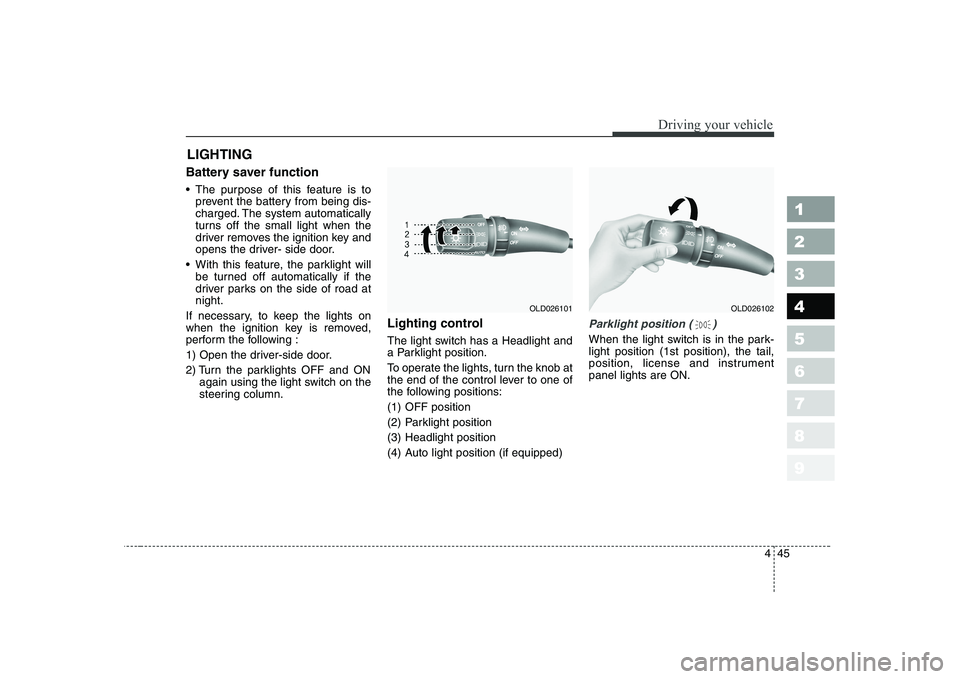
The light switch has a Headlight and
a Parklight position.
To operate the lights, turn the knob at
the end of the control lever to one of
the following positions:
(1) OFF position
(2) Parklight position
(3) Headlight position
(4) Auto light position (if equipped)
Parklight position ( )
When the light switch is in the park- light position (1st position), the tail,
position, license and instrumentpanel lights are ON.
LIGHTING
OLD026102OLD026101
Page 182 of 329
447
1 23456789
Driving your vehicle
High - beam operation
To turn on the high beam headlights,
push the lever away from you. Pull it
back for low beams. The high-beam indicator will light when the headlight high beams are
switched on.
To prevent the battery from being
discharged, do not leave the lights
on for a prolonged time while the
engine is not running.Flashing headlights
To flash the headlights, pull the lever
towards you. It will return to the nor-
mal (low-beam) position when
released. The headlight switch doesnot need to be on to use this flashing
feature.
Turn signals (A)
The ignition switch must be on for the
turn signals to function. To turn on
the turn signals, move the lever up or
down. Green arrow indicators on the
instrument panel indicate which turn
signal is operating. They will self-
cancel after a turn is completed. If
the indicator continues to flash after
a turn, manually return the lever tothe OFF position.
OLD0261061LDN2107OLD026105
Page 189 of 329
Driving your vehicle
54
4
1 23456789
The hazard warning flasher causes
the rear tail lights and front turn sig-
nal lights to flash on and off, which
serves as a warning to other drivers
to exercise caution when approach-
ing or passing your vehicle.
To activate the flasher, depress the
hazard warning flasher switch. This
switch operates in any ignition switchposition.
To turn the flashers off, depress the
switch again. HAZARD WARNING FLASHER
OLD026100
Page 191 of 329
Driving your vehicle
56
4
1 23456789
Fan speed control knob
The ignition switch must be in the ON
position for fan operation.
The fan speed control knob allows
you to control the fan speed of the air
flowing from the ventilation system.
To change the fan speed, turn the
knob to the right for higher speed or
left for lower speed.
Setting the fan speed control knob to
the “OFF” position turns off the fan. Temperature control knob
The temperature control knob allows
you to control the temperature of the
air flowing from the ventilation sys-
tem. To change the air temperature in
the passenger compartment turn the
knob to the right for warm and hot air
or left for cooler air.
Mode selection knob The mode selection knob controls
the direction of the air flow through
the ventilation system.
OLD026126OLD026124OLD026202L
Page 213 of 329

Driving your vehicle
78
4
1 23456789
For maximum defrosting, set the
temperature control to the extreme
right/hot position and the fan speedcontrol to the highest speed.
If warm air to the floor is desired while defrosting or defogging, setthe mode to the floor-defrost posi-tion.
Before driving, clear all snow and ice from the windshield, rear win-
dow, outside rear view mirrors, and
all side windows.
Clear all snow and ice from the hood and air inlet in the cowl grill to
improve heater and defroster effi-ciency and to reduce the probabili-
ty of fogging up inside of the wind-shield. Defogging logic
Manual climate control system
To reduce the probability of fogging up the inside of the windshield, the
air intake control is set to the outside(fresh) air position automatically if
any of following occur.
The mode is selected to the or
while the system is acti-
vated.
The ignition switch is turned on while the mode is selected to the or .
In this case, the air conditioning will
automatically operate if the mode is
selected to the or .
If you don’t want the air-conditioning or outside (fresh) air position, press
the corresponding button to cancel
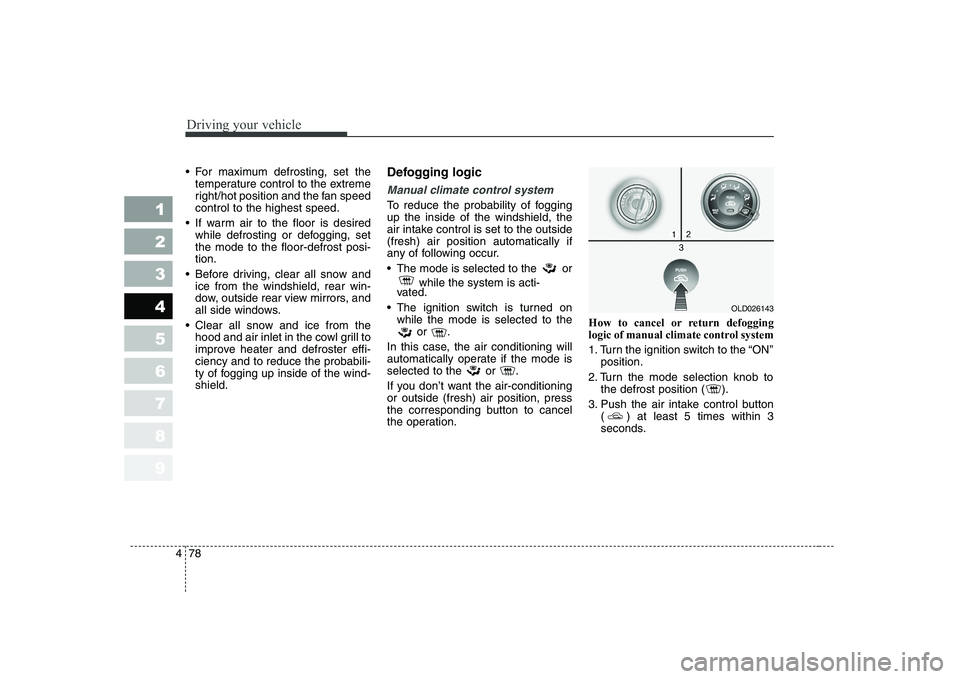
the operation. How to cancel or return defogging
logic of manual climate control system
1. Turn the ignition switch to the “ON”
position.
2. Turn the mode selection knob to the defrost position ( ).
3. Push the air intake control button ( ) at least 5 times within 3
seconds.
OLD026143
Page 214 of 329

479
1 23456789
Driving your vehicle
Then the indicator light in the air
intake control button will blink 3 times
with 0.5 second of interval. It indi-
cates that the defogging logic is can-
celed or returned to the programmed
status.
If the battery has been discharged or
disconnected, it is reset as the defog
logic status.Automatic climate control system
To reduce the probability of fogging up inside of the windshield, the air
intake control is set to outside (fresh)
air position automatically if any of fol-
lowing occur.
The ignition switch is turned on.
The OFF button is pushed.
The mode is selected to the orposition.
In this case, the air conditioning will
automatically operate if the mode is
selected to the or .
If you don’t want the air-conditioning or outside (fresh) air position, press
the corresponding button to cancel
the operation. How to cancel or return defogging
logic of automatic climate control sys-tem
1. Turn the ignition switch to the “ON”
position.
2. Select the defrost position press- ing defrost button ( ).
3. While holding the air conditioning button (A/C) pressed, press the air
intake control button ( ) at least
5 times within 3 seconds.
OLD026144
Page 217 of 329
Driving your vehicle
82
4
1 23456789
Disarmed stage
The armed stage will be deactivated when:
The “ ” button on the transmit-
ter is pressed.
After depressing unlock button,
you must open the doors within 30
seconds or all doors will be lockedagain and automatically placed
into the armed stage.
The ignition switch is in the “ON” position.
The doors are unlocked with the ignition key.
The alarm will be deactivated when:
The lock ( ), unlock ( ) or trunk lid open ( ) button on
the transmitter is pressed.✽✽ NOTICE - Non-immobilizer
system