Page 139 of 329
Driving your vehicle
4
4
1 23456789
Starting the gasoline engine
1. Make sure the parking brake is
applied.
2. Manual Transaxle - Depress the
clutch pedal fully and shift the
transaxle into Neutral. Keep the
clutch pedal depressed while turn-
ing the ignition switch to the startposition.
Automatic Transaxle - Place the
transaxle shift lever in P (Park).
Depress the brake pedal fully.
You can also start the engine
when the shift lever is in the N(Neutral) position.
3. Turn the ignition switch to START and hold it there until the engine
starts (a maximum of 10 seconds),
then release the key.
4. In extremely cold weather (below -18°C / 0°F) or after the vehicle
has not been operated for several
days, let the engine warm up with-
out depressing the accelerator.
Whether the engine is cold or warm,
it should be started without
depressing the accelerator.
✽✽
NOTICE
Do not engage the starter for more than 10 seconds. If the engine stalls
or fails to start, wait 5 to 10 seconds
before re-engaging the starter.
Improper use of the starter maydamage it.
STARTING THE ENGINE
CAUTION
If the engine stalls while you are in motion, do not attempt tomove the shift lever to the P(Park) position. If traffic and road conditions permit, you mayput the shift lever in the N(Neutral) position while thevehicle is still moving and turn the ignition switch to the STARTposition in an attempt to restartthe engine.
CAUTION
Always wear appropriate shoeswhen operating your vehicle.Unsuitable shoes (high heels, ski boots,etc.) may interferewith your ability to use thebrake and accelerator pedal,and the clutch (if equipped).
Page 140 of 329
45
1 23456789
Driving your vehicle
Starting the diesel engine
To start the diesel engine when the engine is cold, it has to be pre-heat-
ed before starting the engine and
then have to be warmed up before
starting the driving.
1. Make sure the parking brake isapplied.
2. Manual Transaxle - Depress the
clutch pedal fully and shift the
Transaxle into the Neutral. Keepthe clutch pedal depressed while
cranking the engine.
Automatic Transaxle - Place the
Transaxle shift lever in P(park).
Depress the brake pedal fully.
You can also start the engine when
the shift lever is in the N(neutral) position.
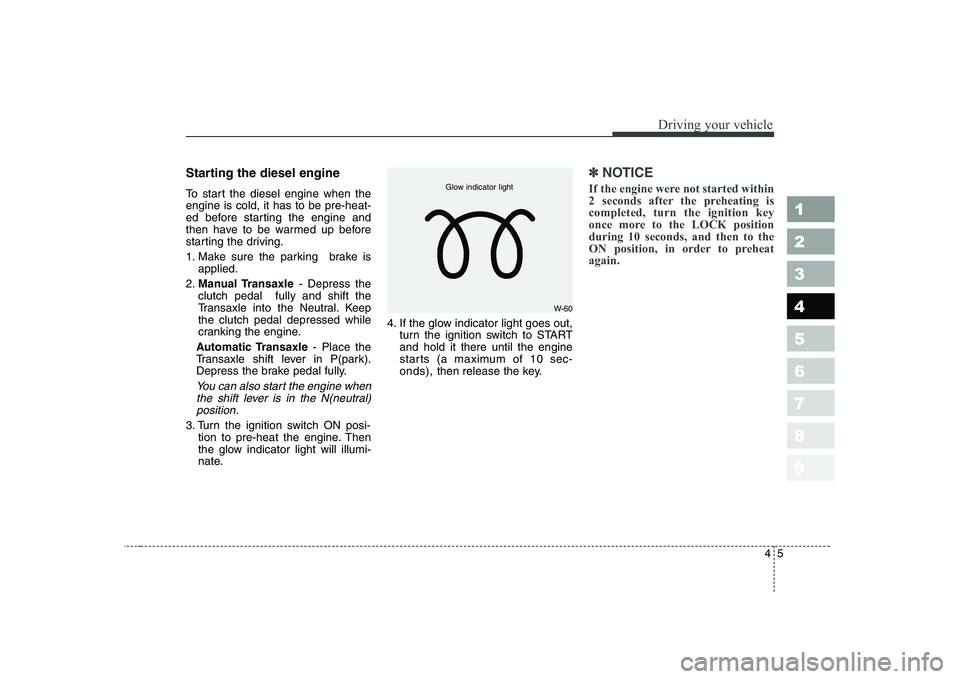
3. Turn the ignition switch ON posi- tion to pre-heat the engine. Then
the glow indicator light will illumi-
nate. 4. If the glow indicator light goes out,
turn the ignition switch to STARTand hold it there until the engine
starts (a maximum of 10 sec-onds), then release the key.
✽✽
NOTICE
If the engine were not started within
2 seconds after the preheating iscompleted, turn the ignition key
once more to the LOCK positionduring 10 seconds, and then to the
ON position, in order to preheatagain.
W-60
Glow indicator light
Page 142 of 329
47
1 23456789
Driving your vehicle
Manual transaxle operation
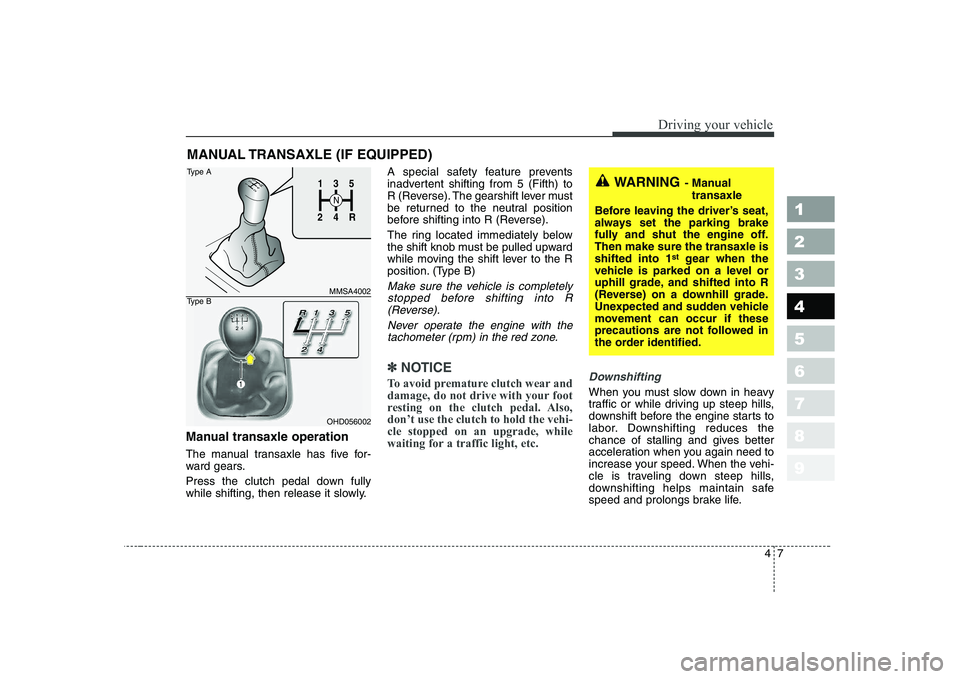
The manual transaxle has five for-
ward gears.
Press the clutch pedal down fully
while shifting, then release it slowly.A special safety feature prevents
inadvertent shifting from 5 (Fifth) to
R (Reverse). The gearshift lever must
be returned to the neutral position
before shifting into R (Reverse).
The ring located immediately below
the shift knob must be pulled upward
while moving the shift lever to the R
position. (Type B)
Make sure the vehicle is completely
stopped before shifting into R (Reverse).
Never operate the engine with thetachometer (rpm) in the red zone.
✽✽ NOTICE
To avoid premature clutch wear and
damage, do not drive with your foot
resting on the clutch pedal. Also,don’t use the clutch to hold the vehi-cle stopped on an upgrade, while
waiting for a traffic light, etc.Downshifting
When you must slow down in heavy
traffic or while driving up steep hills,
downshift before the engine starts to
labor. Downshifting reduces the
chance of stalling and gives better
acceleration when you again need to
increase your speed. When the vehi-
cle is traveling down steep hills,
downshifting helps maintain safe
speed and prolongs brake life.
MANUAL TRANSAXLE (IF EQUIPPED)
WARNING
- Manual
transaxle
Before leaving the driver’s seat,
always set the parking brake
fully and shut the engine off.Then make sure the transaxle isshifted into 1 st
gear when the
vehicle is parked on a level or
uphill grade, and shifted into R
(Reverse) on a downhill grade.
Unexpected and sudden vehicle
movement can occur if these
precautions are not followed in
the order identified.1
2 4
R
3
S
N
135
R
4
2
MMSA4002
OHD056002
Type A
Type B
Page 159 of 329
Driving your vehicle
24
4
1 23456789
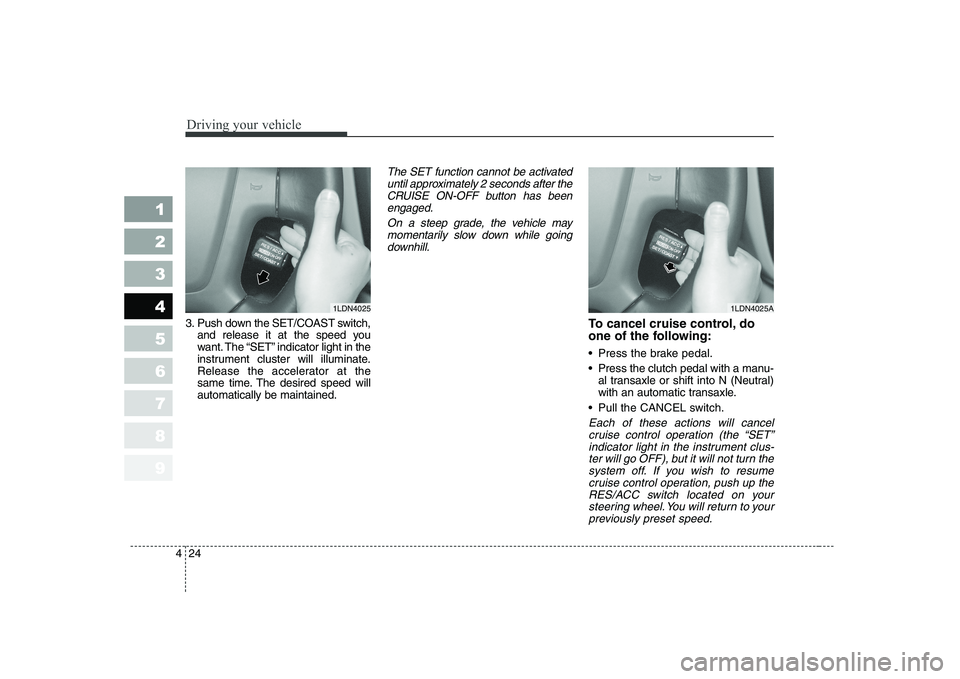
3. Push down the SET/COAST switch,
and release it at the speed you
want. The “SET” indicator light in the
instrument cluster will illuminate.
Release the accelerator at the
same time. The desired speed willautomatically be maintained.
The SET function cannot be activated
until approximately 2 seconds after theCRUISE ON-OFF button has beenengaged.
On a steep grade, the vehicle maymomentarily slow down while goingdownhill.
To cancel cruise control, do
one of the following:
Press the brake pedal.
Press the clutch pedal with a manu- al transaxle or shift into N (Neutral)
with an automatic transaxle.
Pull the CANCEL switch.
Each of these actions will cancel cruise control operation (the “SET”indicator light in the instrument clus-ter will go OFF), but it will not turn the system off. If you wish to resumecruise control operation, push up theRES/ACC switch located on your steering wheel. You will return to yourpreviously preset speed.
1LDN40251LDN4025A
Page 266 of 329
1 234567891 23456789
10
Maintenance services / 7-3 Normal maintenance schedule / 7-5
Maintenance under severe usage conditions / 7-9
Owner maintenance / 7-11Engine compartment / 7-14
Engine oil and oil filter / 7-17Engine cooling system / 7-18Brakes and clutch / 7-21Parking brake / 7-22
Power steering / 7-23Manual transaxle / 7-23Automatic transaxle / 7-24Lubricants and fluids / 7-26
Fuel filter / 7-27
Air cleaner / 7-28
Climate control air filter / 7-30
Wiper blades / 7-32Battery / 7-34
Tires and wheels / 7-37
Maintenance
Page 272 of 329

1 23456789
77
Maintenance
NORMAL MAINTENANCE SCHEDULE (cont.)
I : Inspect and if necessary, adjust, correct, clean or replace. R : Replace or change. *7: When adding coolant, use only a qualified coolant additive for your vehicle and never mix hard water in the
coolant filled at the factory. An improper coolant mixture can result in serious malfunction or engine damage.
*8 : For your convenience, it can be replaced prior to it's interval when you do maintenance of other items.
MAINTENANCE
INTERVALS
MAINTENANCE ITEMNumber of months or driving distance, whichever comes first
Months 12 24 36 48 60 72 84 96
Miles×1,000 10 20 30 40 50 60 70 80
Km×1,000 15 30 45 60 75 90 105 120
Engine coolant *7
Battery condition I I I I I I I I
All electrical systems I I I I
Brake lines, hoses and connections I I I I I I I I
Brake pedal, clutch pedal I I I I
Parking brake I I I I
Brake/clutch fluid For Europe
IRI RIRIR
Except EuropeIII IIIII
Disc brakes and pads I I I I I I I I
Rear brake drums and linings
I I I I
At first, replace at 100,000 km (62,000 miles) or 60 months:
after that, replace every 40,000 km (25,000 miles) or 24 months *8
Page 286 of 329
721
Maintenance
1 23456789
BRAKES AND CLUTCH (IF EQUIPPED)
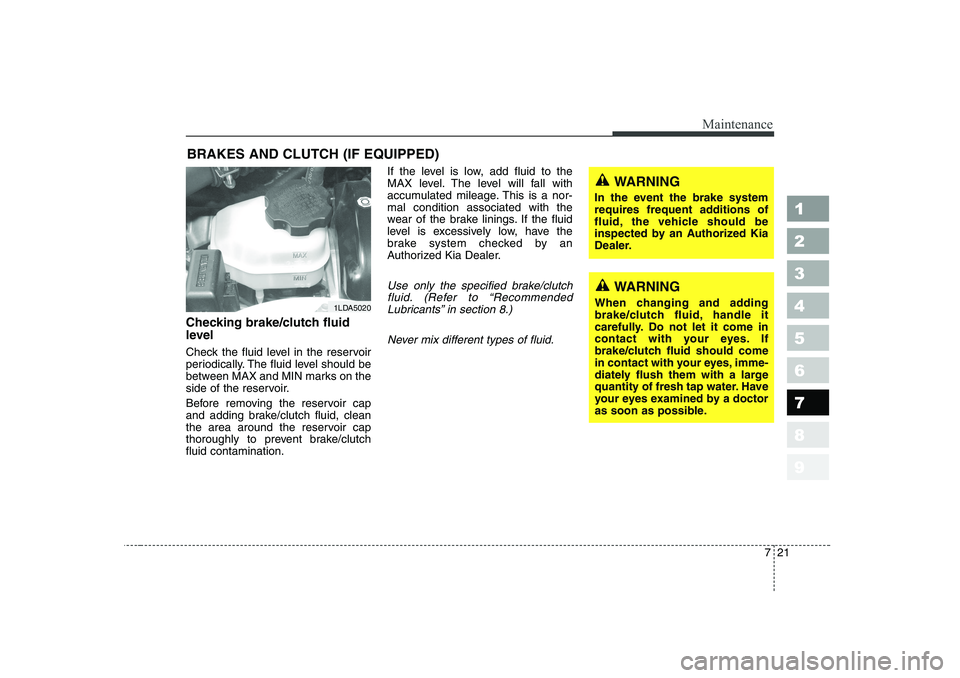
Checking brake/clutch fluid
level
Check the fluid level in the reservoir
periodically. The fluid level should be
between MAX and MIN marks on the
side of the reservoir.
Before removing the reservoir cap
and adding brake/clutch fluid, clean
the area around the reservoir cap
thoroughly to prevent brake/clutchfluid contamination. If the level is low, add fluid to the
MAX level. The level will fall with
accumulated mileage. This is a nor-mal condition associated with the
wear of the brake linings. If the fluid
level is excessively low, have the
brake system checked by an
Authorized Kia Dealer.
Use only the specified brake/clutch
fluid. (Refer to “Recommended Lubricants” in section 8.)
Never mix different types of fluid.WARNING
When changing and adding
brake/clutch fluid, handle it
carefully. Do not let it come in
contact with your eyes. If
brake/clutch fluid should come
in contact with your eyes, imme-
diately flush them with a large
quantity of fresh tap water. Have
your eyes examined by a doctor
as soon as possible.
WARNING
In the event the brake system
requires frequent additions of
fluid, the vehicle should be
inspected by an Authorized Kia
Dealer.
1LDA5020
Page 287 of 329
Maintenance
22
7
1 23456789
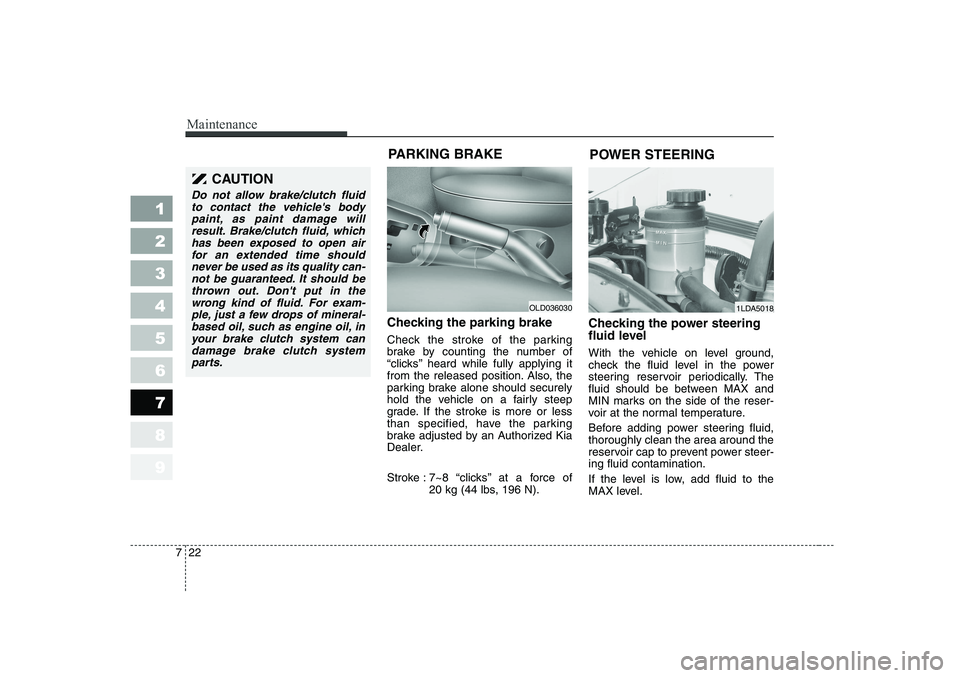
Checking the parking brake
Check the stroke of the parking
brake by counting the number of
“clicks’’ heard while fully applying it
from the released position. Also, the
parking brake alone should securely
hold the vehicle on a fairly steep
grade. If the stroke is more or less
than specified, have the parking
brake adjusted by an Authorized Kia
Dealer.
Stroke : 7~8 “clicks’’ at a force of
20 kg (44 lbs, 196 N). Checking the power steering
fluid level
With the vehicle on level ground,
check the fluid level in the power
steering reservoir periodically. The
fluid should be between MAX and
MIN marks on the side of the reser-
voir at the normal temperature.
Before adding power steering fluid, thoroughly clean the area around the
reservoir cap to prevent power steer-ing fluid contamination.
If the level is low, add fluid to the
MAX level.
OLD036030
PARKING BRAKE 1LDA5018
POWER STEERING
CAUTION
Do not allow brake/clutch fluid
to contact the vehicle's bodypaint, as paint damage will result. Brake/clutch fluid, whichhas been exposed to open airfor an extended time shouldnever be used as its quality can- not be guaranteed. It should bethrown out. Don't put in thewrong kind of fluid. For exam- ple, just a few drops of mineral-based oil, such as engine oil, inyour brake clutch system can damage brake clutch systemparts.