Page 375 of 6020

3C-54 FRONT SUSPENSION
TROUBLESHOOTING
1. VIBRATION, SHOCK, AND SHIMMY OF STEERING WHEEL
Checkpoint Problem Countermeasure
Check front axle
Check wheel alignment
Check suspension ball joint
Check shock absorber or
attaching nut and bolt
Replace
Adjust
Replace
Replace or retighten
Check steering unit and
linkage
Faulty
Worn
Malfunction or loose
Check upper and lower link
bushings
Replace
Adjust
Worn
Incorrect
OK
OK
OK
NG
NG
NG
NG
NG
NG
OK
OK
Check vehicle trim height
• Improperly adjusted or worn front
wheel bearing.
• W orn or incorrectly adjusted wheel
bearing.
Replace; refer to Section 4C "Front
Wheel Drive"
• Insufficiently tightened steering
gear housing.
• W ear of steering linkage.
• Excessive backlash due to
improper adjustment of the steering
gear box.
• W orn column bearing, weakened
column bearing spring, or loose
clamp.
Replace; refer to Section 3B
"Steering"
• Improper tire pressure.
• Imbalance and deformation of frond
wheel.
• Unevenly worn tire or insufficient
tightening of wheel nuts.
Replace; refer to Section 3E "Wheel
and Tires"
BACK TO CHAPTER INDEX
TO MODEL INDEX
ISUZU KB P190 2007
Page 376 of 6020
FRONT SUSPENSION 3C-55
2. VEHICLE PULLS TO RIGHT OR LEFT
Checkpoint Problem Countermeasure
Steering linkage, and upper
and lower link
Rubber bushing for upper and
lower link
W heel alignment
Vehicle trim height
Replace
Replace
Adjust
Adjust
Deformed
Worn
Incorrect
Incorrect
Brake adjustment (binding)
Adjust
Replace
Incorrect
Collapsed or break (4 ×2
Except high ride suspension)
Collapsed or twisted (4 ×4, 4 ×2
High ride suspension)
Continued on the next page OK
OK
OK
OK
NG
NG
NG
NG
NG
NG
OK
OK Coil spring (4
×2 Except high
ride suspension)
Torsion bar (4 ×4, 4 ×2 High
ride suspension)
Front wheel bearing
Adjust or replace
Incorrect adjustment or
abrasion
NG
BACK TO CHAPTER INDEX
TO MODEL INDEX
ISUZU KB P190 2007
Page 517 of 6020

FRONT WHEEL DRIVE 4C1-13
NOTE :
Adjust the buffer clearance before tighten the bolts and nuts of
the lower control arm.
6. Install the breather hose of the front axle.
7. Install the actuator connector of the shift on the fly.
8. Install the tie-rod end of the power steering unit to the knuckle, tighten the nut to the specified torque.
Torque : 98 N·m (10.0kgf·m/73 lb·ft)
9. Install lower bolts and nuts of the shock absorber, tighten it to the specified torque.
Torque : 93 N·m (9.5kgf·m/69 lb·ft)
10. Install lower nuts of the stabilizer link, tighten it to the specified torque.
Torque : 50 N·m (5.1kgf·m/37 lb·ft)
11. Install the suspension crossmember.
12. Install the torsion bar.
Refer to Torsion Bar in Suspension section.
13. Install the front propeller shaft.
Refer to Front Propeller Shaft in this section.
14. Install the hub and disc assembly and adjust the bearing preload.
Refer to Front Hub and Disc in this section.
15. Install the wheel speed sensor of the antilock brake system.
16. Install the brake caliper. Tighten the bolt of the caliper bracket to the specified torque.
Torque : 226 N·m (23.0kgf·m/166 lb·ft)
17. Install the stone guard.
18. Install the tire and wheel.
19. Lower the vehicle, adjust the trim height.
Refer to Trim Height Adjustment in Front Alignment section.
20. Tighten the bolts and nuts of the lower control arm to the specified torque.
Refer to Lower Control Arm in Suspension section.
BACK TO CHAPTER INDEX
TO MODEL INDEX
ISUZU KB P190 2007
Page 730 of 6020

BRAKES 5C-31
ADJUSTMENT PROCEDURE OF BRAKE PEDAL
The push rod serves as the brake pedal stopper when the
pedal is fully released.
Brake pedal height adjustment should be performed as follows.
RTW 35CSH000601
Brake Pedal - Height
Measure the brake pedal height after making sure the pedal is
fully returned by the pedal return spring.
Note:
Pedal height (L2) must be measured after starting the
engine and increasing the revolution several times by
stepping on the accelerator pedal. mm (in)
Pedal free play (L1) 6 - 10 (0.24 - 0.39)
M/T 174 - 186 (6.85 - 7.32) Height (L2)
A/T 176 - 188 (6.93 - 7.40)
Note:
Pedal free play must be measured after turning off the
engine and stepping on the brake pedal firmly five times
or more.
If the measured value deviates from the above range, adjust
the brake pedal as follows:
a) Disconnect the stop lamp switch.
b) Loosen the lock nut on the push rod.
c)
Adjust the brake pedal to the specified height by rotating the
push rod in the appropriate direction.
Lock Nut Torque
N⋅m (kgf ⋅m/lb ⋅
⋅⋅
⋅
ft)
15 - 25 (1.5 – 2.5 / 11 - 18)
d) Install the stop lamp switch.
Note:
Pedal height (L
2) must be 57 mm (2.24 in.) or more when
applying about 50 kg (110.25 lbs.) of stepping force.
331R300005
How to connect the CLEVICE of the BOOSTER ROD with the
PEDAL ARM and how to adjust the PEDAL SW .
After connecting the CLEVIS of the BOOSTER ROD to the
PEDAL ARM, adjust the PEDAL SW mounted (PDA) to the
PEDAL BRACKET using the procedure explained below.
1. Set the hole of the CLEVIS of the BOOSTER & M/CYL
ROD with the hole in the PEDAL ARM.
2. Enter the PIN; PUSH ROD to the PEDAL to the holes from the left side of the PEDAL.
3. Enter and fix the PIN; SNAP PIN FIX to the DITCH o
f
the PIN; PUSH ROD to PEDAL from right side of the
PEDAL.
4. Release the LOCK by turning the SW ITCH counter- clock-wise.
BACK TO CHAPTER INDEX
TO MODEL INDEX
ISUZU KB P190 2007
Page 866 of 6020

ENGINE MECHANICAL 6A – 61
INSPECTION AND REPAIR
Make the necessary adjustments, repairs, and part replacements if excessive wear or damage is discovered during
inspection.
CYLINDER HEAD
Cylinder Head Lower Face Warpage
1. Use a straight edge and a feeler gauge to measure the four sides and the two diagonals of the cylinder head lower
face.
2. The cylinder head lower surface warpage is more than the limit, it should be replaced.
Cylinder Head Lower Face Warpage mm (in)
Standard Limit
0.05
(0.002) or less 0.20
(0.0079)
NOTE:
The cylinder head lower face cannot be reground.
Cylinder Head Height (
H) (Reference) mm (in)
Standard
91.95 – 92.05
(3.620 – 3.624)
Positive Crankcase Ventilation (PCV) Valve
1. Remove PCV valve assembly from cylinder head cover.
2. Inspect the diaphragm for broken.
3. Inspect the spring for broken or weaken.
4. If find any abnormal condition, replace the PCV valve assembly.
011RY00012
011RY00013011RY00014
BACK TO CHAPTER INDEX
TO MODEL INDEX
ISUZU KB P190 2007
Page 1443 of 6020

ENGINE MECHANICAL (4JK1/4JJ1) 6A-83
Inspection
Make the necessary adjustments, repairs, and part
replacements if excessive wear or damage is
discovered during inspection.
Cylinder Head Lower Face Warpage
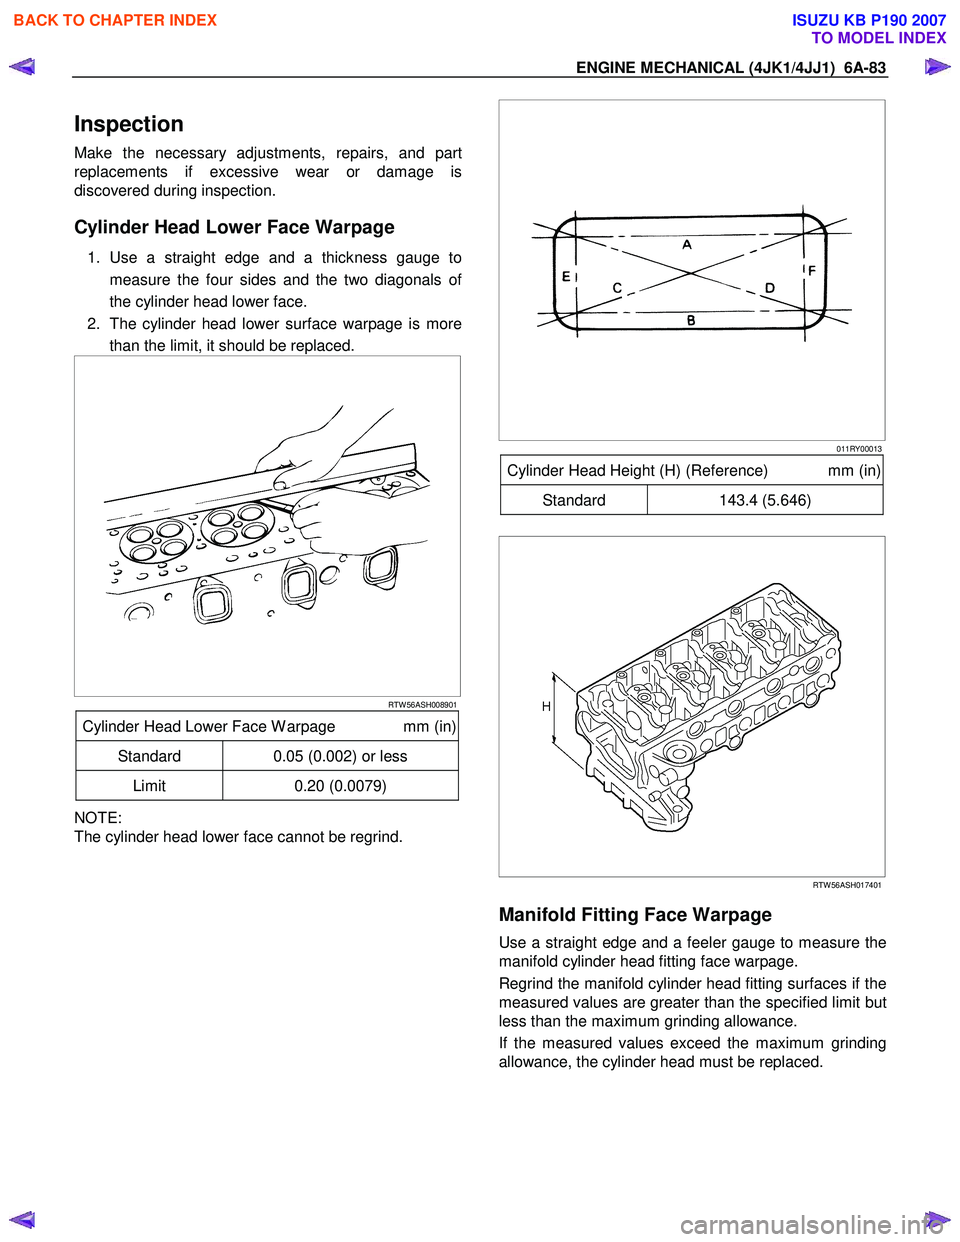
1. Use a straight edge and a thickness gauge to
measure the four sides and the two diagonals o
f
the cylinder head lower face.
2. The cylinder head lower surface warpage is more than the limit, it should be replaced.
RTW 56ASH008901
Cylinder Head Lower Face W arpage mm (in)
Standard 0.05 (0.002) or less
Limit 0.20 (0.0079)
NOTE:
The cylinder head lower face cannot be regrind.
011RY00013
Cylinder Head Height (H) (Reference) mm (in)
Standard 143.4 (5.646)
RTW 56ASH017401
Manifold Fitting Face Warpage
Use a straight edge and a feeler gauge to measure the
manifold cylinder head fitting face warpage.
Regrind the manifold cylinder head fitting surfaces if the
measured values are greater than the specified limit but
less than the maximum grinding allowance.
If the measured values exceed the maximum grinding
allowance, the cylinder head must be replaced.
BACK TO CHAPTER INDEX
TO MODEL INDEX
ISUZU KB P190 2007
Page 2093 of 6020

ENGINE MECHANICAL (C24SE) 6A-79
Adjustment Values/Checking Values
Valve clearance Inlet Hydraulic valve lash adjustment
Outlet No adjustment necessary
Spark plugs - electrode gap 1.0 ∼ 1.1mm
Compression The difference in compression
between the individual cylinders
in the engine must not exceed
100 kPa (1 bar).
Pressure loss The pressure loss of an engine
in perfect condition per cylinder
is not more than max. 25%
Cylinder Head
Cylinder Head Gasket
Thickness - installed mm 1.2
Valve seat width at cylinder head
inlet mm 1.0 to 1.5
outlet mm 1.7 to 2.2
Valve stem play inlet mm 0.018 to 0.052
outlet mm 0.038 to 0.072
Permissible valve stem to cone runout
inlet mm 0.03
outlet mm 0.33
Overall height of cylinder head
(Sealing surface to sealing surface) mm 95.5 ± 0.25
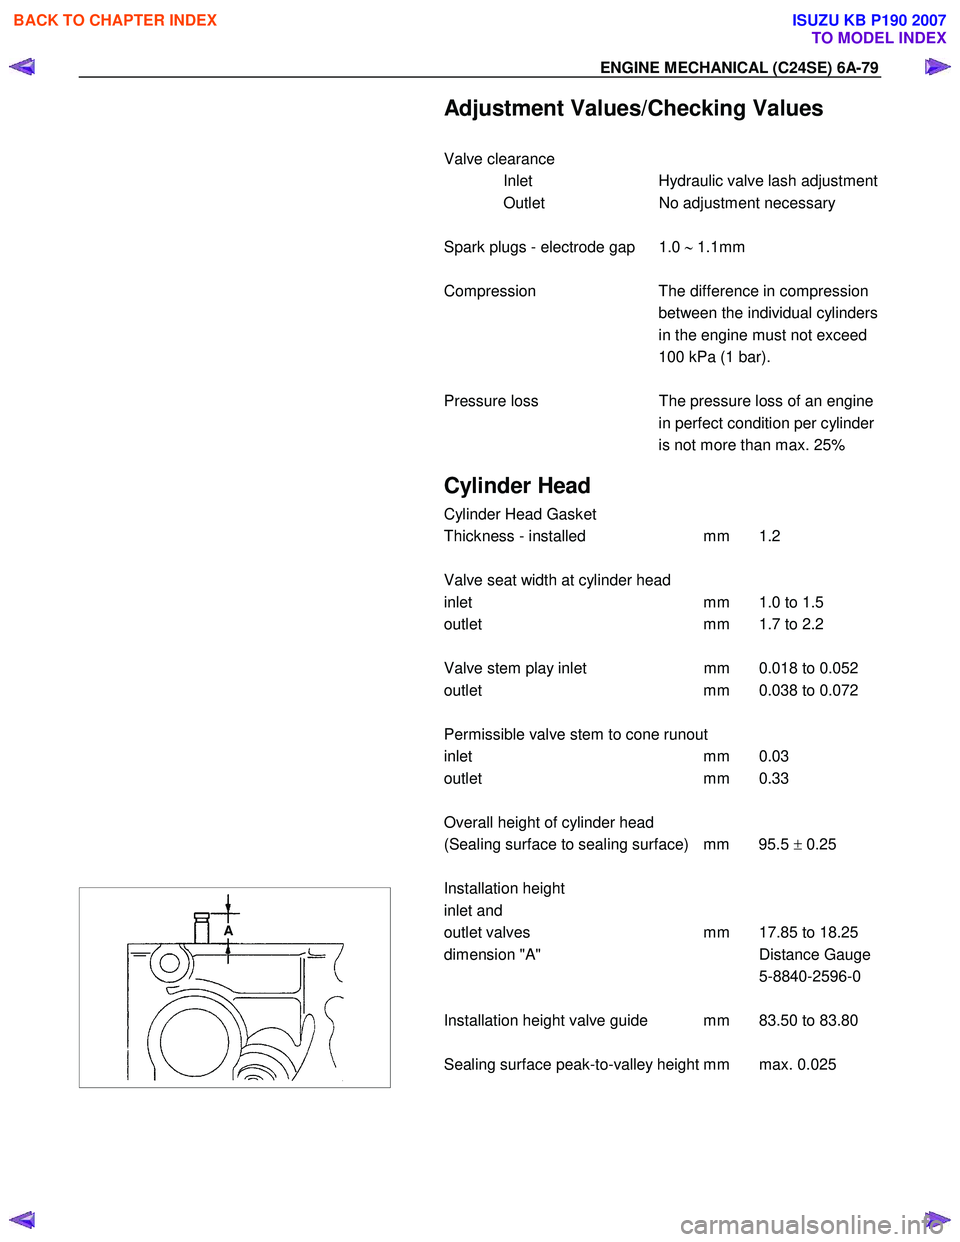
Installation height
inlet and
outlet valves mm 17.85 to 18.25
dimension "A" Distance Gauge
5-8840-2596-0
Installation height valve guide mm 83.50 to 83.80
Sealing surface peak-to-valley height mm max. 0.025
BACK TO CHAPTER INDEX
TO MODEL INDEX
ISUZU KB P190 2007
Page 4589 of 6020

MSG MODEL 7B-25
INSPECTION AND REPAIR
Make the necessary adjustments, repairs, and part replacements if excessive wear or damage is discovered during
inspection.
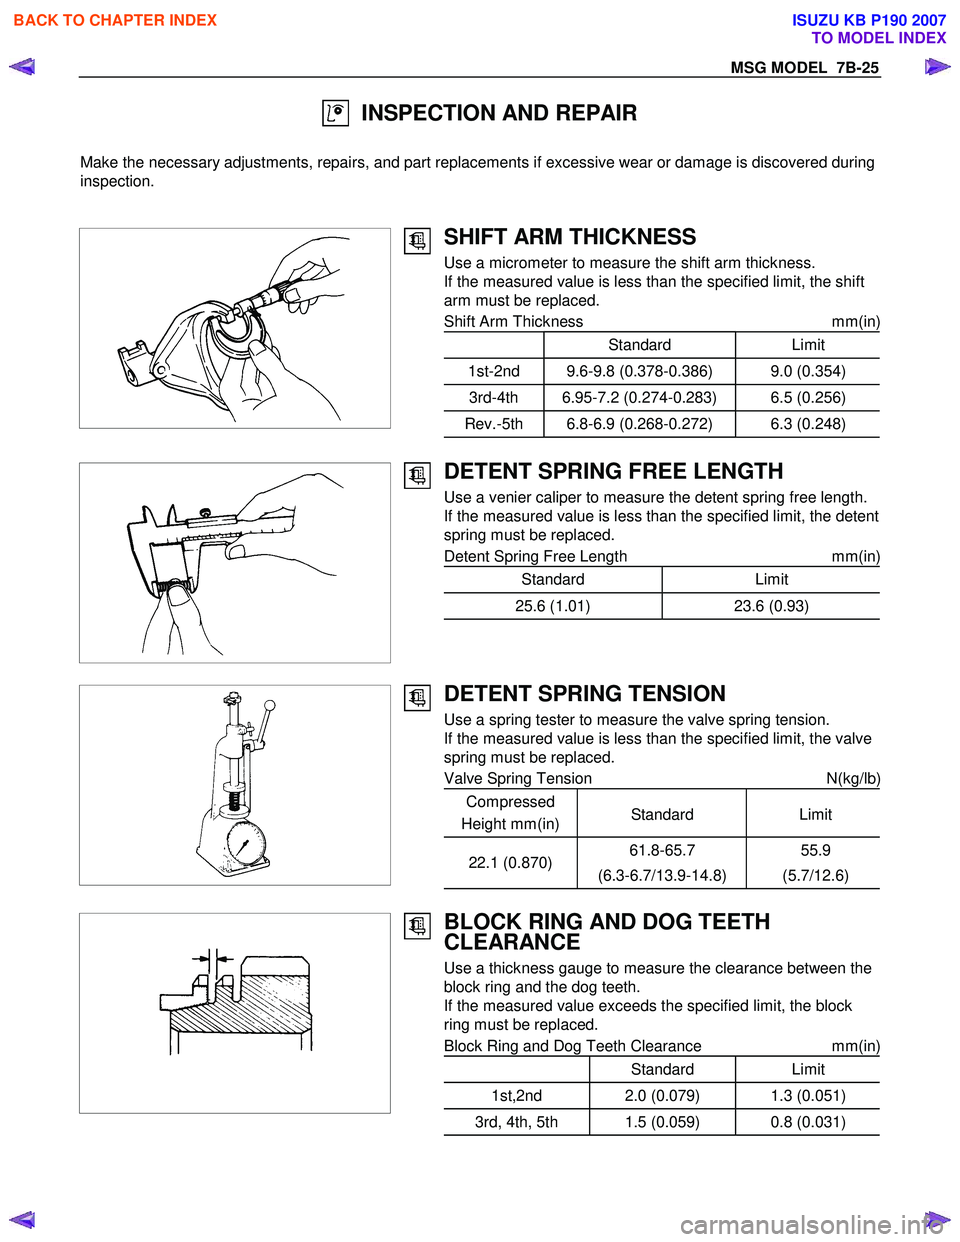
SHIFT ARM THICKNESS
Use a micrometer to measure the shift arm thickness.
If the measured value is less than the specified limit, the shift
arm must be replaced.
Shift Arm Thickness mm(in)
Standard Limit
1st-2nd 9.6-9.8 (0.378-0.386) 9.0 (0.354)
3rd-4th 6.95-7.2 (0.274-0.283) 6.5 (0.256)
Rev.-5th 6.8-6.9 (0.268-0.272) 6.3 (0.248)
DETENT SPRING FREE LENGTH
Use a venier caliper to measure the detent spring free length.
If the measured value is less than the specified limit, the detent
spring must be replaced.
Detent Spring Free Length mm(in)
Standard Limit
25.6 (1.01)23.6 (0.93)
DETENT SPRING TENSION
Use a spring tester to measure the valve spring tension.
If the measured value is less than the specified limit, the valve
spring must be replaced.
Valve Spring Tension N(kg/lb)
Compressed
Height mm(in) Standard
Limit
22.1 (0.870)61.8-65.7
(6.3-6.7/13.9-14.8) 55.9
(5.7/12.6)
BLOCK RING AND DOG TEETH
CLEARANCE
Use a thickness gauge to measure the clearance between the
block ring and the dog teeth.
If the measured value exceeds the specified limit, the block
ring must be replaced.
Block Ring and Dog Teeth Clearance mm(in)
Standard Limit
1st,2nd 2.0 (0.079) 1.3 (0.051)
3rd, 4th, 5th 1.5 (0.059) 0.8 (0.031)
BACK TO CHAPTER INDEX
TO MODEL INDEX
ISUZU KB P190 2007