Page 16 of 441
17
Introduction
INDICATOR SYMBOLS ON THE INSTRUMENT CLUSTER
Seat belt warning lightHigh beam indicatorTurn signal indicatorABS warning lightParking brake & Brake fluid warning lightEngine oil pressure warning lightAWD system warning light (if equipped)
AWD LOCK indicator (if equipped) ESC indicator
ESC OFF indicator
Malfunction indicator
Air bag warning lightCruise indicator Cruise SET indicatorImmobilizer indicator (if equipped) Tailgate open warning light Low fuel level warning light
* For more detailed explanations, refer to “Instrument cluster” in section 4.Charging system warning light
Low windshield washer fluid level warning light
A050000AEN-EU
Door ajar warning light
Key out indicator (if equipped)
KEY
OUT
AW D
LOCK
AIRBAG
ESCESC
OFF
TPMS (Tire Pressure Monitoring System) malfunction
indicator Low tire pressure telltaleLow tire pressure position telltale
EN hma 1.qxd 11/27/2006 6:32 PM Page 7
procarmanuals.com
Page 143 of 441

461
Features of your vehicle
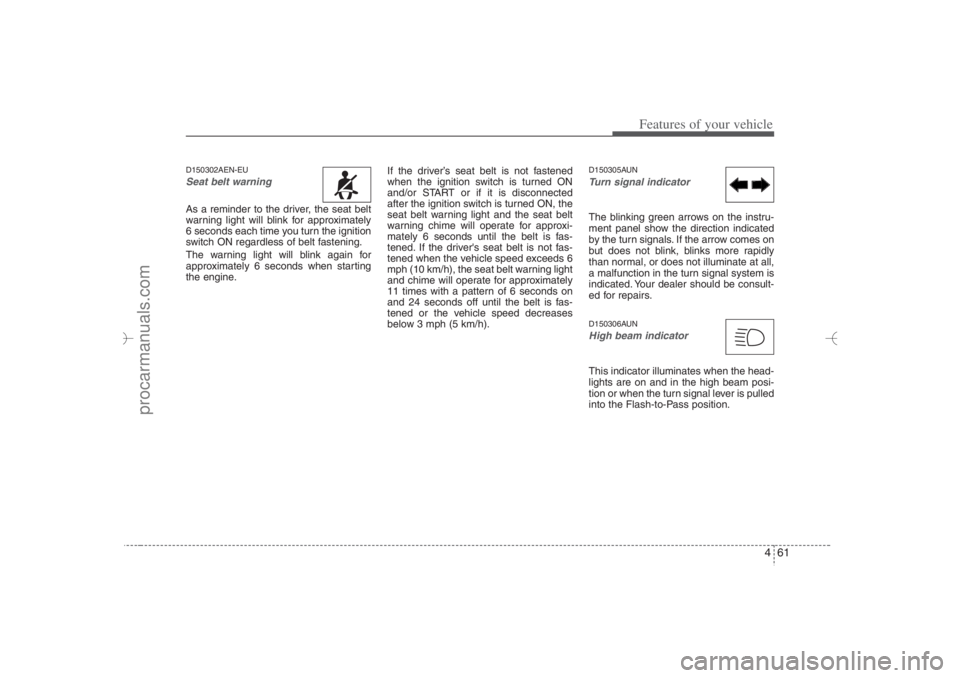
D150302AEN-EUSeat belt warning As a reminder to the driver, the seat belt
warning light will blink for approximately
6 seconds each time you turn the ignition
switch ON regardless of belt fastening.
The warning light will blink again for
approximately 6 seconds when starting
the engine.If the driver’s seat belt is not fastened
when the ignition switch is turned ON
and/or START or if it is disconnected
after the ignition switch is turned ON, the
seat belt warning light and the seat belt
warning chime will operate for approxi-
mately 6 seconds until the belt is fas-
tened. If the driver's seat belt is not fas-
tened when the vehicle speed exceeds 6
mph (10 km/h), the seat belt warning light
and chime will operate for approximately
11 times with a pattern of 6 seconds on
and 24 seconds off until the belt is fas-
tened or the vehicle speed decreases
below 3 mph (5 km/h).
D150305AUNTurn signal indicatorThe blinking green arrows on the instru-
ment panel show the direction indicated
by the turn signals. If the arrow comes on
but does not blink, blinks more rapidly
than normal, or does not illuminate at all,
a malfunction in the turn signal system is
indicated. Your dealer should be consult-
ed for repairs.D150306AUNHigh beam indicator This indicator illuminates when the head-
lights are on and in the high beam posi-
tion or when the turn signal lever is pulled
into the Flash-to-Pass position.
EN hma 4~83.qxd 11/28/2006 3:37 PM Page 61
procarmanuals.com
Page 154 of 441

Features of your vehicle72 4D190100AUNBattery saver function The purpose of this feature is to pre-
vent the battery from being dis-
charged. The system automatically
turns off the exterior lights when the
driver removes the ignition key and
opens the driver-side door.
With this feature, the parking lights will
be turned off automatically if the driver
parks on the side of road at night.
If necessary, to keep the lights on
when the ignition key is removed, per-
form the following:
1) Open the driver-side door.
2) Turn the parking lights OFF and ON
again using the light switch on the
steering column.D190200AENHeadlight escort function
(if equipped)The headlights (and/or taillights) remain
on for approximately 20 minutes after the
ignition key is removed or turned to the
ACC or LOCK position. However, if the
driver’s door is opened and closed, the
headlights are turned off after 30 sec-
onds.The headlights can be turned off by
pressing the lock button on the transmit-
ter twice or turning off the light switch
from the headlight or Auto light position.
D190300AENRescue mode function
(if equipped)If your vehicle has any problem on the
vehicle network system, the headlights
(low beam) turn on automatically with the
ignition switch in the ON position even
though the headlight switch is not turned
on. At this time, the emergency lighting is
not turned off when the headlight switch
is turned off.
D190400AUNLighting controlThe light switch has a Headlight and a
Parking light position.
To operate the lights, turn the knob at the
end of the control lever to one of the fol-
lowing positions:
(1) OFF position
(2) Parking light position
(3) Headlight position
(4) Auto light position (if equipped)
LIGHTING
CAUTION
If the rescue mode occurs, have
your vehicle checked by an author-
ized HYUNDAI dealer as soon as
possible.
OEN046060
EN hma 4~83.qxd 11/28/2006 3:37 PM Page 72
procarmanuals.com
Page 156 of 441

Features of your vehicle74 4
D190500AUNHigh beam operation To turn on the high beam headlights,
push the lever away from you. Pull it back
for low beams.
The high beam indicator will light when
the headlight high beams are switched
on.
To prevent the battery from being dis-
charged, do not leave the lights on for a
prolonged time while the engine is not
running.To flash the headlights, pull the lever
towards you. It will return to the normal
(low beam) position when released. The
headlight switch does not need to be on
to use this flashing feature.
CAUTION
Never place anything over sensor
(1) located on the instrument
panel. This will ensure better
auto-light system control.
Don’t clean the sensor using a
window cleaner. The cleaner may
leave a light film which could
interfere with sensor operation.
If your vehicle has window tint or
other types of coating on the
front windshield, the Auto light
system may not work properly.
OEN046065
OEN046064
EN hma 4~83.qxd 11/28/2006 3:37 PM Page 74
procarmanuals.com
Page 157 of 441

475
Features of your vehicle
D190600AUNTurn signals and lane change sig-
nalsThe ignition switch must be on for the
turn signals to function. To turn on the
turn signals, move the lever up or down
(A). Green arrow indicators on the instru-
ment panel indicate which turn signal is
operating. They will self-cancel after a
turn is completed. If the indicator contin-
ues to flash after a turn, manually return
the lever to the OFF position.To signal a lane change, move the turn
signal lever slightly and hold it in position
(B). The lever will return to the OFF posi-
tion when released.
If an indicator stays on and does not
flash or if it flashes abnormally, one of the
turn signal bulbs may be burned out and
will require replacement.
✽ ✽
NOTICEIf an indicator flash is abnormally quick
or slow, a bulb may be burned out or
have a poor electrical connection in the
circuit.
D190700AEN-EUFront fog light (if equipped) Fog lights are used to provide improved
visibility when visibility is poor due to fog,
rain or snow, etc. The fog lights will turn
on when fog light switch is pressed after
the headlights (low beam) are turned on.
To turn off the fog lights, press the switch
again.
OEN046066
OEN046067
CAUTION
When in operation, the fog lights
consume large amounts of vehicle
electrical power. Only use the fog
lights when visibility is poor.
EN hma 4~83.qxd 11/28/2006 3:37 PM Page 75
procarmanuals.com
Page 407 of 441

753
Maintenance
G220101AUN-EUHeadlight bulb
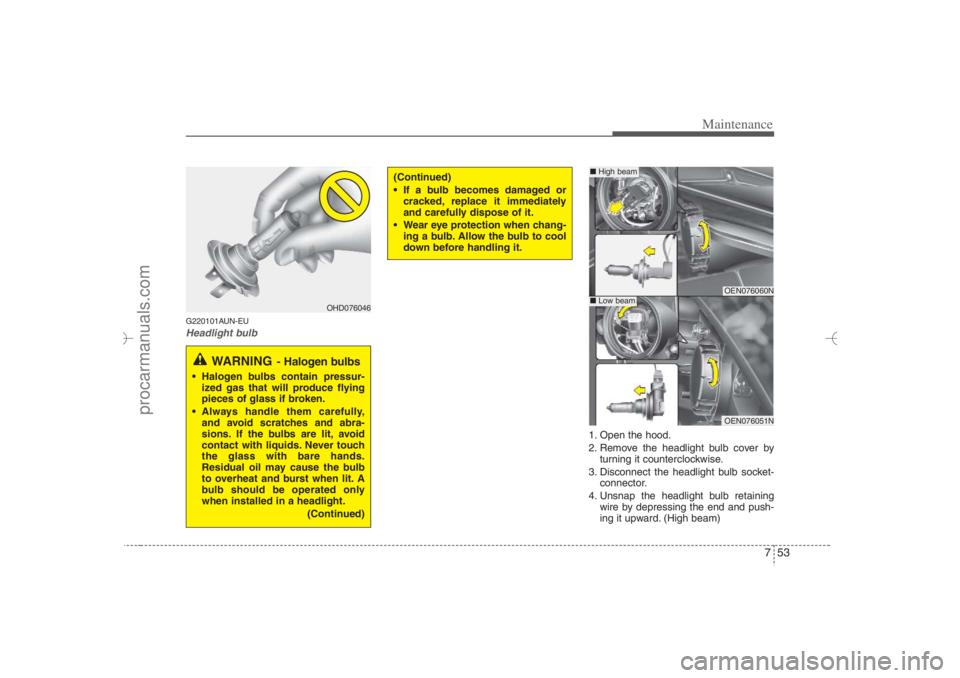
1. Open the hood.
2. Remove the headlight bulb cover by
turning it counterclockwise.
3. Disconnect the headlight bulb socket-
connector.
4. Unsnap the headlight bulb retaining
wire by depressing the end and push-
ing it upward. (High beam)
(Continued)
If a bulb becomes damaged or
cracked, replace it immediately
and carefully dispose of it.
Wear eye protection when chang-
ing a bulb. Allow the bulb to cool
down before handling it.
OHD076046
WARNING
- Halogen bulbs
Halogen bulbs contain pressur-
ized gas that will produce flying
pieces of glass if broken.
Always handle them carefully,
and avoid scratches and abra-
sions. If the bulbs are lit, avoid
contact with liquids. Never touch
the glass with bare hands.
Residual oil may cause the bulb
to overheat and burst when lit. A
bulb should be operated only
when installed in a headlight.
(Continued)
OEN076060NOEN076051N
■High beam■Low beam
EN hma 7.qxd 11/28/2006 3:46 PM Page 53
procarmanuals.com