2007 HYUNDAI TUCSON ignition
[x] Cancel search: ignitionPage 146 of 306
1FEATURES OF YOUR HYUNDAI
134
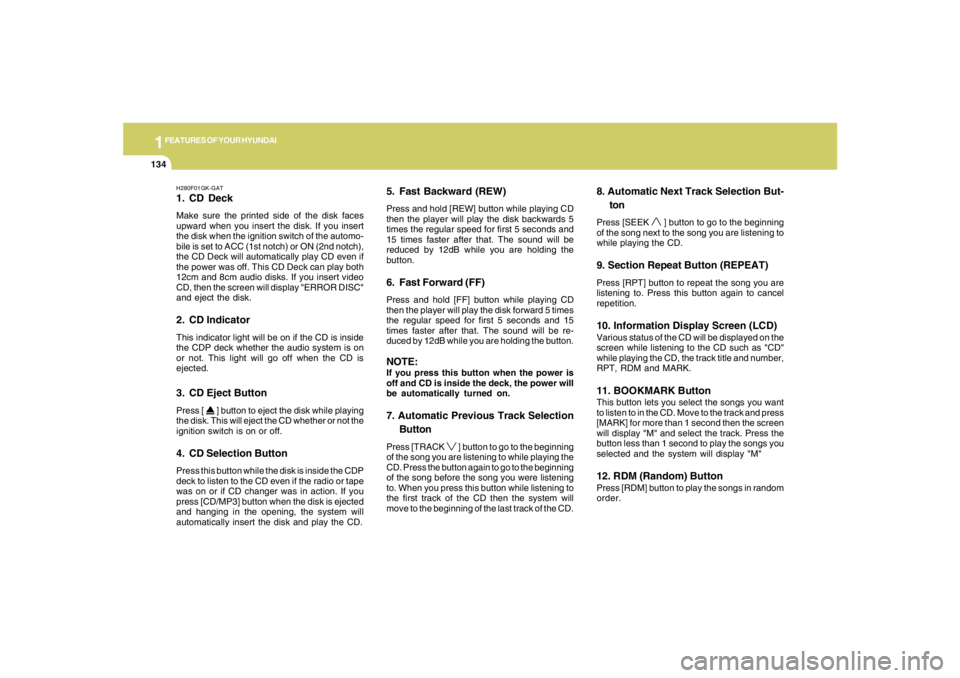
H280F01GK-GAT1. CD DeckMake sure the printed side of the disk faces
upward when you insert the disk. If you insert
the disk when the ignition switch of the automo-
bile is set to ACC (1st notch) or ON (2nd notch),
the CD Deck will automatically play CD even if
the power was off. This CD Deck can play both
12cm and 8cm audio disks. If you insert video
CD, then the screen will display "ERROR DISC"
and eject the disk.2. CD IndicatorThis indicator light will be on if the CD is inside
the CDP deck whether the audio system is on
or not. This light will go off when the CD is
ejected.3. CD Eject ButtonPress [
] button to eject the disk while playing
the disk. This will eject the CD whether or not the
ignition switch is on or off.
4. CD Selection ButtonPress this button while the disk is inside the CDP
deck to listen to the CD even if the radio or tape
was on or if CD changer was in action. If you
press [CD/MP3] button when the disk is ejected
and hanging in the opening, the system will
automatically insert the disk and play the CD.
5. Fast Backward (REW)Press and hold [REW] button while playing CD
then the player will play the disk backwards 5
times the regular speed for first 5 seconds and
15 times faster after that. The sound will be
reduced by 12dB while you are holding the
button.6. Fast Forward (FF)Press and hold [FF] button while playing CD
then the player will play the disk forward 5 times
the regular speed for first 5 seconds and 15
times faster after that. The sound will be re-
duced by 12dB while you are holding the button.NOTE:If you press this button when the power is
off and CD is inside the deck, the power will
be automatically turned on.7. Automatic Previous Track Selection
ButtonPress [TRACK
] button to go to the beginning
of the song you are listening to while playing the
CD. Press the button again to go to the beginning
of the song before the song you were listening
to. When you press this button while listening to
the first track of the CD then the system will
move to the beginning of the last track of the CD.
8. Automatic Next Track Selection But-
tonPress [SEEK
] button to go to the beginning
of the song next to the song you are listening to
while playing the CD.
9. Section Repeat Button (REPEAT)Press [RPT] button to repeat the song you are
listening to. Press this button again to cancel
repetition.10. Information Display Screen (LCD)Various status of the CD will be displayed on the
screen while listening to the CD such as "CD"
while playing the CD, the track title and number,
RPT, RDM and MARK.11. BOOKMARK ButtonThis button lets you select the songs you want
to listen to in the CD. Move to the track and press
[MARK] for more than 1 second then the screen
will display "M" and select the track. Press the
button less than 1 second to play the songs you
selected and the system will display "M"12. RDM (Random) ButtonPress [RDM] button to play the songs in random
order.
Page 149 of 306

1
FEATURES OF YOUR HYUNDAI
137137137137137
CLASSIC → JAZZ → ROCK → DEFEAT
J290B01JM-GAT1. POWER ON-OFF/VOLUME
Control KnobThe radio unit may be operated when the ignition
key is in the "ACC" or "ON" position. Press the
button to switch the power on. The display
shows the radio frequency in the radio mode,
the tape direction indicator in the tape mode, or
CD track in the CD AUTO CHANGER mode. To
switch the power off, press the button again.VOLUME ControlRotate the knob clockwise to increase the
volume and turn the knob counterclockwise to
reduce the volume.2. BAND SelectorPressing the button changes the AM, FM1 and
FM2 bands. The mode selected is shown on the
display.3. SEEK Select Button
(Automatic Channel Selection)Press the SEEK select button 1 sec. or more.
When the ( ) side is pressed, the unit will
automatically tune to the next higher frequency
and when the ( ) side is pressed, it will
automatically tune to the next lower frequency.o When completed, any preset station may be
recalled by selecting AM, FM1 or FM2 band
and the appropriate station button.
5. Best Station Memory Button
(BSM)When the BSM button is pressed for two sec-
onds or longer, the six channels from the high-
est field intensity are selected next and stored
in memory. The stations selected are stored in
the sequence frequency from the first preset
key.6. EQ ButtonPress the EQ button to select the CLASSIC,
JAZZ, ROCK and DEFEAT MODE for the
desired tone quality. Each press of the button
changes the display as follows;
4. PRESET STATION Select
ButtonsSix (6) stations for AM, FM and FM2 respec-
tively can be preset in the electronic memory
circuit.HOW TO PRESET STATIONSSix AM and twelve FM stations may be pro-
grammed into the memory of the radio. Then, by
simply pressing the AM / FM select button and/
or one of the six station select buttons, you may
recall any of these stations instantly. To pro-
gram the stations, follow these steps:
o Press AM/FM selector to set the band for
AM, FM1 and FM2.
o Select the desired station to be stored by
seek, scan or manual tuning.
o Determine the preset station select button
you wish to use to access that station.
o Press the station select button for more than
two seconds. A select button indicator will
show in the display indicating which select
button you have depressed. The frequency
display will flash after it has been stored into
the memory. You should then release the
button, and proceed to program the next
desired station. A total of 18 stations can be
programmed by selecting one AM and two
FM station per button.
7. TUNE (Manual) Select KnobRotate the knob clockwise to increase the
frequency and turn the knob counterclockwise
to reduce the frequency.
Page 154 of 306
1FEATURES OF YOUR HYUNDAI
142
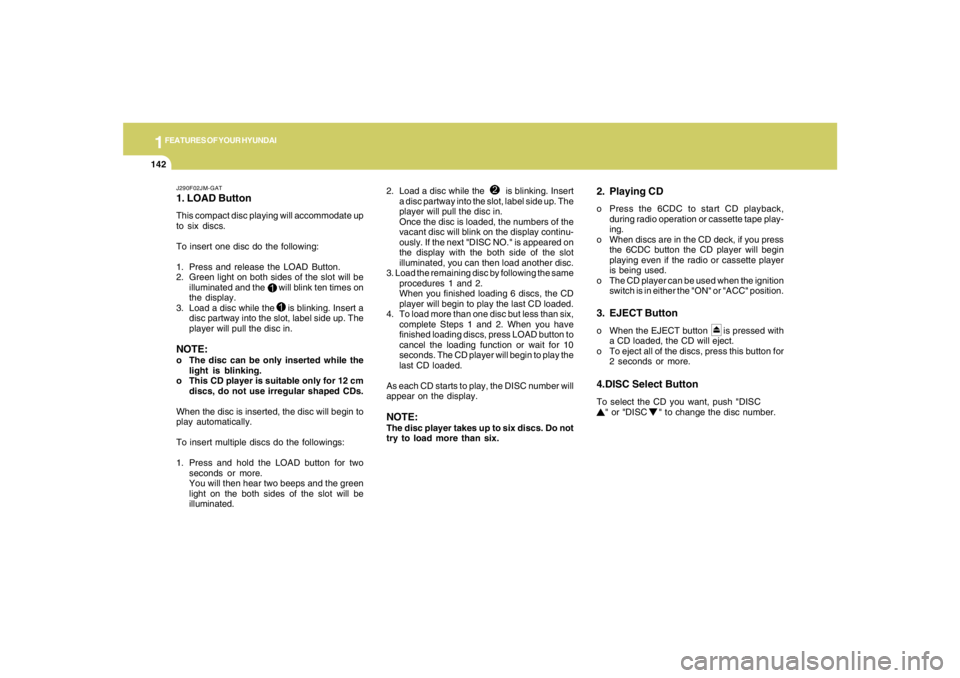
J290F02JM-GAT1. LOAD ButtonThis compact disc playing will accommodate up
to six discs.
To insert one disc do the following:
1. Press and release the LOAD Button.
2. Green light on both sides of the slot will be
illuminated and the will blink ten times on
the display.
3. Load a disc while the is blinking. Insert a
disc partway into the slot, label side up. The
player will pull the disc in.NOTE:o The disc can be only inserted while the
light is blinking.
o This CD player is suitable only for 12 cm
discs, do not use irregular shaped CDs.
When the disc is inserted, the disc will begin to
play automatically.
To insert multiple discs do the followings:
1. Press and hold the LOAD button for two
seconds or more.
You will then hear two beeps and the green
light on the both sides of the slot will be
illuminated.2. Load a disc while the is blinking. Insert
a disc partway into the slot, label side up. The
player will pull the disc in.
Once the disc is loaded, the numbers of the
vacant disc will blink on the display continu-
ously. If the next "DISC NO." is appeared on
the display with the both side of the slot
illuminated, you can then load another disc.
3. Load the remaining disc by following the same
procedures 1 and 2.
When you finished loading 6 discs, the CD
player will begin to play the last CD loaded.
4. To load more than one disc but less than six,
complete Steps 1 and 2. When you have
finished loading discs, press LOAD button to
cancel the loading function or wait for 10
seconds. The CD player will begin to play the
last CD loaded.
As each CD starts to play, the DISC number will
appear on the display.
NOTE:The disc player takes up to six discs. Do not
try to load more than six.
2. Playing CDo Press the 6CDC to start CD playback,
during radio operation or cassette tape play-
ing.
o When discs are in the CD deck, if you press
the 6CDC button the CD player will begin
playing even if the radio or cassette player
is being used.
o The CD player can be used when the ignition
switch is in either the "ON" or "ACC" position.3. EJECT Buttono When the EJECT button is pressed with
a CD loaded, the CD will eject.
o To eject all of the discs, press this button for
2 seconds or more.4.DISC Select ButtonTo select the CD you want, push "DISC
" or "DISC " to change the disc number.
Page 159 of 306

1
FEATURES OF YOUR HYUNDAI
147147147147147
J295B01JM-GAT1. Power Button (POWER ON)Press this button when the ignition switch of the
automobile is set to ACC (1st notch) or ON (2nd
notch) to turn on the power and the audio
system. Press once again when the audio
system is on to turn off the power.2. Volume Control (VOLUME)Turn the volume control clockwise to increase
volume and counterclockwise to reduce. The
volume level will be displayed on the screen
when you adjust the volume.3. Radio Band Selection Button (FM/AM)o Press this button to listen to either FM or AM.
o The radio will be set to each of the following
modes each time you press the button.
FM1 ➟ FM2 ➟ AMNOTE:Push this button when the power is off to
turn on the power automatically.4. SCAN ButtonPress this button to automatically select chan-
nels starting from the current channel and play
each channel for 5 seconds. Press again to
keep listening to the channel currently selected.
5. Automatic Channel Selection Button
(SEEK)Press the [SEEK
] button to automatically
increase frequency and press the [TRACK
]
button to automatically decrease frequency to
select and play the next available channel. If the
received channel is memorized in the preset
buttons then the screen will display the memo-
rized channel.
6. Manual Channel Selection Control
(TUNE)Turn the TUNE control clockwise to increase
frequency and counterclockwise to reduce fre-
quency by 1 step for each click.
o FM: Increases/Decreases by 0.2MHz
(87.5➟87.7➟87.9…87.9➟87.7➟87.5)
o AM: Increases/Decreases by 10MHz
(530➟540➟550…550➟540➟530)7. Preset Button (1~6)Press this button to listen to the channels
memorized to each button. If you want to memo-
rize the current channel to the preset button,
press the button for more than 1.5 seconds then
the channel will be memorized to the button with
a beep.
8. Information Display Screen (LCD)A variety of information will be displayed on the
screen including the radio bands (FM1/FM2/
AM) while listening to the radio, frequency of
each channel, the number of preset channel
and "ST" for FM stereo broadcasting.9. BASS, MIDDLE, TREBLE Tone Control
/ FADE, BALANCE ControlPress this button to control tone. Each time you
press the button, the mode will switch from
BASS➟MIDDLE➟TREBLE➟FADER➟BALANCE
and the mode will be displayed on the screen.
Page 170 of 306
2
DRIVING YOUR HYUNDAI
4
TO START THE ENGINEC030A01E-AATCOMBINATION IGNITION SWITCHo If your Hyundai is equipped with a manual
transaxle, place the shift lever in neutral and
depress the clutch pedal fully.
o If your Hyundai has an automatic transaxle,
place the shift lever in "P" (park).
o To start the engine, insert the ignition key and
turn it to the "START" position. Release it as
soon as the engine starts. Do not hold the
key in the "START" position for more that 15
seconds.NOTE:o For safety, the engine will not start if the
clutch pedal is not depressed fully
(Manual Transaxle) or the shift lever is
not in "P" or "N" Position (Automatic
Transaxle).
o The ignition key cannot be turned from
"ACC" position to "LOCK" position un-
less the shift lever is in the "P" (Park)
position or the negative battery terminal
is disconnected from the battery. To
remove the key, always confirm that the
shift lever is securely positioned in "P"
(Park) (For Automatic Transaxle).
o For additional information about start-
ing, see page 2-6.
BEFORE STARTING THE ENGINEC020A03A-AATBefore you start the engine, you should always:
1. Look around the vehicle to be sure there are
no flat tires, puddles of oil, water or other
indications of possible trouble.
2. After entering the car, check to be sure the
parking brake is engaged.
3. Check that all windows, and lights are clean.
4. Check that the interior and exterior mirrors
are clean and in position.
5. Check your seat, seatback and headrest to
be sure they are in their proper positions.
6. Lock all the doors.
7. Fasten your seat belt and be sure that all
other occupants have fastened theirs.
8. Turn off all lights and accessories that are
not needed.
9. When you turn the ignition switch to "ON",
check that all appropriate warning lights are
operating and that you have sufficient fuel.
10.Check the operation of warning lights and all
bulbs when key is in the "ON" position.
!
WARNING:
o All passengers must be properly belted
whenever the vehicle is moving. Refer to
pages: 1-18 through 1-24 for more infor-
mation on their proper use.
o Always check the surrounding areas near
your vehicle for people, especially chil-
dren, before putting a car into 'drive.'
!
WARNING:
Always wear appropriate shoes when oper-
ating your vehicle.
Unsuitable shoes (high heels, ski boots,
etc.) may interfere with your ability to use
the brake and accelerator pedal, and the
clutch (if installed).
Page 171 of 306
2
DRIVING YOUR HYUNDAI
5
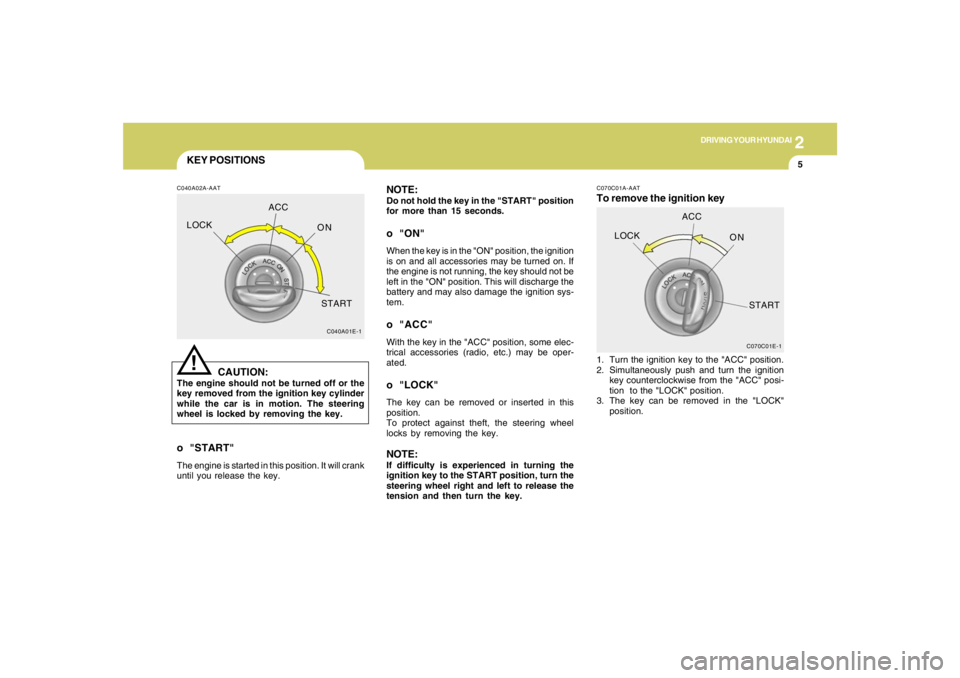
KEY POSITIONSC040A02A-AAT
CAUTION:
The engine should not be turned off or the
key removed from the ignition key cylinder
while the car is in motion. The steering
wheel is locked by removing the key.
!
o "START"The engine is started in this position. It will crank
until you release the key.
C040A01E-1
LOCKACC
ON
START
NOTE:Do not hold the key in the "START" position
for more than 15 seconds.o "ON"When the key is in the "ON" position, the ignition
is on and all accessories may be turned on. If
the engine is not running, the key should not be
left in the "ON" position. This will discharge the
battery and may also damage the ignition sys-
tem.o "ACC"With the key in the "ACC" position, some elec-
trical accessories (radio, etc.) may be oper-
ated.o "LOCK"The key can be removed or inserted in this
position.
To protect against theft, the steering wheel
locks by removing the key.NOTE:If difficulty is experienced in turning the
ignition key to the START position, turn the
steering wheel right and left to release the
tension and then turn the key.
C070C01E-1
LOCKACC
ON
START
C070C01A-AATTo remove the ignition key1. Turn the ignition key to the "ACC" position.
2. Simultaneously push and turn the ignition
key counterclockwise from the "ACC" posi-
tion to the "LOCK" position.
3. The key can be removed in the "LOCK"
position.
Page 172 of 306
2
DRIVING YOUR HYUNDAI
6
!
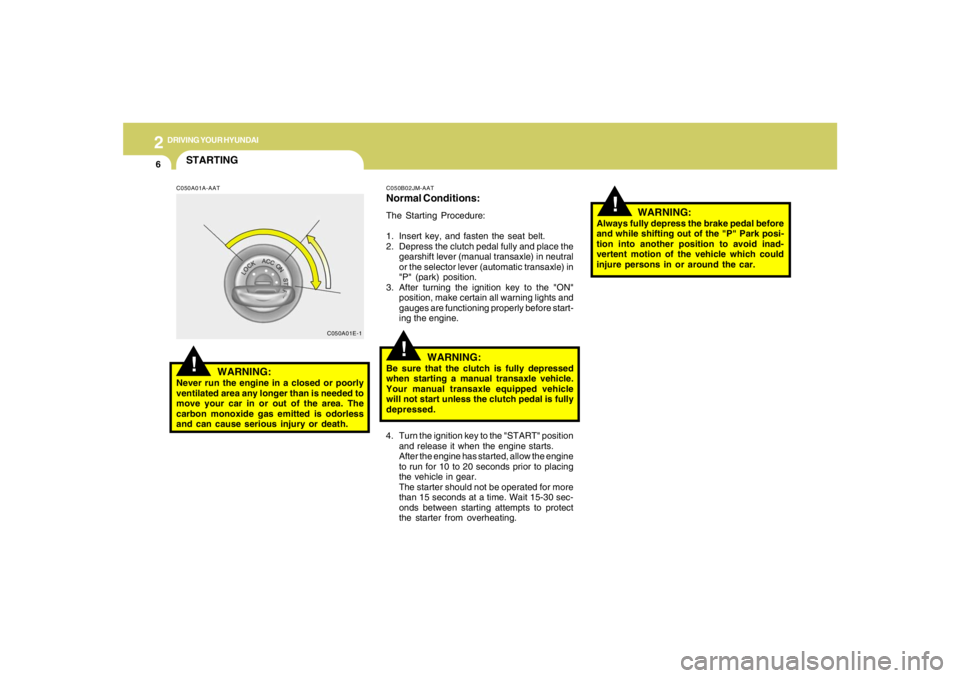
4. Turn the ignition key to the "START" position
and release it when the engine starts.
After the engine has started, allow the engine
to run for 10 to 20 seconds prior to placing
the vehicle in gear.
The starter should not be operated for more
than 15 seconds at a time. Wait 15-30 sec-
onds between starting attempts to protect
the starter from overheating.C050B02JM-AATNormal Conditions:The Starting Procedure:
1. Insert key, and fasten the seat belt.
2. Depress the clutch pedal fully and place the
gearshift lever (manual transaxle) in neutral
or the selector lever (automatic transaxle) in
"P" (park) position.
3. After turning the ignition key to the "ON"
position, make certain all warning lights and
gauges are functioning properly before start-
ing the engine.
WARNING:
Be sure that the clutch is fully depressed
when starting a manual transaxle vehicle.
Your manual transaxle equipped vehicle
will not start unless the clutch pedal is fully
depressed.
!
C050A01E-1
STARTING!
C050A01A-AAT
WARNING:
Never run the engine in a closed or poorly
ventilated area any longer than is needed to
move your car in or out of the area. The
carbon monoxide gas emitted is odorless
and can cause serious injury or death.
WARNING:
Always fully depress the brake pedal before
and while shifting out of the "P" Park posi-
tion into another position to avoid inad-
vertent motion of the vehicle which could
injure persons in or around the car.
Page 175 of 306
2
DRIVING YOUR HYUNDAI
9
HJM3018
OPERATING THE AUTOMATIC
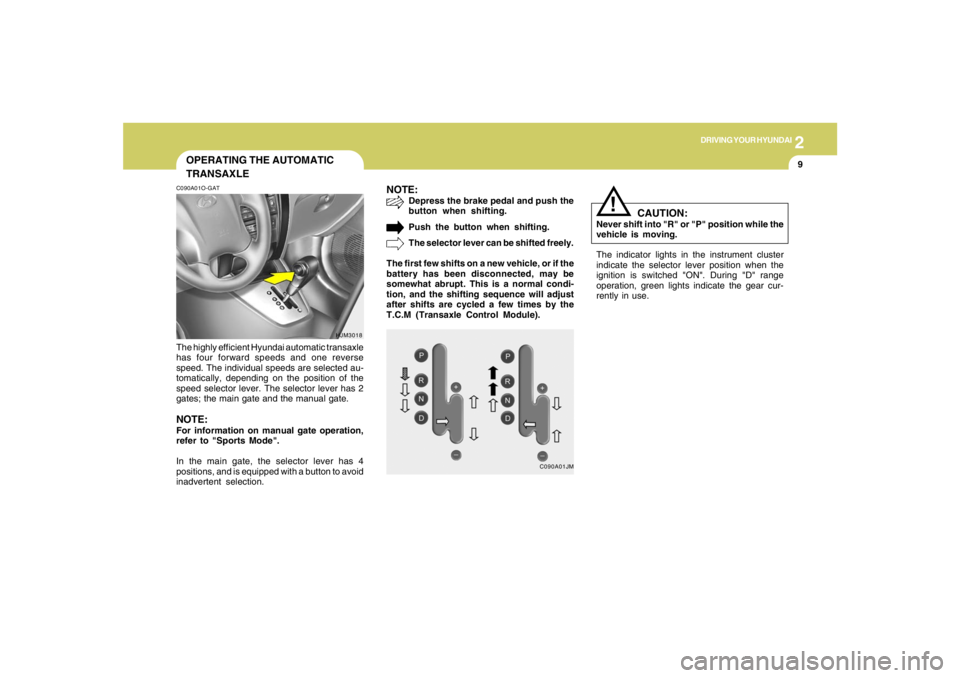
TRANSAXLEC090A01O-GATThe highly efficient Hyundai automatic transaxle
has four forward speeds and one reverse
speed. The individual speeds are selected au-
tomatically, depending on the position of the
speed selector lever. The selector lever has 2
gates; the main gate and the manual gate.NOTE:For information on manual gate operation,
refer to "Sports Mode".
In the main gate, the selector lever has 4
positions, and is equipped with a button to avoid
inadvertent selection.
NOTE:
Depress the brake pedal and push the
button when shifting.
Push the button when shifting.
The selector lever can be shifted freely.
The first few shifts on a new vehicle, or if the
battery has been disconnected, may be
somewhat abrupt. This is a normal condi-
tion, and the shifting sequence will adjust
after shifts are cycled a few times by the
T.C.M (Transaxle Control Module).
C090A01JM
The indicator lights in the instrument cluster
indicate the selector lever position when the
ignition is switched "ON". During "D" range
operation, green lights indicate the gear cur-
rently in use.
CAUTION:
Never shift into "R" or "P" position while the
vehicle is moving.
!