2007 HYUNDAI TUCSON brake light
[x] Cancel search: brake lightPage 12 of 306
YOUR VEHICLE AT A GLANCE
F10
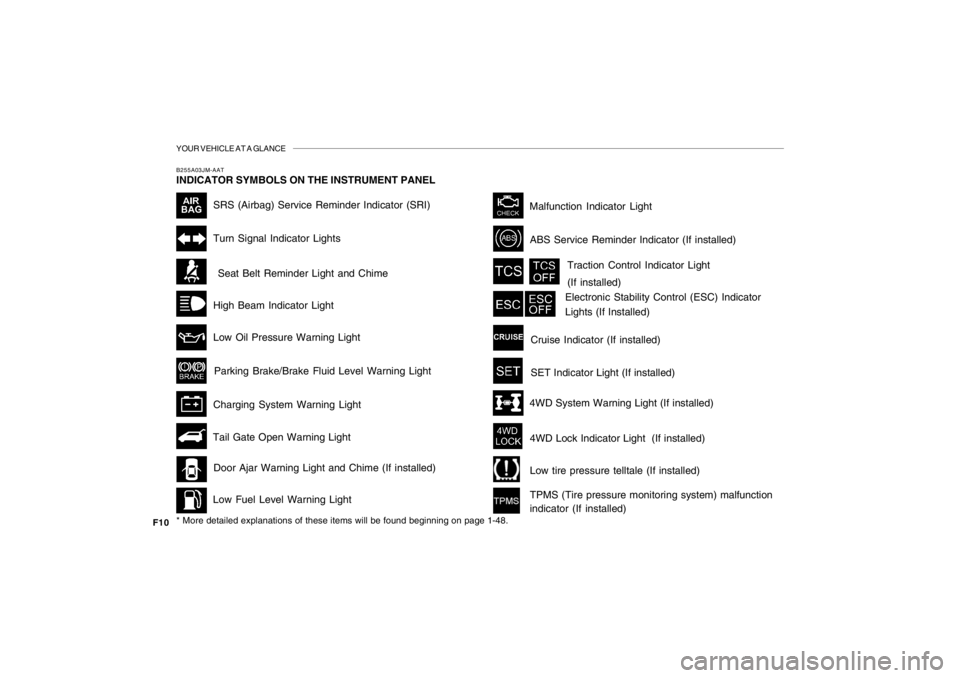
SRS (Airbag) Service Reminder Indicator (SRI)
B255A03JM-AATINDICATOR SYMBOLS ON THE INSTRUMENT PANEL
Turn Signal Indicator LightsHigh Beam Indicator Light
Low Oil Pressure Warning Light
Charging System Warning LightSeat Belt Reminder Light and Chime
* More detailed explanations of these items will be found beginning on page 1-48.
Parking Brake/Brake Fluid Level Warning Light
Malfunction Indicator Light
Tail Gate Open Warning Light
Low Fuel Level Warning LightDoor Ajar Warning Light and Chime (If installed)Traction Control Indicator Light
(If installed)
ABS Service Reminder Indicator (If installed)Cruise Indicator (If installed)
4WD Lock Indicator Light (If installed)4WD System Warning Light (If installed)SET Indicator Light (If installed)
Electronic Stability Control (ESC) Indicator
Lights (If Installed)
Low tire pressure telltale (If installed)
TPMS (Tire pressure monitoring system) malfunction
indicator (If installed)
Page 59 of 306

1
FEATURES OF YOUR HYUNDAI
47
1. Tachometer
2. Turn Signal Indicator Light
3. Seat Belt Warning Light
4. Supplemental Restraint (AirBag) System
Service Reminder Indicator (SRI)
5. Speedometer
6. Parking Brake/Low Brake Fluid Level Warning Light
7. Low Oil Pressure Warning Light
8. High Beam Indicator Light
9. Fuel Gauge
10. Low Fuel Warning Light
11. Tail Gate Open Warning Light
12. Traction Control Indicator Light (If installed)/
Electronic Stability Control (ESC) Indicator Light (If installed)
13. ABS Service Reminder Indicator (If installed)14. Immobilizer Warning Light (If installed)
15. Door Ajar Warning Light
16. Automatic Transaxle Position Indicator Light (If installed)
17. Odometer/ Trip odmeter
18. Trip Computer (If installed)
19. Malfunction Indicator Light (MIL)
20. Charging System Warning Light
21. Low Tire Pressure Telltale (If installed)
22. TPMS (Tire Pressure Monitoring System) Malfunction Indicator
(If installed)
23. Coolant Temperature Gauge
24. Cruise Indicator (If installed)
25. 4WD Lock Indicator Light
26. 4WD System Warning Light (If installed)
Page 61 of 306

1
FEATURES OF YOUR HYUNDAI
49
!
B260H02A-AAT
Parking Brake/Low Brake Fluid
Level Warning Light
The brake fluid level warning light indicates that
the brake fluid level in the brake master cylinder
is low and hydraulic brake fluid conforming to
DOT 3 or DOT 4 specifications should be
added. After adding fluid, if no other trouble is
found, the car should be immediately and care-
fully driven to a Hyundai dealer for inspection.
If further trouble is experienced, the vehicle
should not be driven at all but taken to a dealer
by a professional towing service.
Your Hyundai is equipped with dual-diagonal
braking systems. This means you still have
braking on two wheels even if one of the dual
systems should fail. With only one of the dual
systems working, more than normal pedal travel
and greater pedal pressure are required to stop
the car. Also, the car will not stop in as short a
distance with only half of the brake system
working. If the brakes fail while you are driving,
shift to a lower gear for additional engine braking
and stop the car as soon as it is safe to do so.
WARNING:
If you suspect brake trouble, have your
brakes checked by a Hyundai dealer as
soon as possible. Driving your car with a
problem in either the brake electrical sys-
tem or brake hydraulic system is danger-
ous, and could result in a serious injury or
death.Warning Light OperationThe parking brake/brake fluid level warning light
should come on when the parking brake is
applied and the ignition switch is turned to "ON"
or "START". After the engine is started, the light
should go out when the parking brake is re-
leased.
If the parking brake is not applied, the warning
light should come on when the ignition switch is
turned to "ON" or "START", then go out when
the engine starts. If the light comes on at any
other time, you should slow the vehicle and bring
it to a complete stop in a safe location off the
roadway.
B260J02A-AAT
Charging System Warning Light
The charging system warning light should come
on when the ignition is turned on, then go out
when the engine is running. If the light stays on
while the engine is running, there is a malfunc-
tion in the electrical charging system. If the light
comes on while you are driving, stop, turn off the
engine and check under the hood. First, make
certain the generator drive belt is in place. If it is,
check the tension of the belt. Do this as shown
on page 6-20 by pushing down on the center of
the belt. Have the system checked by your
Hyundai dealer as soon as possible.B260B01JM-AAT
Tail Gate Open Warning Light
This light remains on unless the tail gate and/or
tail gate window is completely closed and latched.
Page 62 of 306
1FEATURES OF YOUR HYUNDAI50
B260L02HP-GAT
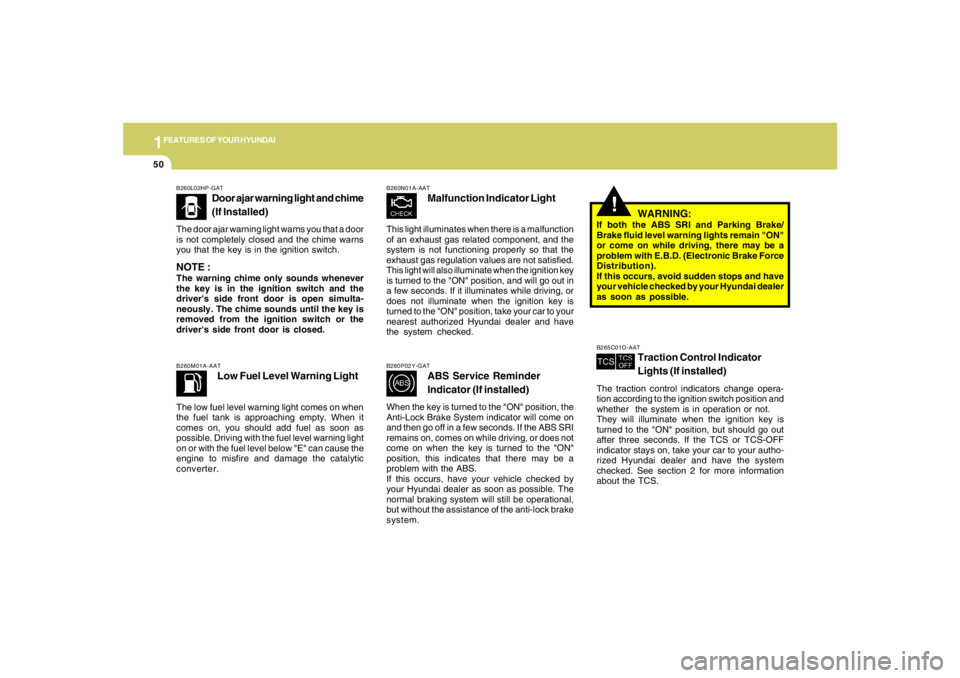
Door ajar warning light and chime
(If Installed)
The door ajar warning light warns you that a door
is not completely closed and the chime warns
you that the key is in the ignition switch.NOTE :The warning chime only sounds whenever
the key is in the ignition switch and the
driver's side front door is open simulta-
neously. The chime sounds until the key is
removed from the ignition switch or the
driver's side front door is closed.
!
B260M01A-AAT
Low Fuel Level Warning Light
The low fuel level warning light comes on when
the fuel tank is approaching empty. When it
comes on, you should add fuel as soon as
possible. Driving with the fuel level warning light
on or with the fuel level below "E" can cause the
engine to misfire and damage the catalytic
converter.
B260N01A-AAT
Malfunction Indicator Light
This light illuminates when there is a malfunction
of an exhaust gas related component, and the
system is not functioning properly so that the
exhaust gas regulation values are not satisfied.
This light will also illuminate when the ignition key
is turned to the "ON" position, and will go out in
a few seconds. If it illuminates while driving, or
does not illuminate when the ignition key is
turned to the "ON" position, take your car to your
nearest authorized Hyundai dealer and have
the system checked.B260P02Y-GAT
ABS Service Reminder
Indicator (If installed)
When the key is turned to the "ON" position, the
Anti-Lock Brake System indicator will come on
and then go off in a few seconds. If the ABS SRI
remains on, comes on while driving, or does not
come on when the key is turned to the "ON"
position, this indicates that there may be a
problem with the ABS.
If this occurs, have your vehicle checked by
your Hyundai dealer as soon as possible. The
normal braking system will still be operational,
but without the assistance of the anti-lock brake
system.
WARNING:
If both the ABS SRI and Parking Brake/
Brake fluid level warning lights remain "ON"
or come on while driving, there may be a
problem with E.B.D. (Electronic Brake Force
Distribution).
If this occurs, avoid sudden stops and have
your vehicle checked by your Hyundai dealer
as soon as possible.B265C01O-AAT
Traction Control Indicator
Lights (If installed)
The traction control indicators change opera-
tion according to the ignition switch position and
whether the system is in operation or not.
They will illuminate when the ignition key is
turned to the "ON" position, but should go out
after three seconds. If the TCS or TCS-OFF
indicator stays on, take your car to your autho-
rized Hyundai dealer and have the system
checked. See section 2 for more information
about the TCS.
Page 64 of 306
1FEATURES OF YOUR HYUNDAI52
!
!
B270A01O-AATBRAKE PAD WEAR WARNING SOUNDThe front and rear disc brake pads have wear
indicators that should make a high-pitched
squealing or scraping noise when new pads are
needed. The sound may come and go or be
heard all the time when the vehicle is moving. It
may also be heard when the brake pedal is
pushed down firmly. Excessive rotor damage
will result if the worn pads are not replaced. See
your Hyundai dealer immediately.
WARNING:
Significantly low tire pressure makes the
vehicle unstable and can contribute to loss
of vehicle control and increased braking
distances.
Continued driving on low pressure tires will
cause the tires to overheat and fail.B260W01JM-GAT
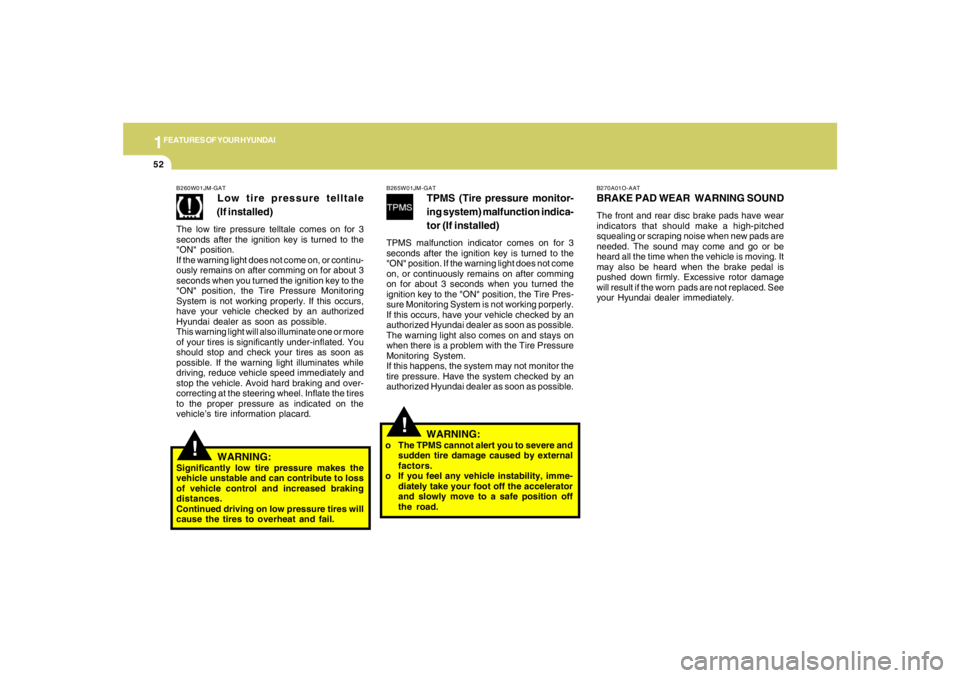
Low tire pressure telltale
(If installed)
The low tire pressure telltale comes on for 3
seconds after the ignition key is turned to the
"ON" position.
If the warning light does not come on, or continu-
ously remains on after comming on for about 3
seconds when you turned the ignition key to the
"ON" position, the Tire Pressure Monitoring
System is not working properly. If this occurs,
have your vehicle checked by an authorized
Hyundai dealer as soon as possible.
This warning light will also illuminate one or more
of your tires is significantly under-inflated. You
should stop and check your tires as soon as
possible. If the warning light illuminates while
driving, reduce vehicle speed immediately and
stop the vehicle. Avoid hard braking and over-
correcting at the steering wheel. Inflate the tires
to the proper pressure as indicated on the
vehicle’s tire information placard.
B265W01JM-GAT
TPMS (Tire pressure monitor-
ing system) malfunction indica-
tor (If installed)
TPMS malfunction indicator comes on for 3
seconds after the ignition key is turned to the
"ON" position. If the warning light does not come
on, or continuously remains on after comming
on for about 3 seconds when you turned the
ignition key to the "ON" position, the Tire Pres-
sure Monitoring System is not working porperly.
If this occurs, have your vehicle checked by an
authorized Hyundai dealer as soon as possible.
The warning light also comes on and stays on
when there is a problem with the Tire Pressure
Monitoring System.
If this happens, the system may not monitor the
tire pressure. Have the system checked by an
authorized Hyundai dealer as soon as possible.
WARNING:
o The TPMS cannot alert you to severe and
sudden tire damage caused by external
factors.
o If you feel any vehicle instability, imme-
diately take your foot off the accelerator
and slowly move to a safe position off
the road.
Page 87 of 306
1
FEATURES OF YOUR HYUNDAI
75
CAUTION:
1. Do not install the ski rack, antenna, etc.
which are attached to the vehicle by
means of a magnet. They affect the op-
eration of the compass.
2. If the compass deviates from the correct
indication soon after repeated adjust-
ment, have the compass checked at an
authorized dealer.
3. The compass may not indicate the cor-
rect compass point in tunnels or while
driving up or down a steep hill.
(The compass returns to the correct
compass point when the vehicle moves
to an area where the geomagnetism is
stabilized.)
4. When cleaning the mirror, use a paper
towel or similar material dampened with
glass cleaner. Do not spray glass cleaner
directly on the mirror as that may cause
the liquid cleaner to enter the mirror
housing.
!
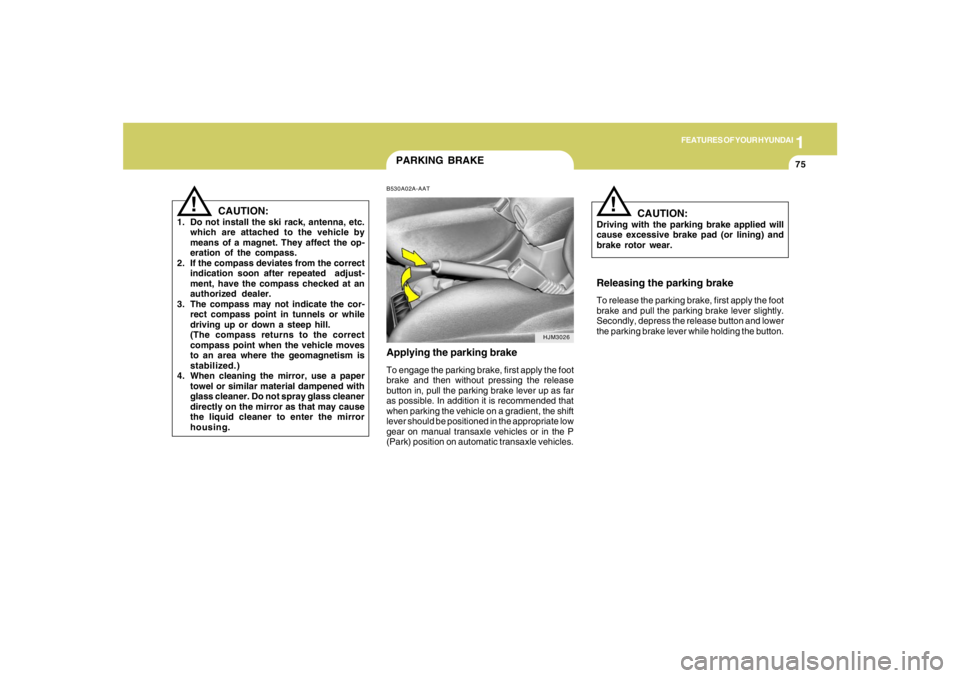
PARKING BRAKEB530A02A-AATApplying the parking brakeTo engage the parking brake, first apply the foot
brake and then without pressing the release
button in, pull the parking brake lever up as far
as possible. In addition it is recommended that
when parking the vehicle on a gradient, the shift
lever should be positioned in the appropriate low
gear on manual transaxle vehicles or in the P
(Park) position on automatic transaxle vehicles.
HJM3026
Releasing the parking brakeTo release the parking brake, first apply the foot
brake and pull the parking brake lever slightly.
Secondly, depress the release button and lower
the parking brake lever while holding the button.
CAUTION:
Driving with the parking brake applied will
cause excessive brake pad (or lining) and
brake rotor wear.
!
Page 92 of 306
1FEATURES OF YOUR HYUNDAI80
!
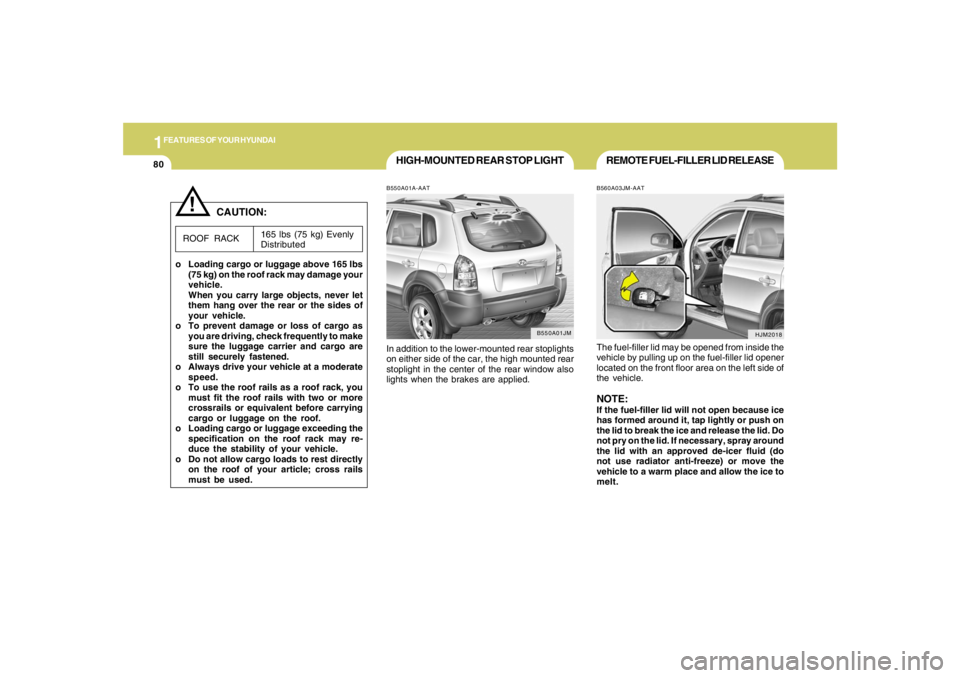
HIGH-MOUNTED REAR STOP LIGHTB550A01A-AATIn addition to the lower-mounted rear stoplights
on either side of the car, the high mounted rear
stoplight in the center of the rear window also
lights when the brakes are applied.
B550A01JM
165 lbs (75 kg) Evenly
Distributed
ROOF RACK
CAUTION:
o Loading cargo or luggage above 165 lbs
(75 kg) on the roof rack may damage your
vehicle.
When you carry large objects, never let
them hang over the rear or the sides of
your vehicle.
o To prevent damage or loss of cargo as
you are driving, check frequently to make
sure the luggage carrier and cargo are
still securely fastened.
o Always drive your vehicle at a moderate
speed.
o To use the roof rails as a roof rack, you
must fit the roof rails with two or more
crossrails or equivalent before carrying
cargo or luggage on the roof.
o Loading cargo or luggage exceeding the
specification on the roof rack may re-
duce the stability of your vehicle.
o Do not allow cargo loads to rest directly
on the roof of your article; cross rails
must be used.
HJM2018
REMOTE FUEL-FILLER LID RELEASEB560A03JM-AATThe fuel-filler lid may be opened from inside the
vehicle by pulling up on the fuel-filler lid opener
located on the front floor area on the left side of
the vehicle.NOTE:If the fuel-filler lid will not open because ice
has formed around it, tap lightly or push on
the lid to break the ice and release the lid. Do
not pry on the lid. If necessary, spray around
the lid with an approved de-icer fluid (do
not use radiator anti-freeze) or move the
vehicle to a warm place and allow the ice to
melt.
Page 98 of 306
1FEATURES OF YOUR HYUNDAI86
!
5. To momently increase speed, depress the
accelerator pedal enough for the vehicle to
exceed the preset speed. When you remove
your foot from the accelerator pedal, the
vehicle will return to the speed you have set.
WARNING:
To avoid accidental cruise control engage-
ment, keep the cruise control main switch
off when not using the cruise control.
B660B01JM B660B02E-AAT
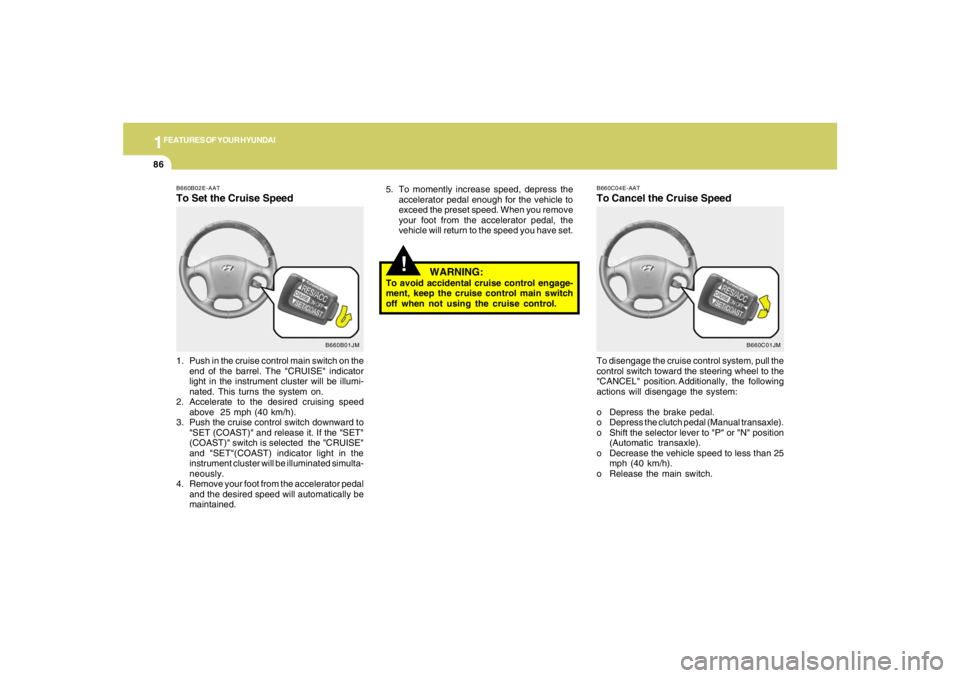
To Set the Cruise Speed1. Push in the cruise control main switch on the
end of the barrel. The "CRUISE" indicator
light in the instrument cluster will be illumi-
nated. This turns the system on.
2. Accelerate to the desired cruising speed
above 25 mph (40 km/h).
3. Push the cruise control switch downward to
"SET (COAST)" and release it. If the "SET"
(COAST)" switch is selected the "CRUISE"
and "SET"(COAST) indicator light in the
instrument cluster will be illuminated simulta-
neously.
4. Remove your foot from the accelerator pedal
and the desired speed will automatically be
maintained.
B660C01JM B660C04E-AAT
To Cancel the Cruise SpeedTo disengage the cruise control system, pull the
control switch toward the steering wheel to the
"CANCEL" position. Additionally, the following
actions will disengage the system:
o Depress the brake pedal.
o Depress the clutch pedal (Manual transaxle).
o Shift the selector lever to "P" or "N" position
(Automatic transaxle).
o Decrease the vehicle speed to less than 25
mph (40 km/h).
o Release the main switch.