2007 Hyundai Terracan clock
[x] Cancel search: clockPage 83 of 291
1
FEATURES OF YOUR HYUNDAI
69MULTIMETER
B990A01HP-GAT (If Installed)
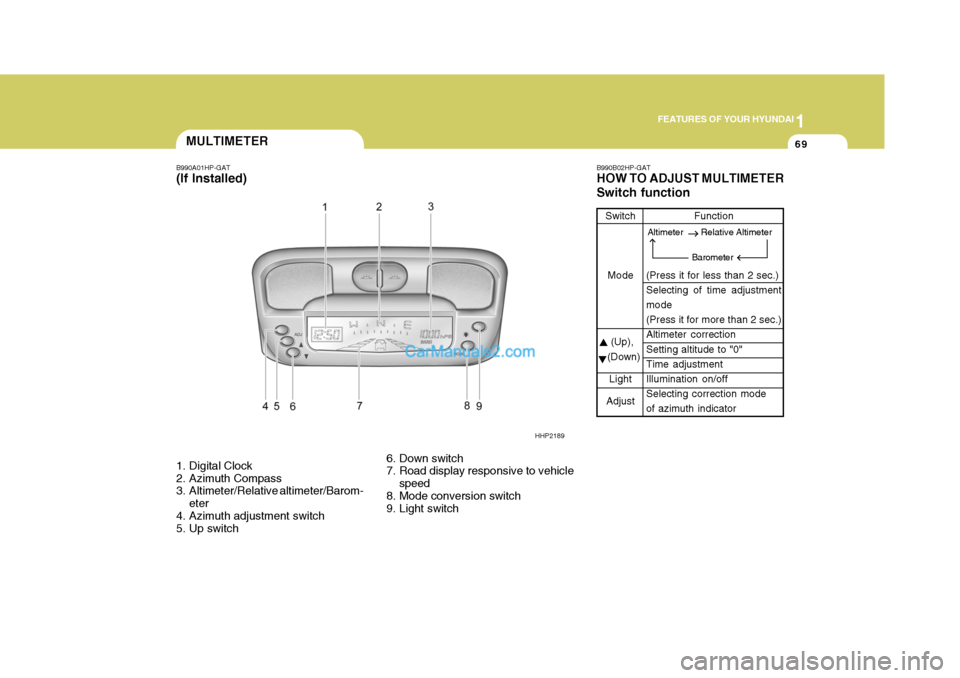
1. Digital Clock
2. Azimuth Compass
3. Altimeter/Relative altimeter/Barom-
eter
4. Azimuth adjustment switch
5. Up switch 6. Down switch
7. Road display responsive to vehicle
speed
8. Mode conversion switch
9. Light switch B990B02HP-GAT HOW TO ADJUST MULTIMETER Switch function
Switch
Mode
(Up),
(Down)
Light
Adjust Function
(Press it for less than 2 sec.) Selecting of time adjustment mode (Press it for more than 2 sec.)Altimeter correction Setting altitude to "0" Time adjustmentIllumination on/off Selecting correction mode of azimuth indicator
HHP2189
Altimeter Relative Altimeter
Barometer
Page 86 of 291
1FEATURES OF YOUR HYUNDAI
72
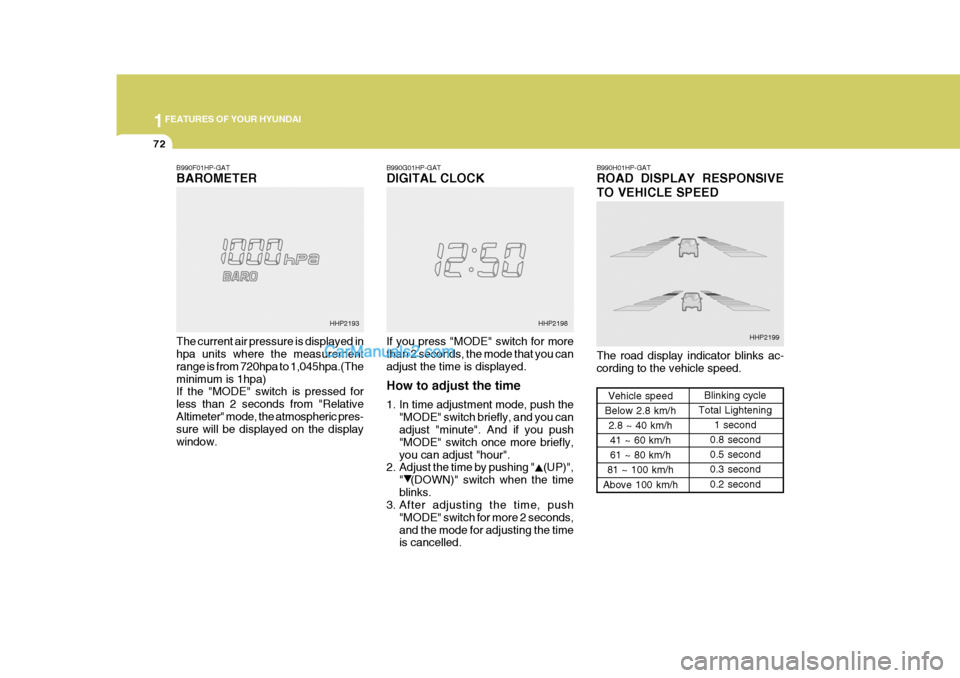
B990F01HP-GAT BAROMETER The current air pressure is displayed in hpa units where the measurement range is from 720hpa to 1,045hpa.(Theminimum is 1hpa) If the "MODE" switch is pressed for less than 2 seconds from "RelativeAltimeter" mode, the atmospheric pres- sure will be displayed on the display window. B990G01HP-GAT DIGITAL CLOCK If you press "MODE" switch for more than 2 seconds, the mode that you can adjust the time is displayed. How to adjust the time
1. In time adjustment mode, push the
"MODE" switch briefly, and you can adjust "minute". And if you push "MODE" switch once more briefly,you can adjust "hour".
2. Adjust the time by pushing " (UP)",
" (DOWN)" switch when the timeblinks.
3. After adjusting the time, push
"MODE" switch for more 2 seconds,and the mode for adjusting the time is cancelled. B990H01HP-GAT ROAD DISPLAY RESPONSIVE TO VEHICLE SPEED The road display indicator blinks ac- cording to the vehicle speed.
Vehicle speed
Below 2.8 km/h 2.8 ~ 40 km/h
41 ~ 60 km/h 61 ~ 80 km/h
81 ~ 100 km/h
Above 100 km/h Blinking cycle
Total Lightening
1 second
0.8 second0.5 second0.3 second 0.2 second
HHP2193 HHP2198
HHP2199
Page 92 of 291
1FEATURES OF YOUR HYUNDAI
78DIGITAL CLOCK
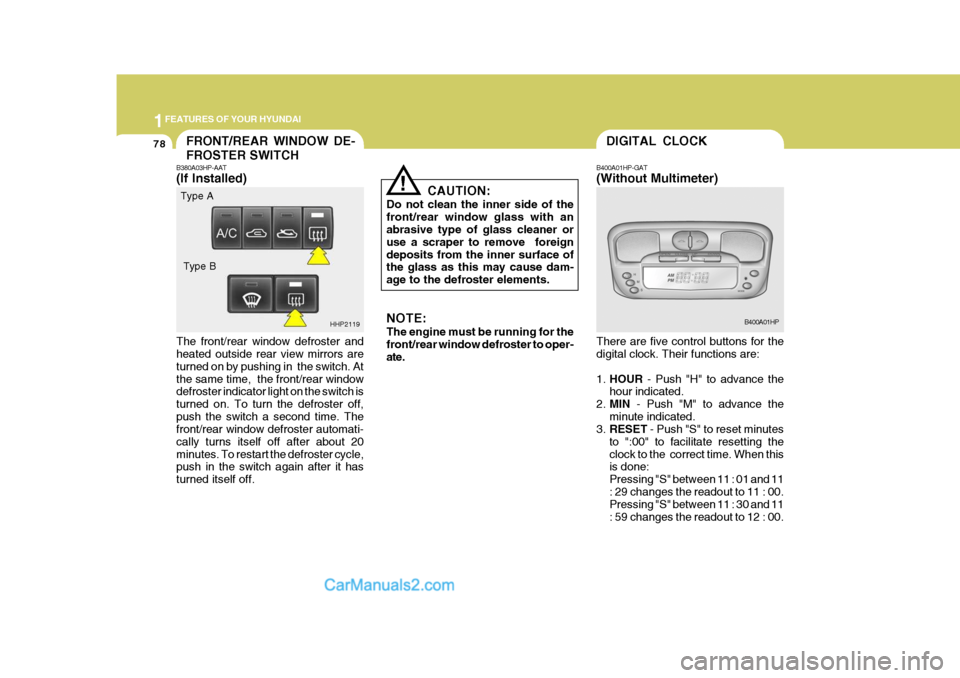
B400A01HP-GAT (Without Multimeter) There are five control buttons for the digital clock. Their functions are: 1. HOUR - Push "H" to advance the
hour indicated.
2. MIN - Push "M" to advance the
minute indicated.
3. RESET - Push "S" to reset minutes
to ":00" to facilitate resetting the clock to the correct time. When this is done: Pressing "S" between 11 : 01 and 11: 29 changes the readout to 11 : 00. Pressing "S" between 11 : 30 and 11 : 59 changes the readout to 12 : 00. B400A01HPFRONT/REAR WINDOW DE- FROSTER SWITCH
!
B380A03HP-AAT (If Installed) The front/rear window defroster and heated outside rear view mirrors are turned on by pushing in the switch. Atthe same time, the front/rear window defroster indicator light on the switch is turned on. To turn the defroster off,push the switch a second time. The front/rear window defroster automati- cally turns itself off after about 20minutes. To restart the defroster cycle, push in the switch again after it has turned itself off. CAUTION:
Do not clean the inner side of thefront/rear window glass with an abrasive type of glass cleaner or use a scraper to remove foreigndeposits from the inner surface of the glass as this may cause dam- age to the defroster elements.
HHP2119 NOTE: The engine must be running for the front/rear window defroster to oper- ate.
Type A
Type B
Page 93 of 291
1
FEATURES OF YOUR HYUNDAI
79INSTRUMENT PANEL LIGHT CONTROL (RHEOSTAT)
4. MODE - Push "MODE" button to
display a 12- or 24-hour clock. When the 12-hour clock is in use, the letters AM or PM appear with the time.
5. - The time is displayed on the LCD by pushing in on the switchand is turned off by pushing in on theswitch again.
If your vehicle is equipped with themultimeter, see the page 1-72. B410A01A-AAT (If Installed)
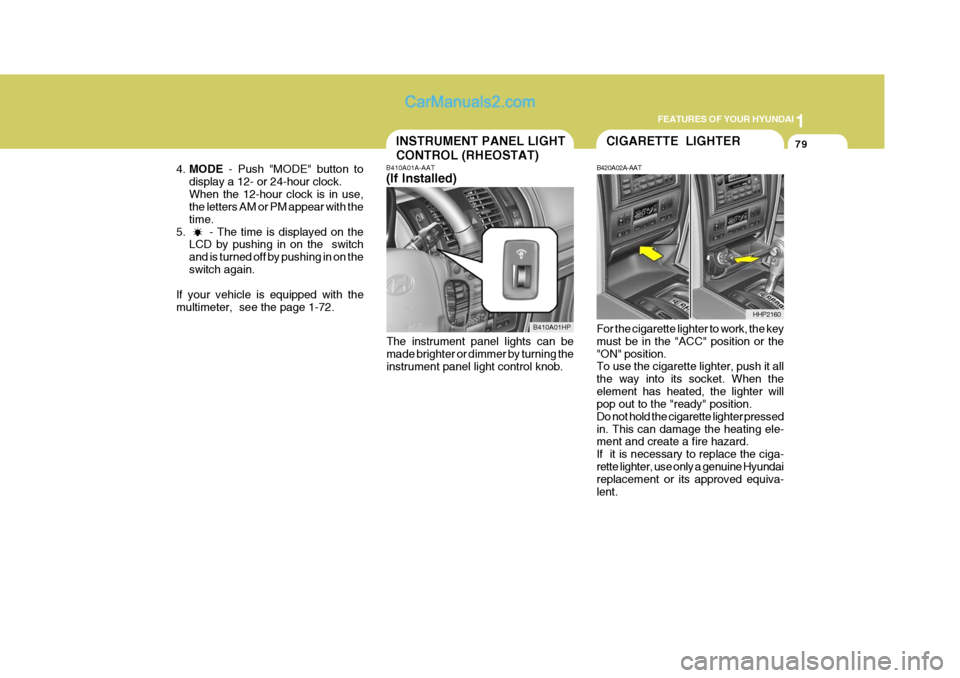
The instrument panel lights can be made brighter or dimmer by turning the instrument panel light control knob.
B410A01HP
CIGARETTE LIGHTER
B420A02A-AAT For the cigarette lighter to work, the key must be in the "ACC" position or the "ON" position. To use the cigarette lighter, push it all the way into its socket. When theelement has heated, the lighter will pop out to the "ready" position. Do not hold the cigarette lighter pressedin. This can damage the heating ele- ment and create a fire hazard. If it is necessary to replace the ciga-rette lighter, use only a genuine Hyundai replacement or its approved equiva- lent. HHP2160
Page 99 of 291
1
FEATURES OF YOUR HYUNDAI
85INTERIOR LIGHT
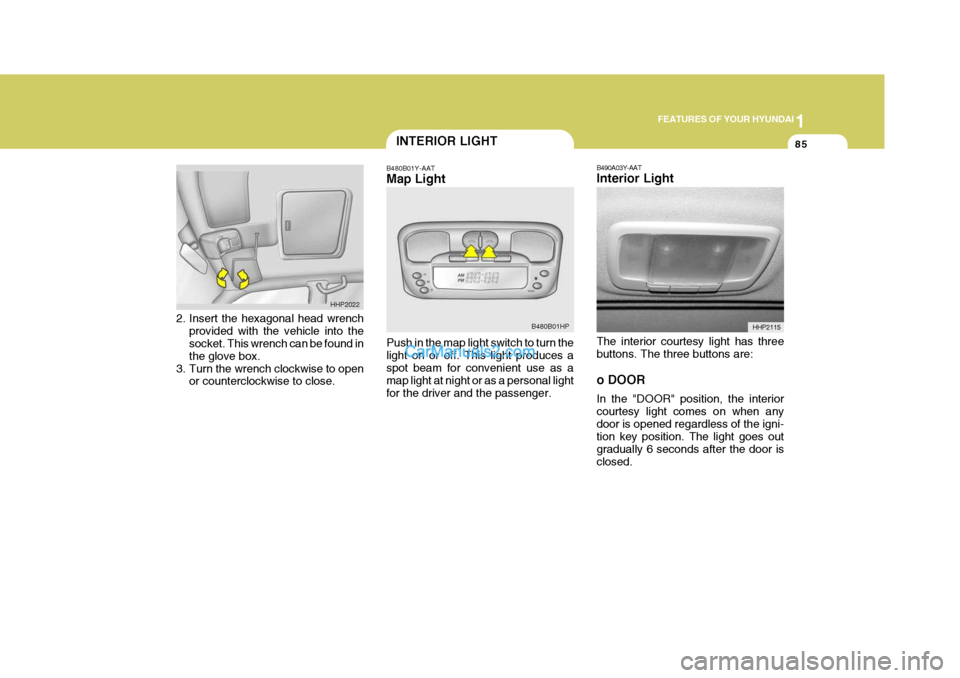
B480B01Y-AAT Map Light Push in the map light switch to turn the light on or off. This light produces aspot beam for convenient use as a map light at night or as a personal light for the driver and the passenger. B480B01HP
2. Insert the hexagonal head wrench
provided with the vehicle into the socket. This wrench can be found in the glove box.
3. Turn the wrench clockwise to open or counterclockwise to close. HHP2022
B490A03Y-AAT Interior Light The interior courtesy light has three buttons. The three buttons are: o DOOR In the "DOOR" position, the interior courtesy light comes on when anydoor is opened regardless of the igni- tion key position. The light goes out gradually 6 seconds after the door isclosed. HHP2115
Page 137 of 291
1
FEATURES OF YOUR HYUNDAI
123
H240B03O-AAT
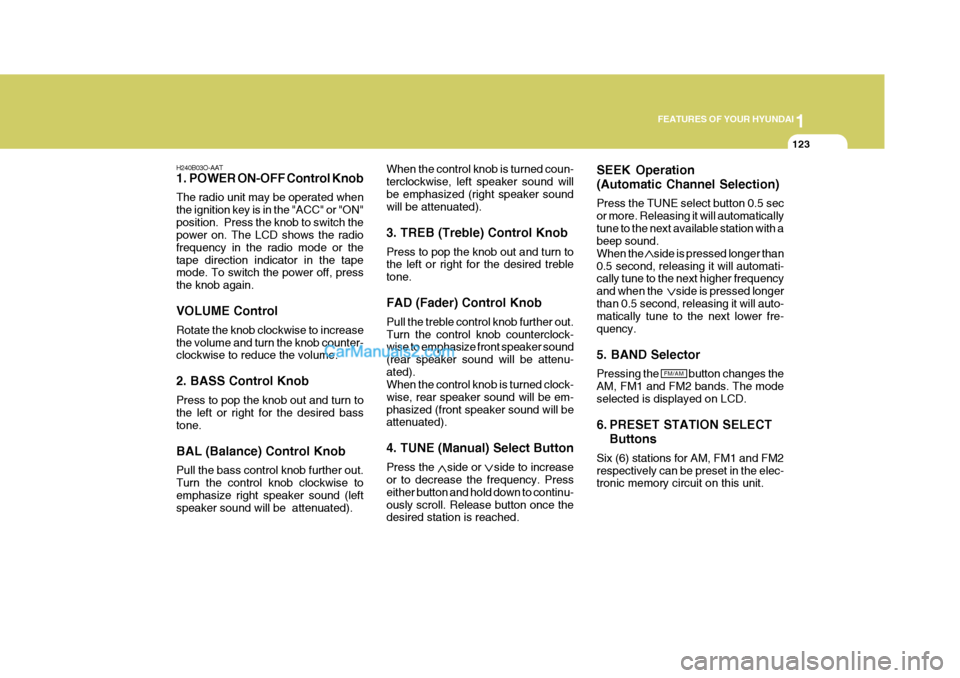
1. POWER ON-OFF Control Knob The radio unit may be operated when the ignition key is in the "ACC" or "ON"position. Press the knob to switch the power on. The LCD shows the radio frequency in the radio mode or thetape direction indicator in the tape mode. To switch the power off, press the knob again. VOLUME Control Rotate the knob clockwise to increase the volume and turn the knob counter- clockwise to reduce the volume. 2. BASS Control Knob Press to pop the knob out and turn to the left or right for the desired bass tone. BAL (Balance) Control Knob Pull the bass control knob further out. Turn the control knob clockwise to emphasize right speaker sound (left speaker sound will be attenuated). When the control knob is turned coun-terclockwise, left speaker sound willbe emphasized (right speaker sound will be attenuated). 3. TREB (Treble) Control Knob Press to pop the knob out and turn to the left or right for the desired treble tone. FAD (Fader) Control Knob Pull the treble control knob further out. Turn the control knob counterclock- wise to emphasize front speaker sound (rear speaker sound will be attenu-ated). When the control knob is turned clock- wise, rear speaker sound will be em-phasized (front speaker sound will be attenuated). 4. TUNE (Manual) Select Button Press the side or side to increase or to decrease the frequency. Press either button and hold down to continu-ously scroll. Release button once the desired station is reached.SEEK Operation (Automatic Channel Selection) Press the TUNE select button 0.5 sec or more. Releasing it will automaticallytune to the next available station with a beep sound. When the side is pressed longer than0.5 second, releasing it will automati- cally tune to the next higher frequency and when the side is pressed longerthan 0.5 second, releasing it will auto- matically tune to the next lower fre- quency. 5. BAND Selector Pressing the button changes the AM, FM1 and FM2 bands. The modeselected is displayed on LCD.
6. PRESET STATION SELECT
Buttons
Six (6) stations for AM, FM1 and FM2 respectively can be preset in the elec- tronic memory circuit on this unit.
FM/AM
Page 142 of 291
1FEATURES OF YOUR HYUNDAI
128
H290B03E-AAT
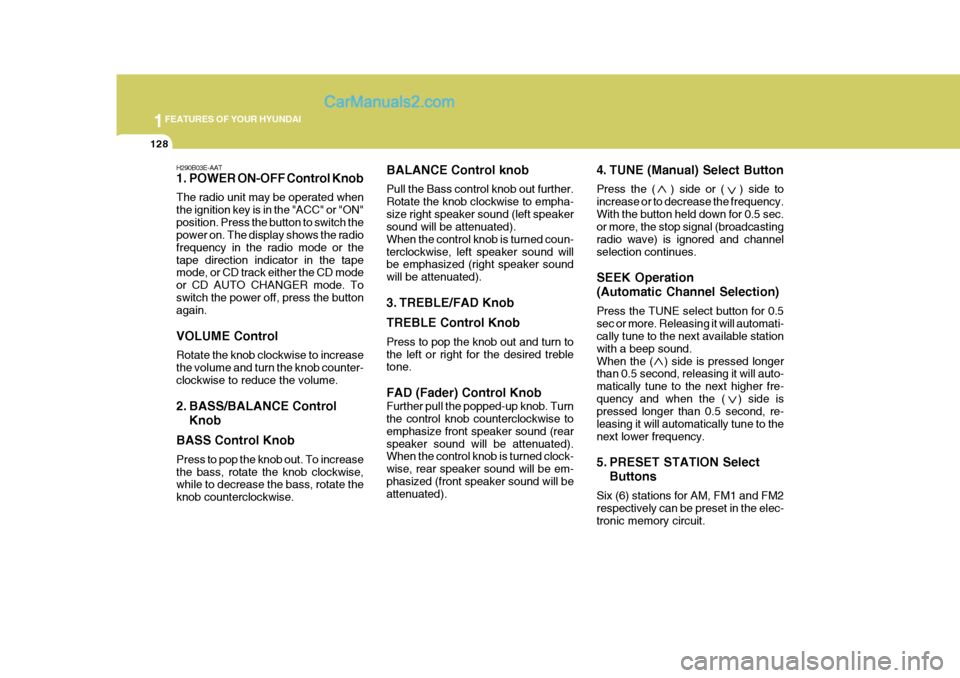
1. POWER ON-OFF Control Knob The radio unit may be operated when the ignition key is in the "ACC" or "ON"position. Press the button to switch the power on. The display shows the radio frequency in the radio mode or thetape direction indicator in the tape mode, or CD track either the CD mode or CD AUTO CHANGER mode. Toswitch the power off, press the button again. VOLUME Control Rotate the knob clockwise to increase the volume and turn the knob counter-clockwise to reduce the volume.
2. BASS/BALANCE ControlKnob
BASS Control Knob Press to pop the knob out. To increase the bass, rotate the knob clockwise, while to decrease the bass, rotate the knob counterclockwise. BALANCE Control knob Pull the Bass control knob out further. Rotate the knob clockwise to empha-size right speaker sound (left speaker sound will be attenuated). When the control knob is turned coun-terclockwise, left speaker sound will be emphasized (right speaker sound will be attenuated).
3. TREBLE/FAD Knob TREBLE Control Knob Press to pop the knob out and turn to the left or right for the desired treble tone. FAD (Fader) Control Knob Further pull the popped-up knob. Turn the control knob counterclockwise to emphasize front speaker sound (rearspeaker sound will be attenuated). When the control knob is turned clock- wise, rear speaker sound will be em-phasized (front speaker sound will be attenuated).
4. TUNE (Manual) Select Button Press the ( ) side or ( ) side to increase or to decrease the frequency.With the button held down for 0.5 sec. or more, the stop signal (broadcasting radio wave) is ignored and channelselection continues. SEEK Operation (Automatic Channel Selection) Press the TUNE select button for 0.5 sec or more. Releasing it will automati- cally tune to the next available station with a beep sound.When the ( ) side is pressed longer than 0.5 second, releasing it will auto- matically tune to the next higher fre-quency and when the ( ) side is pressed longer than 0.5 second, re- leasing it will automatically tune to thenext lower frequency.
5. PRESET STATION Select
Buttons
Six (6) stations for AM, FM1 and FM2 respectively can be preset in the elec- tronic memory circuit.
Page 155 of 291
1
FEATURES OF YOUR HYUNDAI
141ANTENNA
!
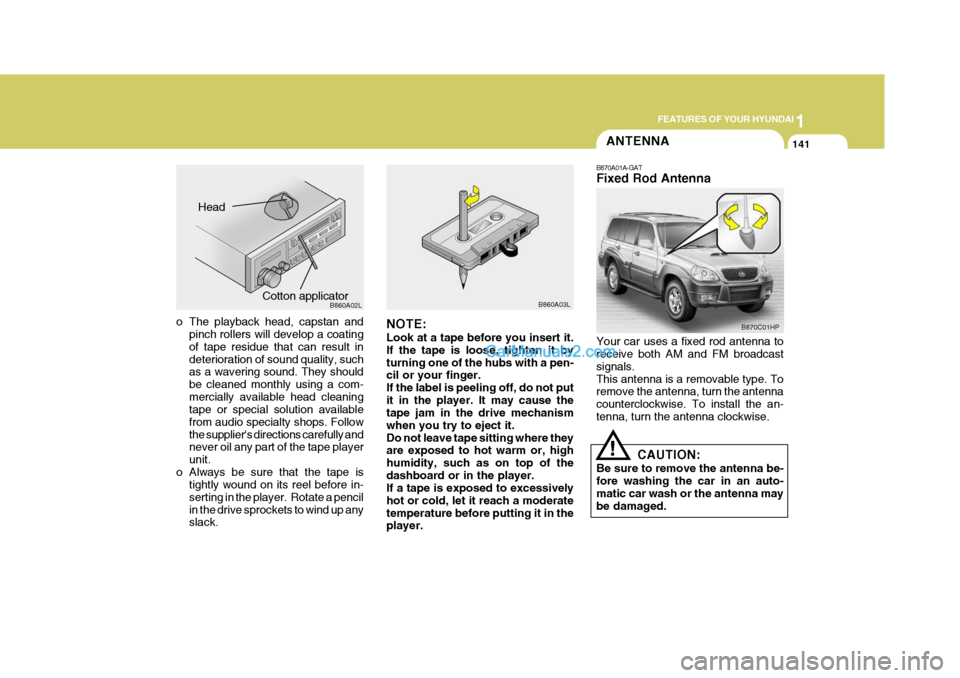
B870A01A-GAT Fixed Rod Antenna Your car uses a fixed rod antenna to receive both AM and FM broadcast signals.This antenna is a removable type. To remove the antenna, turn the antenna counterclockwise. To install the an-tenna, turn the antenna clockwise.
CAUTION:
Be sure to remove the antenna be-fore washing the car in an auto- matic car wash or the antenna may be damaged.
o The playback head, capstan and pinch rollers will develop a coating of tape residue that can result in deterioration of sound quality, such as a wavering sound. They should be cleaned monthly using a com-mercially available head cleaning tape or special solution available from audio specialty shops. Followthe supplier's directions carefully and never oil any part of the tape player unit.
o Always be sure that the tape is tightly wound on its reel before in-serting in the player. Rotate a pencilin the drive sprockets to wind up any slack. NOTE: Look at a tape before you insert it. If the tape is loose, tighten it byturning one of the hubs with a pen- cil or your finger. If the label is peeling off, do not putit in the player. It may cause the tape jam in the drive mechanism when you try to eject it.Do not leave tape sitting where they are exposed to hot warm or, high humidity, such as on top of thedashboard or in the player. If a tape is exposed to excessively hot or cold, let it reach a moderatetemperature before putting it in the player.B860A03L
Head
Cotton applicator B860A02LB870C01HP