2007 Hyundai Terracan radio
[x] Cancel search: radioPage 142 of 291
1FEATURES OF YOUR HYUNDAI
128
H290B03E-AAT
1. POWER ON-OFF Control Knob The radio unit may be operated when the ignition key is in the "ACC" or "ON"position. Press the button to switch the power on. The display shows the radio frequency in the radio mode or thetape direction indicator in the tape mode, or CD track either the CD mode or CD AUTO CHANGER mode. Toswitch the power off, press the button again. VOLUME Control Rotate the knob clockwise to increase the volume and turn the knob counter-clockwise to reduce the volume.
2. BASS/BALANCE ControlKnob
BASS Control Knob Press to pop the knob out. To increase the bass, rotate the knob clockwise, while to decrease the bass, rotate the knob counterclockwise. BALANCE Control knob Pull the Bass control knob out further. Rotate the knob clockwise to empha-size right speaker sound (left speaker sound will be attenuated). When the control knob is turned coun-terclockwise, left speaker sound will be emphasized (right speaker sound will be attenuated).
3. TREBLE/FAD Knob TREBLE Control Knob Press to pop the knob out and turn to the left or right for the desired treble tone. FAD (Fader) Control Knob Further pull the popped-up knob. Turn the control knob counterclockwise to emphasize front speaker sound (rearspeaker sound will be attenuated). When the control knob is turned clock- wise, rear speaker sound will be em-phasized (front speaker sound will be attenuated).
4. TUNE (Manual) Select Button Press the ( ) side or ( ) side to increase or to decrease the frequency.With the button held down for 0.5 sec. or more, the stop signal (broadcasting radio wave) is ignored and channelselection continues. SEEK Operation (Automatic Channel Selection) Press the TUNE select button for 0.5 sec or more. Releasing it will automati- cally tune to the next available station with a beep sound.When the ( ) side is pressed longer than 0.5 second, releasing it will auto- matically tune to the next higher fre-quency and when the ( ) side is pressed longer than 0.5 second, re- leasing it will automatically tune to thenext lower frequency.
5. PRESET STATION Select
Buttons
Six (6) stations for AM, FM1 and FM2 respectively can be preset in the elec- tronic memory circuit.
Page 143 of 291
1
FEATURES OF YOUR HYUNDAI
129
HOW TO PRESET STATIONS Six AM and twelve FM stations may be programmed into the memory of theradio. Then, by simply pressing the band select button and/or one of the six station select buttons, you mayrecall any of these stations instantly. To program the stations, follow these steps:
o Press band selector to set the band for AM, FM1 and FM2.
o Select the desired station to be stored by seek or manual tuning.
o Determine the preset station select button you wish to use to access that station.
o Press the station select button for more than two seconds. A selectbutton indicator will show in the dis- play indicating which select buttonyou have depressed. The frequency display will flash after it has been stored into the memory with a beepsound. You should then release the button, and proceed to program the next desired station. A total of 18stations can be programmed by selecting one AM and two FM sta- tions per button. o When completed, any preset sta-
tion may be recalled by selectingAM, FM1 or FM2 band and the appropriate station button.
6. BAND Selector Pressing the button changes the AM, FM1 and FM2 bands. The mode selected is shown on the dis-play.
7. EQUALIZER Button Press the EQ button to select the CLASSIC, JAZZ, ROCK and DEFEAT MODE for the desired tone quality.Each press of the button changes the display as follows; 8. Best Station Memory Button
(BSM) (If Installed)
When the BSM button is pressed for two seconds or longer, the six chan-nels from the highest field intensity are selected next and stored in memory. The stations selected are stored in thesequence frequency from the first pre- set key. SCAN Button (If Installed) When the scan button is pressed, the frequency will increase and the receiv- able stations will be tuned in one afteranother, receiving each station for 5 seconds. To stop scanning, press the scan button again.
! CAUTION:
o Do not place beverages close to the audio system. The audio sys- tem mechanism may be damagedif you spill them.
o Do not impact on the audio sys-
tem, or the audio system mecha-nism could be damaged.
FM/AM
CLASSIC � JAZZ � ROCK � DEFEAT
Page 147 of 291
1
FEATURES OF YOUR HYUNDAI
133
6. CD EJECT Button When the button is pressed with a CD loaded, the CD will eject.
7. SCAN Button (If Installed)
o Press the SCAN button to playback the first 10 seconds of each track.
o Press the SCAN button again within
10 sec. when you have reached the desired track.
NOTE:
o To assure proper operation of the unit, keep the vehicle interior temperature within a normal range by using the vehicle's air conditioning or heating system.
o When replacing the fuse, replace it with a fuse having the correctcapacity.
o The preset station frequencies are all erased when the car bat-tery is disconnected. Therefore,all data will have to be set again if this should occur.
H290F03O-GAT
1. CD Select Button
o Insert the CD with the label facing
upward.
o Insert the CD to start CD playback, during radio operation or cassette tape playing.
o When a disc is in the CD deck, if you press the CD/CDC button the CDplayer will begin playing even if theradio or cassette player is being used.
o The CD player can be used when the ignition switch is in either the"ON" or "ACC" position.
2. FF/REW ( / ) If you want to fast forward or reverse through the compact disc track, pushand hold the FF ( ) or REW ( ) button. When you release the button, the com-pact disc player will resume playing. 3. TRACK UP/DOWN
o The desired track on the disc cur-
rently being played can be selected using the track number.
o Press button once to skip for-
ward to the beginning of the nexttrack. Press button once to skip back to the beginning of the track.
4. REPEAT
o To repeat the track you are cur- rently listening to, press the RPT button. To cancel, press again.
o If you do not release RPT operation
when the track ends, it will automati-cally be replayed. This process will be continued until you push the button again.
5. EQUALIZER Button Press the EQ button to select the CLASSIC, JAZZ, ROCK and DEFEATMODE for the desired tone quality. Each press of the button changes the display as follows;
CLASSIC � JAZZ � ROCK � DEFEAT
Page 150 of 291
1FEATURES OF YOUR HYUNDAI
136
B290H03HP-GAT The CD auto changer is located in the right side of the luggage compartment.
o To use the CD auto changer.
1. Open the sliding lid of the CD autochanger.
2. To eject the compact disc maga-
zine, press the EJECT button lo- cated inside the CD auto changer.
3. Insert the discs into the magazine.
4. Push the magazine into the CD auto changer and close the sliding lid.
o The CD auto changer can be used when the ignition switch is in either"ON" or "ACC" position.
1. CD CHANGER Select Button When the CD changer magazine con- tains discs, press the "CD/CDC" but-ton and the CD changer can be used even if the radio or cassette player is being used. The Hyundai CD changercan hold up to eight discs. The disc number will be lit, and the track num- ber, and elapsed time will be displayed. 2. DISC Select Button To select the CD you want, push " " to change the disc number. 3. TRACK UP/DOWN
o The desired track on the disc cur-
rently being played can be selected using the track number.
o Press once to skip forward to the beginning of the next track. Press once to skip back to the begin-ning of the track.
4. FF/REW ( / ) If you want to fast forward or reverse through the compact disc track, push and hold in the FF ( ) or REW ( ) button.When you release the button, the com- pact disc player will resume playing. 5. REPEAT
o To repeat the track you are listening to, press the RPT button. To cancel, press again. o If you do not release RPT operation
when the track ends, it will automati-cally be replayed. This process will be continued until you push the button again.
6. SCAN Button (If Installed)
o Press the SCAN button to playback the first 10 seconds of each track.
o Press the SCAN button again within 10 sec. for the desired track.
7. EQ Button Press the EQ button to select the CLASSIC, JAZZ, ROCK and DEFEATMODE for the desired tone quality. Each press of the button changes the display as follows;
TUNE DISC
CLASSIC � JAZZ � ROCK � DEFEAT
Page 156 of 291
1FEATURES OF YOUR HYUNDAI
142
!
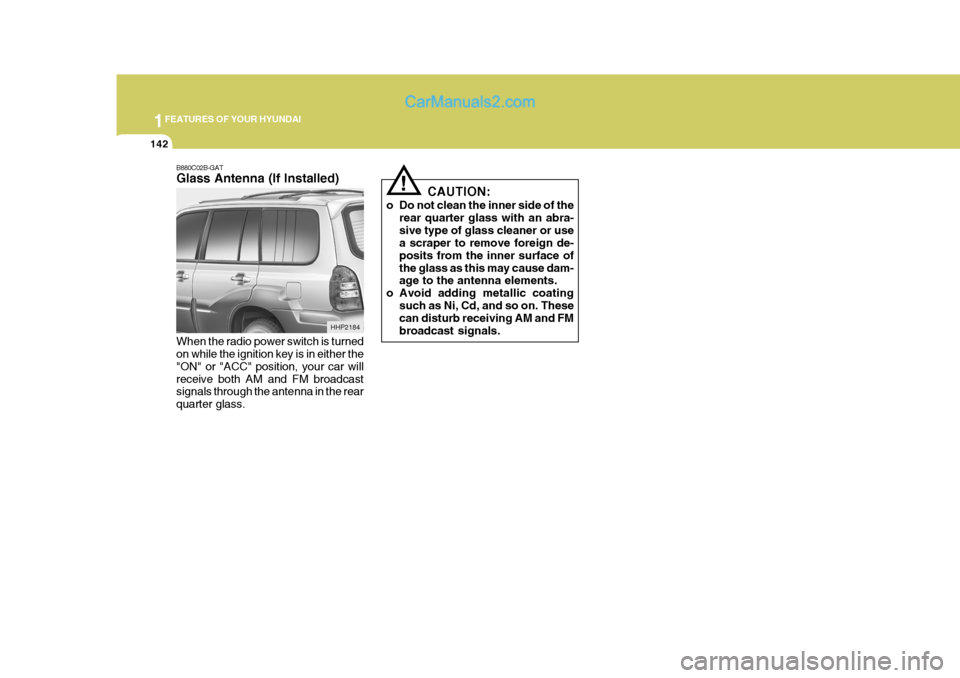
B880C02B-GAT Glass Antenna (If Installed) When the radio power switch is turned on while the ignition key is in either the "ON" or "ACC" position, your car willreceive both AM and FM broadcast signals through the antenna in the rear quarter glass. CAUTION:
o Do not clean the inner side of the rear quarter glass with an abra-sive type of glass cleaner or use a scraper to remove foreign de- posits from the inner surface ofthe glass as this may cause dam- age to the antenna elements.
o Avoid adding metallic coating
such as Ni, Cd, and so on. Thesecan disturb receiving AM and FM broadcast signals.
HHP2184
Page 161 of 291
2
DRIVING YOUR HYUNDAI
5
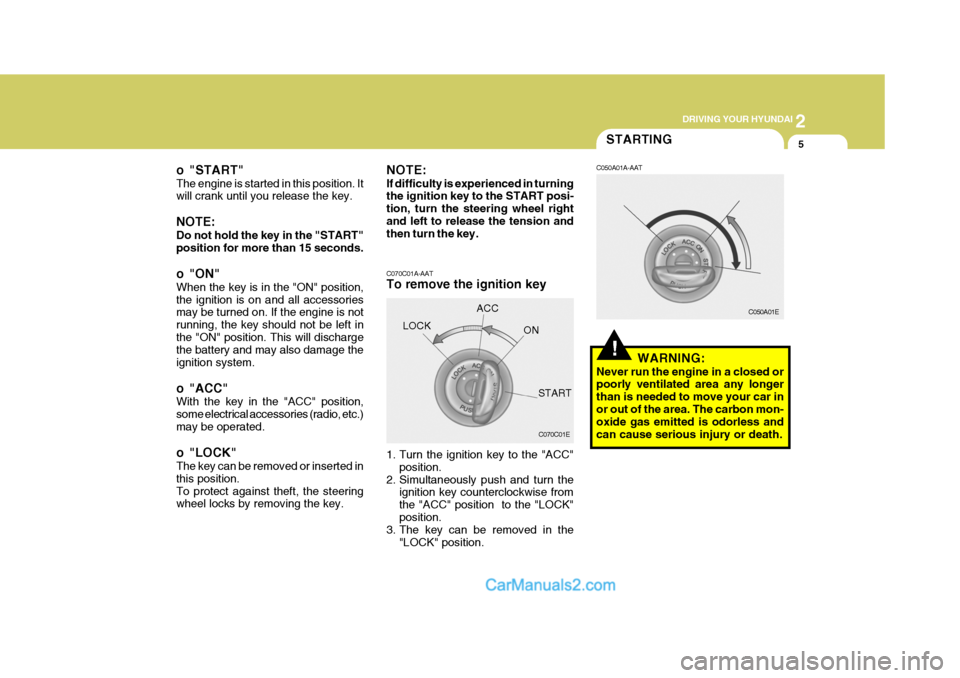
o "START" The engine is started in this position. It will crank until you release the key. NOTE: Do not hold the key in the "START" position for more than 15 seconds.
o "ON" When the key is in the "ON" position, the ignition is on and all accessories may be turned on. If the engine is not running, the key should not be left inthe "ON" position. This will discharge the battery and may also damage the ignition system.
o "ACC" With the key in the "ACC" position, some electrical accessories (radio, etc.)may be operated.
o "LOCK" The key can be removed or inserted in this position.To protect against theft, the steering wheel locks by removing the key.STARTING
!
NOTE: If difficulty is experienced in turning the ignition key to the START posi- tion, turn the steering wheel rightand left to release the tension and then turn the key. C070C01A-AAT To remove the ignition key
1. Turn the ignition key to the "ACC" position.
2. Simultaneously push and turn the ignition key counterclockwise from the "ACC" position to the "LOCK"position.
3. The key can be removed in the
"LOCK" position.LOCK
C050A01A-AAT
WARNING:
Never run the engine in a closed or poorly ventilated area any longer than is needed to move your car inor out of the area. The carbon mon- oxide gas emitted is odorless and can cause serious injury or death.
C070C01E C050A01E
ACC
ON
START
Page 249 of 291
6 DO-IT-YOURSELF MAINTENANCE
26
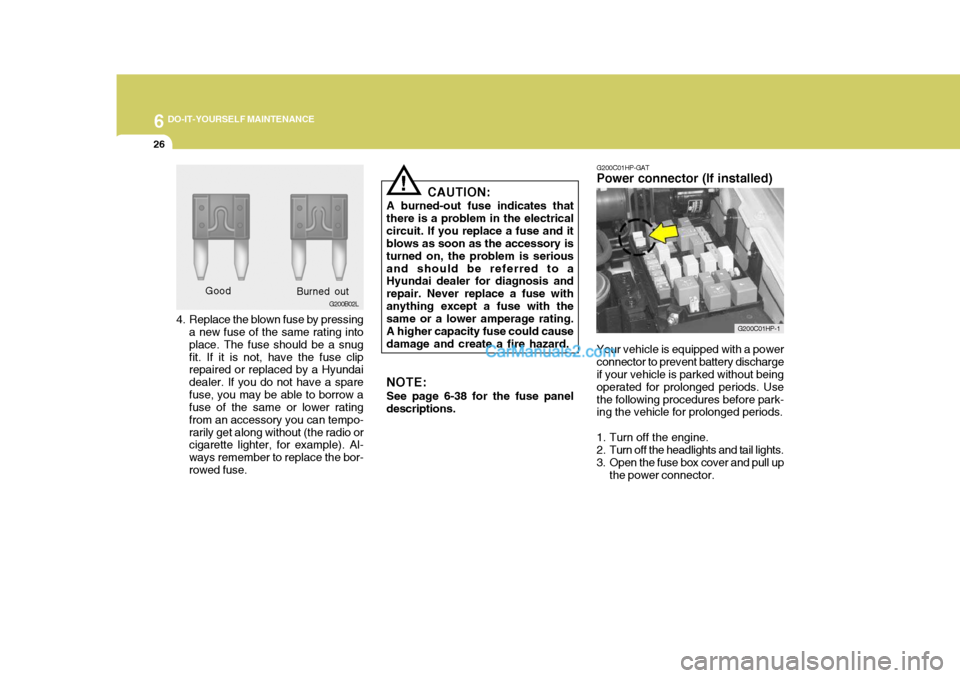
4. Replace the blown fuse by pressing
a new fuse of the same rating into place. The fuse should be a snugfit. If it is not, have the fuse clip repaired or replaced by a Hyundai dealer. If you do not have a sparefuse, you may be able to borrow a fuse of the same or lower rating from an accessory you can tempo-rarily get along without (the radio or cigarette lighter, for example). Al- ways remember to replace the bor-rowed fuse. Good
G200B02L
Burned out CAUTION:
A burned-out fuse indicates thatthere is a problem in the electricalcircuit. If you replace a fuse and it blows as soon as the accessory is turned on, the problem is seriousand should be referred to a Hyundai dealer for diagnosis and repair. Never replace a fuse withanything except a fuse with the same or a lower amperage rating. A higher capacity fuse could causedamage and create a fire hazard. NOTE: See page 6-38 for the fuse panel descriptions.
! G200C01HP-GAT
Power connector (If installed)
Your vehicle is equipped with a power connector to prevent battery discharge if your vehicle is parked without being operated for prolonged periods. Usethe following procedures before park- ing the vehicle for prolonged periods.
1. Turn off the engine.
2. Turn off the headlights and tail lights.
3. Open the fuse box cover and pull up the power connector.
G200C01HP-1
Page 288 of 291
10
INDEX
5
Power Driver's Seat ................................................... 1-21
Power Outlet .............................................................. 1-80
Power Steering Fluid Level ........................................ 6-29
R Rear Seat W arning ................................................... 1-31
Rear Window Defroster Switch ................................ 1-78
Roof Rack ................................................................. 1-94
S Seat Belts 3-Point system ............................................. 1-34, 1-37
2-Point Static Type ................................................ 1-36
Adjusting your seat be lt .........................................1-35
Care of seat belts .................................................. 1-33
Precautions ............................................................ 1-31
Pretensioner Seat Belt ............... ............................ 1-45
Seat Warmer ............................................................. 1-23
Second Seat
Adjusting seatback angle ................. ...................... 1-24
Adjustable headrests . ............................................. 1-24
Folding rear seatback and seat cushion ...............1-25
Side Under View Mirror .............................................. 1-90
Sound Brake Pad Wear Warning Sound ..........................1-65
Speedometer ............................................................. 1-67
Starting Procedure ....................................................... 2-5 Steering Wheel
Steering wheel tilt lever ........................................ 1-100
Stereo Radio Operation (H240, H280) ..........1-122, 1-127
Stereo Sound System ............................................. 1-120
Sun r oof ..................................................................... 1-83
Sun visor ................................................................... 1-98
Sunshade ................................................................... 1-83
T Tachometer ............................................................... 1-66
Tail Gate .................................................................... 1-92
Theft-Alarm system ................................................... 1-13
Third Seat
Adjusting Seatback Angle ......................................1-27
Folding Rear Seatback and seat cushion .............1-28
To get in and out of the third seat ........................1-30
Tires
Balancing .................................................................. 8-5
Chains ...................................................................... 8-4
Changing a flat tire .................................................. 3-7
If you have a flat tire ............................................... 3-7
Information ............................................................... 8-3
Pressure ................................................................... 8-3
Replacement ............................................................. 8-6
Rotation .................................................................... 8-5
Snow tires ................................................................ 8-4
Spare tire .................................................................. 3-5
Traction ..................................................................... 8-5