2007 Hyundai Santa Fe changing
[x] Cancel search: changingPage 73 of 355

1
FEATURES OF YOUR HYUNDAI
61
!
WARNING:
o Sitting improperly or out of position
can cause occupants to be shifted too
close to a deploying air bag, strike the
interior structure or be thrown from
the vehicle resulting in serious injury
or death.
o Always sit upright with the seatback
in an upright position, centered on the
seat cushion with your seat belt on,
legs comfortably extended and your
feet on the floor.
B240D02JM-AATAdditional Safety PrecautionsoNever let passengers ride in the cargo
area (trunk) or on top of a folded-down
back seat. All occupants should sit
upright, fully back in their seats with
their seat belts on and their feet on the
floor.
oPassengers should not move out of or
change seats while the vehicle is mov-
ing. A passenger who is not wearing a
seat belt during a crash or emergency
stop can be thrown against the inside of
the vehicle, against other occupants, or
out of the vehicle.
oEach seat belt is designed to restrain
one occupant. If more than one person
uses the same seat belt, they could be
seriously injured or killed in a collision.
oDo not use any accessories on seat
belts. Devices claiming to improve oc-
cupant comfort or reposition the seat
belt can reduce the protection provided
by the seat belt and increase the chance
of serious injury in a crash.
oPassengers should not place hard or
sharp objects between themselves
and the air bags. Carrying hard or sharp
objects on your lap or in your mouth can
result in injuries if an air bag inflates.oKeep occupants away from the air
bag covers. All occupants should sit
upright, fully back in their seats with
their seat belts on and their feet on the
floor. If occupants are too close to the air
bag covers, they could be injured if the
air bags inflate.
oDo not attach or place objects on or
near the air bag covers. Any object
attached to or placed on the front or side
impact air bag covers could interfere
with the proper operation of the air bags.
oDo not modify the front seats. Modifi-
cation of the front seats could interfere
with the operation of the supplemental
restraint system sensing components
or side impact air bags.
oDo not place items under the front
seats. Placing items under the front
seats could interfere with the operation
of the supplemental restraint system
sensing components and wiring har-
nesses.
oNever hold an infant or child on your
lap. The infant or child could be seri-
ously injured or killed in the event of a
crash. All infants and children should
be properly restrained in appropriate
child safety seats or seat belts in the rear
seat.
Adding Equipment to or Modifying
Your Air bag-Equipped Vehicle.If you modify your vehicle by changing
your vehicle's frame, bumper system, front
end or side sheet metal or ride height, this
may affect the operation of your vehicle's
air bag system.
Page 198 of 355
1FEATURES OF YOUR HYUNDAI
186
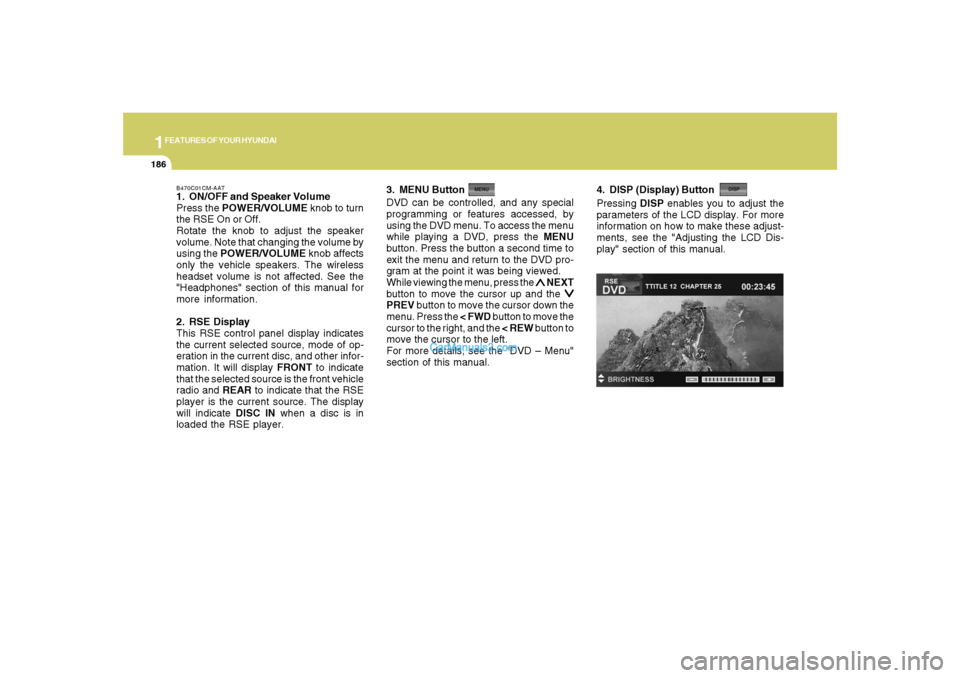
B470C01CM-AAT1. ON/OFF and Speaker Volume
Press the POWER/VOLUME knob to turn
the RSE On or Off.
Rotate the knob to adjust the speaker
volume. Note that changing the volume by
using the POWER/VOLUME knob affects
only the vehicle speakers. The wireless
headset volume is not affected. See the
"Headphones" section of this manual for
more information.
2. RSE Display
This RSE control panel display indicates
the current selected source, mode of op-
eration in the current disc, and other infor-
mation. It will display FRONT to indicate
that the selected source is the front vehicle
radio and REAR to indicate that the RSE
player is the current source. The display
will indicate DISC IN when a disc is in
loaded the RSE player.DVD can be controlled, and any special
programming or features accessed, by
using the DVD menu. To access the menu
while playing a DVD, press the MENU
button. Press the button a second time to
exit the menu and return to the DVD pro-
gram at the point it was being viewed.
While viewing the menu, press the
∧ ∧∧ ∧
∧ NEXT
button to move the cursor up and the
∨ ∨∨ ∨
∨
PREV button to move the cursor down the
menu. Press the < FWD button to move the
cursor to the right, and the < REW button to
move the cursor to the left.
For more details, see the "DVD – Menu"
section of this manual. 3. MENU Button
4. DISP (Display) ButtonPressing DISP enables you to adjust the
parameters of the LCD display. For more
information on how to make these adjust-
ments, see the "Adjusting the LCD Dis-
play" section of this manual.
Page 235 of 355

2
DRIVING YOUR HYUNDAI
24
It should be noted that installing tire chains
on the tire will provide a greater driving
force, but will not prevent side skids.NOTE:o Tire chains are not legal in all states.
Check state laws before fitting tire
chains.
o When using tire chains, attach them
to the drive wheels as follows.
2WD : Front wheels
AWD : All four wheels
In some unavoidable circumstances,
install them on only the front wheels,
not the rear wheels.
C160A01A-AATThe more severe weather conditions of
winter result in greater wear and other
problems. To minimize the problems of
winter driving, you should follow these
suggestions:C160B01CM-AATSnowy or Icy ConditionsTo drive your vehicle in deep snow, it may
be necessary to use snow tires or to install
tire chains on your tires. If snow tires are
needed, it is necessary to select tires
equivalent in size and type of the original
equipment tires. Failure to do so may ad-
versely affect the safety and handling of
your car. Furthermore, speeding, rapid
acceleration, sudden brake applications,
and sharp turns are potentially very haz-
ardous practices.
During deceleration, use engine braking
to the fullest extent. Sudden brake applica-
tions on snowy or icy roads may cause
skids to occur. You need to keep sufficient
distance between the vehicle in operation
in front and your vehicle. Also, apply the
brake gently.WINTER DRIVING
SMOOTH CORNERINGC150A01A-AATAvoid braking or gear changing in corners,
especially when roads are wet. Ideally,
corners should always be taken under
gentle acceleration. If you follow these
suggestions, tire wear will be held to a
minimum.
Page 249 of 355
If the Engine will not Start .............................................. 3-2
Jump Starting ................................................................ 3-3
If the Engine Overheats ................................................ 3-4
Tire Pressure Monitoring System (TPMS) .................... 3-5
Spare Tire...................................................................3-10
If You Have a Flat Tire ................................................3-12
Changing a Flat Tire ....................................................3-12
If Your Car Must be Towed.........................................3-18
Emergency Towing.....................................................3-20
If You Lose Your Keys................................................3-21
3
3
WHAT TO DO IN AN EMERGENCY
Cmhma-3.p653/20/2006, 5:02 PM 1
Page 256 of 355

38WHAT TO DO IN AN EMERGENCY
Changing a tire with TPMS
If you have a flat tire, the Low Tire
Pressure and Position telltales will come
on. Have the flat tire repaired by an
authorized Hyundai dealer as soon as
possible or replace the flat tire with the
temporary spare tire. NEVER use a
puncture-repairing agent to repair and/
or inflate a low pressure tire. The tire
sealant can damage the tire pressure
sensor. If used, you will have to replace
the tire pressure sensor.
Each wheel is equipped with a tire
pressure sensor mounted inside the tire
behind the valve stem. You must use
TPMS specific wheels. It is recom-
mended that you always have your tires
serviced by an authorized Hyundai
dealer.
Even if you replace the low pressure tire
with the temporary spare tire, the Low
Tire Pressure and Position telltales will
remain on when the low pressure tire is
in the vehicle. NOTE:
o The TPMS malfunction indicator
may be illuminated if the vehicle
is moving around electric power
supply cables or radios transmit-
ter such as at police stations, gov-
ernment and public offices, broad-
casting stations, military installa-
tions, airports, or transmitting tow-
ers, etc. This can interfere with
normal operation of the Tire Pres-
sure Monitoring System (TPMS).
o The TPMS malfunction indicator
may be illuminated if some elec-
tronic devices, such as notebook
computer, are used in the vehicle.
This can interfere with normal
operation of the Tire Pressure
Monitoring System (TPMS).However, if the low pressure tire is not
in the vehicle, the Low Tire Pressure
and Position telltales will go off and the
TPMS malfunction indicator will go on
after a few minutes because the tempo-
rary spare tire does not have a sensor.
Once the low pressure tire is re-inflated
to the recommended pressure and in-
stalled on the vehicle, the TPMS mal-
function indicator and the low tire pres-
sure and position telltales will extin-
guish within a few minutes.
If the indicators are not extinguished
after a few minutes, please visit an
authorized Hyundai dealer.
You may not be able identify a low tire
by simply looking at it. Always use a
good quality tire pressure gauge to
measure the tire's inflation pressure.
Please note that a tire that is hot (from
being driven) will have a higher pres-
sure measurement than a tire that is
cold (from sitting stationary for at least
3 hours and driven less than 1 mile
(1.6km) during that 3 hour period).
Cmhma-3.p653/20/2006, 5:02 PM 8
Page 260 of 355
312
WHAT TO DO IN AN EMERGENCY
IF YOU HAVE A FLAT TIRED050A02A-AATIf a tire goes flat while you are driving:
1. Take your foot off the accelerator
pedal and let the car slow down while
driving straight ahead. Do not apply
the brakes immediately or attempt to
pull off the road as this may cause a
loss of control. When the vehicle has
slowed to such a speed that it is safe
to do so, brake carefully and pull off
the road. Drive off the road as far as
possible and park on firm, level
ground. If you are on a divided high-
way, do not park in the median area
between the two traffic lanes.
2. When the car is stopped, turn on your
emergency hazard flashers, set the
parking brake and put the transaxle
in "P" (automatic) or reverse (manual
transaxle).
3. Have all passengers get out of the
vehicle. Be sure they all get out on
the side of the vehicle that is away
from traffic.
4. Change the tire following the instruc-
tions provided on the following pages.
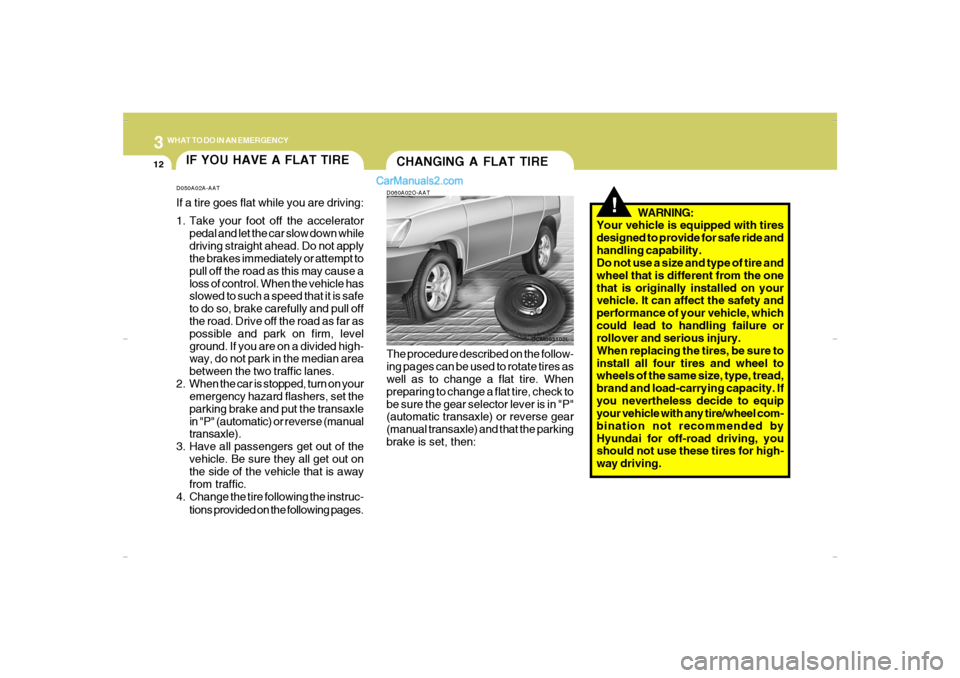
CHANGING A FLAT TIRED060A02O-AAT
OCM053102L
!
The procedure described on the follow-
ing pages can be used to rotate tires as
well as to change a flat tire. When
preparing to change a flat tire, check to
be sure the gear selector lever is in "P"
(automatic transaxle) or reverse gear
(manual transaxle) and that the parking
brake is set, then:WARNING:
Your vehicle is equipped with tires
designed to provide for safe ride and
handling capability.
Do not use a size and type of tire and
wheel that is different from the one
that is originally installed on your
vehicle. It can affect the safety and
performance of your vehicle, which
could lead to handling failure or
rollover and serious injury.
When replacing the tires, be sure to
install all four tires and wheel to
wheels of the same size, type, tread,
brand and load-carrying capacity. If
you nevertheless decide to equip
your vehicle with any tire/wheel com-
bination not recommended by
Hyundai for off-road driving, you
should not use these tires for high-
way driving.
Cmhma-3.p653/20/2006, 5:02 PM 12
Page 263 of 355
3
WHAT TO DO IN AN EMERGENCY
15
!
Wheels and wheel covers may have
sharp edges. Handle them carefully
to avoid possible severe injury. Be-
fore putting the wheel into place, be
sure that there is nothing on the hub
or wheel (such as mud, tar, gravel,
etc.) that interferes with the wheel
from fitting solidly against the hub. If
there is, remove it. If there is not
good contact on the mounting sur-
face between the wheel and hub, the
wheel nuts could come loose and
cause the loss of a wheel. Loss of a
wheel may result in loss of control of
the vehicle. This may cause serious
injury or death.WARNING:
!
WARNING:
If the vehicle has been driven re-
cently, some pieces may be very hot.
Use caution.
OCM053104L
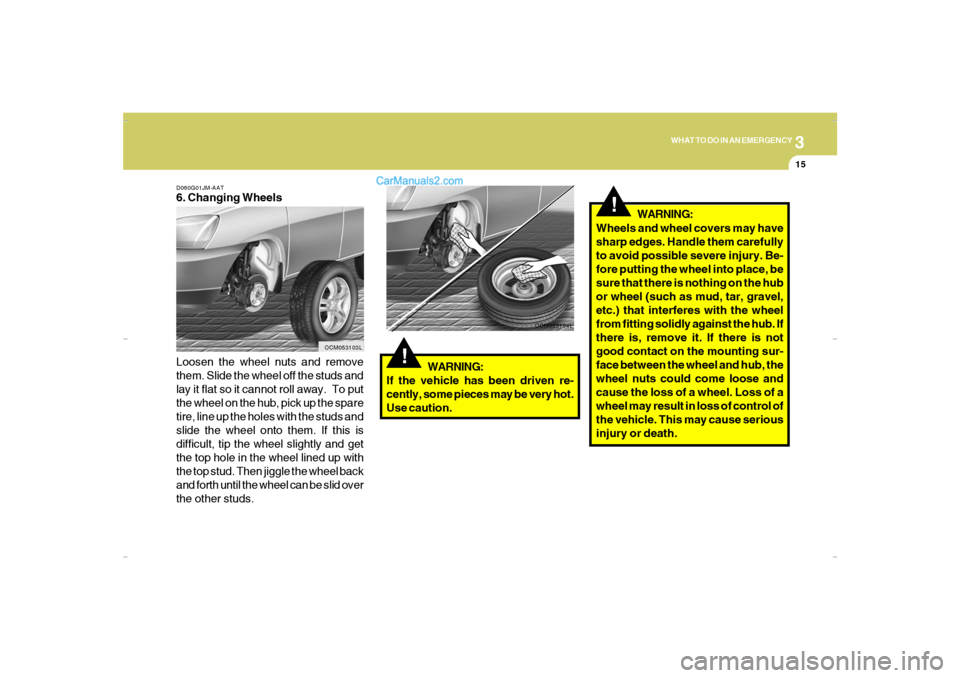
D060G01JM-AAT6. Changing Wheels
Loosen the wheel nuts and remove
them. Slide the wheel off the studs and
lay it flat so it cannot roll away. To put
the wheel on the hub, pick up the spare
tire, line up the holes with the studs and
slide the wheel onto them. If this is
difficult, tip the wheel slightly and get
the top hole in the wheel lined up with
the top stud. Then jiggle the wheel back
and forth until the wheel can be slid over
the other studs.
OCM053103L
Cmhma-3.p653/20/2006, 5:02 PM 15
Page 264 of 355
316
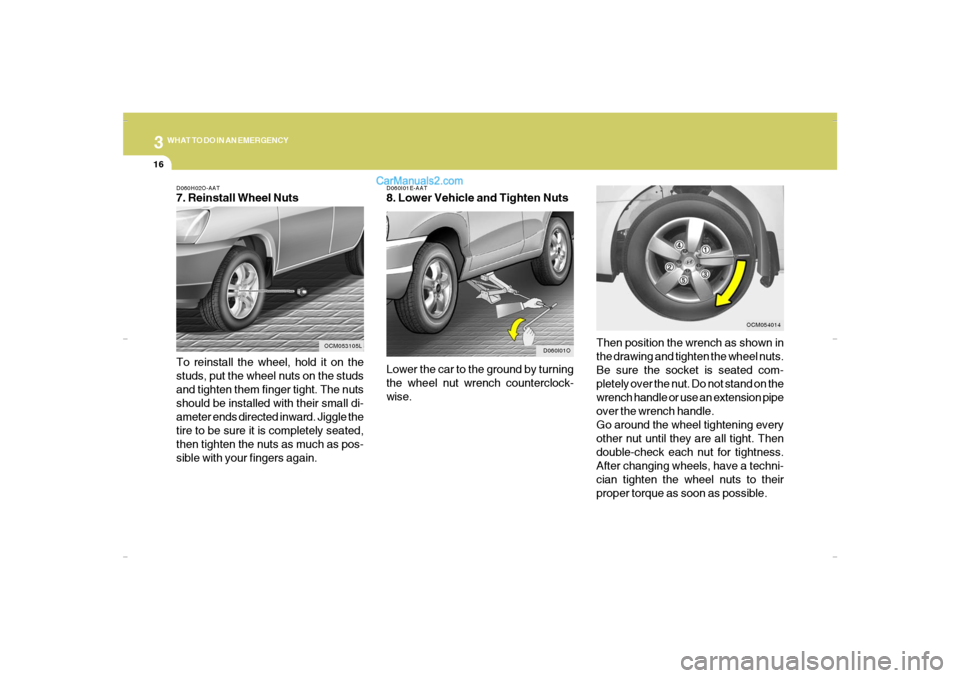
WHAT TO DO IN AN EMERGENCYD060H02O-AAT7. Reinstall Wheel Nuts
To reinstall the wheel, hold it on the
studs, put the wheel nuts on the studs
and tighten them finger tight. The nuts
should be installed with their small di-
ameter ends directed inward. Jiggle the
tire to be sure it is completely seated,
then tighten the nuts as much as pos-
sible with your fingers again.
OCM053105LD060I01E-AAT
8. Lower Vehicle and Tighten Nuts
Lower the car to the ground by turning
the wheel nut wrench counterclock-
wise.
D060I01O
Then position the wrench as shown in
the drawing and tighten the wheel nuts.
Be sure the socket is seated com-
pletely over the nut. Do not stand on the
wrench handle or use an extension pipe
over the wrench handle.
Go around the wheel tightening every
other nut until they are all tight. Then
double-check each nut for tightness.
After changing wheels, have a techni-
cian tighten the wheel nuts to their
proper torque as soon as possible.
OCM054014
Cmhma-3.p653/20/2006, 5:03 PM 16