2007 Hyundai H-1 (Grand Starex) ignition
[x] Cancel search: ignitionPage 30 of 284
1BEFORE DRIVING YOUR VEHICLE
18
B070D03P-AAT Disarmed Stage The system will be disarmed when the driver's or passenger's door is un-locked by depressing the button on the transmitter after the system was armed. After completion of the step above, the turn signal lights will blink twice to indicate that the system is disarmed. NOTE:
o Once the system has been dis-armed, it can not be rearmed ex- cept by repeating the arming pro- cedures.
o When the system is disarmed
with the interior light switched to"DR", the interior light will illumi- nate for 30 seconds.
The alarming horn will sound and theturn signal light will blink continuouslyfor 27 seconds (E.C only/ Except E.C 3 times). To turn off the system, unlock the door or tail gate with the transmit-ter.
CAUTION:
Avoid trying to start the engine whilethe system is armed.
! CAUTION:
Only the transmitter can disarm the armed stage. If the transmitter doesnot disarm the system, it is neces- sary to take the following steps;
1. Unlock the door with the key, which will cause, the alarm to be activated.
2. Insert the key in the ignition key cylinder and turn the ignition keyto "ON" position.
3. Wait for 30 seconds. After completing the steps above, the system will be disarmed.
!
Page 31 of 284

1
BEFORE DRIVING YOUR VEHICLE
19
B070F03A-GAT Keyless Entry System (If installed) Locking doors
1. Close all doors.
2. Push the button on the transmitter.
3. At the same time all doors lock, the turn signal lights will blink once toindicate that the system is armed.
Unlocking doors 1. Push the button on the transmitter once more after all doors were locked.
2. At the same time all doors unlock,
the turn signal lights will blink twiceto indicate that the system is dis- armed. NOTE:
o The transmitter will not work if any
of following occur:
- The ignition key is in ignition
switch.
- You exceed the operating dis-
tance limit (10 m).
- The battery in the transmitter is weak.
- Other vehicles or objects may be blocking the signal.
- The weather is extremely cold.
- The transmitter is close to a
radio transmitter such as a radio station or an airport which can interfere with normal operationof the transmitter.
When the transmitter does not workcorrectly, open and close the doorwith the ignition key. If you have a problem with the transmitter, con- tact an authorized Hyundai Dealer.
o Keep the transmitter away from water or any liquid. If the keylessentry system is inoperative due toexposure to water or liquids, it will not be covered by your manufac- turer vehicle warranty.
B070E02P-AAT Replacing the battery When the transmitter's battery be- comes weak, it may take several pushes on the button to lock or unlockthe doors, and the LED will not light. Replace the battery as soon as pos- sible. Battery type : CR1220 (Minibus/Van) CR2032 (Truck)
Replacement instructions: (Minibus/Van)
1. Remove the screw with a phillips screwdriver.
2. Carefully separate the case with a flat-head screwdriver as shown in the illustration. HTB053
Page 38 of 284
1BEFORE DRIVING YOUR VEHICLE
26
!WARNING:
o Always double check to be sure that the hood is firmly latched before driving away. If it is not latched, the hood could fly openwhile the vehicle is being driven, causing a total loss of visibility, which might result in an acci-dent.
o The support rod must be inserted
completely into the hole providedin the hood whenever you in- spect the engine compartment. This will prevent the hood fromfalling and possibly injuring you.
o Do not move the vehicle with the
hood in the raised position, asvision is obstructed and the hood could fall or be damaged.
REMOTE FUEL-FILLER LID RELEASE
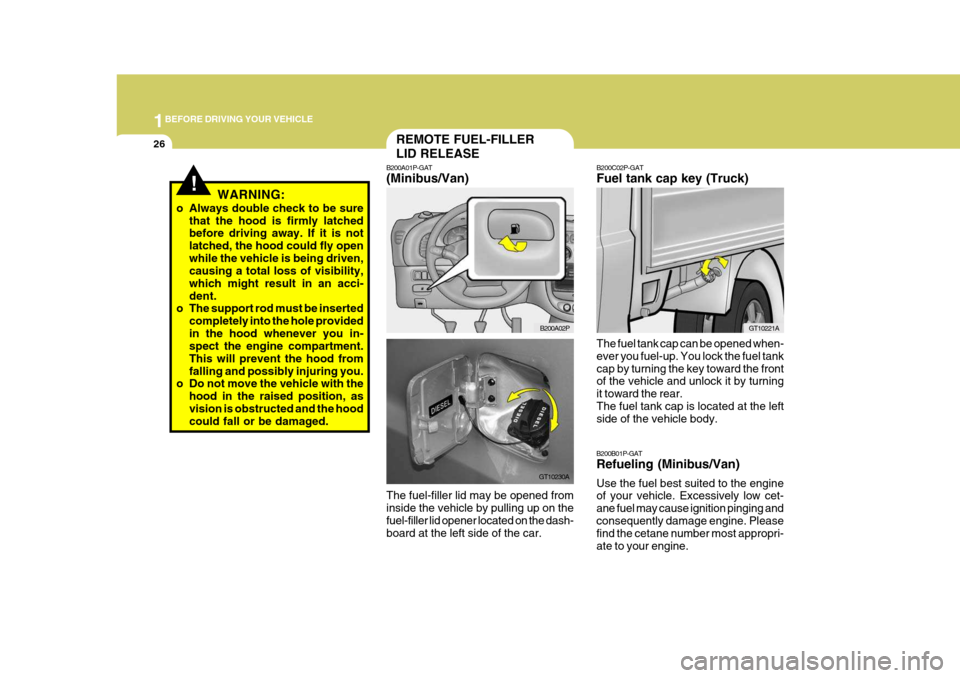
B200A01P-GAT (Minibus/Van) The fuel-filler lid may be opened from inside the vehicle by pulling up on thefuel-filler lid opener located on the dash- board at the left side of the car. B200A02P
GT10230A
B200C02P-GAT Fuel tank cap key (Truck) The fuel tank cap can be opened when- ever you fuel-up. You lock the fuel tankcap by turning the key toward the front of the vehicle and unlock it by turning it toward the rear.The fuel tank cap is located at the left side of the vehicle body. GT10221A
B200B01P-GAT Refueling (Minibus/Van) Use the fuel best suited to the engine of your vehicle. Excessively low cet- ane fuel may cause ignition pinging andconsequently damage engine. Please find the cetane number most appropri- ate to your engine.
Page 41 of 284
1
BEFORE DRIVING YOUR VEHICLE
29
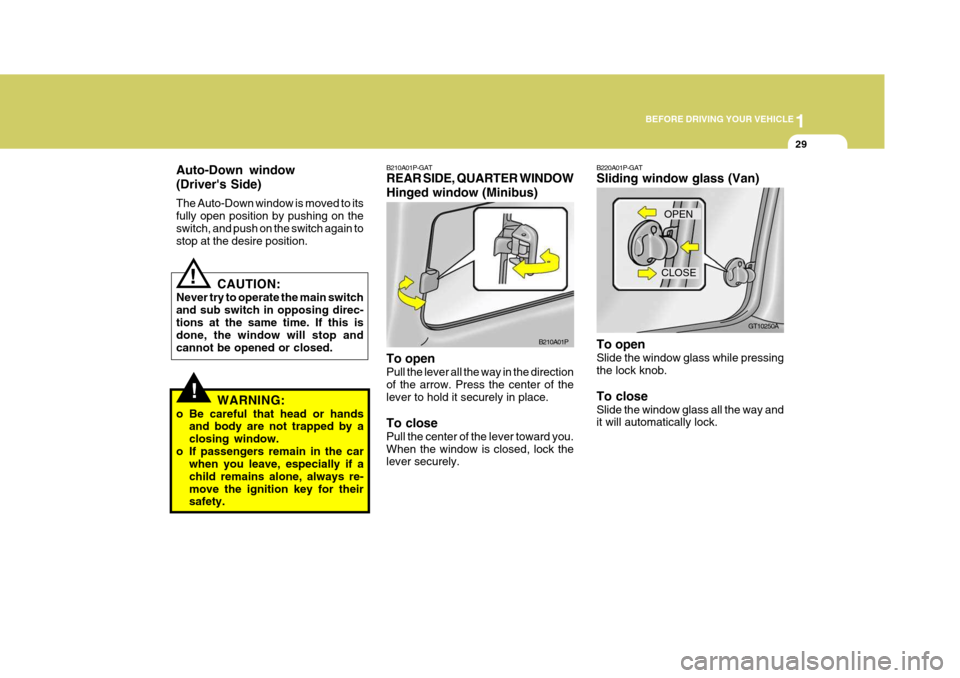
B210A01P-GAT REAR SIDE, QUARTER WINDOW Hinged window (Minibus) To open Pull the lever all the way in the direction of the arrow. Press the center of the lever to hold it securely in place. To close Pull the center of the lever toward you. When the window is closed, lock the lever securely. B210A01P
!
Auto-Down window (Driver's Side) The Auto-Down window is moved to its fully open position by pushing on theswitch, and push on the switch again to stop at the desire position.
CAUTION:
Never try to operate the main switch and sub switch in opposing direc-tions at the same time. If this is done, the window will stop and cannot be opened or closed.
WARNING:
o Be careful that head or hands and body are not trapped by aclosing window.
o If passengers remain in the car when you leave, especially if achild remains alone, always re-move the ignition key for their safety.
!
B220A01P-GAT Sliding window glass (Van) To open Slide the window glass while pressing the lock knob. To close Slide the window glass all the way and it will automatically lock. CLOSE
GT10250A
OPEN
Page 53 of 284
1
BEFORE DRIVING YOUR VEHICLE
41
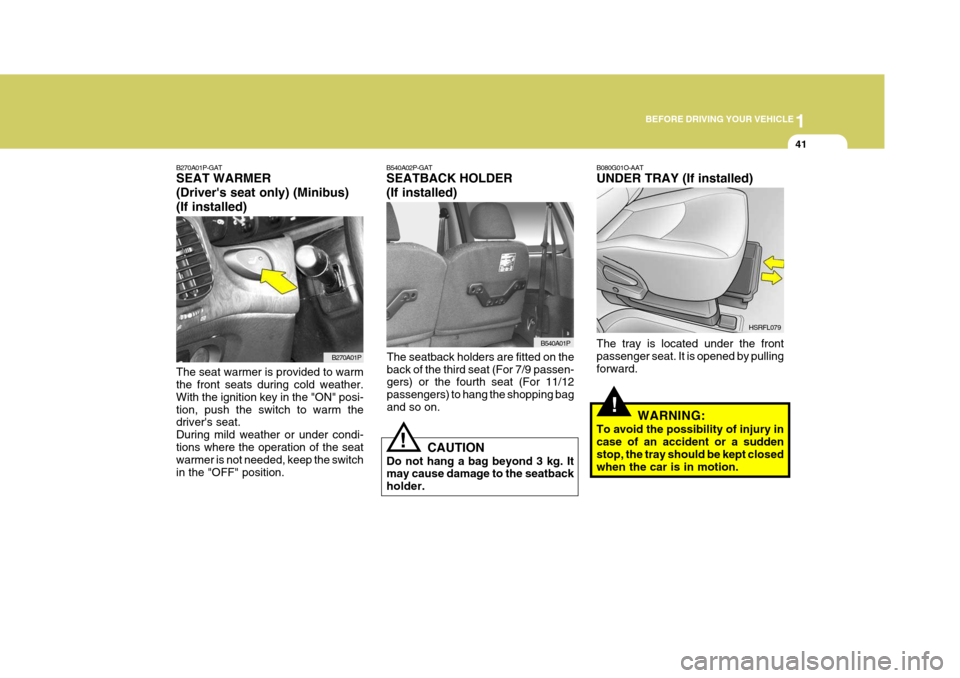
B270A01P-GAT SEAT WARMER (Driver's seat only) (Minibus)(If installed) The seat warmer is provided to warm the front seats during cold weather. With the ignition key in the "ON" posi-tion, push the switch to warm the driver's seat. During mild weather or under condi-tions where the operation of the seat warmer is not needed, keep the switch in the "OFF" position.
B270A01P
!
B080G01O-AAT UNDER TRAY (If installed) The tray is located under the front passenger seat. It is opened by pullingforward.
WARNING:
To avoid the possibility of injury incase of an accident or a sudden stop, the tray should be kept closed when the car is in motion. HSRFL079
The seatback holders are fitted on theback of the third seat (For 7/9 passen- gers) or the fourth seat (For 11/12 passengers) to hang the shopping bagand so on. B540A01P
B540A02P-GAT SEATBACK HOLDER (If installed)
!
CAUTION
Do not hang a bag beyond 3 kg. It may cause damage to the seatback holder.
Page 64 of 284

1BEFORE DRIVING YOUR VEHICLE
52
The airbag modules are located both in the center of the steering wheel and inthe front passenger's panel above the glove box. When the SRSCM detects a considerable impact to the front of thevehicle, it will automatically deploy the airbags. Upon deployment, tear seams molded directly into the pad covers will sepa- rate under pressure from the expan-sion of the airbags. Further opening of the covers then allows full inflation of the airbags. A fully inflated airbag in combination with a properly worn seat belt slowsthe driver's or the passenger's forward motion, thus reducing the risk of head or chest injury. After complete inflation, the airbag immediately starts deflating, enablingthe driver to maintain forward visibility.
The SRS service reminder indicator (SRI) on the instrument panel will blink for about 6 seconds after the ignitionkey is turned to the "ON" position or after the engine is started, after which the SRI should go out.B240B02L
B240B03L
B240B02P-AAT SRS Components and Functions The SRS consists of the following com- ponents:
- Driver's Side Airbag Module
- Passenger's Side Airbag Module
- SRS Service Reminder Indicator(SRI)
- SRS Control Module (SRSCM)
The SRSCM continually monitors allelements while the ignition is "ON" todetermine if a frontal or near-frontal impact is severe enough to require airbag deployment. B240B01L
Page 65 of 284
1
BEFORE DRIVING YOUR VEHICLE
53
CAUTION:
When installing the container of liquid air refresher inside a vehicle, do not place it near the instrumentcluster nor on the crash pad sur- face. If there is any leakage from the air refresher onto these areas (In-strument cluster, crash pad or air ventilator), it may damage these parts. If the liquid from air refresherdoes leak onto these areas, wash them with water immediately.!
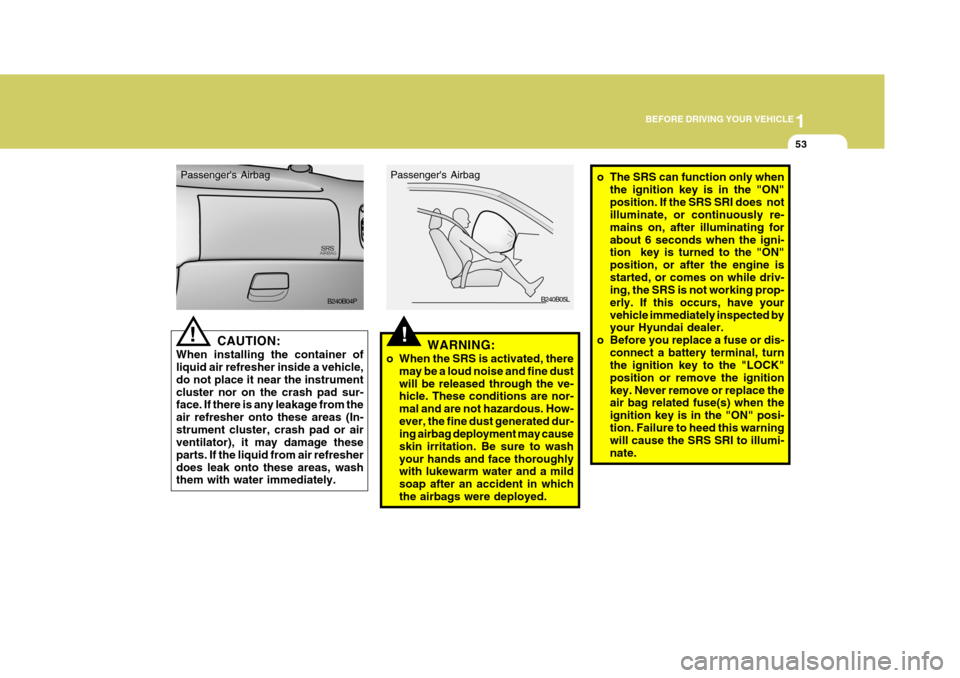
Passenger's Airbag
B240B04P!WARNING:
o When the SRS is activated, there may be a loud noise and fine dust will be released through the ve- hicle. These conditions are nor- mal and are not hazardous. How-ever, the fine dust generated dur- ing airbag deployment may cause skin irritation. Be sure to washyour hands and face thoroughly with lukewarm water and a mild soap after an accident in whichthe airbags were deployed. B240B05L
Passenger's Airbag
o The SRS can function only when
the ignition key is in the "ON" position. If the SRS SRI does not illuminate, or continuously re- mains on, after illuminating forabout 6 seconds when the igni- tion key is turned to the "ON" position, or after the engine isstarted, or comes on while driv- ing, the SRS is not working prop- erly. If this occurs, have yourvehicle immediately inspected by your Hyundai dealer.
o Before you replace a fuse or dis-
connect a battery terminal, turnthe ignition key to the "LOCK" position or remove the ignitionkey. Never remove or replace the air bag related fuse(s) when the ignition key is in the "ON" posi-tion. Failure to heed this warning will cause the SRS SRI to illumi- nate.
Page 75 of 284

2 INSTRUMENTS AND CONTROLS
8WARNING AND INDICATOR LIGHTS
B260B01S-GAT SRS (Airbag) Service Reminder Indicator (SRI)(If installed)
The SRS service reminder indicator (SRI) comes on and flashes for about 6 seconds after the ignition key isturned to the "ON" position or after the engine is started, after which it will go out. This light also comes on when the SRS is not working properly. If the SRI doesnot come on, or continuously remains on after flashing for about 6 seconds when you turned the ignition key to the"ON" position or started the engine, or if it comes on while driving, have the SRS inspected by an authorizedHyundai Dealer.
C130N02Y-GAT Anti-lock Brake Warning
Light (If installed)
When the key is turned to the "ON" position, the ABS light will come onand then go off in a few seconds. If the ABS light remains on, comes on while driving, or does not come onwhen the key is turned to the "ON" position, this indicates that there may be a problem with the ABS.If this occurs, have your vehicle checked by your Hyundai dealer as soon as possible. The normal brakingsystem will still be operational, but without the assistance of the anti-lock brake system.C130I01P-GAT Overdrive/Off Indicator (If installed)
When the overdrive switch is turned on and 4th gear is engaged, the overdriveoff indicator will go out. This amber indicator will be illuminated when the overdrive switch is turned off.(Automatic tranmission only)
C130F01P-GAT Turn-signal Indication Lamps
These indication lamps blink on and off when a turn-signal lamp is blinking. Ifthe blinking is too short, the cause may be a faulty turn-signal lamp connection or a blown lamp bulb.
C130G01P-GAT High-beam Indication Lamp
This indication lamp illuminates when the high beams are on.
!WARNING:
If both the ABS SRI and Parking Brake/Brake fluid level warning lights remain "ON" or come on whiledriv ing, there may be a problem with
E.B.D (Electronic brake force distri-
bution). If this occurs, avoid suddenstops and have your vehicle checked by your Hyundai dealer as soon as possible.