2007 Hyundai Getz oil
[x] Cancel search: oilPage 309 of 463

FEATURES OF YOUR HYUNDAI 1- 43
1. Tail Gate Open Warning Light
2. Immobiliser Warning Indicator Light
3. Tachometer
4. Turn Signal Indicator Light
5. Automatic Transaxle Position Indicator Light
(Not all models)
6. Fuel Gauge
7. Odometer/Trip Odometer
8. Speedometer
9. Malfunction Indicator Light (MIL)
10. Diesel Pre-heat Indicator Light (Diesel only)
11. High Beam Indicator Light
12. Engine Coolant Temperature Indicator Light
13. Parking Brake/Brake Fluid Level Warning Light 14. Door Open (Ajar) Warning Light
15. Passenger' s Front Airbag OFF Indicator Light
(Not all models)
16. SRS (Airbag) Warning Light (Not all models)
17. Low Fuel Warning Light
18. Electronic Stability Program (ESP) Indicator Light (Not all models)
19. ABS Warning Light
20. Fuel Filter Warning Light (Diesel only)
21. Seat Belt Warning Light
22. Oil Pressure Warning Light
23. Charging System Warning Light
24. Overdrive off Indicator Light (Auto T/A only)
Page 311 of 463

FEATURES OF YOUR HYUNDAI 1- 45
1. Hatch back door Open Warning Light
2. Immobiliser Warning Indicator Light
3. Tachometer
4. Turn Signal Indicator Light
5. Automatic Transaxle Position Indicator Light
(Not all models)
6. Odometer/Trip Odometer
7. Fuel Gauge
8. Trip Computer (Not all models)
9. Speedometer
10. Malfunction Indicator Light (MIL)
11. Diesel Pre-heat Indicator Light (Diesel only)
12. High Beam Indicator Light
13. Engine Coolant Temperature Indicator Light 14. Parking Brake/Brake Fluid Level Warning Light
15. Door Open (Ajar) Warning Light
16. Passenger' s Front Airbag OFF Indicator Light
(Not all models)
17. SRS (Airbag) Warning Light (Not all models)
18. Low Fuel Warning Light
19. Electronic Stability Program (ESP) Indicator Light (Not all models)
20. ABS Warning Light
21. Fuel Filter Warning Light (Diesel only)
22. Seat Belt Warning Light
23. Oil Pressure Warning Light
24. Charging System Warning Light
25. Overdrive Off Indcator Light (Auto T/A only)
Page 314 of 463

1- 48 FEATURES OF YOUR HYUNDAI
Warning light operation The parking brake/brake fluid level warn- ing light will be illuminated wheneverthe ignition switch is turned to the "ON" position irrespective of whether or not the parking brake is applied and mustbe extinguished when the engine starts and the parking brake released. If the warning light fails to extinguish orilluminates at any other time, the ve- hicle must be brought to rest in a safe location and the level of brake fluid inthe reservoir checked. If the fluid level is incorrect, fluid conforming to DOT 3 or DOT 4 specifications should be added.If, after correcting the brake fluid level, the warning light continues to be illumi- nated, the advice of the nearest Hyundaiauthorised repairer must be sought be- fore the vehicle is driven again. Your Hyundai is equipped with a diago-nally split dual braking system which will ensure that in the event of one of the brake circuits becoming defective, ap-proximately fifty per cent of the normal braking performance will be available.
!
B260H03A-EAT
PARKING BRAKE/ BRAKE FLUID LEVELWARNING LIGHT
SB210K1-E
OIL PRESSURE WARNING LIGHT
!CAUTION:
If the oil pressure light illuminates when the engine is running, an in- sufficient oil pressure level for con-tinued safe operation of the engine exists. Continued operation of the engine in this condition may resultin serious engine damage. Under normal circumstances, the light will illuminate when the igni- tion is turned "on" and will be extin-guished when the engine is started. If the oil pressure warning light illu- minates whilst the engine is run-ning, stop the engine immediately and check the engine oil level. If the level is insufficient, add the requiredamount of oil as indicated by the engine oil dipstick. If the light fails to extinguish when the engine is re-started, do not continue to operate the vehicle. If the oil pressure light illuminates during normal operation and the cause is not an insufficient oil level, or the light fails to illuminate whenthe ignition is turned "on", contact the nearest Hyundai authorised re- pairer before further operating thevehicle.
WARNING:
In the event of problems being sus- pected with the braking system, the advice of the nearest Hyundai authorised repairer must be soughtbefore the vehicle is driven. Driving the vehicle with either an electrical or hydraulic braking system defectmay be dangerous, resulting in acci- dent or personal injury.
Page 324 of 463

1- 58 FEATURES OF YOUR HYUNDAI
HTB017-DHTB015-D
B340C03FC-EAT LIGHTING SWITCH
The vehicle side lights and headlights are operated by rotating the end of the turn signal switch barrel. To operate theside lights, rotating the switch to the first detent with ignition switch at the "OFF" position will cause the lights toilluminate. To operate the headlights, the turn signal switch barrel should be rotated to the second detent. The head-lights will only operate when the ignition switch is at the "On" position. If the ignition switch is turned to the "Off"position, only the side lights will func- tion. NOTE: The ignition must be in the "ON" position to turn on the headlights. Side light auto cut (Not all models) If you do not turn the side lights "OFF" after driving, the side light will automati- cally shut "OFF" when the driver's dooris opened. To turn them "ON" again you must simply turn the ignition key to the "ON"position. SB220D1-E HIGH AND LOW BEAM To turn on the headlight high beams, push the lever forward (away from you). For low beams, pull the lever back (toward you). The appropriate headlightbeam indicator light will come on at the same time.
SB220E1-E HEADLIGHT FLASH The headlights may be flashed by pull- ing the turn signal switch lever towards the steering wheel. The headlights willbe extinguished when the switch is released.
Page 339 of 463

FEATURES OF YOUR HYUNDAI 1- 73
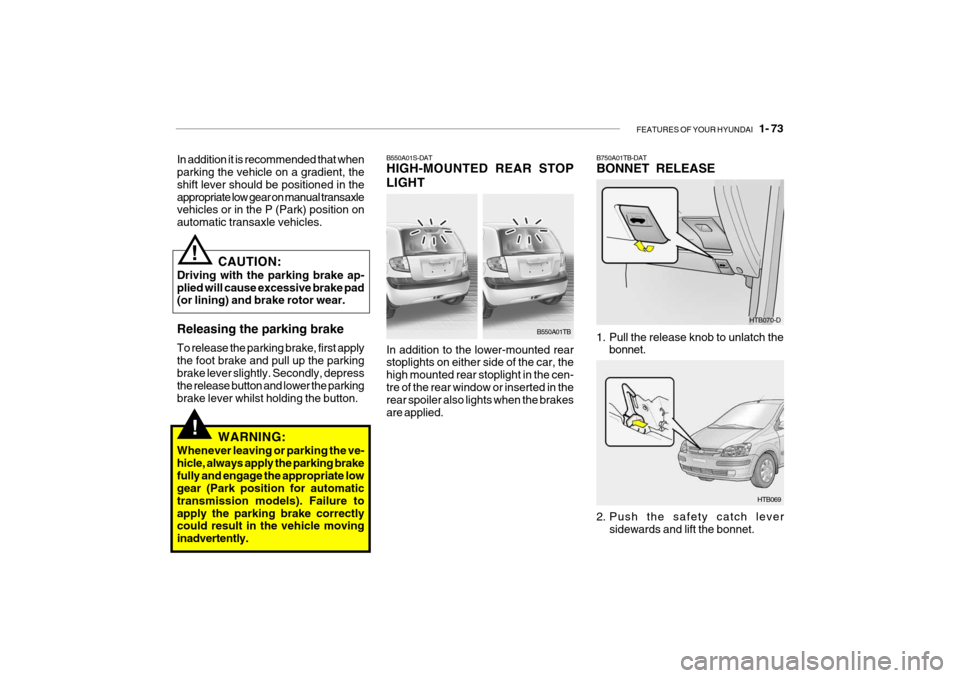
B550A01S-DAT HIGH-MOUNTED REAR STOP LIGHT In addition to the lower-mounted rear stoplights on either side of the car, the high mounted rear stoplight in the cen-tre of the rear window or inserted in the rear spoiler also lights when the brakes are applied. B550A01TBB750A01TB-DAT BONNET RELEASE
HTB070-D
1. Pull the release knob to unlatch the bonnet.
HTB069
2. Push the safety catch lever sidewards and lift the bonnet.
!
In addition it is recommended that when parking the vehicle on a gradient, the shift lever should be positioned in theappropriate low gear on manual transaxle vehicles or in the P (Park) position on automatic transaxle vehicles.
CAUTION:
Driving with the parking brake ap-plied will cause excessive brake pad (or lining) and brake rotor wear. Releasing the parking brake To release the parking brake, first apply the foot brake and pull up the parkingbrake lever slightly. Secondly, depress the release button and lower the parking brake lever whilst holding the button.
WARNING:
Whenever leaving or parking the ve-hicle, always apply the parking brakefully and engage the appropriate low gear (Park position for automatic transmission models). Failure toapply the parking brake correctly could result in the vehicle moving inadvertently.
!
Page 345 of 463

FEATURES OF YOUR HYUNDAI 1- 79
!
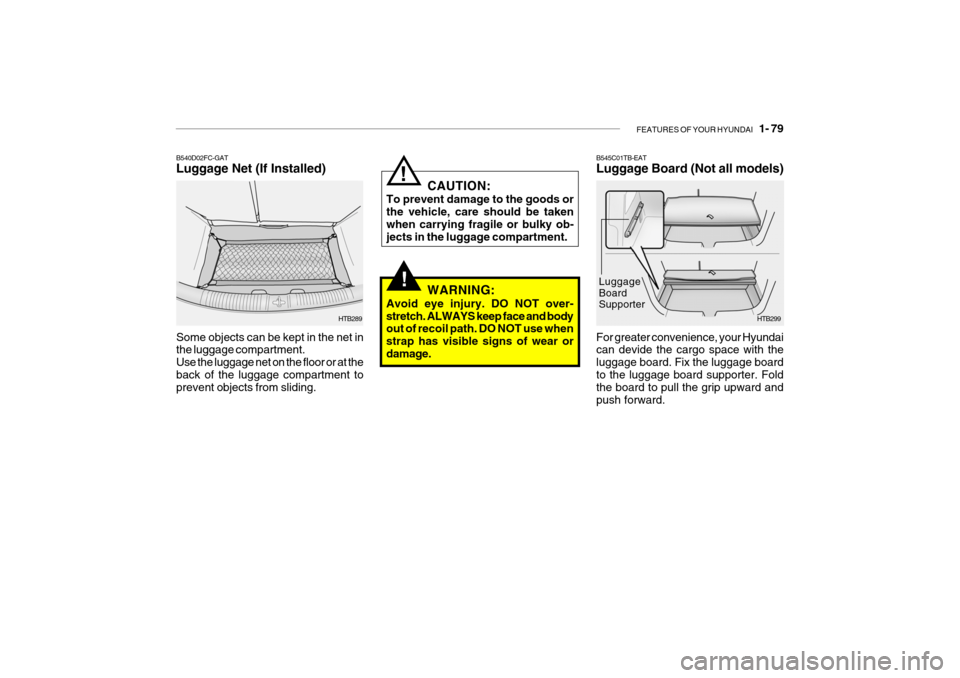
B545C01TB-EAT Luggage Board (Not all models)
HTB299
For greater convenience, your Hyundai can devide the cargo space with the luggage board. Fix the luggage boardto the luggage board supporter. Fold the board to pull the grip upward and push forward. Luggage BoardSupporterB540D02FC-GAT Luggage Net (If Installed) Some objects can be kept in the net in the luggage compartment. Use the luggage net on the floor or at theback of the luggage compartment to prevent objects from sliding.
HTB289
WARNING:
Avoid eye injury. DO NOT over- stretch. ALWAYS keep face and body out of recoil path. DO NOT use when strap has visible signs of wear ordamage.
! CAUTION:
To prevent damage to the goods or the vehicle, care should be takenwhen carrying fragile or bulky ob- jects in the luggage compartment.
Page 363 of 463

DRIVING YOUR HYUNDAI 2- 3
!
C020A02O-EAT BEFORE STARTING THE EN- GINE Before you start the engine, you should always:
1. Look around the vehicle to be sure
there are no flat tyres, puddles of oil or water or other indications of pos-sible trouble.
2. After entering the car, check to be
sure the parking brake is engaged.
3. Check that all windows, and lights are clean.
4. Check that the interior and exterior mirrors are clean and in position.
5. Check your seat, seatback and
headrestraint to be sure they are intheir proper positions.
6. Close all the doors.
7. Fasten your seat belt and be sure
that all other occupants have fas- tened theirs.
8. Turn off all lights and accessories that are not needed.
9. When you turn the ignition switch to
"ON" check that all appropriate warn- ing lights are operating and that you have sufficient fuel. 10.Check the operation of warning
lights and all bulbs when key is in the "ON" position.
WARNING: (DIESEL ENGINE)
To ensure that sufficient vacuum exists within the brake system dur-ing cold weather start-up condi- tions, it is necessary to run the engine at idle for several secondsafter starting the engine. SC040A1-F COMBINATION IGNITION SWITCH AND STEERING LOCKTo Start the Engine
o If your Hyundai is equipped with a
manual transaxle, place the shift lever in neutral and depress theclutch pedal fully.
o If your Hyundai has an automatic
transaxle, place the shift lever in "P"(park).
o To start the engine, insert the igni-
tion key and turn it to the "START"position. Release it as soon as the engine starts. Do not hold the key in the "START" position for more than15 seconds.
NOTE: For safety, the engine will not start if the shift lever is not in "P" or "N"Position (automatic transaxle).
!WARNING:
Always wear appropriate shoes when operating your vehicle. Unsuitable shoes (high heels, ski boots, etc.) may interfere with yourability to use the brake and accelera- tor pedal, and the clutch (if installed).
Page 379 of 463

DRIVING YOUR HYUNDAI 2- 19
The use of a proprietary stabiliser will assist in achieving an inherently stable outfit but whilst the use of such equip-ment will improve the characteristics of a balanced outfit, it will not compen- sate for a badly loaded and thereforeunstable outfit. The tyres and braking equipment fitted to the trailer or caravan must be main- tained in accordance with the recom- mendations of the manufacturer. Spe-cial attention should be paid to tyres which deteriorate through time and exposure rather than as a result of thedistances towed. The inside walls of the tyres should be inspected along with the outside walls for cracking anddamage. The trailer wheel nut torque must be checked on a regular basis, preferably before each towing ses-sion.
!
Nose weight
Total trailer weight
C190E01L C195F02TB-EAT TOWING ATTACHMENTS It is strongly recommended that only an Hyundai Approved towing attach-ment is used to ensure that the loads placed upon the body structure are correctly distributed. The use of a nonapproved attachment will result in the invalidation of the vehicle warranty. Hyundai towing attachments are de-signed and constructed to ensure maximum towing performance and ease of fitment. A range of accesso-ries including electrical kits are avail- able through the Hyundai authorised repairer network. It is of the utmost importance that those areas of the vehicle which aresubjected to greater stress during tow- ing are maintained in accordance with the recommendations given at the endof this book. In addition, the daily oper- ating checks relating to engine oil, transmission oil and tyres must beperformed at each refuelling to ensure maximum reliability and safety.
C190E02TB-EAT TRAILER AND CARAVAN TOW- ING
WARNING:
It is not recommended that the ve- hicle be used for towing until thefirst 1,000 miles of Running In has been completed. All Hyundai Getz models are suited to towing trailersand caravans up to the limits indi- cated on page 2-21. This models fitted with automatic transaxle havea transaxle oil cooler and further transaxle cooling should not be re- quired.