Page 78 of 463

1- 66 FEATURES OF YOUR HYUNDAI
B420A02A-AAT CIGARETTE LIGHTER (If Installed) For the cigarette lighter to work, the key must be in the "ACC" position or the"ON" position. To use the cigarette lighter, push it all the way into its socket. When the ele-ment has heated, the lighter will pop out to the "ready" position. Do not hold the cigarette lighter pressedin. This can damage the heating ele- ment and create a fire hazard. If it is necessary to replace the ciga-rette lighter, use only a genuine Hyundai replacement or its approved equivalent. HHR2098AB400A01A-AAT DIGITAL CLOCK
HTB2033
There are three control buttons for the digital clock. Their functions are: HOUR -Push "H" to advance the hour
indicated.
MIN -Push "M" to advance the
minute indicated.
RESET - Push "R" to reset minutes to
":00" to facilitate resetting the clock to the correct time. When this is done:
Pressing "R" between 10 : 30 and 11 :29 changes the readout to 11 : 00. Pressing "R" between 11 : 30 and 12 :29 changes the readout to 12 : 00.
B360A01Y-GAT REAR FOG LIGHT SWITCH (If Installed)
To turn on the rear fog lights, push the switch. They will come on when the headlight switch is in the second posi-tion and the key is in the "ON" position. B360A01TB
Page 79 of 463

FEATURES OF YOUR HYUNDAI 1- 67
CAUTION:
Do not use electric accessories or equipment other than the Hyundai genuine parts in the socket.!
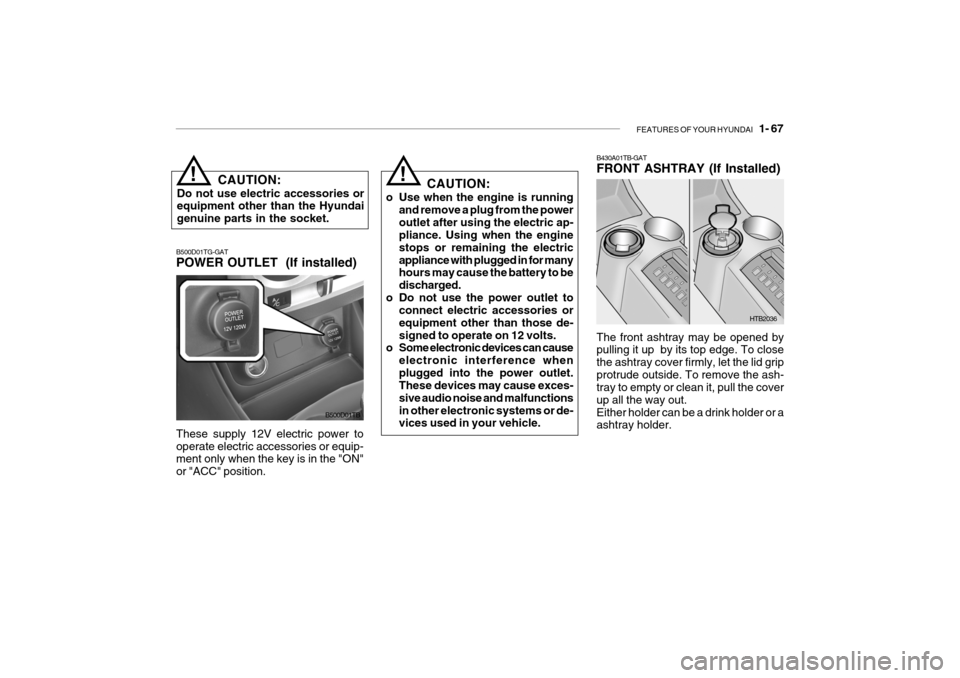
B500D01TG-GAT POWER OUTLET (If installed)
B500D01TB
These supply 12V electric power to operate electric accessories or equip- ment only when the key is in the "ON" or "ACC" position.
! CAUTION:
o Use when the engine is running and remove a plug from the power outlet after using the electric ap- pliance. Using when the engine stops or remaining the electricappliance with plugged in for many hours may cause the battery to be discharged.
o Do not use the power outlet to connect electric accessories orequipment other than those de-signed to operate on 12 volts.
o Some electronic devices can cause
electronic interference whenplugged into the power outlet. These devices may cause exces- sive audio noise and malfunctionsin other electronic systems or de- vices used in your vehicle. The front ashtray may be opened bypulling it up by its top edge. To close the ashtray cover firmly, let the lid gripprotrude outside. To remove the ash- tray to empty or clean it, pull the cover up all the way out.Either holder can be a drink holder or a ashtray holder.
B430A01TB-GAT FRONT ASHTRAY (If Installed)
HTB2036
Page 81 of 463
FEATURES OF YOUR HYUNDAI 1- 69
B460A01Y-AAT SUNROOF (If installed) Sun Shade
Your HYUNDAI is equipped with a sliding sunshade which you can manu- ally adjust to let in light with the sunroof closed, or to block sunlight.
Loading condition Switch
position
Driver only Driver + front passenger Full passengers (including driver)Full passengers (including driver) + full trunk loading (or light trailer loading)Driver + full trunk loading (or maximum trailer loading) 0
1 2
3 0
B470A01FC
WARNING:
Never adjust the sunshade while driving.!
B460B02GK-GAT Opening the Sunroof System The sunroof can be electrically opened or closed with the ignition key in the "ON" position. The sunroof is moved toits fully open position by pushing the "Open" switch, and to stop at the de- sired position, push in any switches(Open, Close, Up, Down). To close, press and hold the "CLOSE" button. Release the button when the sunroofreaches the desired position. HFC2021
Page 83 of 463

FEATURES OF YOUR HYUNDAI 1- 71
2. Insert the hexagonal head wrench
provided with the vehicle into the socket. This wrench can be found in the vehicle’s tailgate or glove box.
3. Turn the wrench counterclockwise to open or clockwise to close thesunroof. HGK033B460E01TB-GAT Resetting the Sunroof System If the battery has been recharged, disconnected, if the sunroof is oper- ated with the hexagonal head wrenchmanually, or if the sunroof operation is stopped by that ignition key is turned to the "OFF" position while it is moving,you may need to reset the sunroof. To do this;
1. Turn the ignition switch "OFF".
2. With pressing "open" "up" button at
the same time, turn the ignition switch "ON".
3. If the sunroof is set like this, the
sunroof is reset with tilting up/downautomatically once for all.
! CAUTION:
If the sunroof is not reset, it may not be operated properly.
With Sunroof
B480A01E-AAT FRONT INTERIOR LIGHT Map Light The two map light switches are located on both sides of the front overhead console. Push in the map light switchto turn the light on or off. This light produces a spot beam for convenient use as a map light at night or as apersonal light for the driver and the passenger.Without Sunroof
HTB050
Page 84 of 463

1- 72 FEATURES OF YOUR HYUNDAI
B500A01A-AAT GLOVE BOX
HTB101
WARNING:
Do not keep objects such as sharp or unsuitable things inside the spec- tacle case. Such objects can bethrown out in the event of a sudden stop or an accident, possibly injur- ing the passengers in the vehicle.
!
HTB102
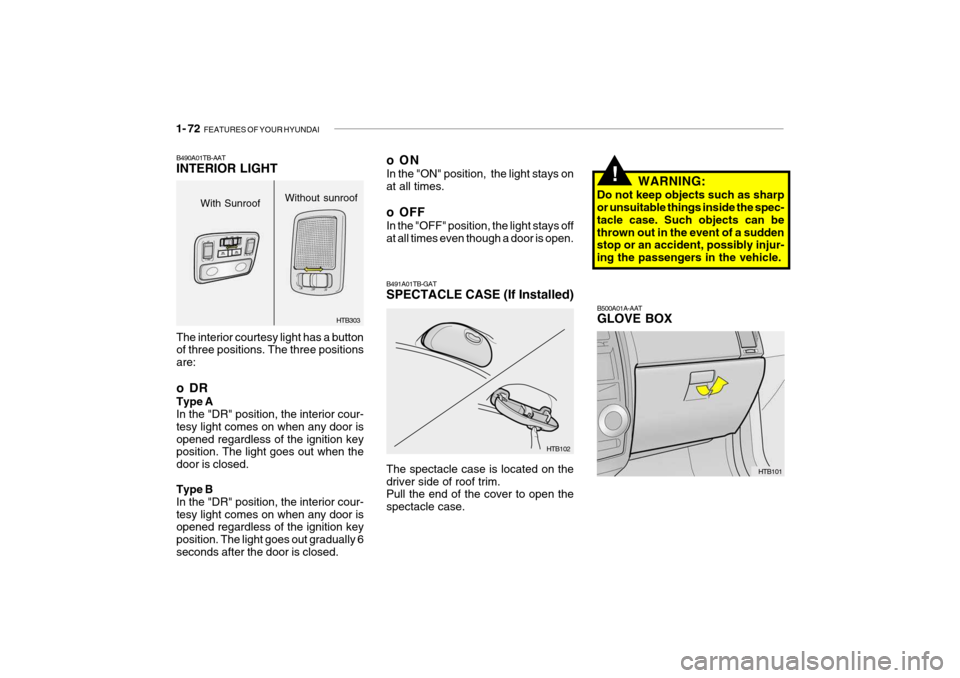
B491A01TB-GAT SPECTACLE CASE (If Installed) The spectacle case is located on the driver side of roof trim. Pull the end of the cover to open the spectacle case.
The interior courtesy light has a button of three positions. The three positions are:
oDR Type A In the "DR" position, the interior cour- tesy light comes on when any door isopened regardless of the ignition key position. The light goes out when the door is closed. Type B In the "DR" position, the interior cour-tesy light comes on when any door is opened regardless of the ignition key position. The light goes out gradually 6seconds after the door is closed.
B490A01TB-AAT INTERIOR LIGHT
HTB303
With Sunroof
Without sunroof
oON In the "ON" position, the light stays on at all times.
o OFF In the "OFF" position, the light stays off at all times even though a door is open.
Page 88 of 463

1- 76 FEATURES OF YOUR HYUNDAI
!
Always engage the parking brake be- fore leaving the car. This also turns on the parking brake indicator light whenthe key is in the "ON" or "START" position. Before driving away, be sure that the parking brake is fully releasedand the indicator light is off. Applying the parking brake To engage the parking brake, first apply the foot brake and then without press- ing the release button in, pull the park- ing brake lever up as far as possible. Inaddition it is recommended that when parking the vehicle on a gradient, the shift lever should be positioned in the
B530A03A-AAT PARKING BRAKE
B550A01S-GATHIGH-MOUNTED REAR STOP
LIGHT (If Installed) In addition to the lower-mounted rear stop lights on either side of the car, the high mounted rear stop light in thecenter of the rear window or inserted in the rear spoiler also lights when the brakes are applied.
HTB3024
B550A01TB
CAUTION:
Driving with the parking brake ap- plied will cause excessive brake pad (or lining) and brake rotor wear.
!
Releasing the parking brake To release the parking brake, first apply the foot brake and pull up the parking brake lever slightly. Secondly, depressthe release button and lower the parking brake lever while holding the button. WARNING:
Whenever leaving vehicle or parking always set the parking brake as far aspossible and fully engage the vehicle's transaxle into the park po- sition. Vehicles not fully engaged inpark with the parking brake set are at risk for moving inadvertently and injuring yourself or others.
appropriate low gear on manual transaxle vehicles or in the P (Park) position on automatic transaxle vehicles.
Page 91 of 463

FEATURES OF YOUR HYUNDAI 1- 79
B540A01FC-GAT TAIL GATE
HTB067
o Do not get back in the vehicle
while refueling. Do not operate anything that can produce static electricity. Static electricity dis-charge can ignite fuel vapors re- sulting in explosion.
o When using a portable fuel con-
tainer be sure to place the con-tainer on the ground while refuel- ing. Static electricity dischargefrom the container can ignite fuel vapors causing a fire. While start- ing refueling contact should bemaintained until the filling is com- plete.
o Do not use cellular phones around a gas station. The electric current or electronic interference fromcellular phones can ignite fuel vapors causing a fire.
o When refueling always shut the
engine off. Sparks by electricalequipment of the engine can ig- nite fuel vapors causing a fire.After refueling, check to make sure the fuel filler cap is securely closed, and then start the engine.
o Do not smoke or try to light ciga- rettes around a gas station. Auto-motive fuels are flammable. WARNING:
The tail gate should always be kept completely closed while the vehicle is in motion. If it is left open or ajar,poisonous exhaust gases may en- ter the car resulting in serious ill- ness or death to the occupants. Seeadditional warnings concerning ex- haust gases on page 2-2.
!
o The tail gate can be locked or un- locked with a key.
o The tail gate is opened by pulling the
outside handle up, raising the tail gate manually.
o To close, lower the tail gate, then
press down on it until it is closed. Tobe sure the tail gate is fully closed, always try to pull it up again without using the outside handle.
Page 120 of 463

1- 108 FEATURES OF YOUR HYUNDAI
!
HMP280B01TB-GAT
1. POWER ON-OFF Control
o The radio unit may be operated when
the ignition key is in the "ACC" or "ON" position. Press the button to switch the power on. The display shows the radio frequency in theradio mode, the tape direction indi- cator in the tape mode or CD ˆ
MP3
track in either the CD ˆ
MP3 mode or
CD AUTO CHANGER mode. Toswitch the power off, press the but- ton again.
o Push the FM ˆ
AM, TAPE or CD ˆ
MP3
to turn on that function without push-ing Power ON ˆ
OFF control knob.
VOLUME Control Rotate the knob clockwise to increase the volume and turn the knob counter-clockwise to reduce the volume.
2. BAND Selector Pressing the band selector FM ˆ
AM
changes the AM, FM1 and FM2 bands. The mode selected is shown on thedisplay. 3. TUNE (Manual) Select Knob Push the TUNE select knob (JOY STICK) upwards or downwards to in-crease or decrease the frequency. Re- lease the knob when the station is selected. SEEK Operation (Automatic Channel Selection) Push the TUNE select knob (JOY STICK) to the right or left, the frequencywill be automatically tuned to the next higher or lower available station.
4. SCAN When the scan button is pressed, the frequency will increase and the receiv-able stations will be tuned in one after another, receiving each station for 5 seconds. To stop scanning, press thescan button again.
5. Best Station Memory (BSM) When the BSM button is pressed the six channels from the highest field in- tensity are selected next and stored in memory. The stations selected arestored in the sequence frequency from the first preset key.
6. PRESET STATION Select
Buttons
Six (6) stations for AM, FM and FM2 respectively can be preset in the elec- tronic memory circuit.
WARNING:
Don't touch the button and joy stickswitch while driving. It can causedeath or serious injury in case of an accident.