2007 HONDA PILOT fold seats
[x] Cancel search: fold seatsPage 18 of 319
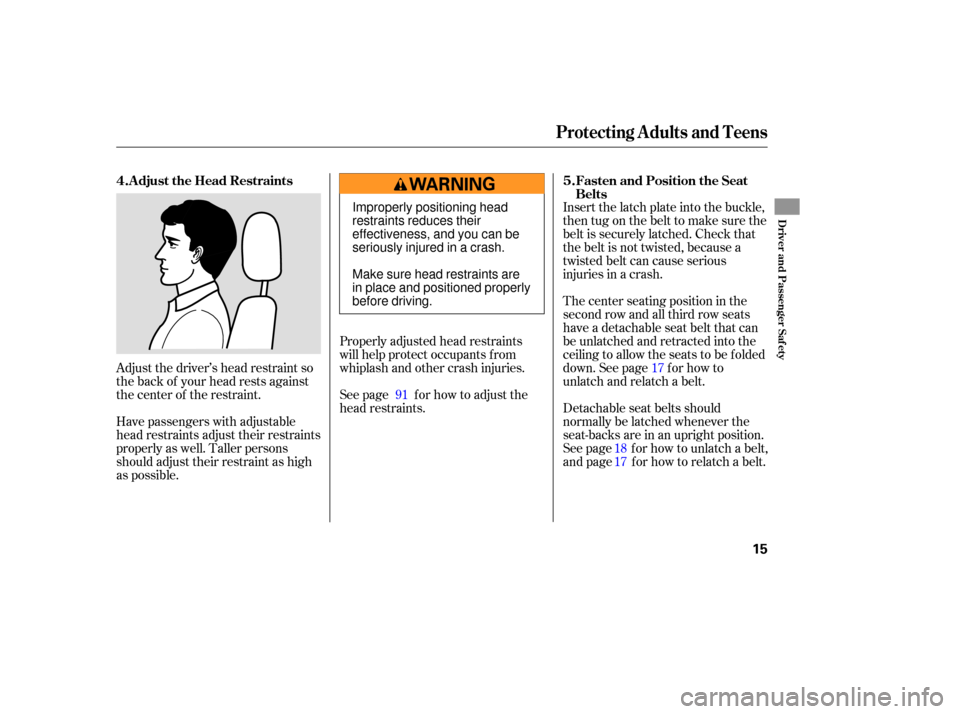
Properly adjusted head restraints
will help protect occupants from
whiplash and other crash injuries.
See page for how to adjust the
head restraints. Insert
the latch plate into the buckle,
then tug on the belt to make sure the
belt is securely latched. Check that
the belt is not twisted, because a
twisted belt can cause serious
inju ries in a crash.
Adjust the driver’s head restraint so
the back of your head rests against
the center of the restraint.
Have passengers with adjustable
head restraints adjust their restraints
properly as well. Taller persons
should adjust their restraint as high
as possible. The
center seating position in the
second row and all third row seats
have a detachable seat belt that can
be unlatched and retracted into the
ceiling to allow the seats to be folded
down. See page for how to
unlatch and relatch a belt.
Detachable seat belts should
norm ally be latched whenever the
seat-backs are in an upright position.
See page for how to unlatch a belt,
and page for how to relatch a belt.
91
17 1817
Adjust the Head Restraints
Fasten and Position the Seat
Belts
4.
5.
Protecting A dults and Teens
Driver and Passenger Saf ety
15
Improperly positioning head
restraints reduces their
effectiveness, and you can be
seriously injured in a crash.
Make sure head restraints are
in place and positioned properly
before driving.
Page 21 of 319

This could cause
very serious injuries in a crash.
See page f or additional
inf ormation about your seat belts
and how to take care of them. If a seat belt does not seem to work
properly, it may not protect the
occupant in a crash. Using a seat
belt that is not working properly can
result in serious injury or death.
Have your dealer check the belt as
soon as possible. After all occupants have adjusted
their seats and put on seat belts, it is
very important that they continue to
sit upright, well back in their seats,
with their feet on the floor, until the
vehicle is parked and the engine is
of f .
Sitting improperly can increase the
chance of injury during a crash. For
example, if an occupant slouches,
lies down, turns sideways, sits
forward, leans forward or sideways,
or puts one or both f eet up, the
chance of injury during a crash is
greatly increased.
To unlatch the detachable seat belt
anchor before folding down the seat-
back, insert your ignition key into
the slot on the side of the anchor
buckle and allow the seat belt to
retract. For the center seating
positions, place the latch plate and
anchor latch into their holding slots
in the ceiling. For the third row outer
seating positions, re-f asten the belt
with the clip. 21
Protecting A dults and Teens
Maintain a Proper Sitting
Position
6.Never place t he shoulder port ion of a
lap/shoulder belt under your arm orbehind your back.
No one should sit in a seat wit h aninoperat ive seat belt .
18
ANCHOR LATCH
ANCHOR BUCKLE
Page 92 of 319
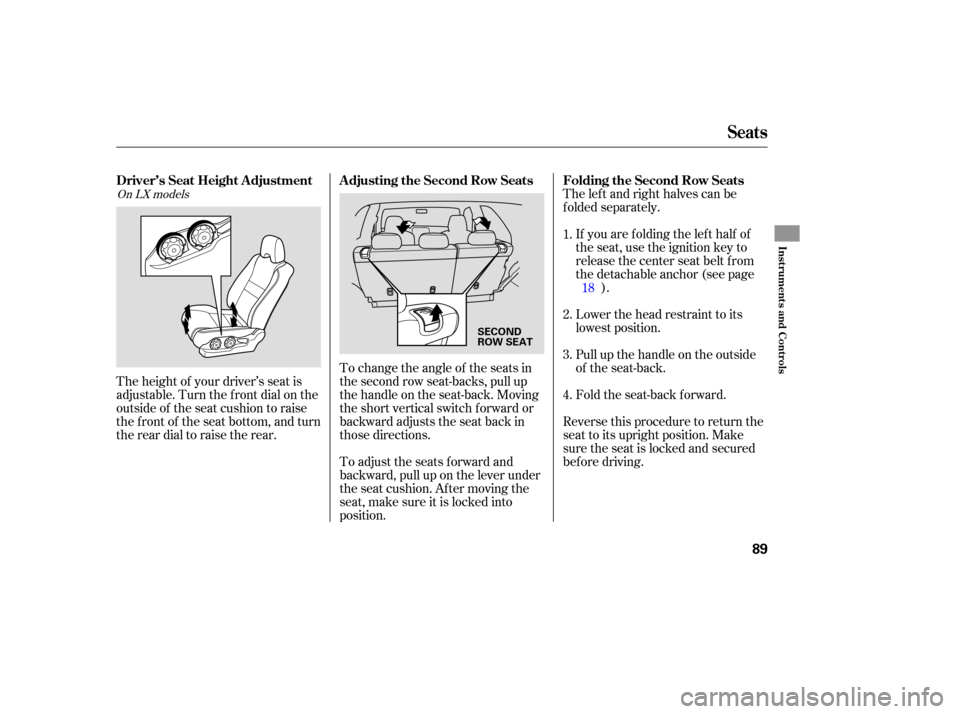
The left and right halves can be
folded separately.
If you are folding the left half of
the seat, use the ignition key to
release the center seat belt from
thedetachableanchor(seepage ).
Lower the head restraint to its
lowest position.
Pull up the handle on the outside
of the seat-back.
Fold the seat-back forward.
To change the angle of the seats in
the second row seat-backs, pull up
the handle on the seat-back. Moving
the short vertical switch f orward or
backward adjusts the seat back in
those directions.
To adjust the seats forward and
backward, pull up on the lever under
the seat cushion. Af ter moving the
seat, make sure it is locked into
position.
The height of your driver’s seat is
adjustable. Turn the front dial on the
outside of the seat cushion to raise
the front of the seat bottom, and turn
the rear dial to raise the rear.
Reverse this procedure to return the
seat to its upright position. Make
sure the seat is locked and secured
bef ore driving. 2.
3. 1.
4.18On LX models
Seats
Folding the Second Row Seats
Adjusting the Second Row Seats
Driver’s Seat Height A djustment
Inst rument s and Cont rols
89
SECOND
ROW SEAT
Page 93 of 319
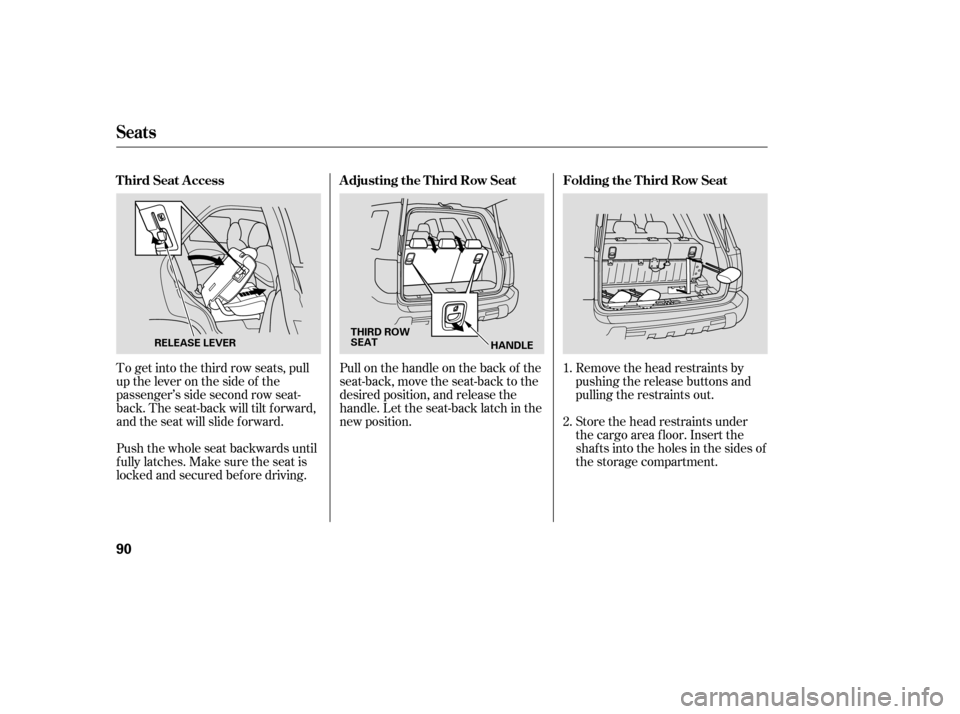
Remove the head restraints by
pushing the release buttons and
pulling the restraints out.
Store the head restraints under
the cargo area floor. Insert the
shafts into the holes in the sides of
the storage compartment.
Pull on the handle on the back of the
seat-back, move the seat-back to the
desired position, and release the
handle. Let the seat-back latch in the
new position.
To get into the third row seats, pull
uptheleveronthesideof the
passenger’s side second row seat-
back. The seat-back will tilt f orward,
and the seat will slide f orward.
Push the whole seat backwards until
f ully latches. Make sure the seat is
locked and secured bef ore driving. 1.
2.
Seats
Folding the T hird Row Seat
A djusting the T hird Row Seat
T hird Seat A ccess
90
THIRD ROW
SEAT
HANDLE
RELEASE LEVER
Page 94 of 319
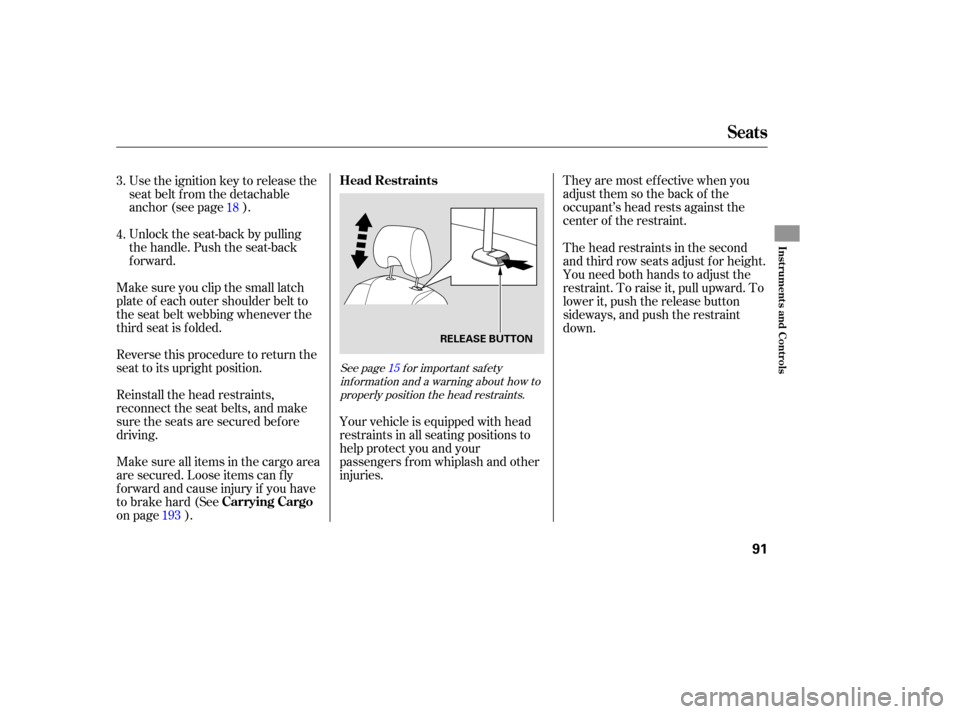
They are most effective when you
adjust them so the back of the
occupant’s head rests against the
center of the restraint.
Your vehicle is equipped with head
restraints in all seating positions to
help protect you and your
passengers from whiplash and other
injuries.
Use
the ignition key to release the
seat belt from the detachable
anchor (see page ).
Unlock the seat-back by pulling
the handle. Push the seat-back
forward.
Make sure you clip the small latch
plate of each outer shoulder belt to
the seat belt webbing whenever the
third seat is folded.
Reverse this procedure to return the
seat to its upright position.
Reinstall the head restraints,
reconnect the seat belts, and make
sure the seats are secured before
driving.
Ma ke sure all items in the cargo area
are secured. Loose items can fly
forward and cause injury if you have
to brake hard (See
on page ). The
head restraints in the second
and third row seats adjust for height.
You need both hands to adjust the
restraint. To raise it, pull upward. To
lower it, push the release button
sideways, and push the restraint
down.
3.
4.
18
193
See page f or important saf ety inf ormation and a warning about how toproperly position the head restraints. 15
Seats
Head Restraints
Carrying Cargo
Inst rument s and Cont rols
91
RELEASE BUTTON
Page 196 of 319
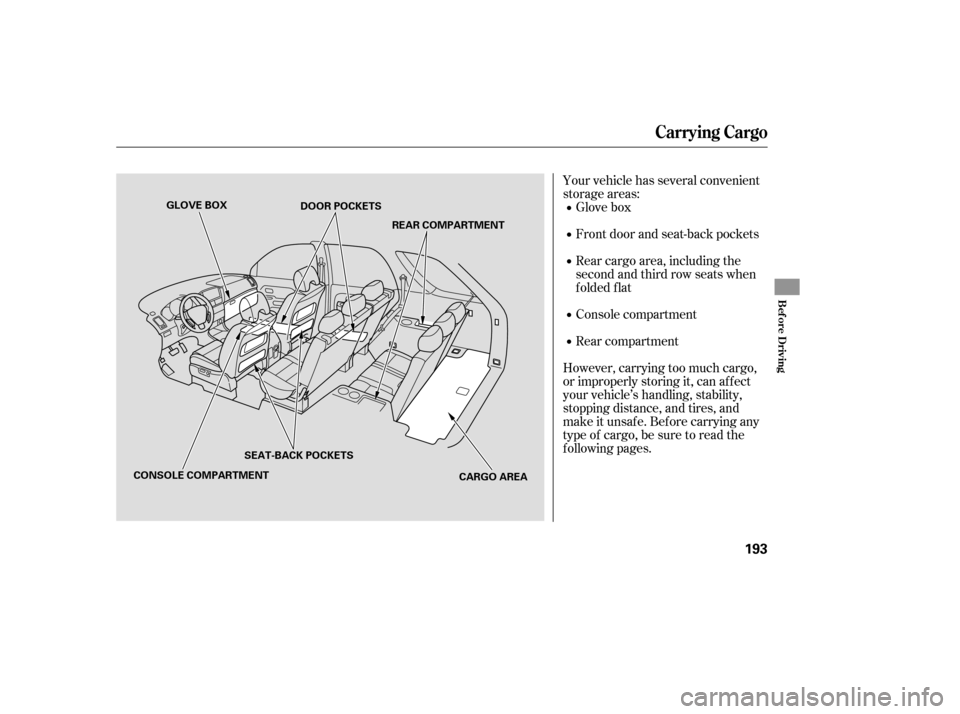
Your vehicle has several convenient
storage areas:Glove box
Front door and seat-back pockets
Rear cargo area, including the
second and third row seats when
folded flat
Console compartment
Rear compartment
However, carrying too much cargo,
or improperly storing it, can af f ect
your vehicle’s handling, stability,
stopping distance, and tires, and
make it unsaf e. Bef ore carrying any
type of cargo, be sure to read the
f ollowing pages.
Carrying Cargo
Bef ore Driving
193
GLOVE BOX
CARGO AREA
CONSOLE COMPARTMENT DOOR POCKETS
SEAT-BACK POCKETS REAR COMPARTMENT
Page 198 of 319

Store or secure all items that could
be thro wn around and hurt
someone during a crash. If
you use an accessory roof rack,
the roof rack weight limit may be
lower. Refer to the info rmation that
came with your roof rack.
Theseparationnetcanbeusedto
hold back soft, lightweight items
stored in the cargo area. Heavy
items should be properly secured on
the floor of the cargo area. The net
may not prevent heavy items from
being thrown forward in a crash or a
sudden stop.
Be
sure items placed on the floor
behind the front seats cannot roll
under the seats and interfere with
the driver’s ability to operate the
pedals, the proper operation of the
seats, or proper operation of the
sensors under the seats.
Keep the glove box closed while
driving. If it is open, a passenger
could injure their knees during a
crash or sudden stop. The
cargo cover can be used to
cover the cargo area behind the third
row seats. When the third row seats
are folded down, the cargo cover can
be exte nded over the larger area. Do
not install the cover over the larger
area if the third row seats are not
folded down.
Ifyoufoldthesecondorthirdrow
seats
down, tie down items that
could be thrown about the vehicle
during a crash or sudden stop.
Also, keep all cargo below the
bottom of the windows. If it is
higher, it could interfere with the proper operation of the side
curtain airbags.
If you carry large items that
prevent you f rom closing the
tailgate, exhaust gas can enter the
passenger area. To avoid the
possibility of
, f ollow the instructions
on page . Distribute cargo evenly on the
f loor of the cargo area, placing the
heaviest items on the bottom and
as far forward as possible. Tie
down items that could be thrown
about the vehicle during a crash or
sudden stop.
If you carry any items on a roof
rack,besurethetotalweightof
the rack and the items does not
exceed 165 lbs (75 kg). 57
Carrying Cargo
Optional Separation Net
Optional Cargo Cover
Carrying Items in the Passenger
Compartment
carbon monoxide
poisoning
Carrying Cargo in the Cargo A rea
Bef ore Driving
195
Page 315 of 319

...................
Radiator Overheating .274
.............
Radio/CD Sound System .115
...........................
Readiness Codes .298
...............................
Rear A/C Unit .113
............
Rear Audio Control Panel .147
........
Rear Entertainment System .142
..
Rear Lights, Bulb Replacement .252
.
Rear View Camera and Monitor .180
............................
Rear View Mirror .92
.................
Rear Window Def ogger .77
.
Rear Window Wiper and Washer .74
..........
Reclining the Seat Backs .87-91
.............................
Reminder Lights .61
................
Remote Audio Controls .138
.................
Remote Control (RES) .169
.......................
Remote Transmitter .83
Replacement Inf ormation
................
Engine Oil and Filter .240
.................................
Floor Mats .254
..........................................
Fuses .279
................................
Light Bulbs .248
........................................
Minder .235
................................
Timing Belt .245
...........................................
Tires .259 .............................
Wiper Blades .255
Replacing Seat Belts Af ter a ............................................
Crash .23
...
Reserve Tank, Engine Coolant .190
...............................
Restraint, Child .38
..................
Reverse Gear Position .201
................................
Rotation, Tire .260
......................................
Saf ety Belts .10
............
Safety Defects, Reporting .304
.................................
Saf ety Features .9
.........................................
Airbags .11
.....................................
Seat Belts .10
.............
Saf ety Labels, Location of . 58
..............................
Saf ety Messages .iii
.........................................
Seat Belts .10
...............
Additional Information . 21
Automatic Seat Belt ...............................
Tensioners .23
.....................................
Cleaning .254
......................
Lap/Shoulder Belt .22
................................
Maintenance .23
Reminder Light and ................................
Beeper . 21, 62 ...................
System Components . 25
...............
Use During Pregnancy . 19
...
Wearing a Lap/Shoulder Belt . 15
....................................
Seat Heaters .86
.................................................
Seats .87
............
Folding the Second Seat . 89
...............
Folding the Third Seat . 90
..........................
Head Restraints .91
.........
Reclining the Second Seat . 89
............
Reclining the Third Seat . 90
.......................
Third Seat Access .90
...................
Se ats, Adjusting the . 87-91
............................
Security System .174
...............................
Serial Number .286
...........................
Service Intervals .229
.............................
Service Manual .305
.........
Service Station Procedures . 187
..........................
Setting the Clock .140
Shif ting the Automatic .............................
Transmission .200
.....
Shif t Lever Position Indicator . 200
........................
Shif t Lock Release .203
Side Marker Lights, Bulb .........................
Replacement in .249
..............................
Side Airbags . 11, 31
..........................
Off Indicator . 34, 63
Index
R
S
VI