Page 8 of 304
�Î
�Î�Î
�Î
CONT INUED: If equipped
Your Vehicle at a Glance
Your Vehicle at a Glance
3
POWER WINDOW
SWITCHESGAUGES
POWER DOOR LOCK
MASTER SWITCH FUEL FILL DOOR
RELEASE HANDLE TRUNK RELEASE
HANDLE
DRIVER’S FRONT
AIRBAG
HEATING/COOLING
CONTROLS
AUTOMATIC
TRANSMISSIONMANUAL
TRANSMISSION
MIRROR CONTROLS
INSTRUMENT PANEL INDICATORS
AUDIO SYSTEMMOONROOF SWITCH
Vehicle with navigation system is shown. PASSENGER’S FRONT AIRBAG
DOOR LOCK TABACCESSORY
POWER SOCKET
AUXILIARY INPUT JACK
(P. 57)
(P. 66)
(P.9,24) (P. 99)
(P. 80)
(P. 96) (P. 177) (P. 87) (P. 110)
(P. 97)
(P.9,24)
(P. 106)(P. 103)
(P. 194) (P. 191)
(P. 167) (P. 79)
�����—�����—�����y���������������y���
�(�#�����
���y���������y
Page 15 of 304
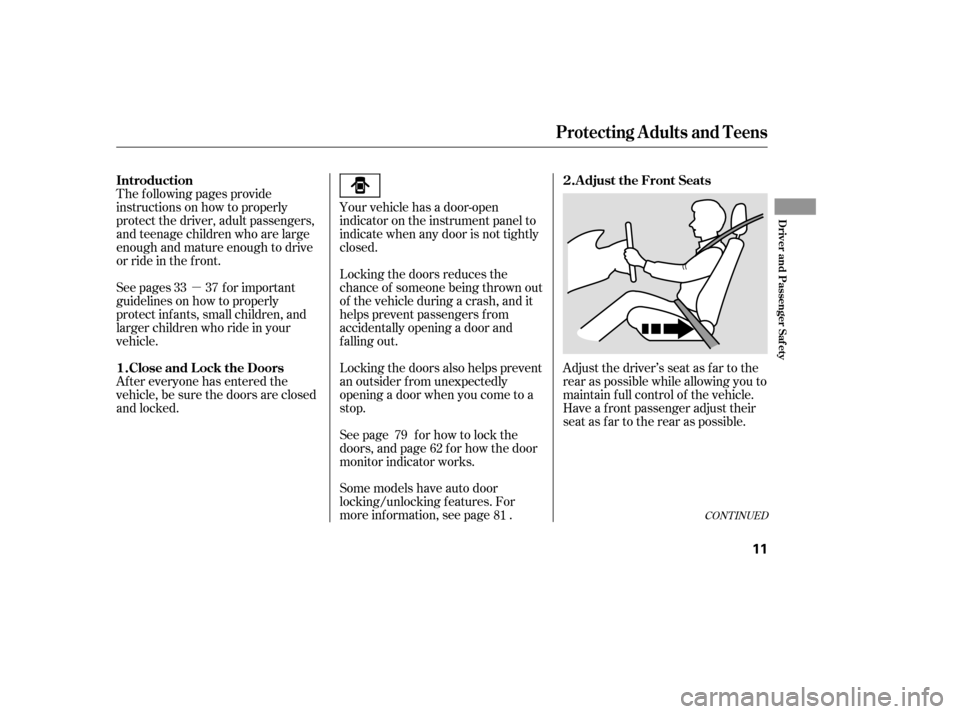
�µAdjust the driver’s seat as far to the
rear as possible while allowing you to
maintain f ull control of the vehicle.
Have a front passenger adjust their
seat as far to the rear as possible.
The f ollowing pages provide
instructions on how to properly
protect the driver, adult passengers,
and teenage children who are large
enough and mature enough to drive
or ride in the f ront.
See pages f or important
guidelines on how to properly
protect inf ants, small children, and
larger children who ride in your
vehicle.
Af ter everyone has entered the
vehicle, be sure the doors are closed
and locked.
Your vehicle has a door-open
indicator on the instrument panel to
indicate when any door is not tightly
closed.
Locking the doors reduces the
chance of someone being thrown out
of the vehicle during a crash, and it
helps prevent passengers f rom
accidentally opening a door and
f alling out.
Locking the doors also helps prevent
an outsider f rom unexpectedly
opening a door when you come to a
stop.
See page f or how to lock the
doors, and page f or how the door
monitor indicator works.
Some models have auto door
locking/unlocking f eatures. For
more inf ormation, see page .
62
33 37
7981
CONT INUED
Adjust the Front Seats
Introduction
Close and L ock the Doors
1. 2.
Protecting A dults and T eens
Driver and Passenger Saf ety
11
�����—�����—�����y���������������y���
�(�#�����
���y�����
���y
Page 23 of 304
CONT INUED
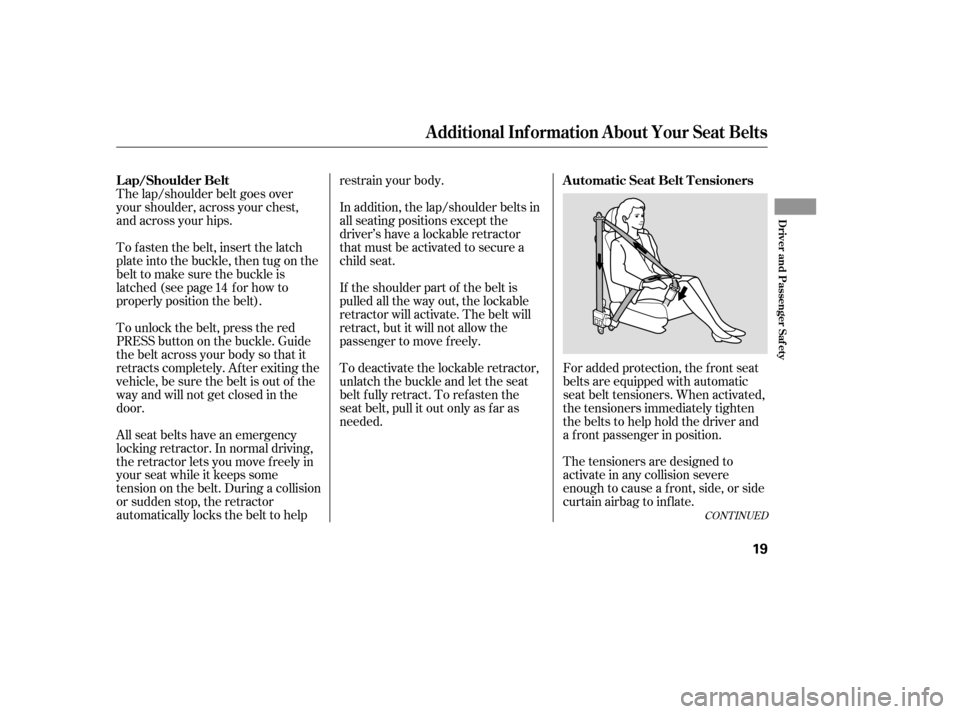
For added protection, the f ront seat
belts are equipped with automatic
seat belt tensioners. When activated,
the tensioners immediately tighten
the belts to help hold the driver and
a f ront passenger in position.
The tensioners are designed to
activate in any collision severe
enough to cause a f ront, side, or side
curtainairbagtoinflate.
The lap/shoulder belt goes over
your shoulder, across your chest,
and across your hips.
To fasten the belt, insert the latch
plate into the buckle, then tug on the
belt to make sure the buckle is
latched (see page f or how to
properly position the belt).
To unlock the belt, press the red
PRESSbuttononthebuckle.Guide
the belt across your body so that it
retracts completely. Af ter exiting the
vehicle, be sure the belt is out of the
way and will not get closed in the
door.
All seat belts have an emergency
locking retractor. In normal driving,
the retractor lets you move f reely in
your seat while it keeps some
tension on the belt. During a collision
or sudden stop, the retractor
automatically locks the belt to help restrain your body.
If the shoulder part of the belt is
pulled all the way out, the lockable
retractor will activate. The belt will
retract, but it will not allow the
passenger to move f reely.
To deactivate the lockable retractor,
unlatch the buckle and let the seat
belt fully retract. To refasten the
seat belt, pull it out only as f ar as
needed.
In addition, the lap/shoulder belts in
all seating positions except the
driver’s have a lockable retractor
that must be activated to secure a
child seat.
14
Additional Inf ormation About Your Seat Belts
A utomatic Seat Belt T ensioners
L ap/Shoulder Belt
Driver and Passenger Saf ety
19
�����—�����—�����y�������������
�y���
�(�#�����
���y���������y
Page 59 of 304
�Î
�Î
�Î �Î
: If equipped
Cont rol L ocat ions
56
POWER WINDOW
SWITCHES AUDIO SYSTEM
HEATING/COOLING
CONTROLS
POWER DOOR LOCK
MASTER SWITCH
MIRROR CONTROLS
FUEL FILL DOOR
RELEASE HANDLE
AUTOMATIC
TRANSMISSION
MANUAL
TRANSMISSION
MOONROOF SWITCH
TRUNK RELEASE
HANDLE
Vehicle with navigation system is shown. INSTRUMENT PANEL INDICATORS
ACCESSORY
POWER
SOCKET
AUXILIARY INPUT JACK DOOR LOCK TAB
GAUGES
(P. 57)
(P. 66)
(P. 99)
(P. 80)
(P. 96) (P. 87) (P. 97)
(P. 110)
(P. 106)
(P. 103) (P. 194) (P. 191)
(P. 167)
(P. 177) (P. 79)
�����—�����—�����y���������������y���
�(�#�����
���y�������
�y
Page 63 of 304

This indicator normally comes on f or
a f ew seconds when you turn the
ignition switch to the ON (II)
position. If it comes on at any other
time, there is a problem with the
ABS. If this happens, have your
vehicle checked at a dealer. With
this indicator on, your vehicle still
has normal braking ability but no
anti-lock f unction. For more
inf ormation, see page .
This indicator comes on f or several
seconds when you turn the ignition
switch to the ON (II) position. If it
comes on at any other time, it
indicates a potential problem with
your f ront airbags. This indicator will
also alert you to a potential problem
with your side airbags, passenger’s
side airbag automatic cutoff system,
side curtain airbags, automatic seat
belt tensioners, driver’s seat position
sensor, or the f ront passenger’s
weight sensors. For more
inf ormation, see page .
This indicator comes on when you
turn the ignition switch to the ON
(II) position. If it comes on at any
other time, it indicates that the
passenger’s side airbag has
automatically shut off. For more
inf ormation, see page .
This indicator comes on brief ly when
you turn the ignition switch to the
ON (II) position. It will then go of f if
you have inserted a properly-coded
ignition key. If it is not a properly-
coded key, the indicator will blink,
and the engine’s f uel system will be
disabled (see page ).
77
29 30
200
Supplemental Restraint
System Indicator
Immobilizer System
Indicator
Anti-lock Brake System
(A BS) Indicator Side Airbag Of f
Indicator
Instrument Panel Indicators
60
U.S. Canada
�����—�����—�����y�������������
�y���
�(�#�����
���y���������y
Page 81 of 304
�µ
�µ
�µ
�µ If the f ront wheels are turned, the
anti-thef t lock may make it dif f icult
to turn the key. Firmly turn the
steering wheel to the lef t or right as
you turn the key.
You can
operate the audio system and the
accessory power sockets in this
position.
This is the normal key
position when driving. Several of the
indicators on the instrument panel
come on as a test when you turn the
ignition switch f rom the
ACCESSORY (I) to the ON (II)
position.
Use this position
only to start the engine. The switch
returns to the ON (II) position when
you let go of the key.
You can insert or
remove the key only in this position.
To turn the key, push it in slightly. If
your vehicle has an automatic
transmission, the shif t lever must
also be in park.
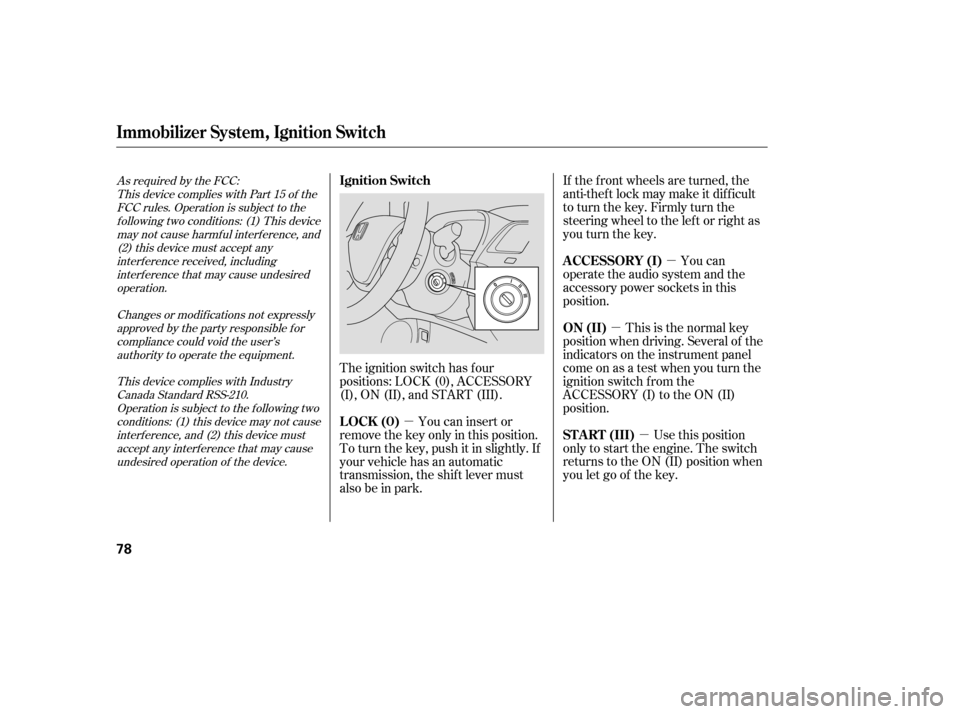
The ignition switch has f our
positions: LOCK (0), ACCESSORY
(I), ON (II), and START (III).
As required by the FCC:
This device complies with Part 15 of theFCC rules. Operation is subject to thef ollowing two conditions: (1) This device
may not cause harmf ul interf erence, and(2) this device must accept any
interf erence received, includinginterf erence that may cause undesired
operation.
Changes or modif ications not expresslyapproved by the party responsible f or
compliance could void the user’s authority to operate the equipment.
This device complies with IndustryCanada Standard RSS-210. Operation is subject to the f ollowing two
conditions: (1) this device may not causeinterf erence, and (2) this device must
accept any interf erence that may cause undesired operation of the device.
Immobilizer Syst em, Ignition Switch
A CCESSORY (I)
ON (II)
ST A RT (III)
Ignition Switch
LOCK (0)
78
�����—�����—�����y�������������
�y���
�(�#�����
���y���������y
Page 82 of 304
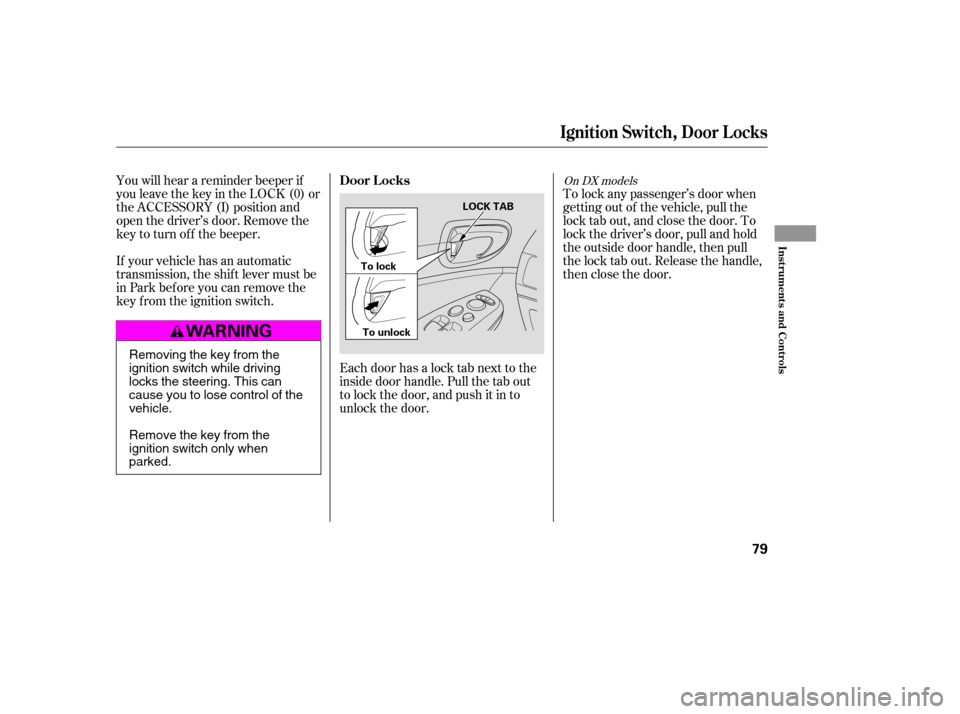
Each door has a lock tab next to the
inside door handle. Pull the tab out
to lock the door, and push it in to
unlock the door.To lock any passenger’s door when
getting out of the vehicle, pull the
lock tab out, and close the door. To
lock the driver’s door, pull and hold
the outside door handle, then pull
the lock tab out. Release the handle,
then close the door.
You will hear a reminder beeper if
you leave the key in the LOCK (0) or
the ACCESSORY (I) position and
open the driver’s door. Remove the
key to turn of f the beeper.
If your vehicle has an automatic
transmission, the shif t lever must be
in Park bef ore you can remove the
key f rom the ignition switch.
On DX models
Ignit ion Swit ch, Door L ocks
Door L ocks
Inst rument s and Cont rols
79
LOCK TAB
To lock
To unlock
Removing the key from the
ignition switch while driving
locks the steering. This can
cause you to lose control of thevehicle.
Remove the key from the
ignition switch only whenparked.
�����—�����—�����y���������������y���
�(�#�����
���y���������y
Page 84 of 304
CONT INUED
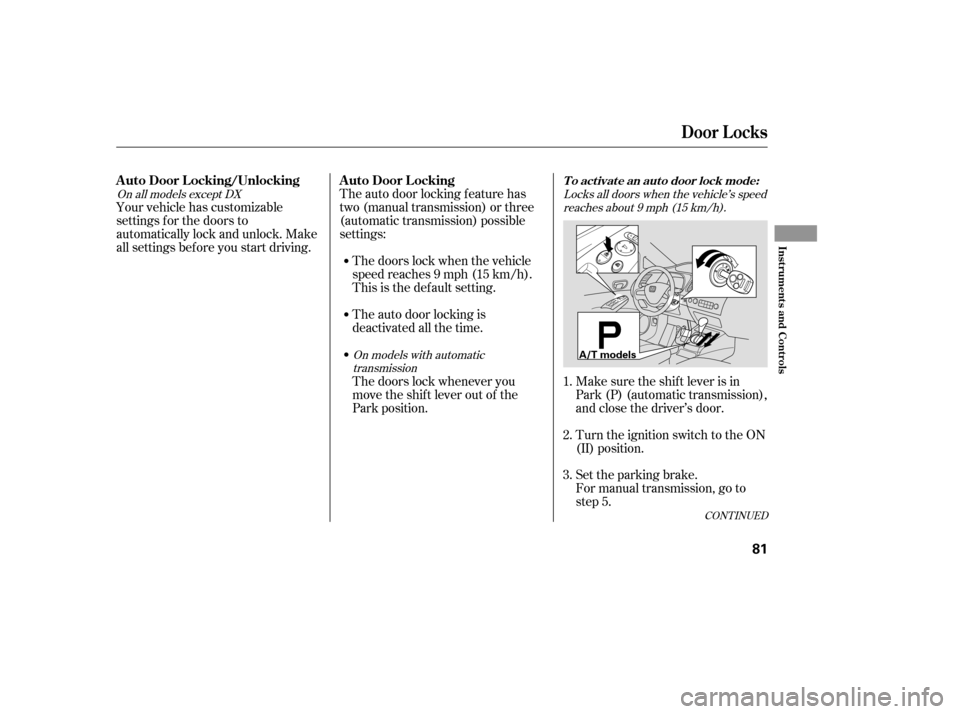
Locks all doors when the vehicle’s speedreaches about 9 mph (15 km/h).
On models with automatic transmission
On all models except DX
For manual transmission, go to
step 5.
Set the parking brake.
Make sure the shif t lever is in
Park (P) (automatic transmission),
and close the driver’s door.
Turn the ignition switch to the ON
(II) position.
Your vehicle has customizable
settings f or the doors to
automatically lock and unlock. Make
all settings bef ore you start driving.
The auto door locking f eature has
two (manual transmission) or three
(automatic transmission) possible
settings:
The doors lock when the vehicle
speed reaches 9 mph (15 km/h).
This is the def ault setting.
The auto door locking is
deactivated all the time.
The doors lock whenever you
move the shift lever out of the
Park position. 1. 2. 3.
Door L ocks
To activate an auto door lock mode:A uto Door L ocking/Unlocking A uto Door L ocking
Inst rument s and Cont rols
81
A/T models
�����—�����—�����y�������������
�y���
�(�#�����
���y���������y