Page 248 of 311
To saf ely operate your vehicle, your
tires must be the proper type and
size, in good condition with adequate
tread, and correctly inf lated.
The f ollowing pages give more
detailed inf ormation on how to take
care of your tires and what to do
when they need to be replaced.Keeping the tires properly inf lated
provides the best combination of
handling, tread lif e, and riding
comf ort.
Underinf lated tires wear unevenly,
adversely affect handling and fuel
economy, and are more likely to
fail from being overheated.
Overinf lated tires can make your
vehicleridemoreharshly,are
more prone to damage f rom road
hazards, and wear unevenly.
We recommend that you visually
check your tires every day. If you
think a tire might be low, check it
immediately with a tire gauge.
Install the new blade onto the
blade assembly:
Pull back either end of the blade
assembly.
Place the side of the blade not
labeled‘‘LOCK’’ontheendof
the blade assembly, and slide
the blade onto the assembly
until it is f ully installed.
Slide the wiper blade assembly
onto the wiper arm. Make sure it
locks in place.
Reinstall the cover onto the blade
assembly.
Lower the wiper arm down against
the windshield, the passenger’s
side first, then the driver’s side. Make sure the blade is completely
installed and that its edge is not
bunched up.
6.
7.
8.
9.
10.
CONT INUED
Wiper Blades, Tires
T ires Inf lation Guidelines
Maint enance
245
Using tires that are excessively
worn or improperly inflated can
cause a crash in which you can
be seriously hurt or killed.
Follow all instructions in this
owner’s manual regarding tire
inflation and maintenance.
Page 250 of 311
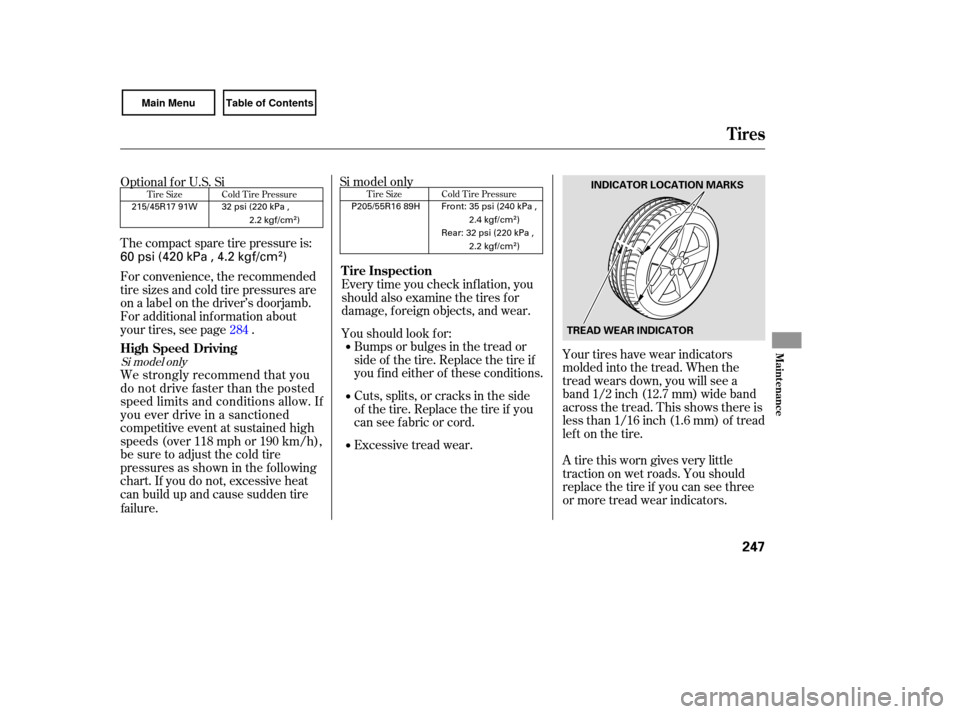
Your tires have wear indica tors
molded into the tread. When the
tread wears down, you will see a
band 1/2 inch (12.7 mm) wide band
across the tread. This shows there is
less than 1/16 inch (1.6 mm) of tread
left on the tire.
A tire this worn gives very little
traction on wet roads. You should
replace the tire if you can see three
or more tread wear indicators.
Bumps
or bulges in the tread or
side of the tire. Replace the tire if
youfindeitheroftheseconditions.
Cu ts, splits, or cracks in the side
of the tire. Replace the tire if you
can see fabric or cord.
Excessive tread wear.
Every
time you check inflation, you
should also examine the tires for
damage, foreign objects, and wear.
Youshouldlookfor:
Thecompactsparetirepressureis:
For
convenience, the recommended
tire sizes and cold tire pressures are
on a label on the driver’s doorjamb.
For additional inf ormation about
your tires, see page . Optional f or U.S. Si
284
Tire Size Cold Tire Pressure
Tires
Tire Inspection
Maint enance
247
TREAD WEAR INDICATORINDICATOR LOCATION MARKS
60 psi (420 kPa , 4.2 kgf/cm)
32 psi (220 kPa ,
2.2 kgf/cm
)
215/45R17 91W
competitive event at sustained high
speeds (over 118 mph or 190 km/h),
be sure to adjust the cold tire
pressures as shown in the following We strongly recommend that you
do not drive faster than the posted
speed limits and conditions allow. If
you ever drive in a sanctioned
Si model only
High Speed Driving
Tire Size Cold Tire Pressure
Front: 35 psi (240 kPa ,
2.4 kgf/cm
)
P205/55R16 89H
Rear: 32 psi (220 kPa ,
2.2 kgf/cm
)
Si model only
chart. If you do not, excessive heat
can build up and cause sudden tire
failure.
Page 258 of 311
This section covers the more
common problems that motorists
experience with their vehicles. It
gives you inf ormation about how to
safely evaluate the problem and what
to do to correct it. If the problem has
stranded you on the side of the road,
you may be able to get going again.
If not, you will also f ind instructions
on getting your vehicle towed.......................
Compact Spare Tire .256
....................
Changing a Flat Tire .257
.............
If the Engine Won’t Start .261
................................
Jump Starting .263
..............
If the Engine Overheats .265
.........
Low Oil Pressure Indicator .267
..........
Charging System Indicator .267
.......
Malf unction Indicator Lamp .268
...............
Brake System Indicator .269
..............................................
Fuses .270
..............................
Fuse Locations .274
......................
Emergency Towing .276
Taking Care of the Unexpected
T aking Care of t he Unexpect ed
255
Page 259 of 311
Check the inflation pressure of the
compact spare tire every time you
check the other tires. It should be
inflated to: Follow
these precautions:
Never exceed 50 mph (80 km/h).
This tire gives a harsher ride and
less traction on some road
surfaces. Use greater caution
while driving.
Use
the compact spare tire as a
temporary replacement only. Get
your regular tire repaired or replaced,
and put it back on your vehicle as
soon as you can.
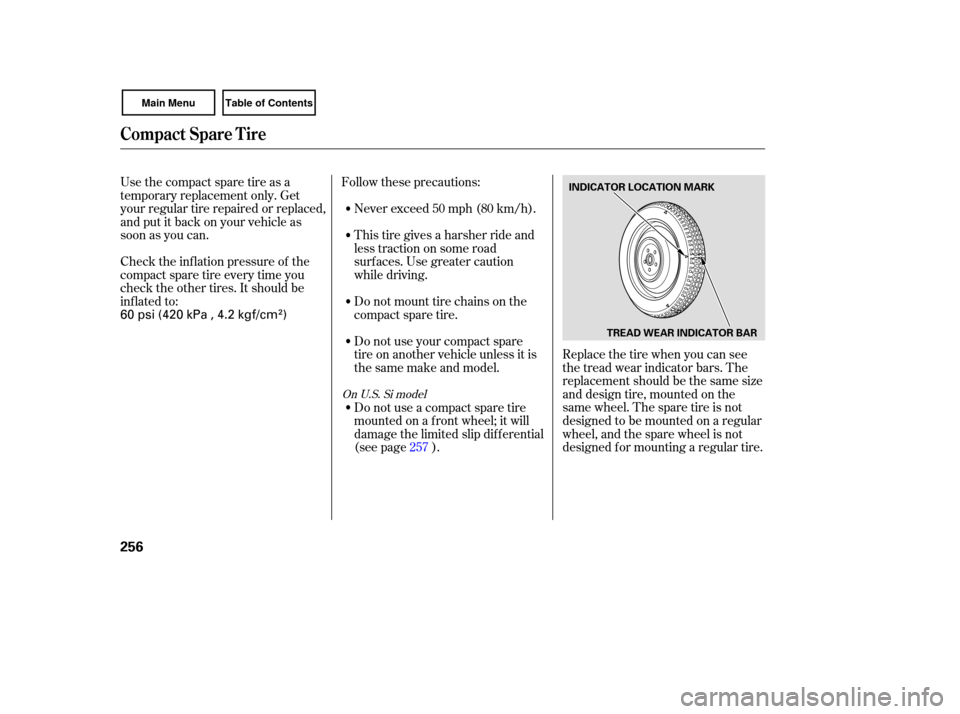
Replace the tire when you can see
the tread wear indica tor bars. The
replacement should be the same size
and design tire, mounted on the
same wheel. The spare tire is not
designed to be mounted on a regular
wheel, and the spare wheel is not
designed for mounting a regular tire.
Do
not mount tire chains on the
compact spare tire.
Do not use your compact spare
tire on another vehicle unless it is
thesamemakeandmodel.
Do not use a compact spare tire
mounted on a f ront wheel; it will
damage the limited slip dif f erential
(see page ). 257
On U.S. Si model
Compact Spare Tire
256
INDICATOR LOCATION MARK
TREAD WEAR INDICATOR BAR
60 psi (420 kPa , 4.2 kgf/cm)
Page 260 of 311
Turn on the hazard warning lights,
and turn the ignition switch to the
LOCK (0) position. Have all
passengers get out of the vehicle
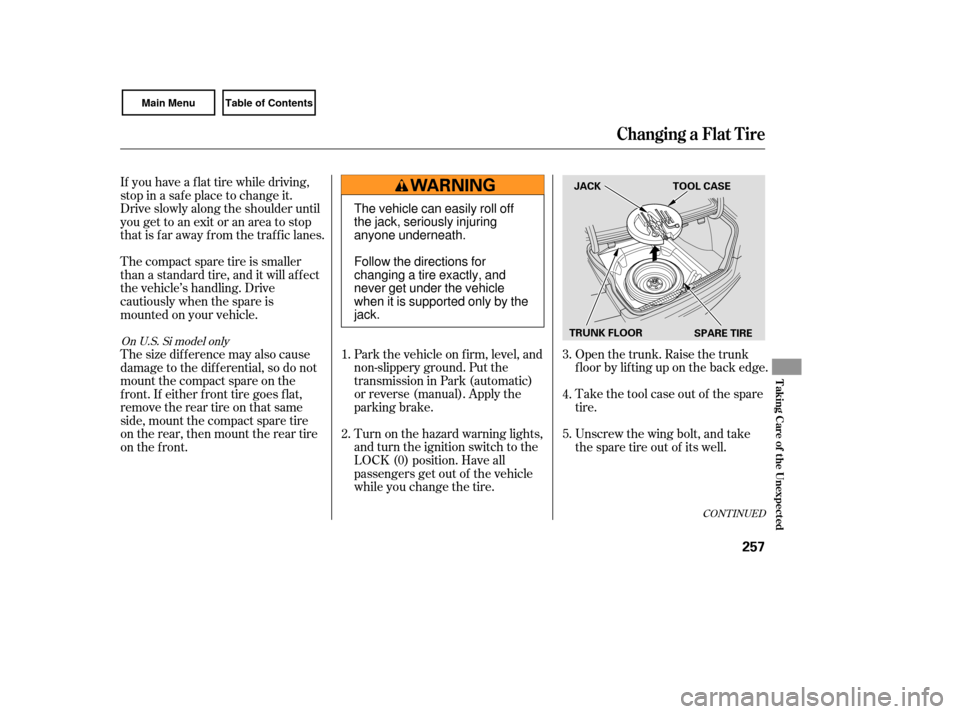
while you change the tire. Park the vehicle on f irm, level, and
non-slippery ground. Put the
transmission in Park (automatic)
or reverse (manual). Apply the
parking brake.Open the trunk. Raise the trunk
f loor by lif ting up on the back edge.
Take the tool case out of the spare
tire.
Unscrew the wing bolt, and take
the spare tire out of its well.
If you have a f lat tire while driving,
stop in a saf e place to change it.
Drive slowly along the shoulder until
you get to an exit or an area to stop
that is far away from the traffic lanes.
Thecompactsparetireissmaller
than a standard tire, and it will affect
the vehicle’s handling. Drive
cautiously when the spare is
mounted on your vehicle.
Thesizedifferencemayalsocause
damage to the dif f erential, so do not
mount the compact spare on the
f ront. If either f ront tire goes f lat,
removethereartireonthatsame
side, mount the compact spare tire
on the rear, then mount the rear tire
on the f ront.
5. 4.
3.
2. 1.
CONT INUED
On U.S. Si model only
Changing a Flat Tire
T aking Care of t he Unexpect ed
257
SPARE TIRE
TRUNK FLOOR JACK TOOL CASE
The vehicle can easily roll off
the jack, seriously injuring
anyone underneath.
Follow the directions for
changing a tire exactly, and
never get under the vehicle
when it is supported only by the
jack.
Page 261 of 311
Loosen each wheel nut 1/2 turn
with the wheel nut wrench.Place the jack under the jacking
point. Turn the end bracket
clockwise until the top of the jack
contacts the jacking point. Make
sure the jacking point tab is
restinginthejacknotch.Use the extension and the wheel
nut wrench as shown to raise the
vehicle until the f lat tire is of f the
ground.
Remove the wheel nuts, then
remove the f lat tire. Handle the
wheel nuts caref ully; they may be
hot from driving. Place the flat tire
on the ground with the outside
surface facing up.
6. 7. 8.
9.
Changing a Flat Tire
258
JACKING POINTS
WHEEL NUT WRENCH EXTENSION
WHEEL NUT WRENCH
Page 262 of 311
Bef ore mounting the spare tire,
wipeanydirtoff themounting
surface of the wheel and hub with
a clean cloth. Wipe the hub
carefully;itmaybehotfrom
driving.Put on the spare tire. Put the
wheel nuts back on f inger-tight,
then tighten them in a crisscross
pattern with the wheel nut wrench
until the wheel is f irmly against
the hub. Do not try to tighten the
wheel nuts f ully.
Lower the vehicle to the ground,
and remove the jack.
Do not attempt to forcibly pry the
wheel cover of f with a screwdriver or
other tool. The wheel cover cannot
be removed without f irst removing
the wheel nuts. 10. 11.
12.
CONT INUED
DX, U.S. LX, and Canadian DX-G
models:
Changing a Flat Tire
T aking Care of t he Unexpect ed
259
WHEEL
NUTS
WHEEL NUTS WHEEL COVER BRAKE HUB
Page 263 of 311
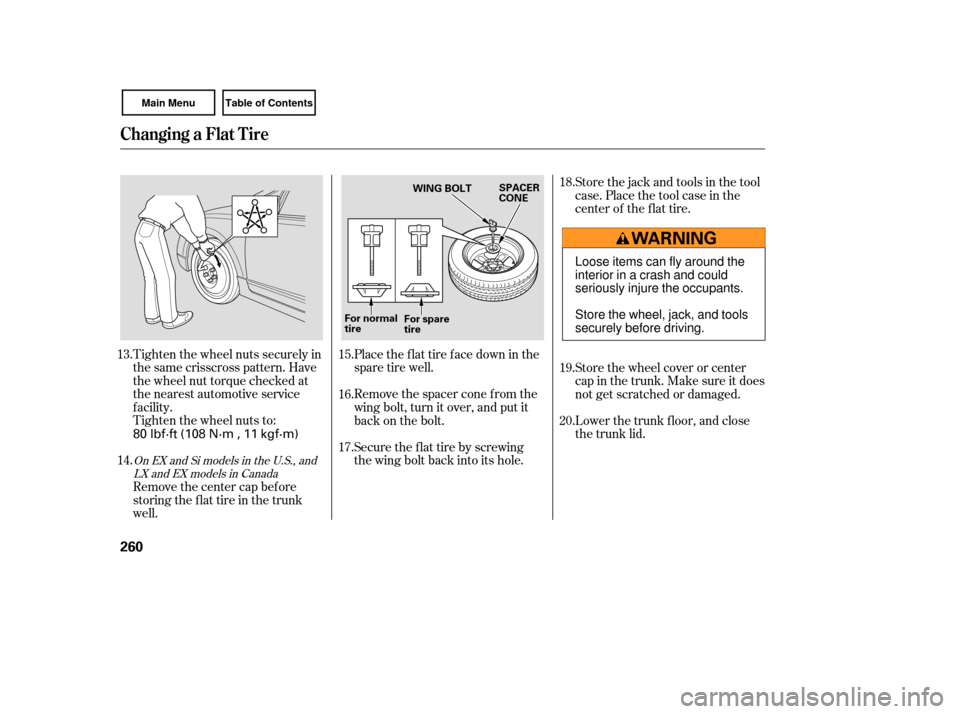
Tighten the wheel nuts securely in
the same crisscross pattern. Have
the wheel nut torque checked at
the nearest automotive service
f acility.
Tighten the wheel nuts to:Place the flat tire face down in the
spare tire well.
Remove the spacer cone f rom the
wing bolt, turn it over, and put it
back on the bolt.
Securetheflattirebyscrewing
the wing bolt back into its hole.Store the jack and tools in the tool
case. Place the tool case in the
center of the f lat tire.
Store the wheel cover or center
cap in the trunk. Make sure it does
not get scratched or damaged.
Lower the trunk f loor, and close
the trunk lid.
Remove the center cap before
storing the f lat tire in the trunk
well.
13.
14. 15.
16.
17.18.
19.
20.
OnEXandSimodelsintheU.S.,and
LX and EX models in Canada
Changing a Flat Tire
260
WING BOLT SPACER
CONE
For normal
tire For spare
tire
80 lbf·ft (108 N·m , 11 kgf·m) Loose items can fly around the
interiorinacrashandcould
seriously injure the occupants.
Store the wheel, jack, and tools
securely before driving.