Page 77 of 311

Make sure the rear window is clear
and you have good visibility before
starting to drive.
The defogger and antenna wires on
the inside of the rear window can be
accidentally damaged. When
cleaning the glass, always wipe side-
to-side.
Pushing this button also turns the
mirror heaters on or off. For more
inf ormation, see page .
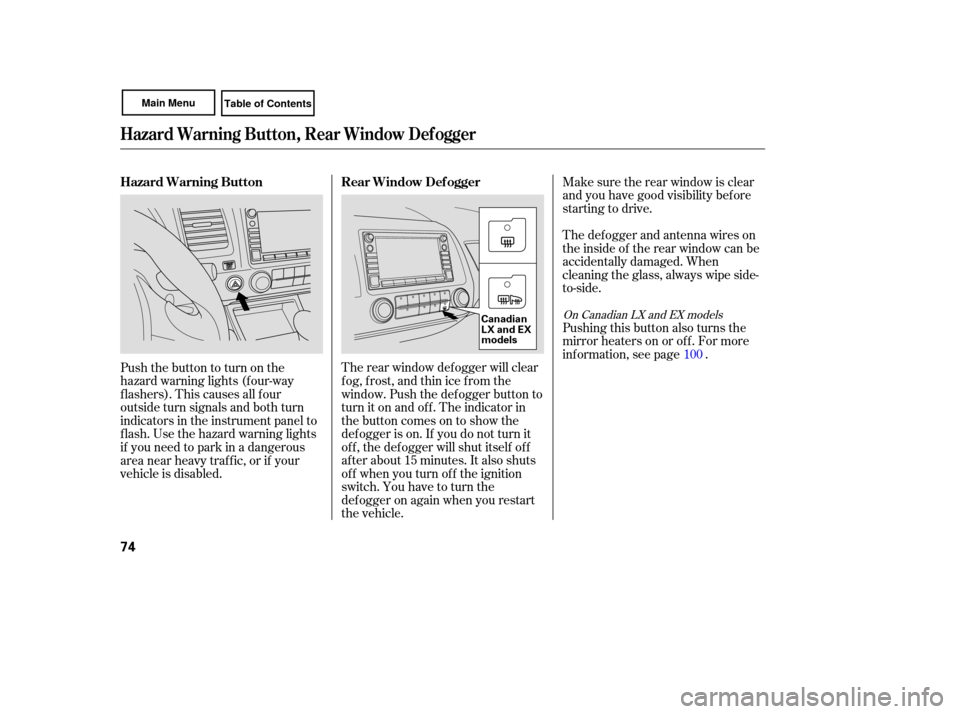
The rear window def ogger will clear
fog, frost, and thin ice from the
window. Push the def ogger button to
turn it on and off. The indicator in
the button comes on to show the
def ogger is on. If you do not turn it
of f , the def ogger will shut itself of f
af ter about 15 minutes. It also shuts
of f when you turn of f the ignition
switch. You have to turn the
def ogger on again when you restart
the vehicle.
Pushthebuttontoturnonthe
hazard warning lights (f our-way
flashers). This causes all four
outside turn signals and both turn
indicators in the instrument panel to
f lash. Use the hazard warning lights
if you need to park in a dangerous
area near heavy traffic, or if your
vehicle is disabled.
100
On Canadian LX and EX models
Hazard Warning Button, Rear Window Def ogger
Rear Window Def ogger
Hazard Warning Button
74
Canadian
LX and EX
models
Page 91 of 311

�µ�µ
�µ
�µ
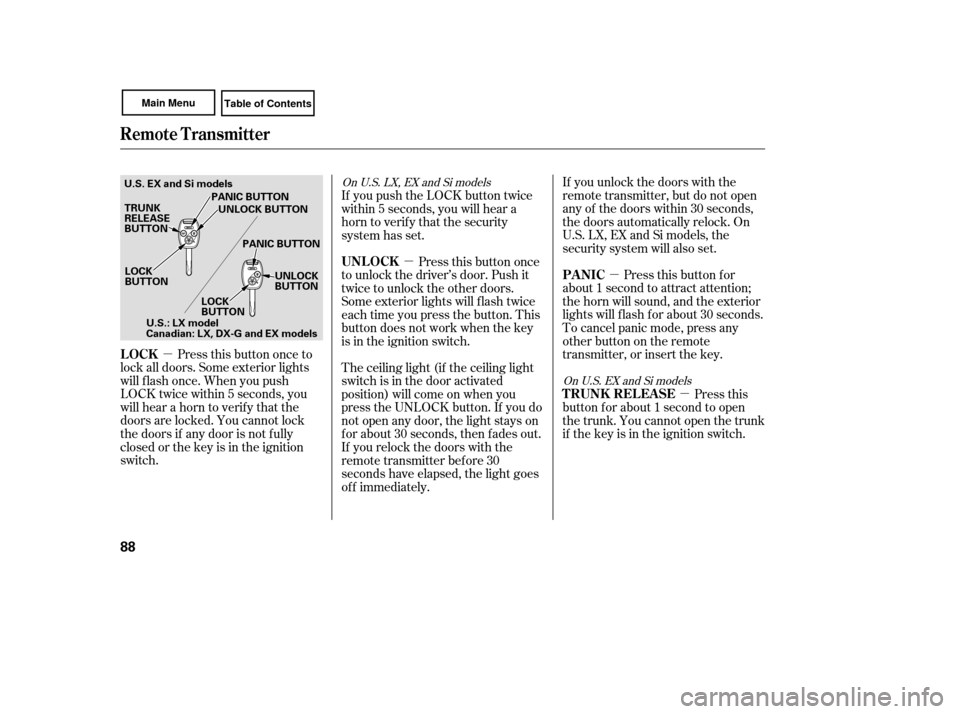
Press this button once to
lock all doors. Some exterior lights
will f lash once. When you push
LOCK twice within 5 seconds, you
will hear a horn to verif y that the
doors are locked. You cannot lock
the doors if any door is not f ully
closed or the key is in the ignition
switch. If you unlock the doors with the
remote transmitter, but do not open
any of the doors within 30 seconds,
the doors automatically relock. On
U.S. LX, EX and Si models, the
security system will also set.
Pressthisbuttonfor
about 1 second to attract attention;
the horn will sound, and the exterior
lights will f lash f or about 30 seconds.
To cancel panic mode, press any
other button on the remote
transmitter, or insert the key.
Press this
button f or about 1 second to open
the trunk. You cannot open the trunk
if the key is in the ignition switch.
The ceiling light (if the ceiling light
switch is in the door activated
position) will come on when you
press the UNLOCK button. If you do
not open any door, the light stays on
f or about 30 seconds, then f ades out.
If you relock the doors with the
remote transmitter before 30
seconds have elapsed, the light goes
of f immediately. Press this button once
to unlock the driver’s door. Push it
twice to unlock the other doors.
Some exterior lights will f lash twice
each time you press the button. This
button does not work when the key
is in the ignition switch. If you push the LOCK button twice
within 5 seconds, you will hear a
horn to verify that the security
system has set.
On U.S. LX, EX and Si models
OnU.S.EXandSimodels
LOCK PA NIC
T RUNK REL EA SE
UNL OCK
Remote Transmitter
88
LOCK
BUTTON
TRUNK
RELEASE
BUTTON
PANIC BUTTON
UNLOCK BUTTON
PANIC BUTTON UNLOCK
BUTTON
LOCK
BUTTON
U.S. EX and Si models
U.S.: LX model
Canadian: LX, DX-G and EX models
Page 102 of 311
Push the appropriate edge of the
adjustment switch to move the
mirrorright,left,up,ordown.
When you f inish, move the
selector switch to the center (off)
position. This turns the
adjustment switch of f to keep your
settings.
Keeptheinsideandoutsidemirrors
clean and adjusted f or best visibility.
Be sure to adjust the mirrors bef ore
you start driving.
The inside mirror has day and night
positions. The night position reduces
glare f rom headlights behind you.
Flip the tab on the bottom edge of
the mirror to select the day or night
position.
Turn the ignition switch to the ON
(II) position.
Move the selector switch to L
(driver’s side) or R (passenger’s
side).
2. 3.
4.
1.If equipped
A djusting the Power Mirrors
Mirrors
Inst rument s and Cont rols
99
SELECTOR SWITCH
ADJUSTMENT SWITCH
TAB
Page 104 of 311
The ceiling light has a three-position
switch;ON(right),DoorActivated,
andOFF(left).IntheDoor
Activated (center) position, the light
comesonwhenyou:Open any door.
Remove the key from the ignition.
Unlock the doors with the key or
the remote transmitter. The f ront ceiling light has a two-
position switch; Door Activated and
OFF.
The f ront ceiling light has two
spotlights. Push the spotlight lenses
to turn them on and off.
After all doors are closed tightly, the
light(s) dims slightly, then f ades out
in about 30 seconds.
If you do not open any door af ter you
unlock the driver’s door or remove
the key from the ignition switch, the
light(s) f ades out in about 30
seconds.
If you leave any door open without
the key in the ignition switch, the
ceiling light(s) will go of f af ter 3
minutes.On models with moonroof
On models with moonroof
CONT INUED
Ceiling L ight
Spotlights
Interior Lights
Inst rument s and Cont rols
101
DOOR ACTIVATED OFF
OFF ON
SWITCHES
DOOR
ACTIVATED
Page 119 of 311

�µ�µ
�µ
These two
modes adjust the strength of the
sound coming from each speaker.
BALANCE adjusts the side-to-side
strength, while FADER adjusts the
front-to-back strength. You
can use the instrument panel
brightness control buttons to adjust
the illumination of the audio system
(see page ). The audio system
illuminates when the parking lights
are on, even if the radio is of f .
The SVC
mode controls the volume based on
vehicle speed. The f aster you go, the
louder the audio volume becomes.
As you slow down, the audio volume
decreases.
The SVC has f our modes; SVC OFF,
SVC LOW, SVC MID, and SVC
HIGH. The def ault setting is MID.
Turn the SOUND (TUNE) knob to
adjust the setting to your liking.
If you f eel the sound is too loud,
choose low. If you f eel the sound is
too quiet, choose high.
Use the TREBLE/
BASS modes to adjust the tone to
your liking.
73
Balance/Fader A udio System L ighting
Speed-sensitive volume
compensation (SVC)
Treble/Bass
Audio System (Models without navigation system)
116
Page 144 of 311

You can use the instrument panel
brightness control buttons to adjust
the illumination of the audio system
(see page ). The audio system
illuminates when the parking lights
are on, even if the radio is of f .
You can select the background
screen to display the sound level.
There are three screen modes: level
(the sound level is shown with the
vertical bars), spectrum analysis (the
sound level appears as ripples of
water), and off. Each time you touch
the background icon, the display
changes.
The system will return to the audio
display about 5 seconds af ter you
stop adjusting a mode. You can also select the icon with the
joystick. Move it up and down to
move the highlighting and scroll
through lists. Select the icon, then
move the joystick to lef t or right to
change the setting. This f unction is set to MID as the
def ault setting when the vehicle
leaves the f actory. If you f eel the
sound is too loud, choose low. If you
f eel the sound is too quiet, choose Hi.73 A udio System L ighting
Audio System (Models with navigation system)
Screen Mode
Features
141
Page 173 of 311

Once the security system is set,
opening any door, the trunk, or the
hood without using the key or the
remote transmitter will cause it to
alarm. It also alarms if the radio is
removed from the dashboard or the
wiring is cut.
The
security system helps to protect
your vehicle and valuables from theft.
The horn sounds and a combination
of headlights (low beam), parking
lights, side marker lights, and
taillights flash if someone attempts
to break into your vehicle or remove
the radio. This alarm continues for 2
minutes, then it stops. To reset an
alarming system before the 2
minutes have elapsed, unlock the
driver’s door with the key or the
remote transmitter.
The security system automatically
sets 15 seconds after you lock the
doors, hood, and trunk. For the
system to activate, you must lock the
doors from the outside with the key,
driver’s lock tab, door lock switch, or
remote transmitter. The security
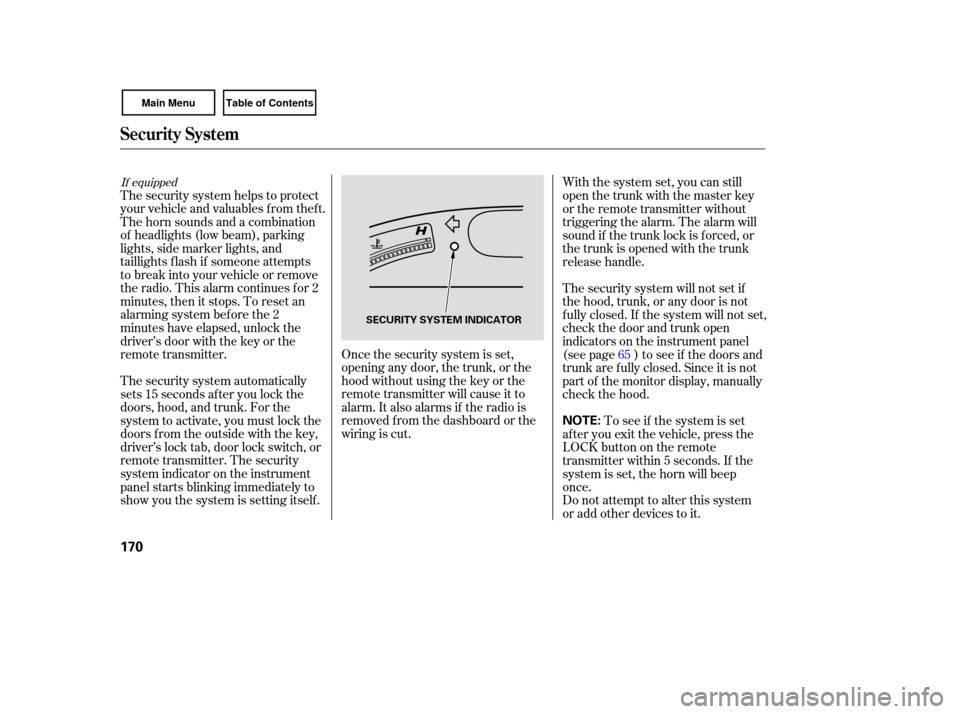
system indicator on the instrument
panel starts blinking immediately to
show you the system is setting itself. With
the system set, you can still
open the trunk with the master key
or the remote transmitter without
triggering the alarm. The alarm will
sound if the trunk lock is forced, or
the trunk is opened with the trunk
release handle.
The security system will not set if
the hood, trunk, or any door is not
f ully closed. If the system will not set,
check the door and trunk open
indicators on the instrument panel
(see page ) to see if the doors and
trunk are f ully closed. Since it is not
part of the monitor display, manually
check the hood.
Do not attempt to alter this system
or add other devices to it. To see if the system is set
af ter you exit the vehicle, press the
LOCK button on the remote
transmitter within 5 seconds. If the
system is set, the horn will beep
once. 65
If equipped
Security System
170
NOTE:
SECURITY SYSTEM INDICATOR
Page 186 of 311

Larger or smaller wheels and tires
can interfere with the operation of
your vehicle’s anti-lock brakes and
other systems.
Modifying your steering wheel or
any other part of your vehicle’s
safety features can make the
systems ineffective.
If you plan to modify your vehicle,
consult your dealer.
Removing
parts from your vehicle,
or replacing componen ts with
non-Honda components could
seriously affect your vehicle’s
handling, stability, and reliability.
Some examples are:
Lo wering your vehicle with a
non-Honda suspension kit that
signifi cantly reduces ground
clearance can allow the
undercarri age to hit speed bumps
or other raised objects, which
could cause the airbags to deploy.
Raising your vehicle with a
non-Honda suspension kit can
affect the handling and stability.
Non-Honda wheels, because they
are a universal design, can cause
excessive stress on suspension
components.
Befo
re installing any accesso ry:
Make sure the accessory does not
obscure any lights, or interfere
with proper vehicle operation or
perf ormance.
Be sure electronic accessories do
not overload electrical circuits
(see page ) or interf ere with
the proper operation of your
vehicle.
Do not install accessories on the
side pillars or across the rear
windows. In these areas,
accessories may interf ere with
proper operation of the side
curtain airbags. Bef ore installing any electronic
accessory, have the installer
contact your dealer f or assistance.
If possible, have your dealer
inspect the f inal installation. 270 Modif ying Your Vehicle
A ccessories and Modif ications
Bef ore Driving
183