Page 456 of 608

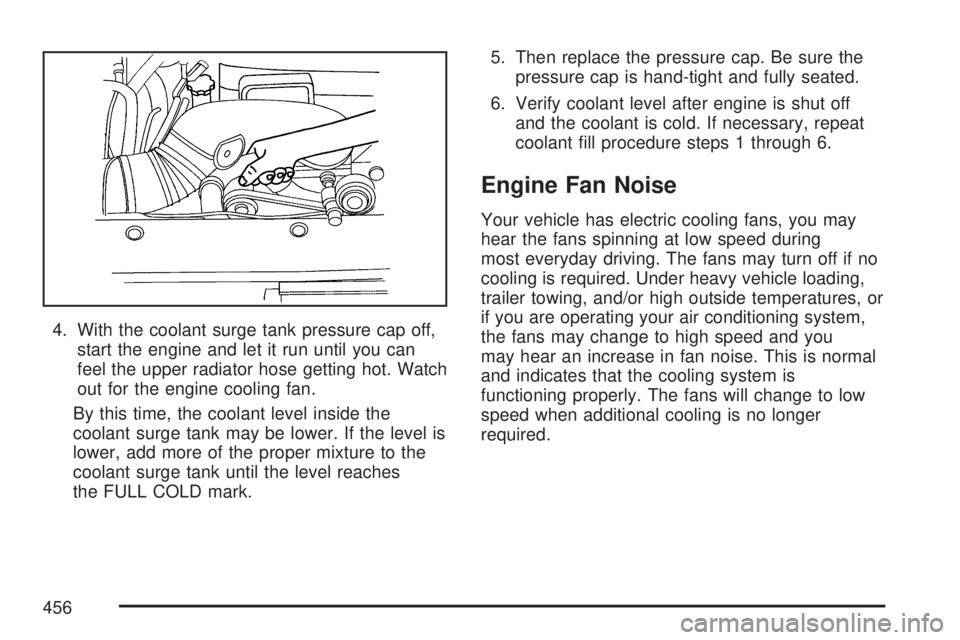
4. With the coolant surge tank pressure cap off,
start the engine and let it run until you can
feel the upper radiator hose getting hot. Watch
out for the engine cooling fan.
By this time, the coolant level inside the
coolant surge tank may be lower. If the level is
lower, add more of the proper mixture to the
coolant surge tank until the level reaches
the FULL COLD mark.5. Then replace the pressure cap. Be sure the
pressure cap is hand-tight and fully seated.
6. Verify coolant level after engine is shut off
and the coolant is cold. If necessary, repeat
coolant �ll procedure steps 1 through 6.
Engine Fan Noise
Your vehicle has electric cooling fans, you may
hear the fans spinning at low speed during
most everyday driving. The fans may turn off if no
cooling is required. Under heavy vehicle loading,
trailer towing, and/or high outside temperatures, or
if you are operating your air conditioning system,
the fans may change to high speed and you
may hear an increase in fan noise. This is normal
and indicates that the cooling system is
functioning properly. The fans will change to low
speed when additional cooling is no longer
required.
456
Page 543 of 608
Fuses Usage
1 Not Used
2Electronic Stability Suspension
Control, Automatic Level Control
Exhaust
3 Left Trailer Stop/Turn Lamp
4 Engine Controls
5Engine Control Module,
Throttle Control
6 Right Trailer Stop/Turn Lamp
7 Front Washer
8 Oxygen Sensors
9 Anti-lock Brakes System 2
10 Trailer Back-up Lamps
11 Driver’s Side Low-Beam Headlamp
12 Engine Control Module (Battery)
13Fuel Injectors, Ignition Coils
(Right Side)
14Transmission Control Module
(Battery)
15 Vehicle Back-up LampsFuses Usage
16Passenger’s Side Low-Beam
Headlamp
17 Air Conditioning Compressor
18 Oxygen Sensors
19 Transmission Controls (Ignition)
20 Fuel Pump
21 Not Used
22 Rear Washer
23Fuel Injectors, Ignition Coils
(Left Side)
24 Trailer Park Lamps
25 Driver’s Side Park Lamps
26 Passenger’s Side Park Lamps
27 Fog Lamps
28 Horn
29Passenger’s Side High-Beam
Headlamp
30 Daytime Running Lamps
31 Driver’s Side High-Beam Headlamp
543
Page 545 of 608
J-Case Fuses Usage
60 Cooling Fan 1
61 Automatic Level Control Compressor
62 Heavy Duty Anti-lock Brake System
63 Cooling Fan 2
64 Anti-lock Brake System 1
65 Starter
66 Stud 2 (Trailer Brakes)
67 Left Bussed Electrical Center 1
68 Electric Running Boards
69 Heated Windshield Washer System
70 Not Used
71Stud 1 (Trailer Connector
Battery Power)
72 Mid-Bussed Electrical Center 1
73 Climate Control Blower
74 Power Liftgate Module
75 Left Bussed Electrical Center 2Relays Usage
FAN HI Cooling Fan High Speed
FAN LO Cooling Fan Low Speed
ENG EXH VLV Not Used
FAN CNTRL Cooling Fan Control
HDLP LO/HID Low-Beam Headlamps
FOG LAMP Front Fog Lamps
A/C CMPRSR Air Conditioning Compressor
STRTR Starter
PWR/TRN Powertrain
FUEL PMP Fuel Pump
PRK LAMP Parking Lamps
REAR DEFOG Rear Defogger
RUN/CRANK Switched Power
545
Page 557 of 608

(g)Inspect system. Check all fuel and vapor
lines and hoses for proper hook-up, routing, and
condition. Check that the purge valve works
properly, if equipped. Replace as needed.
(h)Change automatic transmission �uid and �lter
if the vehicle is mainly driven under one or
more of these conditions:
�In heavy city traffic where the outside
temperature regularly reaches 90°F (32°C)
or higher.
�In hilly or mountainous terrain.
�When doing frequent trailer towing.
�Uses such as found in taxi, police, or delivery
service.
(i)Drain, �ush, and re�ll cooling system. This
service can be complex; you should have
your dealer perform this service. See Engine
Coolant on page 445 for what to use. Inspect
hoses. Clean radiator, condenser, pressure
cap, and �ller neck. Pressure test the cooling
system and pressure cap.(j)A �uid loss in any vehicle system could indicate
a problem. Have the system inspected and
repaired and the �uid level checked. Add �uid if
needed.
(k)If you drive regularly under dusty conditions,
inspect the �lter at each engine oil change.
(l)Visually inspect belt for fraying, excessive
cracks, or obvious damage. Replace belt if
necessary.
(m)Check vent hose at transfer case for kinks
and proper installation.
Owner Checks and Services
These owner checks and services should be
performed at the intervals speci�ed to help
ensure the safety, dependability, and emission
control performance of your vehicle. Your
GM Goodwrench
®dealer can assist you with
these checks and services.
Be sure any necessary repairs are completed at
once. Whenever any �uids or lubricants are added
to your vehicle, make sure they are the proper
ones, as shown inRecommended Fluids and
Lubricants on page 561.
557
Page 606 of 608

T
Tachometer................................................. 227
Taillamps
Turn Signal, Stoplamps and Back-up
Lamps.................................................. 476
Theft-Deterrent, Radio................................. 335
Theft-Deterrent Systems.............................. 134
Content Theft-Deterrent............................ 135
PASS-Key
®III+........................................ 136
PASS-Key®III+ Operation........................ 137
Third Row Seat............................................. 32
Throttle, Adjustable...................................... 143
Tilt Wheel.................................................... 193
Tire
Pressure Light.......................................... 236
Tires........................................................... 480
Aluminum Wheels, Cleaning..................... 532
Buying New Tires..................................... 498
Chains..................................................... 504
Changing a Flat Tire................................ 506
Cleaning.................................................. 533
Different Size........................................... 500
High-Speed Operation.............................. 490
If a Tire Goes Flat................................... 505
In�ation - Tire Pressure............................ 488Tires (cont.)
Inspection and Rotation............................ 496
Installing the Spare Tire........................... 512
Pressure Monitor System......................... 490
Removing the Flat Tire............................. 512
Removing the Spare Tire and Tools......... 507
Secondary Latch System......................... 518
Spare Tire................................................ 526
Storing a Flat or Spare Tire and Tools..... 522
Tire Sidewall Labeling.............................. 482
Tire Terminology and De�nitions............... 485
Uniform Tire Quality Grading.................... 501
Wheel Alignment and Tire Balance........... 502
Wheel Replacement................................. 503
When It Is Time for New Tires................. 497
Tow/Haul Mode........................................... 150
Tow/Haul Mode Light................................... 242
Towing
Recreational Vehicle................................. 398
Towing a Trailer....................................... 400
Your Vehicle............................................. 398
Traction
Locking Differential................................... 349
StabiliTrak
®System................................. 349
Trailer
Recommendations.................................... 415
606