Page 283 of 674

Unlock Doors (Automatic
Transmission only)
If you have an automatic transmission vehicle,
press the customization button until UNLOCK
DOORS appears in the display. To select
your preference for automatic unlocking, press the
select button while UNLOCK DOORS is displayed
on the DIC. Pressing the select button will
scroll through the following choices:
UNLOCK DOORS: IN PARK (default):All of the
doors will unlock when the vehicle is shifted
into PARK (P).
UNLOCK DRIVER: IN PARK:The driver’s door
will be unlocked when the vehicle is shifted
into PARK (P).
UNLOCK DOORS: KEY OUT:All of the doors
will unlock when the key is taken out of the
ignition.UNLOCK DOORS: MANUALLY:The doors will
not be unlocked automatically.
Choose one of the available options and press the
customization button while it is displayed on the
DIC to select it and move on to the next feature.
For more information on automatic door locks, see
Programmable Automatic Door Locks on
page 123.
Door Lock Delay (Crew Cab only)
If your DIC does not have this feature, you still
may be able to program the delayed locking
feature. SeeDelayed Locking on page 122for
more information.
When locking the doors with the power lock switch
or the Remote Keyless Entry (RKE) transmitter
and a door is open, the delayed locking feature will
delay locking the doors until �ve seconds after
the last door is closed.
283
Page 284 of 674

Press the customization button until DOOR LOCK
DELAY appears in the display. To select your
preference for delayed locking, press the select
button while DOOR LOCK DELAY is displayed on
the DIC. Pressing the select button will scroll
through the following choices:
DOOR LOCK DELAY: OFF (default):The doors
will lock immediately when pressing the power
lock switch or the lock button on the RKE
transmitter.
DOOR LOCK DELAY: ON:The doors will not
lock until �ve seconds after the last door is closed.
You will hear three chimes to signal that the
delayed locking feature is in use. You can
temporarily override delayed locking by pressing
the lock button on the door or the RKE transmitter
a second time.
Choose one of the available options and press the
customization button while it is displayed on the
DIC to select it and move on to the next feature.
This feature will not operate if the key is in
the ignition.Lock Feedback
Press the customization button until LOCK
FEEDBACK appears in the display. To select your
preference for the feedback you receive when
locking the vehicle with the Remote Keyless Entry
(RKE) transmitter, press the select button while
LOCK FEEDBACK is displayed on the DIC.
Pressing the select button will scroll through the
following choices:
LOCK FEEDBACK: BOTH (default):The parking
lamps will �ash each time you press the button with
the lock symbol on the RKE transmitter and the
horn will chirp the second time you press the lock
button.
LOCK FEEDBACK: LAMPS:The parking lamps
will �ash each time you press the button with
the lock symbol on the RKE transmitter.
LOCK FEEDBACK: HORN:The horn will chirp
the second time you press the button with the lock
symbol on the RKE transmitter.
LOCK FEEDBACK: OFF:There will be no
feedback when locking the vehicle.
284
Page 409 of 674

Loading Your Vehicle
It is very important to know how much weight your
vehicle can carry. This weight is called the
vehicle capacity weight and includes the weight of
all occupants, cargo, and all nonfactory-installed
options. Two labels on your vehicle show how
much weight it was designed to carry, the Tire and
Loading Information label and the Certi�cation/Tire
label.
{CAUTION:
Do not load your vehicle any heavier than
the Gross Vehicle Weight Rating (GVWR),
or either the maximum front or rear Gross
Axle Weight Rating (GAWR). If you do,
parts on your vehicle can break, and it
can change the way your vehicle handles.
These could cause you to lose control
and crash. Also, overloading can shorten
the life of your vehicle.
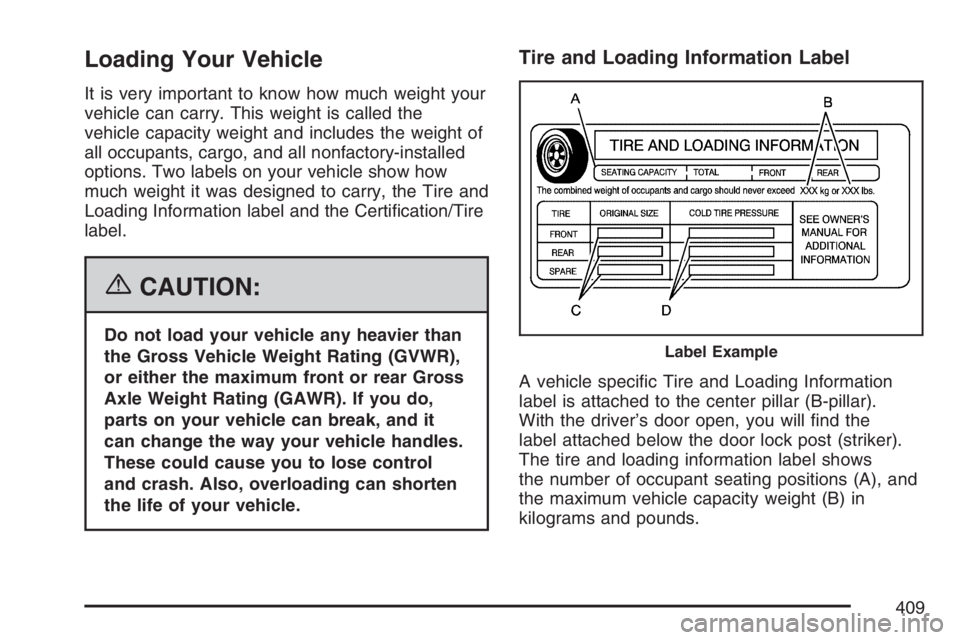
Tire and Loading Information Label
A vehicle speci�c Tire and Loading Information
label is attached to the center pillar (B-pillar).
With the driver’s door open, you will �nd the
label attached below the door lock post (striker).
The tire and loading information label shows
the number of occupant seating positions (A), and
the maximum vehicle capacity weight (B) in
kilograms and pounds.
Label Example
409
Page 475 of 674

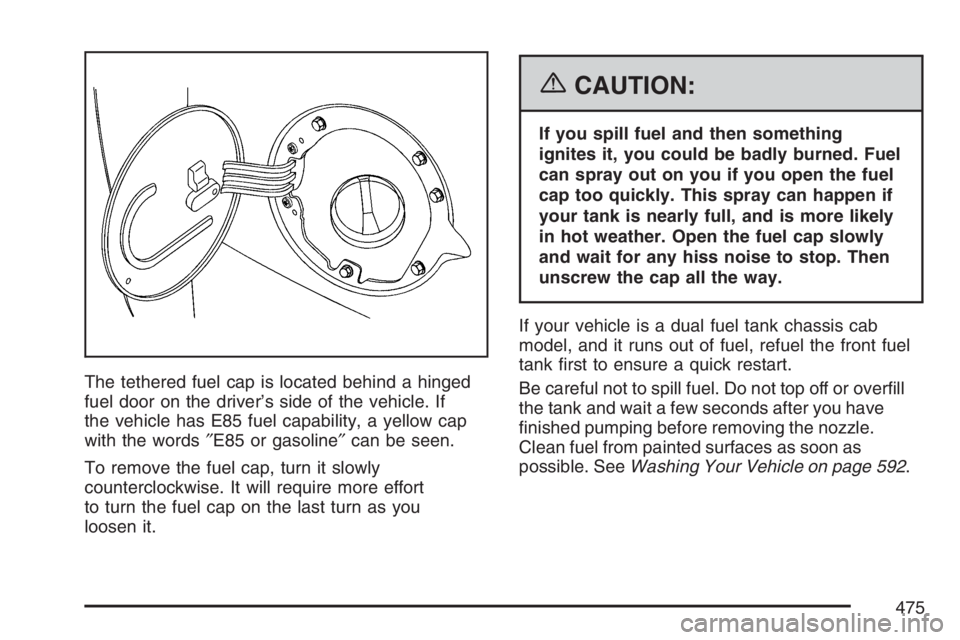
The tethered fuel cap is located behind a hinged
fuel door on the driver’s side of the vehicle. If
the vehicle has E85 fuel capability, a yellow cap
with the words″E85 or gasoline″can be seen.
To remove the fuel cap, turn it slowly
counterclockwise. It will require more effort
to turn the fuel cap on the last turn as you
loosen it.
{CAUTION:
If you spill fuel and then something
ignites it, you could be badly burned. Fuel
can spray out on you if you open the fuel
cap too quickly. This spray can happen if
your tank is nearly full, and is more likely
in hot weather. Open the fuel cap slowly
and wait for any hiss noise to stop. Then
unscrew the cap all the way.
If your vehicle is a dual fuel tank chassis cab
model, and it runs out of fuel, refuel the front fuel
tank �rst to ensure a quick restart.
Be careful not to spill fuel. Do not top off or over�ll
the tank and wait a few seconds after you have
�nished pumping before removing the nozzle.
Clean fuel from painted surfaces as soon as
possible. SeeWashing Your Vehicle on page 592.
475
Page 551 of 674

Vehicle Maximum Load on the Tire:Load on
an individual tire due to curb weight, accessory
weight, occupant weight, and cargo weight.
Vehicle Placard:A label permanently attached to
a vehicle showing the vehicle’s capacity weight
and the original equipment tire size and
recommended in�ation pressure. See “Tire and
Loading Information Label” underLoading
Your Vehicle on page 409.
In�ation - Tire Pressure
Tires need the correct amount of air pressure to
operate effectively.
Notice:Do not let anyone tell you that
under-in�ation or over-in�ation is all right.
It is not. If your tires do not have enough air
(under-in�ation), you can get the following:
Too much �exing
Too much heat
Tire overloading
Premature or irregular wear
Poor handling
Reduced fuel economyIf your tires have too much air (over-in�ation),
you can get the following:
Unusual wear
Poor handling
Rough ride
Needless damage from road hazards
A Tire and Loading Information label is attached
to the vehicle’s center pillar (B-pillar), below the
driver’s door lock post (striker). This label lists
your vehicle’s original equipment tires and their
recommended cold tire in�ation pressures. The
recommended cold tire in�ation pressure, shown
on the label, is the minimum amount of air pressure
needed to support your vehicle’s maximum load
carrying capacity.
For additional information regarding how much
weight your vehicle can carry, and an example
of the tire and loading information label, see
Loading Your Vehicle on page 409.
When to Check
Check your tires once a month or more. Do not
forget to check the spare tire. For additional
information regarding the spare tire, seeSpare
Tire on page 588.
551
Page 600 of 674

Fuses and Circuit Breakers
The wiring circuits in your vehicle are protected
from short circuits by a combination of fuses, circuit
breakers and fusible thermal links. This greatly
reduces the chance of �res caused by electrical
problems.
Look at the silver-colored band inside the fuse. If
the band is broken or melted, replace the fuse.
Be sure you replace a bad fuse with a new one of
the identical size and rating.
If you ever have a problem on the road and
don’t have a spare fuse, you can borrow one
that has the same amperage. Just pick some
feature of your vehicle that you can get along
without – like the radio or cigarette lighter – and
use its fuse, if it is the correct amperage. Replace
it as soon as you can.
Instrument Panel Fuse Block
The fuse block access
door is on the driver’s
side edge of the
instrument panel.
Pull off the cover to
access the fuse block.
To remove fuses, hold the end of the fuse
between your thumb and index �nger and pull
straight out.
You may have spare fuses located behind the
fuse block access door. These can be used
to replace a bad fuse. However, make sure it
is of the correct amperage.
600
Page 601 of 674
Fuses Usage
RR WPR Not Used
SEO ACCYSpecial Equipment Option
Accessory
WS WPR Windshield Wipers
TBC ACCYTruck Body Controller
Accessory
IGN 3 Ignition, Heated Seats
4WDFour-Wheel Drive System,
Auxiliary Battery
Fuses Usage
HTR A/C Climate Control System
LOCK (Relay)Power Door Lock Relay
(Lock Function)
HVAC 1 Climate Control System
LT DRDriver’s Door Harness
Connection
CRUISECruise Control, Power
Take Off (PTO)
UNLCK (Relay)Power Door Lock Relay
(Unlock Function)
RR FOG LP Not Used
BRAKE Anti-Lock Brake System
DRIVER UNLCKPower Door Lock Relay
(Driver’s Door Unlock
Function)
IGN 0 TCM
TBC IGN 0 Truck Body Controller
VEH CHMSLVehicle and Trailer High
Mounted Stoplamp
LT TRLR ST/TRN Left Turn Signal/Stop Trailer
601
Page 602 of 674
Fuses Usage
LT TRNLeft Turn Signals and
Sidemarkers
VEH STOPVehicle Stoplamps, Brake
Module, Electronic Throttle
Control Module
RT TRLR ST/TRN Right Turn Signal/Stop Trailer
RT TRNRight Turn Signals and
Sidemarkers
BODY Harness Connector
DDM Driver Door Module
AUX PWR 2, M/GATE Not Used
LCKS Power Door Lock System
ECC, TPMTire Pressure Monitoring
System
TBC 2C Truck Body Controller
HAZRD Flasher Module
CB LT DRSLeft Power Windows
Circuit Breaker
TBC 2B Truck Body Controller
TBC 2A Truck Body ControllerCenter Instrument Panel Fuse Block
The center instrument panel utility block is
located underneath the instrument panel, to the
left of the steering column.
Device Usage
SEO Special Equipment Option
TRAILER Trailer Brake Wiring
UPFIT Up�tter (Not Used)
SL RIDERide Control Harness
Connection
602