2007 GMC SIERRA CLASSIC ECO mode
[x] Cancel search: ECO modePage 198 of 674
Reprogramming Universal Home
Remote Buttons
You can reprogram any of the three buttons by
repeating the instructions.
Erasing Universal Home Remote
Buttons
You should erase the programmed buttons when
you sell the vehicle or terminate your lease.
To erase either rolling code or �xed code on the
Universal Home Remote device, do the following:
1. Press and hold the two outside buttons at
the same time for approximately 20 seconds,
until the indicator lights, located directly
above the buttons, begin to blink rapidly.
2. Once the indicator lights begin to blink,
release both buttons. The codes from all
button will be erased.
For additional information on Universal Home
Remote, seeCustomer Assistance Offices
on page 642.
Universal Home
Remote System Operation
(With One Triangular LED)
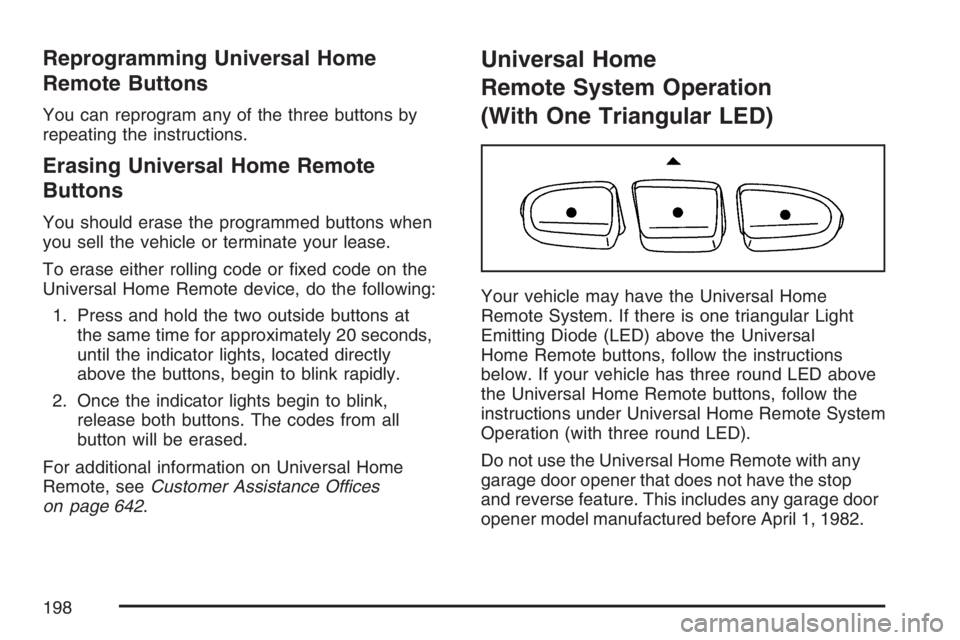
Your vehicle may have the Universal Home
Remote System. If there is one triangular Light
Emitting Diode (LED) above the Universal
Home Remote buttons, follow the instructions
below. If your vehicle has three round LED above
the Universal Home Remote buttons, follow the
instructions under Universal Home Remote System
Operation (with three round LED).
Do not use the Universal Home Remote with any
garage door opener that does not have the stop
and reverse feature. This includes any garage door
opener model manufactured before April 1, 1982.
198
Page 201 of 674
Gate Operator and Canadian
Programming
Canadian radio-frequency laws require transmitter
signals to time out or quit after several seconds
of transmission. This may not be long enough
for Universal Home Remote to pick up the signal
during programming. Similarly, some U.S. gate
operators are manufactured to time out in
the same manner.
If you live in Canada, or you are having difficulty
programming a gate operator or garage door
opener by using the “Programming Universal
Home Remote” procedures, regardless of where
you live, replace Step 3 under “Programming
Universal Home Remote” with the following:
Continue to press and hold the Universal Home
Remote button while you press and release every
two seconds (cycle) the hand-held transmitter
button until the frequency signal has been
successfully accepted by the Universal Home
Remote. The Universal Home Remote indicator
light will �ash slowly at �rst and then rapidly.
Proceed with Step 4 under “Programming
Universal Home Remote” to complete.
Using Universal Home Remote
Press and hold the appropriate Universal Home
Remote button for at least half of a second.
The indicator light will come on while the signal is
being transmitted.
Erasing Universal Home Remote
Buttons
To erase programming from the three Universal
Home Remote buttons do the following:
1. Press and hold down the two outside buttons
until the indicator light begins to �ash, after
20 seconds. Do not hold the two outside
buttons for longer than 30 seconds.
2. Release both buttons.
The Universal Home Remote is now in the training
(learning) mode and can be programmed at any
time beginning with Step 2 under “Programming
Universal Home Remote” shown earlier in
this section.
Individual buttons cannot be erased, but they can
be reprogrammed. See “Reprogramming a
Single Universal Home Remote Button” following
this section.
201
Page 214 of 674

Turn Signal/Multifunction Lever
The lever on the left side of the steering column
includes the following:
GTurn and Lane Change Signals. See
Turn and Lane-Change Signals on page 214.
53Headlamp High/Low-Beam Changer.
SeeHeadlamp High/Low-Beam Changer on
page 215.
Flash-to-Pass. SeeFlash-to-Pass on
page 216.
NWindshield Wipers. SeeWindshield
Wipers on page 216.
LWindshield Washer. SeeWindshield
Washer on page 217.
ICruise Control. SeeCruise Control on
page 217.
For information on the headlamps, seeHeadlamps
on page 221.
Turn and Lane-Change Signals
The turn signal has two upward (for right) and two
downward (for left) positions. These positions
allow you to signal a turn or a lane change.
To signal a turn, move the lever all the way up or
down. When the turn is �nished, the lever will
return automatically.
To signal a lane change, raise or lower the lever
for less than one second until the arrow starts
to �ash. This will cause the turn signals to
automatically �ash three times. It will �ash six
times if tow-haul mode is active. Holding the turn
signal lever for more than one second will
cause the turn signals to �ash until you release
the lever. The lever will return by itself when
it is released.
214
Page 236 of 674
Passenger’s Side Temperature Knob
The passenger’s side knob can be used to change
the temperature of the air coming through the
system on the passenger’s side of the vehicle. The
temperature can be adjusted even if the system
is turned off. This is possible since outside air will
always �ow through the system as the vehicle
is moving forward unless it is set to recirculation
mode. See “Recirculation” later in this section.
Turn the knob counterclockwise or clockwise
to lower or increase the cabin temperature. The
display will show the temperature setting
decreasing or increasing and an arrow pointing to
the passenger will be displayed under and to
the right of the temperature setting.
The passenger’s temperature setting can be set to
match the driver’s temperature setting by
pressing and holding the AUTO button for four
seconds. Both the driver and passenger arrows will
be displayed.
Automatic Operation
AUTO (Automatic):When automatic operation is
active the system will control the inside
temperature, the air delivery, and the fan speed.
Use the steps below to place the entire system in
automatic mode:
1. Press the AUTO button.
When AUTO is selected, the display will change
to show the current driver’s set temperature,
delivery mode and fan speed. Press the AUTO
button again within �ve seconds to display the
passenger’s set temperature.
If the driver and passenger’s temperature
settings are not the same, the opposite side
temperature setting will be displayed for
an additional �ve seconds. To make the
passenger’s temperature the same as
the driver’s press and hold the AUTO button
for about four seconds.
236
Page 239 of 674
If you select recirculation while in defrost, defog,
or �oor, the light in the button will �ash and then go
out to let you know that this is not allowed. This
is normal and helps to prevent fogging.
When the weather is cool or damp, operating the
system in recirculation for extended periods of
time may cause fogging of the vehicle’s windows.
To clear the fog, select either defog or front
defrost.
You may also notice that the air condition
compressor will run while in recirculation mode.
This is normal and helps to prevent fogging.
9(Off):Press this button to turn off the entire
climate control system. Outside air will still
enter the vehicle, and will be directed to the �oor.
This direction can be changed by pressing the
mode button. The temperature can also be
adjusted using either temperature knob. Press the
up or down arrows on the fan switch, the defrost
button, the AUTO button, or the air conditioning
button to turn the system on when it is off.
Display
If you press the mode button to select an air
delivery mode, the display will change to show you
the selected air delivery mode. After ten seconds,
the display will change to show the driver
temperature setting and the selected mode.
If you press the up or down arrows on the fan
switch, the display will change to show the
selected fan speed. After ten seconds, the display
will change to show the driver temperature
setting and the selected mode.
Whenever you press AUTO, the display will
change to show the following:
The current driver’s set temperature and an
arrow for �ve seconds
The current passenger’s set temperature
setting and an arrow for �ve seconds
The automatic air delivery mode and fan speed
If the driver’s and passenger’s temperature
settings are the same when AUTO is pressed,
the temperature setting and both arrows will be
displayed for �ve seconds along with the automatic
air delivery mode and fan speed. After the
�ve second update, the display will change to show
the temperature setting, both arrows, and AUTO.
239
Page 246 of 674

Speedometer and Odometer
Your speedometer lets you see your speed in both
miles per hour (mph) and kilometers per hour
(km/h). Your odometer shows how far your vehicle
has been driven, in either miles (used in the
United States) or kilometers (used in Canada).
Engine Hour Meter Display
The Driver Information Center (DIC) can also
display the number of hours the engine has run.
To display the hour meter, turn the ignition
off, press and hold the reset button for at least
four seconds. The hour meter will be displayed for
up to 30 seconds, or until the ignition is turned
on. SeeDIC Operation and Displays on page 266
for more information.
Trip Odometer
The trip odometer can tell you how far your
vehicle has been driven since you last set the trip
odometer to zero.
Press the reset button, located on the instrument
panel cluster next to the trip odometer display,
to toggle between the trip odometer and the
regular odometer. Holding the reset button for
approximately one second while the trip odometer
is displayed will reset it.
To display the odometer reading with the ignition
off, press the reset button.
SeeDIC Operation and Displays on page 266for
more information.
Tachometer
Your tachometer displays the engine speed in
revolutions per minute (rpm). See “Grade Braking
(Allison Transmission
®)” underTow/Haul Mode
on page 147for more information.
Notice:If you operate the engine with the
tachometer in the solid red area, your vehicle
could be damaged. The damages would
not be covered by your warranty. Do not
operate the engine in the solid red area.
246
Page 253 of 674
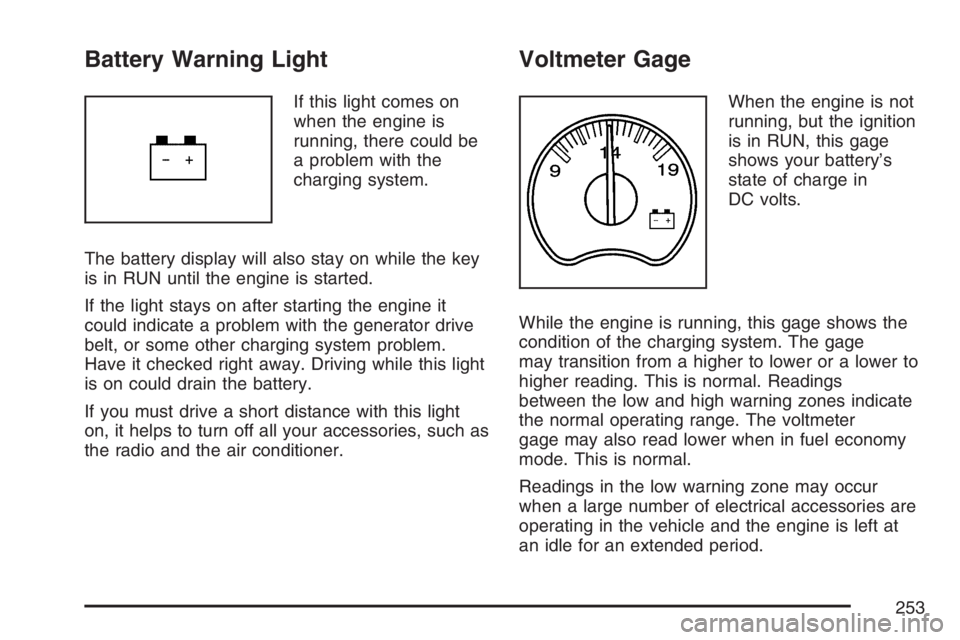
Battery Warning Light
If this light comes on
when the engine is
running, there could be
a problem with the
charging system.
The battery display will also stay on while the key
is in RUN until the engine is started.
If the light stays on after starting the engine it
could indicate a problem with the generator drive
belt, or some other charging system problem.
Have it checked right away. Driving while this light
is on could drain the battery.
If you must drive a short distance with this light
on, it helps to turn off all your accessories, such as
the radio and the air conditioner.
Voltmeter Gage
When the engine is not
running, but the ignition
is in RUN, this gage
shows your battery’s
state of charge in
DC volts.
While the engine is running, this gage shows the
condition of the charging system. The gage
may transition from a higher to lower or a lower to
higher reading. This is normal. Readings
between the low and high warning zones indicate
the normal operating range. The voltmeter
gage may also read lower when in fuel economy
mode. This is normal.
Readings in the low warning zone may occur
when a large number of electrical accessories are
operating in the vehicle and the engine is left at
an idle for an extended period.
253
Page 266 of 674

If your vehicle has an Allison Transmission®and
the shift lever is in the MANUAL MODE (M)
position, the DIC will display the current gear
range. The DIC will also display the gear range as
it is shifted up or down. For example, if the gear
range is currently set to 6, the DIC will display
(6)54321. When thegear range is shifted down
one time, the DIC will display 6 (5)4321. See
Automatic Transmission Operation on page 140for
more information.
3(Trip Information):Press this button to
display the odometer, trip odometers, timer, engine
hours, and selected range if your vehicle has an
Allison Transmission
®.
t(Fuel Information):Press this button to
display the current range, fuel used, average fuel
economy, and engine oil life.
4(Customization):Press this button to access
the vehicle settings menu and customize the
personal settings on your vehicle.
r(Select):Press this button to reset certain
DIC functions and set your customization settings.
Pressing any of the four DIC buttons will
acknowledge DIC messages and clear them from
the DIC display.
DIC Operation and Displays
The Driver Information Center (DIC) comes on
when the ignition is on. After a short delay, the DIC
will display the information that was last displayed
before the engine was turned off.
The DIC has different modes which can be
accessed by pressing the four DIC buttons located
on the steering wheel. These buttons are trip
information, fuel information, customization, and
select. The button functions are detailed in
the following pages.
266